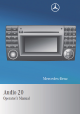
Welcome to Audio 20. Please familiarize yourself with your Audio 20 radio and read this Operator’s Manual before using it. This will help you to obtain the maximum pleasure from your system and to avoid endangering yourself and others. The equipment or product description of your Audio 20 may vary, depending on: O model O order O country specification O availability The manufacturer continuously updates its vehicles and equipment.
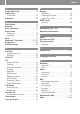
Contents Index . . . . . . . . . . . . . . . . . . . . . . . . . . . 4 At a glance. . . . . . . . . . . . . . . . . . . . . . . 9 Introduction . . . . . . . . . . . . . . . . . . . . . 7 Audio . . . . . . . . . . . . . . . . . . . . . . . . . 17 Telephone . . . . . . . . . . . . . . . . . . . . . 31 System settings . . . . . . . . . . . . . . . .
Index 4 A Audio AUX mode . . . . . . . . . . . . . . . . 29 Authorizing Cell phone . . . . . . . . . . . . . . . . . . . . . 34 Autostore . . . . . . . . . . . . . . . . . . . . . . 20 B Back button . . . . . . . . . . . . . . . . . . . . 12 Balance . . . . . . . . . . . . . . . . . . . . . . . . 15 Basic functions. . . . . . . . . . . . . . . . . . 14 Basic menu Calling up . . . . . . . . . . . . . . . . . . . . . 12 Overview . . . . . . . . . . . . . . . . . . . . . . 12 Bass . . . . . . . . . . . . . .
Index O Operating safety . . . . . . . . . . . . . . . . . 7 Operating system . . . . . . . . . . . . . . . 10 Operation . . . . . . . . . . . . . . . . . . . 11, 13 P Phone book Calling up . . . . . . . . . . . . . . . . . . . . . 39 Deleting an entry . . . . . . . . . . . . . . . 41 Selecting an entry. . . . . . . . . . . . . . . 39 Presets . . . . . . . . . . . . . . . . . . . . . . . . 20 Proper use . . . . . . . . . . . . . . . . . . . . . . 8 R Radio mode Menu overview . . . . . . . . . . . . . . . .
6
Introduction Operator’s Manual Your vehicle may have some or all of the equipment described in this manual. Therefore, you may find explanations for optional equipment not installed in your vehicle. If you have any questions about operating particular equipment, any authorized Sprinter Dealer will be glad to demonstrate the proper procedures. Optional equipment is also described in this manual, including operating instructions wherever necessary.
8 Introduction $ Risk of injury Excessive electromagnetic radiation may constitute a health hazard to yourself and others. Scientists are currently investigating the possibility that electromagnetic fields may be a health risk. You can reduce this risk by using an external antenna. Therefore, when possible only use mobile communication devices if these are connected to the vehicle's external antenna.
Vehicle equipment Audio 20 operating system Operating Audio 20 Basic functions of Audio 20 Steering wheel with buttons Connecting an external audio source At a glance 9
10 Audio 20 operating system At a glance Vehicle equipment + This Operator’s Manual describes all features, standard or optional, potentially available for your vehicle at the time of purchase. Please be aware that your vehicle might not be equipped with all features described in this manual.
Function I o Control knob Page 14 Adjusts the volume J q Switches on/off 14 K Selects a station Selects a track Fast forward/rewind 19 27 28 L Accepts a call Starts a call Redials 42 43 41 M Ends a call Rejects a call 43 41 N Mute Pause function 14 27 O Calls up sound settings 14 Operating Audio 20 With the Audio 20 system you can operate the following main functions: O audio function with the radio, disc (CD audio or MP3 mode), Audio AUX and external audio devices O the cell phone with
12 Operating Audio 20 Horizontal menus At a glance Menu overview The following table shows the structure of the modes and their menus. Each mode has a basic menu. Each menu item in turn has several submenu items. Button Mode/Menu $ Radio mode Radio (FM/AM) Weather Band (WB) 18 18 Disc mode CD/MP3 Mode Audio AUX Mode 21 29 % Telephone mode 33 i System mode System Settings Display On/Off 48 48 h Page E E E Moving through the menu bar: Press the = or ; button.
Operating Audio 20 13 Use the j button for deleting digit or entire entries (e page 42). E Deleting a single digit: Press the j button briefly. E Deleting entire entry: Press and hold the j button. E Example of how to operate Audio 20 Example: direct frequency input FM 104.5 MHz. In the following description, an operation step is described as in the following example. E $QRadioQEnter Frequency is the short for the following individual steps.
14 Basic functions of Audio 20 At a glance Basic functions of Audio 20 Adjusting the volume Switching Audio 20 system on/off E Adjusting: Turn the o control knob 1. or E E Switching on: Press the q button. Press the W or X button on the steering wheel. or E If the Audio 20 system was on as you switched off the ignition, turn the key to position 1 in the ignition lock. The Audio 20 system will come back on with the last selected function.
Steering wheel with buttons 15 Adjusting bass or treble u Q Treble or Bass. or E Select Sound Q Treble or Bass. The Sound menu appears. A longer and brighter bar indicates the previously stored setting. The red pointer indicates the currently selected setting. E E Example for adjusting bass E E Changing setting: Press the 9, :, = or ; button until desired balance and fader settings are achieved. Saving setting: Press the 9 or % button.
16 Connecting an external audio source At a glance Function ? Selects menu in the display of the instrument cluster (see vehicle Operator's Manual) V up U down A Selects submenu or list entry (see vehicle Operator's Manual) & up * down Page To operate Audio 20 functions with the steering wheel, the display of the instrument cluster must be set to the respective radio, CD or telephone function.
Vehicle equipment Radio mode Audio CD and MP3 mode Audio AUX mode Steering wheel with buttons Audio 17
18 Radio mode Audio Vehicle equipment + This Operator’s Manual describes all features, standard or optional, potentially available for your vehicle at the time of purchase. Please be aware that your vehicle might not be equipped with all features described in this manual. Switching to Radio mode E Press the $ function button. The radio basic menu appears. You will hear the last station selected. Weather Band will automatically tune to the strongest station in the area.
Radio mode You can switch the radio between the FM, AM and WB (Weather Band) wavebands. Waveband Frequency FM 87.7 – 107.9 MHz AM 530 – 1710 kHz WB Weather channels E Press the $ button repeatedly until the desired waveband appears in the display. The FM, AM, and WB wavebands are called up one after another.The waveband currently selected appears in the main area of the audio display. The last selected station in the selected waveband is heard.
20 Radio mode Saving stations manually Audio Storing directly using the keypad E Press and hold a number button, e.g. 4, until a brief signal tone sounds. The currently set station is stored. or E Press the l button on the keypad of the control panel briefly. The Enter Frequency submenu appears. E To enter a frequency: press the number buttons on the keypad of the control panel. Audio 20 sets the frequency entered.
Audio CD and MP3 mode Audio CD and MP3 mode Safety notes $ Risk of injury The CD changer is a class 1 laser product. If the casing is opened or is faulty or damaged, there is a danger that invisible laser radiation may damage your eyes or other people's eyes. Do not open the casing. The unit contains no parts on which you can carry out maintenance. For safety reasons, have any necessary maintenance work carried out by qualified aftersales technicians only.
Audio 22 Audio CD and MP3 mode If MP3 files are stored in the root directory itself, the root directory will also be treated as a folder. Audio 20 will then show the name of the root directory as the folder name. You must observe the following when assigning track names: O Track names must have at least one character. O Track names must have the extension "mp3" or "wma". O There must be a period between the track name and the extension. O Example of a correct track name: Track1.
If you insert thicker discs, e.g. those that contain data on both sides (DVD on one side and audio data on the other), they cannot be ejected and they can damage the CD drive. Do not use discs with a diameter of 8 cm, even with an adapter, as this can damage the CD drive. If the CD has a printed side, this must face upwards when the CD is inserted. If neither side is printed, the side to be played should face downwards. The system may not be able to play discs with copy protection.
24 Audio CD and MP3 mode Audio E Press a number key (1-6). The CD changer switches to the selected magazine tray. You see the Please Wait... message. When the magazine tray is ready, you see the Please Insert Disc message. + Only insert a CD when Audio 20 prompts you to do so. Never insert more than one CD at a time into each magazine tray. E Insert a disc into the slot with the printed side facing upwards. The CD changer loads the disc into the selected magazine tray.
Ejecting CDs $ Risk of accident In order to avoid distraction which could lead to an accident, the driver should insert or eject CDs with the vehicle at a standstill and operate Audio 20 only if permitted by road, weather and traffic conditions. Bear in mind that at a speed of just 30 mph (50 km/h), your vehicle is covering a distance of 44 feet (14 m) every second.
26 Audio CD and MP3 mode Menu overview = Track number Submenu ? Track name (only if stored on the disc as CD text) CD or MP3 Normal track sequence A Track time Random tracks B Visual time and track display C Sound settings D Magazine tray selection E Current playback settings (no icon for "Normal track sequence") F Disc name (only if stored on the disc as CD text) G To call up the track list H Playback options Audio Menu Random folder (MP3 mode only) Track list (CD mode only) Fol
Pause function In audio CD/MP3 mode E E To pause playback: briefly press the 8 button. The x icon appears at the top left in the status bar. To continue playback: briefly press the 8 button again or turn the volume control slightly. x goes out. + If a disc is unreadable, the following appears after the magazine tray number: Disc unreadable. E To select a medium: press the 9 or : button. E Press the 9 button.
28 Audio CD and MP3 mode E Audio E To select a track: press the 9 or : button. Press the 9 button. E Press the 9 button when the display/ selection window is selected. The folder list appears. + In MP3 mode, the list shows all the tracks in alphabetical order. Selecting a track using the keypad E E Press the l button on the keypad. A numerical entry field appears. The number of positions offered corresponds to the number of tracks on the CD.
Audio AUX mode The following options are available to you: O Normal track sequence O You hear tracks played back in the normal order (e.g. track 1, 2, 3, etc.). O Random tracks O All the tracks on the CD are played in random order (e.g. track 3, 8, 5 etc.). Random folder (MP3 mode only) The tracks in the currently active category or folder are played in random order. O O E E E To select options: switch to audio CD or MP3 mode (e page 26). Select CD or MP3. The options list appears.
30 Steering wheel with buttons Steering wheel with buttons Setting the radio station/weather channel Audio E E E + Please see the respective operating instructions for how to operate the external audio source. You can set the following in audio AUX mode: O volume O balance and fader O treble and bass The volume of external audio sources can vary greatly. In some cases, the volume of the external audio device may be quieter or louder, or the maximum possible volume may be less than usual.
Vehicle equipment Safety notes General information Telephony via the Bluetooth® interface Menu overview Emergency calls "911" Reception and transmission volume Phone book Call lists Using the telephone Steering wheel with buttons Telephone 31
32 Safety notes Telephone Vehicle equipment + This Operator’s Manual describes all features, standard or optional, potentially available for your vehicle at the time of purchase. Please be aware that your vehicle might not be equipped with all features described in this manual. Safety notes $ Risk of accident Please do not forget that your primary responsibility is to drive the vehicle. A driver's attention to the road must always be his/her primary focus when driving.
Telephony via the Bluetooth® interface Using the Bluetooth® interface and a suitable cell phone, you can use the hands-free operation function of Audio 20 and receive vCards, for example. Please note that these functions are only available with cell phones approved by the distributor named on the inside of the front cover. Please contact an authorized Sprinter Dealer for information on features available for your cell phone of choice.
Telephone 34 Telephony via the Bluetooth® interface In preparation for making calls via the Bluetooth® interface, you should check the following items on your cell phone (see the cell phone operating instructions): O Hands-Free Profile O Some displays (e.g. the signal strength displayed) appear independently of the supported version of the Hands-Free Profile. ® O Bluetooth visibility O On some cell phones, in addition to Bluetooth® being activated, the device must also be made "visible" to other devices.
Telephony via the Bluetooth® interface + The passcode is any one to sixteen-digit number combination which you can determine yourself. You must enter the same number on Audio 20 and on the device to be authorized. Entering on Audio 20 To enter the passcode on Audio 20, you can use the keypad or select the desired digits in sequence from the on-screen menu bar.
36 Menu overview Telephone + On some cell phones, you have to set up the connection to Audio 20 again after entering the passcode (see the cell phone operating instructions). Otherwise, the cell phone cannot be authorized. Displaying details There is a detail display for each cell phone in the phone list. E %QPhoneQBluetooth Phones. E Select the cell phone from the list. E Select OptionsQDetails. More information about the selected cell phone is displayed.
Emergency calls "911" The following information is displayed in the status bar: O Bluetooth® device name of the connected cell phone, in this case: blue_mobile O Cell phone network signal strength r. This information will only be shown with suitable cell phones. The bars indicate the current signal strength of the cell phone network for reception. Optimum reception is indicated by all bars full. All bars empty indicates very poor or no reception.
38 Phone book Telephone + Emergency calls may not be possible with all telephone networks or if certain network services and/or telephone functions are active. Check with your local service providers and cell phone instructions. If you cannot make an emergency call, you will have to initiate rescue measures yourself.
Phone book E %QName. Entries in the phone book are displayed in alphabetical order. The search speller is active when more than 8 entries are available. The search speller appears on the lower edge of the display. If a phone book entry has the G icon next to it, this indicates that there are several numbers stored in this entry. You can select these sub-entries (e page 40). You can use the search speller to reduce the number of entries you need to make.
40 Phone book E To delete an entire entry: select 2 and press and hold the 9 button until the entire entry has been deleted. or E Telephone E Press and hold the j button until the entire entry has been deleted. Ending search: Switch from the search speller to the list. The entry at the top of the list is automatically highlighted. : Expanded phone book entry Press and hold the 9 or : button until the desired sub-entry is highlighted. E Press the 9 button to confirm. A call will be initiated.
Deleting an entry E E E Select an entry. Select OptionsQDelete. A prompt appears, asking whether the entry should be deleted. Select Yes or No. If you select Yes, the entry is deleted from the Audio 20 phone book. + If there is a symbol with a telephone receiver in front of the phone number or the name, then you have missed this call (e.g. in the highlighted line of the following figure). E Press the 9 or : button until the desired entry is highlighted. E Initiating a call: Press the 6 or 9 button.
42 Using the telephone Making calls E Press the % function button to call up the telephone mode. When the cell phone is ready for operation, the display will look similar like this: Telephone If the caller’s name and number are among the entries in the audio system’s phone book and the caller has not withheld this information, it will appear on the display. If the caller withholds this information, you will see: E To accept: Press the 9 button (Accept is selected).
E E E E To enter digits: Press the = or ; button to select the required digit. Press the 9 button to confirm. Repeat the procedure, until you have select all digits for the necessary phone number. To delete individual digits: Select 2 in the menu bar and press the 9 button briefly. or E E Press the j button. To delete an entire phone number: select 2 in the menu bar and press and hold the 9 button until the phone number has been deleted.
44 Using the telephone Functions available during a single call connection E E Switching hands-free microphone on/ off Telephone E + This function is not supported by all cell phones. The menu bar changes when you make or receive a call. Instead of the Call Lists menu item, Mic Off or Mic On will appear. E To switch off: Select Mic Off. The message The microphone is off will flash up on the display. If the microphone is switched off, the Q icon appears in the main area. E To switch on: select Mic On.
Steering wheel with buttons Basic information about operation using the steering wheel buttons can be found in the "At a glance" section (e page 15). Call lists Calling up a list E Audio20 phone book Calling up the Audio20 phone book E E Press the V or U button on the steering wheel to select the Telephone menu. Select Name using the & or * button on the steering wheel. E E E Press the V or U button on the steering wheel to select the Telephone menu.
46
47 System settings Menu overview Setting the system language Display settings Bluetooth® settings Resetting
48 Menu overview Menu overview Setting the system language Calling up the System menu System settings E Press the i function button. The System menu appears. : To call up menu options ; To switch off the display Menu Function/submenu System Settings Language setting Display settings Bluetooth® settings Reset to factory settings Display On/Off Switching display on/ off Switching the display on/off E E To switch off the display: select Display Off.
Display settings You can adapt the brightness of the audio display to the prevailing light conditions. Setting the brightness + The brightness detected by the Audio 20 light sensor influences the settings available for this function. E iQSystem SettingsQDisplay QBrightness. Bluetooth® settings General information about Bluetooth® Bluetooth®-capable devices must support Hands-Free Profile 1.0 or higher to be connected to Audio 20. Every Bluetooth® device has its own specific Bluetooth® name.
50 Resetting System settings Resetting You can reset Audio 20 back to its factory settings. In this case, all data is lost, including personal settings (i.e. station presets). Resetting is recommended before selling or transferring ownership of your vehicle, for example. E iQSystem SettingsQReset. A prompt appears asking whether you wish to reset. E Select Yes or No. If you select Yes, a prompt will appear again asking whether you really wish to reset. E Select Yes or No.