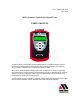
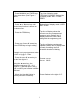
User’s Manual 9R122-A June, 2010 M203 Altimeter / Indicated Air Speed Tester USER’S MANUAL The Meriam Process Technologies (Meriam) M203 Altimeter / Indicated Air Speed Tester is a microprocessor based pressure sensing device used to measure pressure 0-900 millimeters (mm) Hg relative to absolute zero. The handheld is NIST traceable. When used in Pressure Measure Mode, pressure can be displayed in a variety of engineering units.
Safety Information Failure to follow all instructions could result in injury. Read, understand and follow all safety warnings and instructions provided with this product. Also, meet or exceed your employer’s safety practices. In no event shall Meriam be liable for any indirect, special, incidental, consequential or punitive damages or for any lost profits arising out of or relating to any services provided by Meriam or its affiliates.
Table of Contents Certification/Safety/Warnings .......................................................1 User Interface ...............................................................................2 1. Keypad Functions ...................................................................2 ON/OFF & BACK KEY ................................................................2 MIN/MAX & UP KEY...................................................................2 TARE & DOWN KEY ...............................
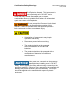
Certification/Safety/Warnings User’s Manual 9R122-A June, 2010 Fire/Explosion Hazard. This instrument is not intrinsically safe. DO NOT use in areas that may contain flammable gas or vapors, combustible dusts or ignitable fibers where an unintended spark can cause a fire/explosion. Do not exceed the Pressure Limits listed in the Specifications section of this manual.
User Interface 1. Keypad Functions ON/OFF & BACK ◄ KEY Turns the manometer on and enters the unit into the Measure Mode. Pressing the key while in the Measure Mode turns the unit off. It also serves as a backspace key when editing in the Program Mode. The ◄ key takes the user out of a programmable register without changing the previous setting. Pressing this key repeatedly will return the user to the Measure Mode and then shut off the manometer.
PRGM & ENTER ► KEY Puts the manometer into the Program Mode from the Measure Mode. When in the Program Mode, pressing this key selects the programmable register to be edited (with prompt for password if Lockout is set). After the register has been edited, pressing the PRGM key enters the new setting into the manometer’s non-volatile memory. This key also acts as a forward space ► key when editing user inputs such as the header name.
2. Zeroing the Manometer The M203 Precision Smart Manometer is a stable and precise instrument. However, on occasion the M203 should have a new zero taken. This is done to remove zero drift that can occur since the manometer was last zeroed. The M203 can be zeroed only if the new applied zero is within ±1% FS of the original factory calibration zero. This prevents accidental zeroing at atmospheric pressure or other relatively high pressures.
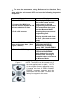
1. To zero the manometer using Referenced to Absolute Zero, start with the unit turned OFF and use the following keystroke sequence: Keystroke 1. Press ON/OFF button. 2. Connect the M203 to a vacuum source capable of 100 microns absolute or less. 3. Pull a full vacuum 4. Press MIN/MAX and TARE keys at the same time. (See Figure 1 below.) 5. Press the PGRM key. Figure 1 Display The display briefly shows the header name and full scale range in the last engineering units selected.
2. To zero the manometer using Factory Zero, start with the unit turned ON and in Measure Mode. Then use the following keystroke sequence: Keystroke 1. Press MIN/MAX and TARE keys at the same time. (See Figure 1 above.) 2. Press ▲ or ▼ arrow key until desired zero function is shown on the bottom line. 3. Press the PRGM key.
2. Press MIN/MAX and TARE keys at the same time. (See Figure 1 above. Top Line of display reads “ZEROING SOURCE:” Bottom line of display reads “REF TO ABS ZERO” 3. Press ▲ or ▼ arrow key until desired zero function is shown on the bottom line. Bottom line of display reads “USER ADJ. ZERO” 4. Press the PRGM key. Top line of display shows the current non-zero compensated pressure value. Bottom line of display shows the same value, along with the engineering unit. 5.
If an error is made use the back space ◄ key to move the cursor back to the incorrect digit. Press the UP ▲ or DOWN ▼ arrow keys to correct the value, 8. Continue this process until the display reads as shown at right. 9. Press the PRGM key to enter the final value. Current: xxx.xx 029.50 INHG Zeroing is complete when unit returns to Measure Mode. Note that the User Adjusted Zero feature will not accept entries in altitude units (FEET or METERS).
Units Select The standard units available on the M203 are: Inches of Mercury at 0° C (in Hg @ 0° C) (absolute) Millimeters of Mercury at 0° C (mm Hg @ 0° C) (absolute) PSI (absolute) Mbars (absolute) Bars (absolute) kPa (absolute) Torr (absolute) ALT / IAS - selecting this unit gives access to English units. (knots, MPH and Feet) or Metric (km/h and Meters) To change the engineering units the manometer should be “ON” and in Measure Mode. Then follow these steps: Keystroke 1. Press the PRGM key.
ALT/ IAS (Altitude / Indicated Air Speed) Mode The model M203 is capable of displaying altitude (feet or meters based on “U.S. Standard Atmosphere 1962” tables) and air speed (knots, MPH or km/h). The ALT / IAS Mode is selected from Program Mode in the Units Select menu. Once ALT / IAS Mode is selected, the M203’s default measurement is altitude. Pressing the “Tare” key nulls the prevailing barometric pressure and converts the display to air speed indication.
6. If METRIC units are desired, press the ▲ or ▼ arrow key Top line reads “UNITS SELECT” and bottom line reads “METRIC”. Units are set to METERS and km/h. 7. Press the PRGM key. Top line reads “PROGRAM MODE” and bottom line reads “UNITS SELECT”. 8. Press the ◄ key. Manometer returns to Measure Mode displaying Altitude. 1. Altitude is the default measurement when ALT /IAS Mode is active. 2.
Damp Rate Select Adjustable exponential type damping is available to steady the display when measuring pulsating pressures. The M203 has a range of damping rates; 0.1, 0.2, 0.5, 1, 2, 5, 10, or 25 seconds. Damping is done by averaging new data from the pressure sensor against previously collected data. The microprocessor collects data from the sensor every 0.1 seconds. The display updates every 0.5 seconds, showing the current 0.1 second pressure reading. When set at 25 seconds, the display updates every 0.
User Info Select (Accuracy, SW version, Mfr date, SN) The User Info Select registers are designed to provide the user with information on the hardware and software in the manometer. This register provides read only information on the sensor’s accuracy, software version, date of manufacture and serial number. It also allows the user to edit the Auto Shut-Off, Lockout and StartUp Header Name features. To access the User Info Select registers, follow the steps below.
Auto Shut-Off Enabling the Auto Shut-Off feature allows the manometer to turn itself off after a user selected period of keypad inactivity. Selectable options include DISABLED, 10 Minutes (which is the factory shipped default), 20 Minutes, 30 Minutes, 45 Minutes and 60 Minutes. Disabling this feature limits the manometer to being turned off by using the ON/OFF key only. To configure auto shut-off follow these steps: Keystroke 1. Follow steps 1-6 in the user Info Select table. 2.
Lockout Select Enabling the Lockout feature prevents unauthorized users from making changes to the configuration of the manometer. To enter the Program Mode, the user must first enter the “password” (two-digit Lockout Code) within approximately 40 seconds when prompted. Failure to enter the correct two digit code within approximately 40 seconds will return the unit to Measure Mode. Any two-digit numeric code can be programmed.
Header Name Follow the steps below to edit the Header Name. Keystroke 1. From the Measure Mode press the PRGM key. 2. Press the up arrow key twice. Display Top line reads “PROGRAM MODE” and bottom line reads “UNITS SELECT”. Bottom line changes to “USER INFO SELECT”. 3. Press the PRGM key. Bottom line shows serial number. 4. Press the up arrow key five times. 5. If header is correct press backspace key. If editing is desired proceed to Step 7. 6. Press the left arrow key.
Contrast Select The Contrast Select register allows the user to adjust the character contrast of the LCD display to provide the best visibility for the ambient light conditions. To adjust the contrast, follow these steps: Keystroke Display 1. From the Measure Mode press the PRGM key. Top line reads “PROGRAM MODE” and bottom line reads “UNITS SELECT”. 2. Press the ▲ key three times. Bottom line reads “CONTRAST SELECT”. 3. Press the PRGM key, Top line reads “CONTRAST SELECT”.
Data Logging Data Logging can be used to record pressure measurements. Two record modes are supported: automatic and manual. In automatic mode, a pressure value is captured every 5 seconds for 20 minutes, resulting in 240 stored values. In manual mode, a pressure value is captured each time the PRGM key is pressed up to 240 values. The data collected during a logging session can be viewed upon completion. Keystroke Display 1. From the Measure Mode, press the PRGM key.
Leak Test The Leak Test feature allows the user to determine the leak rate in the pneumatic system being monitored. Once configured, Leak Test monitors the measured pressure, altitude or air speed over time and displays the leak rate in units per minute at the conclusion of the test. The maximum configurable leak test period is 1440 min (1 day). Pressing any key during the leak test aborts the test. To enable Leak Test follow these steps: Keystroke 1. From the Measure Mode, press the PRGM key. 2.
Re-Calibration The Manometer can be re-calibrated in the field for zero, span, and linearity. The proper primary standards must be available prior to calibrating the Manometer. These standards should meet the accuracy requirements for your company or industry. Meriam Process Technologies follows the guidelines established by ANSI / NCSL Z540- 1-1994 which requires that the primary standard be four times more accurate than the unit under test.
RE-CALIBRATION – 1 Point EDIT and START To perform a 1-point re-calibration, apply a pressure between 50% and 100% of Full Scale and then follow these steps: Keystroke 1. With unit OFF, press and hold the MIN/MAX key, turn the unit on by pressing the ON/OFF key, then release MIN/MAX. Display Top line reads “RE-CAL”. Bottom line reads “EDIT”. 2. Press the up arrow key until “START” is displayed on the bottom line. Top line reads “RE-CAL”. Bottom line reads “START”. 3. Press the PRGM key.
RE-CALIBRATION – 5 Point EDIT To edit the calibration points for a 5 Point re-calibration follow the steps below. NOTE: If the factory default values are acceptable, skip this section and proceed to the re- calibration 5-Point START procedure. Keystroke 1. With unit OFF, press and hold the MIN/MAX key, turn the unit on using the ON/OFF key, h Press l the PGRM key 2. Display Top line reads “RE-CAL”. Bottom line reads “EDIT”. 3. Press the up/down arrow keys to edit the selected digit.
RE-CALIBRATION – 5 Point START To begin the 5-point re-calibration procedure, turn the unit OFF and follow the steps below. Keystroke Display 1. Press and hold the MIN/MAX key and turn the unit on by pressing the ON/OFF key. 2. Press the up arrow key until “START” is displayed on the bottom line. Top line reads “RE-CAL”. Bottom line reads “EDIT”. 3. Press the PGRM key Top line reads “RE-CAL Bottom line reads “1-POINT”. 4. Press the up arrow key until “5-POINT” is displayed on the bottom line.
11. Press the PRGM key at YES to save the ReCalibration data or at NO to exit without saving. YES to save the ReCalibration data or at NO to exit without saving. 12. Press the left arrow key. Returns to Measure Mode. RE-CALIBRATION – Restore Factory Defaults To restore the re-calibration data to the factory defaults, follow these steps: Keystroke 1. With unit OFF, press and hold the MIN/MAX key, turn the unit on using the OFF key, then release. Display Top line reads “RE-CAL”.
Specifications Type, Range and Display Resolution: 17.4-3 psia (900.00 mmHg) – XX.YYY (XXX.YY) Minimum / Maximum Display Values: Altitude: -2000.0 to +36,000.0 Feet -609.6 + 10,972.8 Meters Indicated Air Speed: 0 – 496.4 Knots (approx.) 0 – 571.3 MPH (approx.) 0 – 919.4 km/h (approx.) Note: the barometric pressure value at time the TARE button is activated will determine the maximum indicated air speed. Altitude Accuracy (NIST traceable): + 0.02 % F.S. (F.S.
Battery Type: 4 each AA alkaline Battery Operation: > 100 hours continuous use, 1 year shelf life, auto power off programmable at disabled, 10, 20, 30, 60 or 90 minutes Enclosure: (6.9” x 3.8” x 2.3”) Polycarbonate, Permanently Static Dissipative, ESD Protection Enclosure with Boot: (7.2” x 4.2” x 2.5”) Rating: IP40 Changing the Batteries Fire/Explosion Hazard. This instrument is not intrinsically safe.
battery polarity markings at the bottom of the compartment, as shown here. To install the four batteries: 1) Make sure polarity of battery matches the markings in the compartment. 2) 1st place the (+) end of the battery into the bottom of the battery slot. 3) Then push in (-) end of the battery until it is seated in the bottom of the battery slot. The battery compartment has stand offs molded into the side of the compartment.
Service and Calibration If the M203 can not be zeroed, recalibrated or is damaged, it must be returned to the factory for servicing. In this case, contact the Meriam Process Technologies representative in your area or call the factory at the numbers listed below for a Return Material Authorization (RMA) number. DO NOT send any unit in for service without first contacting Meriam for a Return Material Authorization (RMA) number.
For customer assistance please call your local Meriam representative or Meriam directly. Meriam Process Technologies 10920 Madison Avenue Cleveland, Ohio 44102 Telephone: (216) 281-1100 Fax: (216) 281-0228 E-mail: meriam@meriam.com Web: www.meriam.