
Manual


46
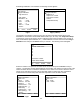
Once the As Found loop calibration test procedure is completed, the screen will change to the intermediate
screen shown below. At this point, the user performs any necessary adjustments to the transmitter or
troubleshoots the loop to correct errors. Once complete, select the As Left menu option to complete the As Left
portion of the loop calibration.
When the As Left loop calibration procedure is completed, the calibration record is saved in MFT memory under
the Loop Tag previously entered. This data can be viewed at any time by selecting the View Results menu
option under the Calibration Key Main Screen.
Loop Calibration Procedures and Documentation – From PC (Stored)
Loop calibration procedure setup features similar to those described in the Loop Calibrations and
Documentation section above are available in the Meriam Device Management System. This allows the user to
define loop calibrations and assign calibration procedures to specific loop tag numbers in the DMS database.
DMS tracks calibration schedules and alerts the user when loop calibrations are coming due. DMS will
download loop calibration procedures to a documenting MFT for use in the field. For conventional devices, the
VMA0055 module is used to simulate a transmitter on the loop to be tested. For HART devices, the MFT 4010
sends the HART commands needed to fix the device output to the procedure value. Once the loop calibration
has been completed, the results can be uploaded to DMS where they are stored by their loop tag numbers for
review and future reference.
Many of the MFT screens shown in the Loop Calibration and Documentation – Manual section above are
reused in the Stored procedure method.
Switch Test Calibration Procedures and Documentation – Manual
Switch Test procedures allow the MFT to test and document the set point, reset point and deadband of a
switch. Supported switch types include pressure, temperature and level (head type) switches.
To start a switch test, press the Calibrate key from
Measure Mode. The following screen appears:
As Found Complete
As found
Save AsFnd to AsLft
Smart Trim
As Left
View Results
Up Down Select Abrt
As Found Complete Screen
Cal
Cal Setup:
Begin Calibration
Procedure: Manual
DeviceOut: Conv
Cal Type: P
P Meas / IV Meas
Quick Cal
Smart Trim
View Results
Clear Cal Memory
U
p
Down Select Back
Calibrate Key Main Menu Screen