
User's Manual


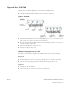


Table Of Contents
- Contents
- Introduction
- OAP180 Access Point Features
- Special Release Software for Meru Controllers
- OAP180 Hardware Installation Instructions
- Limitations and Advisories
- Regulatory Information
- Documentation for this Release
- Contacting Meru

OAP180 Hardware Installation Instructions 5 of 24
© 2007 Meru Networks, Inc.
ip ftp|sftp|scp|tftp username and ip ftp|sftp|scp password commands. (Using
these commands is optional. If you do not set the username and password before trans-
ferring files, you must provide the username and password when prompted.)
mc500# configure terminal
mc500(config)# ip ftp username user1
mc500(config)# ip ftp password userpass
mc500(config)# ^Z
mc500# dir ftp://myserver/images/
total 134576
-rw-rw-r-- 1 root root 21790720 Jul 14 17:03 meru-3.2SR2-9-
MC500.tar
mc500# cd images
mc150# copy ftp://myserver/images/meru-3.4.SR2-10-MC500-
rpm.tar
2. If you see an error message stating that there is not enough free disk space, use
the show flash command to see if there are previous images on the flash. Delete
the previous image using the delete flash version command. Then try the copy
command again.
3. After the image transfer is complete, use show flash to verify the system is on the
flash.
4. Enter the upgrade system version command to update the controller and OAP
software:
mc500# upgrade system 3.4.SR2-10
The system is now upgraded. Log in as
admin to access the system.
OAP180 Hardware Installation Instructions
Perform the procedures in the following sections to install the OAP180 and configure
the controller to use this special release.
Unpack the OAP180
Plan the Location
Test Basic Link Operation
Mount the Unit
Connect External Antennas and Ground Wire to OAP180
Connect Cables to the Unit
Connect the Power Injector
Align Antenna
Check the OAP180 for Activity
Configure the OAP180 Access Point