
User Manual


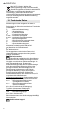


ENGLISHen
10
See page 2.
1 Chuck key (for geared chuck) *
2Geared chuck *
3 Futuro Plus keyless chuck *
4Depth stop *
5 Additional handle *
6 Direction switch *
7 Sliding switch for normal drilling/impact drilling *
8 Rocker switch for pulse function *
9 Lock button (continuous operation)
10 Trigger
11 Speed preselection wheel *
* depending on the features / model
Before plugging in, check to see that the
rated mains voltage and mains frequency,
as stated on the rating label, match with your
power supply.
Always install an RCD with a maximum trip
current of 30 mA upstream.
BE 650, SBE 650, SBE 650 Impuls:
Make sure the chuck clamps securely:
After drilling for the first time (clockwise), firmly
tighten the safety screw inside the chuck using
a screwdriver. Caution: left-handed thread!
(see Section 7.9)
6.1 Attaching the Additional Handle
(SB 650, SBE 650, SBE 650 Impuls)
For safety reasons, always use the
additional handle supplied.
Open the clamping ring by turning the additional
handle (5) anticlockwise. Push the additional
handle onto the collar of the machine. Insert the
depth stop (4). Securely tighten the additional
handle at the angle required for the application.
7.1 Adjusting the Depth Stop
(
SB 650, SBE 650, SBE 650 Impuls
)
Loosen the additional handle (5). Set depth stop (4)
to the desired drilling depth and retighten additional
handle.
7.2 Switching On and Off
To start the machine, press the trigger switch (10).
BE 650, SBE 650, SBE 650 Impuls: Press in the
trigger switch to change the speed.
For continuous operation the trigger switch can be
locked using the lock button (9). To stop the
machine, press the trigger switch again.
In continuous operation, the machine
continues running if it is forced out of your
hands. Therefore, always hold the machine
with both hands using the handles provided,
stand in a safe position and concentrate.
7.3 Speed Preselection
(BE 650, SBE 650, SBE 650 Impuls)
Select the (11) maximum speed using the
preselection wheel. See page 4 for recommended
drilling speeds.
7.4 Switching Between Normal Drilling/
Impact Drilling
(SB 650, SBE 650, SBE 650 Impuls)
Select the desired operating mode by pushing the
sliding switch (7).
Drilling
Impact drilling
Work with high speed settings when impact drilling.
Impact drilling and normal drilling only in
a clockwise direction.
7.5 Selecting the Direction of Rotation
(BE 650, SBE 650, SBE 650 Impuls)
Do not activate the direction switch (6)
unless the motor has completely stopped.
Select direction of rotation:
R=Clockwise
L=Anticlockwise
Screw the chuck firmly to the spindle and
tighten the safety screw inside the chuck
using a screwdriver. (Caution: left-handed
thread!)
Otherwise it may come loose during
anticlockwise operation (e.g. when
screwdriving).
7.6 Switching pulse function on and off
(SBE 650 Impuls)
Do not work for long periods with
pulse function switched on!
(The motor can overheat.)
Actuate rocker switch for pulse function (8).
0 = pulse function switched off
= pulse function switched on
7.7 Tool Change With
Futuro Plus Keyless Chuck (3)
Quick-action keyless chuck with metal sleeve:
See illustrations on page 2.
Insert the tool. Hold the retaining ring (a) firmly and
turn the collet (b) towards "GRIP, ZU" with the other
hand until the mechanical resistance which can be
felt is overcome.
Caution! The tool is not yet clamped! Keep
turning the sleeve (it must "click" when turning)
until it cannot be turned any further - only now is the
tool securely clamped.
With a soft tool shank, retightening may be required
after a short drilling period.
Open the chuck:
Hold the retaining ring (a) firmly and turn the collet
(b) towards "AUF, RELEASE" with the other hand.
5. Overview
6. Commissioning
7. Use