
User Manual


ENGLISHen
12
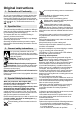
- Ensure good ventilation of the workplace and
keep it clean using a vacuum cleaner. Sweeping
or blowing stirs up dust.
- Vacuum or wash protective clothing. Do not blow,
beat or brush.
Illustrations are provided at the beginning of the
operating instructions.
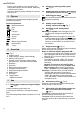
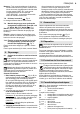
Symbol explanation:
Movement direction
Slow
Fast
First gear
Second gear
Screws
Drill bit
Without torque limitation
Impact drilling
Torque
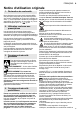
Fig. A
1Keyless chuck
2 Sleeve (torque, drilling, impact drilling)*
3S
witch (1st/2nd gear)
4 Rotation selector switch (rotation setting,
transport lock) - both sides of the machine
5Bit depot *
6Belt hook *
7B
attery pack release button
8 Capacity indicator button
9 Capacity and signal indicator
10
Battery pack
11 LED lights
12 Trigger switch
*equipment-specific
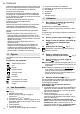
7.1 Battery pack, capacity and signal display
Fig. B
Charge the battery pack before use.
If performance diminishes, recharge the battery
pack.
The ideal storage temperature is between 10°C and
30°C.
7.2 Removing, replacing battery pack
Fig. C
7.3 Setting direction of rotation, transporting
safety device (switch-on lock) Fig. D
7.4 Selecting gear stage Fig. E
Do not set the switch (3) unless the motor has
stopped completely!
7.5 Setting torque limitation,
drilling, impact drilling Fig. F
7.6 Switching on/off, setting speed
Fig. A
Switching on, speed: press the trigger (12). The
speed can be changed by pressing in the
trigger.
Switching off: release the trigger (12). Note:
The
noise that the machine makes when it switches
off is due to the design (quick stop) and has no
influence on the function or the service life of
the machine.
7.7 Keyless chuck Fig. G
With a soft tool shank, retightening may be required
after a short period of operation.
Notes on
machines with the designation SB...
:
1. The ratchet sound which can possibly be heard
after opening the drill chuck is functional and is
switched off by a reverse rotation of the sleeve.
2. Clamping tool:
Turn sleeve in direction "GRIP, ZU" until the
noticeable mechanical resistance has been
overcome.
Caution! The chuck is not yet fully tight-
ened! Keep turning the sleeve (it must "click"
when turning)) until it cannot be turned any
further - only now is the tool safely clamped.
Cleaning: From time to time, hold the machine
vertically with the keyless chuck facing
downwards and turn the sleeve fully in direction
"GRIP, ZU" and then turn fully in direction
"AUF, RELEASE". The dust collected falls from
the keyless chuck.
7.8 Unscrewing chuck Fig. H
Employ the same procedure when attaching the
chuck, except in reverse order.
7.9 Chuck with quick bit change system (for
BS 14.4 LT Quick, BS 18 LT Quick)
Fig. I
To remove: Push the interlock ring forward (a),
advance and pull off the chuck (b).
To mount: Push the interlock ring forward and
move the chuck as far as the limit stop on the drill
spindle.
5. Figures
6. Overview
7. Use
Nm