
Operation Manual


ENGLISH en
15
Clean the appliance (see section9.).
For maintenance by the user, the vacuum cleaner
must be taken apart, cleaned and maintained, to the
extent possible, without endangering maintenance
staff or other people.
Preventive Measures
Appropriate preventive measures include: cleaning
the appliance before disassembly; providing local
filtered forced ventilation where the vacuum cleaner
is disassembled; cleaning of the maintenance area
and providing suitable personal protective clothing
and equipment.
10.2 Reduction in suction power
If the suction power decreases, carry out the
following steps:
1. Clean the pleated filter (11): Press button (4)
('PressClean', see section 7.2)
2. Empty the container or replace the fleece filter
bag (9) or PE filter bag (10).
3. Replace the pleated filter (11), or shake it out,
brush it off or remove it, rinse under running
water, dry and reinsert (see section 10.3).
10.3 Replacing the pleated filter (11)
- Clean the pleated filter (11) again before replace-
ment: Press the (4) button ('PressClean', see
section 7.2).
- Unplug mains cable. Ensure the plug cannot be
reconnected accidentally.
- Open the snap locks (6). Remove the upper part
(3) from the container (8).
See illustration D, page 2. Turn the filter cage (12)
anti-clockwise (bayonet catch) and remove.
Remove the pleated filter (11).
Seal the old pleated filter immediately in a dust-tight
plastic bag and dispose of it in accordance with
regulations.
Fit the new pleated filter as far as the limit stop,
ensuring that the filter is properly and securely posi-
tioned. Insert the filter cage (12) and turn it anti-
clockwise (bayonet catch) in order to secure the
pleated filter.
10.4 Water sensor
CAUTION- Regularly clean the mobile float
that is incorporated in the filter cage (12) and
check it for signs of damage.
10.5 Technical inspection
At least once a year, the manufacturer or a suitably
qualified and trained person must carry out a dust
test, e.g. to check for damage to the filter, verify that
the appliance is airtight and that the control unit is
functioning correctly.
For maintenance by the user, the vacuum cleaner
must be taken apart, cleaned and maintained, to the
extent possible, without endangering maintenance
staff or other people.
Preventive Measures
Appropriate preventive measures include: cleaning
the appliance before disassembly; providing local
filtered forced ventilation where the vacuum cleaner
is disassembled; cleaning of the maintenance area
and providing suitable personal protective clothing
and equipment.
When carrying out maintenance or repairs, it is
essential to dispose of any contaminated objects
that cannot be adequately cleaned. These objects
must be disposed of using impermeable bags and
in accordance with the applicable regulations for
removing such waste.
Reduction in suction power:
See the instructions in the section on Cleaning.
• Is the pleated filter (11) dirty? Clean the
cassettes.
• Fleece filter bag (9) full? Replace the filter bag.
• PE filter bag (10) full? Replace the filter bag.
• Container (8) full? Empty the container.
• Nozzle, tubes or hose blocked? Clean.
Appliance will not start:
• Is the plug in the plug socket?
•No power from mains?
• Mains lead OK?
• Appliance hood correctly closed?
• Has the water sensor cut off? - Empty the
container; then switch on and off again.
• Switch (1) in ' ' position? - Set to "I" position.
See section 7.1.
• The vacuum cleaner is not switched on or off by a
power tool, even though switch (1) is set to the '
' position. - Connect the power tool to the
plug socket (2).
Do not interfere with the appliance.
Contact an authorised workshop or
Metabo's after-sales service department (see
section on 13. Repairs).
f
Use only genuine Metabo accessories.
If you need any accessories, check with your
dealer.
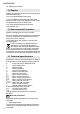
See page 4.
A Fleece filter bags
5 bags = 1 set
BPE filter bags
5 bags = 1 set
C Pleated filter
DSuction hose
E Suction nozzle
F Floor nozzle (metal fitting)
G Universal nozzle
HUniversal brush
I Upholstery brush
JCrevice nozzle
KRubber nozzle
L Floor nozzle set (with floor piece and wet vacu-
uming piece)
11. Troubleshooting
12. Accessories