
Operation Manual

MI 3310 / MI 3310A SigmaGT Working with results
108
7 Working with autotest results
After the autotest sequence is completed, measurement results can be:
- Saved to the flash memory of the instrument. Before that they can be viewed and
edited. Refer to chapter 7.1 Saving autotest results for more information.
- Send to PC or a test report can be printed out to serial printer. Refer to chapter
7.4 Downloading and printing results for more information.
- DUT label can be printed out. Refer to chapter 7.4 Downloading and printing
results for more information.
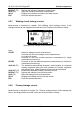
7.1 Saving autotest results
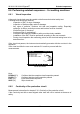
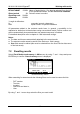
After the autotest sequence is completed, Save results menu is displayed.
Following data can be added to the test results for saving:
- Device number and its name
- Test site and location,
- Retest period,
- Repairing code,
- Comments.
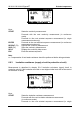
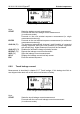
Save results menus
Keys:
/
Selects the item.
/ , alphanumeric Edits data
SAVE (F1) Saves test results and returns to last autotest menu.
UNDO (F2) Undo changes.
VIEW (F3) Views test results, see 6.3.3 Comparison of results
LIST(F4) Offers predefined names for selected field.
ESC
Returns to Main menu.
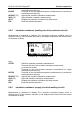
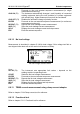
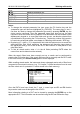
Entry fields for tested device data:
Field Length* Note
DEVICE No.
20ASN Numeric code of device. It can also be entered via
barcode reader scanning, see chapter 6.4 Working with
barcode / RFID tag.
Test site
15ASN Name of test site. Can also be selected from the list of
100 predefined names. 4.2.5.3 Test sites submenu.
Location
15ASN Name of location. Can also be selected from the list of
100 predefined names. 4.2.5.4 Locations submenu.