
Operation Manual

MI 3310 / MI 3310A SigmaGT Autotest sequences
93
6.5 Performing autotest sequences – for appliances
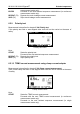
An autotest can be started from any of the Autotest menus by following simple
procedures:
- In Autotest shortcut menu, select the test sequence to be executed by code
(see 6.1.1 Selecting the autotest shortcut sequence).
- In Autotest custom menu, select the test sequence to be executed (see 6.2
Autotest custom).
- In Project autotest menu, select the test sequence to be executed by device
number (see 6.3.1 Selecting a project autotest).
Press the START key to start the autotest sequence.
Note that autotest procedure can be concluded or with skipped particular functions in
case that any of previous preceded function is skipped or get bad result. Reason is
safety for operator and DUT.
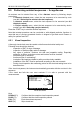
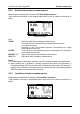
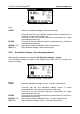
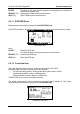
6.5.1 Visual inspection
A thorough visual check must be carried out before each electrical safety test.
Following items should be checked:
- Inspection of DUT for sign of damage.
- Inspection of flexible supply cable for damage.
- Any signs of pollution, moisture, dirt that can jeopardize safety. Especially
openings, air filters, protection covers and barriers must be checked!
- Are there signs of corrosion?
- Are there signs of overheating?
- Inscriptions and marking related to safety must be clearly readable.
- Installation of the DUT must be performed according to the user manuals.
- During visual inspection the measuring points for the electrical testing have to be
determined too.
If the visual test passes, the instrument automatically proceeds with the next test in the
sequence.
If the visual test fails the user must evaluate if it is safe to proceed with the
measurements.
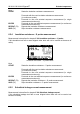
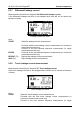
Visual test menu
Keys
PASSall (F1) Confirms that the complete visual inspection passed.
PASS (F2) Confirms that the visual inspection passed.
FAIL (F3) Ends the autotest sequence.
SKIP (F4) Skips visual test.