
Operating instructions


Basic principles for using the terminal and the firmware (software)
11
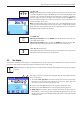
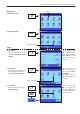
10 «H» key
Taring: If you are working with a weighing container, first set the balance to zero. Place the
container on the balance and press the «H» key to tare the balance. The weight of the
container is set as the new tare weight and the current tare (if available) is overwritten.
The “Net” display indicates that all weight values displayed are net values. Note: If you
try to tare a negative weight value, an error message appears as this is not permitted. Set
the balance to zero and try again.
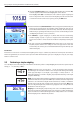
Note: Place the weighing sample on the pan. As soon as the stability detector icon (the
small ring to the left of the weight display) fades, the display is stable and the weighing
result can be read. In the illustration opposite, the stability detector icon is still visible and
the weighing result is therefore not yet stable.
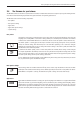
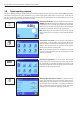
11 «On/Off» key
Switching on the balance: Press the «On/Off» key briefly. The balance carries out a test
and is then ready to weigh.
Switching off the balance: Press and hold the «On/Off» key until the message “OFF”
appears in the display. The display then fades and the balance is switched off.
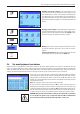
12 «K» key (Model-dependent)
Use this button to open and close the doors of the glass draft shield. For ease of operation,
these buttons are located on both sides of the terminal.
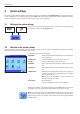
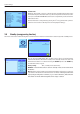
2.2 The display
Your terminal's illuminated, colorful display is a “Touch Screen”, that is to say, a touch-sensitive screen. Not only can you read data, but
you can also make settings and execute functions by touching the surface of the screen.
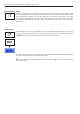
The display is divided into different zones (the figure shows the display with information
fields and “SmartTrac”):
1 The current active application is indicated in the top left of the display. By touching
this zone you can call up the menu in which you can select the desired application
(this menu can also be accessed using the «D» key).
2 Display of the current date. The date can be changed by touching this zone.
3 Display of the current time. The time can be changed by touching this zone.
4 Status icons: These symbols appear as needed and indicate any special needs of
the balance (e.g., needs servicing, needs adjustment, change batteries, etc.). You can
obtain a list of all status icons and their meanings in section 15.3 or by pressing the
actual status icons.
Note: Depending on country-specific rules, on certified versions of balances the uncertified decimal places are displayed
dimmed.
5b 5a5
1
2 3
4
H
On
Off
K