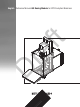
D ra ft English Reference Manual Q3 Dosing Module for XPR Analytical Balances
ft ra D
English D ra ft Reference Manual Q3 Dosing Module
ft ra D
en Table of Contents Introduction 1.1 Further documents and information................................................................................ 1.2 Explanation of conventions and symbols used ................................................................ 1.3 Acronyms and Abbreviations ......................................................................................... 1.4 Compliance information................................................................................................
8.4 8.3.1 Glossary of material acronyms ....................................................................... 8.3.2 Powder dosing head QH008 .......................................................................... 8.3.3 Powder dosing head QH012 .......................................................................... 8.3.4 Powder dosing head QH002-CNMW ............................................................... 8.3.5 Powder dosing head QH012-LNJW ...................................................
en 1 Introduction Thank you for choosing a METTLER TOLEDO instrument. The instrument combines high performance with ease of use. This document is based on the software version V 2.21. 1.1 Further documents and information u www.mt.com/MS-precision This document is available in other languages online. u www.mt.com/Q3-RM u www.mt.com/labweighing-software-download Search for software downloads u www.mt.
1.4 Compliance information D ra ft The compliance information related to this product can be found in appendix.
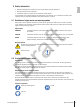
en 2 Safety Information Read and understand the instructions in this manual before using the instrument. • Keep this manual for future reference. • Include this manual if you pass on the instrument to other parties. If the instrument is not used according to the instructions in this manual or if it is modified, the safety of the instrument may be impaired and Mettler-Toledo GmbH assumes no liability. • 2.
Safety notes WARNING Death or serious injury due to electric shock Contact with parts that carry a live current can lead to death or injury. 1 Only use the METTLER TOLEDO power supply cable and AC/DC adapter designed for your instrument. 2 Connect the power cable to a grounded power outlet. 3 Keep all electrical cables and connections away from liquids and moisture. 4 Check the cables and power plug for damage and replace damaged cables and power plugs.
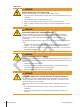
en WARNING Injury or death due to toxic substances If you use toxic, explosive, or flammable liquids with the pump, the exhaust air will be contaminated. − Connect a tube to the exhaust air outlet to collect the contaminated air. WARNING Injury and/or damage due to reacting substances When pressure is released from the bottle, the air/gas in the bottle moves back towards the pump. The air/gas coming from the coupled outlets mixes in the pump.
NOTICE Damage to the instrument due to the use of unsuitable parts Using unsuitable parts with the instrument can damage the instrument or cause it to malfunction. − Only use parts from METTLER TOLEDO that are intended to be used with your instrument. NOTICE Damage to the instrument The instrument contains no user-serviceable parts. 1 Do not open the instrument. 2 In the event of problems, please contact a METTLER TOLEDO representative.
en 3 Design and Function 3.1 Function description The Q3 dosing module can be added to any XPR analytical balance to perform automatic dosing of powders and/or liquids. The powder or liquid dosing head is attached to the dosing module and stays outside of the weighing chamber during the whole dosing procedure. The top door of the balance is replaced by a top panel with an opening through which the powder or liquid is dosed.
3.3 Components description Dosing module The dosing module is designed to hold the dosing head and can automatically move up and down during the dosing procedure. ra ft Dosing lift The dosing lift is fixed to the back of the weighing chamber. It contains the mechanism that moved the dosing module up and down during the dosing procedure and is controlled through the terminal.
en Optical sensor for vial detection The dosing module is equipped with an optical sensor to detect the position of the vial opening. This allows automatic vertical positioning of the dosing module for fast and safe dosing. ft ErgoClip adapter holder and adapters The Q3 dosing module includes an adapter holder that can be placed on the SmartGrid weighing pan. It can hold adapters of various sizes allowing perfect positioning of different sample vessels. Additional adapters are available as accessories.
Weight test head The weight test head performs an automated repeatability test by placing a test weight on given tare weights. The repeatability of the system is determined based on 10 consecutive measurements of the test weight. If your instrument fails the tests, inform a METTLER TOLEDO service technician. ft Liquid dosing head Liquid dosing heads areused for automatic liquid dosing. They are used together with a pump and bottle.
en 4 Installation and Putting into Operation This instrument must be installed by a METTLER TOLEDO service technician. 4.1 Selecting the location A balance is a sensitive precision instrument. The location where it is placed will have a profound effect on the accuracy of the weighing results.
4.3 Setting up the liquid dosing configuration 4.3.1 Overview 1 11 2 10 3 4 5 9 8 ft 6 7 Dosing lift 7 ErgoClip adapter holder 2 Dosing module 8 QLL kit for bottles (available separately) 3 Liquid dosing head 4 Sealing insert 9 QL3 pump (available separately) 10 Air tube (included in QLL kit for bottles) 5 Top panel 11 Liquid tube (included in QLL kit for bottles) 6 Vial adapter ra 1 4.3.
en 4 Insert the plug of the power cable into a grounded power outlet that is easily accessible. 5 Using the USB cable, connect the USB port of the pump to the USB device port of the balance. 4.3.4 Connecting the tubes 1 2 ft Tubes definition The liquid tube is the thinner tube (1) used for transporting liquid from the bottle to the liquid dosing head. The air tube is the slightly bigger tube (2) used for pumping air into the bottle. By adding air through the air tube, pressure rises in the bottle.
6 Using the micro dosing valve tool, slide the sealing ring until the distance (D) is enough for the tube to reach the bottom of the bottle. Recommended distances for typical bottle volumes are listed next. Typical distances (D) between the sealing ring and the bottle-end of the tube Thread Bottle volume Distance (D) GL45 1000 ml 220 mm 500 ml 170 mm 250 ml 135 mm 25 ml 90 mm GL25 1 2 ft Connecting the liquid tube 1 Insert the dosing-head end of the tube (1) in the dosing head (2).
1 Using a tube cutter or a sharp knife, cut a sufficient amount of tubing. The appropriate length mainly depends on the distance between the bottle and the pump while dosing. Recommended length: about 0.7 m 2 Connect the air tube (1) to the air inlet of the bottle (2) en 1 2 3 Insert the other end of the air tube (1) in a tube adapter (3) and press firmly. 4 3 1 ft 4 Connect the tube adapter (3) to one of the air outlets (4) of the pump. Press until you hear a click.
2 Remove the air tube from the bottle by firmly pressing down the ring (3) and pulling the tube (4) simultaneously. 3 If necessary, e.g., for maintenance purposes, use the same procedure to remove the air tube from the tube adapter: firmly press the ring and pull the tube simultaneously. 4 3 4 3 ft Using the pump with external gas The liquid can be protected by feeding an external gas, e.g., nitrogen, to the pump. Make sure that the pressure of the external gas does not exceed 0.5 bar (7.2 psi).
en Collecting contaminated air WARNING Injury or death due to toxic substances If you use toxic, explosive, or flammable liquids with the pump, the exhaust air will be contaminated. − Connect a tube to the exhaust air outlet to collect the contaminated air. 3 ft − Connect a tube (1) to the exhaust air outlet (2) to collect the contaminated air into a safe container (3). Note Outer tube diameter: 6 mm The exhaust air tube is not provided by METTLER TOLEDO.
5 Operation For further information, consult the XPR Reference Manual (RM). u www.mt.com/XPR-analytical-RM 5.1 Installing and removing the dosing head When the dosing module is in its upper-most position, the dosing head is unlocked. That means that it can be released by pressing the release buttons of the holder. During dosing, the dosing head is locked and cannot be removed until it returns to its upper-most position. ft Installing the dosing head § The dosing module is in the upper-most position.
en 5.2 Installing the sealing insert Always install a sealing insert (1) to avoid air drafts in the weighing chamber. 1 5.3 Powder dosing 5.3.1 Using dosing heads without a vial 1 ft Most powder dosing heads can be used with or without a vial, since the neck of the dosing head can accommodate a certain amount of powder. Using dosing heads without vials is particularly relevant when dosing very small quantities. In this case, they need to be closed using the provided spare cap (1).
5.3.3 Storing powder dosing heads For short-term and long-term storage of the powder dosing heads, METTLER TOLEDO recommends using storage containers to: • reduce the risk of contamination • reduce the quantity of humidity absorbed by the powder You can store the dosing heads right-side up (1) or upside-down (2). 2 See also 2 Accessories } Page 42 ft 1 5.3.4 Avoiding electrostatic charges D ra When preparing sample vessels, electrostatic charge may build up.
en 5.4 Liquid dosing 5.4.1 Attaching the dosing head to the bottle cap 1 Insert the liquid dosing head in the liquid dosing head support. 1 ft 2 To remove the liquid dosing head from the liquid dosing head support, pull the lever (1) towards the dosing head and remove the liquid dosing head (2). ra 2 5.4.
§ Pressure is released. 1 Unscrew the cap. 2 Fill in the liquid. (max. is shown on bottle, e.g., 1000 ml). Do not exceed the maximum. The air above the liquid is necessary for dosing. 3 Screw cap on. 4 Check that the cap is tight. ra ft Changing the liquid of the bottle This procedure is used if you have a single cap with dosing head and want to change the liquid. § Pressure is released. 1 Unplug the air tube. 2 Unscrew the cap. 3 Remove the suction filter, if applicable.
en 5.4.3 Using the QL3 pump Pressure indicator light The pressure indicator light displays the status of the pump: • Light on: pressure is building up or pressure is established • Light off: there is no pressure and no pressure is building up • Light blinking: pump error and/or warning Releasing the pressure § The pressure indicator light (1) is on. − Press the pressure release button (2) to release the pressure. ð The status light (1) turns off when pressure is released.
6 Maintenance Please contact your METTLER TOLEDO representative for details about the available service options. Regular servicing by an authorized service technician ensures constant accuracy for years to come and prolongs the service life of your instrument. For further information, consult the XPR Reference Manual (RM). u www.mt.com/XPR-analytical-RM 6.1 Cleaning WARNING Risk of electric shock The power cable must be disconnected prior to cleaning and maintenance.
§ § § § en 6.1.3 Cleaning the weighing chamber The dosing module is in the upper-most position. The dosing head is removed. The sealing insert is removed. 1 The draft shield is removed. ft 1 Tilt the top panel (1) upwards and remove. 2 Remove any adapter holder or ErgoClip, the weighing pan, and the drip tray. 2 3 Clean the weighing chamber. WARNING: Damage to the covering strip. The ð covering strip is delicate and must be handled with care.
§ The liquid dosing head is installed on the dosing or liquid module. § A sample vessel is on the weighing pan, big enough for the quantity of liquid in the liquid tube. 1 Empty the liquid tube by replacing the bottle by an empty bottle and using the Purge function. ð The liquid tube is empty. 2 Release pressure. 3 Remove the dosing head from the dosing or liquid module. WARNING: Injury or contamination from 4 hazardous substances. Be aware of any liquid draining from the tubing and the valve.
en 7 Troubleshooting For further information, consult the XPR Reference Manual (RM). u www.mt.com/XPR-analytical-RM 7.1 Error symptoms Possible cause Diagnostic Remedy The powder dosing head does not dispense any powder. The powder does not Check through the transreach the dispensing parent dosing head. mechanism of the dosing head. Remove the dosing head and shake it to loosen the powder. The liquid dosing head does not dispense any liquid. The suction filter is clogged.
Error symptoms Possible cause The value on the display is The weighing sample is unstable when dosing electrostatically charged. powders. Diagnostic Remedy Check if the weighing Increase the air humidity result is stable when using in the weighing chamber. a test weight. Use an antistatic kit. See "Accessories" in the Reference Manual (RM).
en 8 Technical Data 8.
8.2 Model-specific data Liquid dosing heads QL001 QL002 QL003 20 mPa·s 20 cP 20 mPa·s Dosing quantity, offset 1) 1 mg 20 mg 2.5 mg Dosing quantity, repeatability (sd) 1) 1 mg 10 mg 2 mg Dosing time 1) 30 s 12 s 20 s Outer Diameter Inner Diameter Recommended length Liquid tube, for GL45 bottles (dosing head to bottle) 3.2 mm 1.6 mm 0.9 m Liquid tube, for GL25 bottles (dosing head to bottle) 1.6 mm 0.8 mm 0.9 m Air tube (pump to bottle) 4.0 mm 2.4 mm 0.
en 8.3 Material specifications Materials in contact with the substance to be dosed. Please note that traces of all contact material could be transferred to the sample. 8.3.1 Glossary of material acronyms Acronyms defined in ISO 1043: Plastics – Symbols and abbreviated terms.
8.3.3 Powder dosing head QH012 Designation Material 1 Dosing head body PMP 2 Bushing POM 3 Dosing pin Stainless steel 1.4404 4 Scraper Stainless steel 1.4310 5 Cone Stainless steel 1.
Designation Material 1 Body PP 2 Closing cap PP 3 Dosing pin PP (ESD) 4 Cone body PP (ESD) en 8.3.
8.3.
Material 1 Fastening nut PEEK 2 Sealing ring ETFE 3 Tube connector Stainless steel 1.4404 4 O-Ring FFKM 5 Solenoid valve PEEK Sapphire-Ruby Stainless steel 1.4105IL Stainless steel 1.14301 / 1.4306 Stainless steel 1.4305 1 2 3 ft Designation en 8.3.
8.3.7 Liquid dosing head QL003 Designation Material 1 Fastening nut PEEK 2 Sealing ring ETFE 3 Valve block PTFE 4 Gasket EPDM 5 Valve PEEK 1 5 4 2 ft 3 8.3.
en 8.4 Dimensions ft 426 453 Q3 dosing module and XPR balance Dimensions in mm.
152 Dosing module Dimensions in mm. 79 78 ft ra 297 Dosing lift Dimensions in mm.
en 9 Disposal In conformance with the European Directive 2012/19/EU on Waste Electrical and Electronic Equipment (WEEE) this device may not be disposed of in domestic waste. This also applies to countries outside the EU, per their specific requirements. D ra ft Please dispose of this product in accordance with local regulations at the collecting point specified for electrical and electronic equipment.
10 Accessories and Spare Parts 10.1 Accessories Please contact your METTLER TOLEDO sales representative for more details about using accessories with your product. Description Part No. Dosing heads 11141533 QH012-LNMW dosing head 10 pcs. 11141532 ft QH008-BNMW dosing head 10 pcs. ra QH012-LNLW dosing head 10 pcs. QH012-LNJW dosing head 10 pcs. 11150145 30366317 QH002-CNMW dosing head 30083440 30098264 30244518 QH010-CNMW dosing head 10 pcs. 40 pcs. 150 pcs.
11150118 Storage containers with vials 16 ml (for QH008), 10 pcs. 30139824 Storage containers with vials 125 ml (for QH012), 10 pcs. 30036965 QA075-P powder test head filled with CaCO3, for 15 tests of 10 automatically dispensed doses each 11141506 QA000-W weight test head 11141507 ra ft en QH012-LNMP dosing head 10 pcs. Dosing head starterkit Set of various dosing heads.
P-56RUE thermal printer with RS232, USB and ethernet connections, simple print-outs, date and time, label printing (limited) Paper roll, white (length: 27 m), set of 10 pcs 30094723 Paper roll, white, self-adhesive (length: 13 m), set of 10 pcs 30094724 Paper roll, white, self-adhesive labels (550 labels), set of 6 pcs Dimension of the label 56 × 18 mm 30094725 P-58RUE thermal printer with RS232, USB and ethernet connections, simple print-outs, date and time, label printing, balance applications: stat
Barcode readers 30417466 en USB Barcode Reader Adapters Vial adapters (POM) 30428901 30428902 30428903 30428904 30428905 30428906 30428907 30428908 30428909 30428910 30428911 30428912 30428913 30428914 30428915 30428916 30428917 30428918 30428919 30428920 30428926 30428921 30428922 30428923 30428924 D ra ft 8.5 mm × 15 mm (5 pcs.) 9 mm × 25 mm (5 pcs.) 9.5 mm × 25 mm (5 pcs.) 10 mm × 25 mm (5 pcs.) 10.5 mm × 25 mm (5 pcs.) 11 mm × 30 mm (5 pcs.) 11.5 mm × 30 mm (5 pcs.) 12 mm × 20 mm (5 pcs.) 12.
Capsule adapters (stainless steel) size 000 (5 pcs.) size 00 (5 pcs.) size 0 (5 pcs.) size 1 (5 pcs.) size 2 (5 pcs.) size 3 (5 pcs.) size 4 (5 pcs.) 30006416 30006417 30006418 30006419 30006430 30006431 30006432 Tube adapters (POM) Eppendorf 1.5 ml (5 pcs.) Falcon 16.4 mm × 60 mm (5 pcs.) Falcon 29.3 mm × 60 mm (5 pcs.
30237340 en QLL standard kit for small bottles • QL001 liquid dosing head • Bottle, pressure resistant • Stand for bottle • Bottle cap (GL25) with tube connector • Spare parts for QLL standard kit small QLL advanced kit for bottles • QL003 liquid dosing head • Bottle, pressure resistant • Bottle cap (GL45) with tube connector and dosing head support • Spare parts for QLL standard kit 10.2 Spare parts ra ft 10.2.1 Q3 dosing module 1 D 2 3 Q3 Dosing Module Order no.
10.2.2 QL3 pump 1 Designation Remarks 30378287 Muffler for pump Including: Muffler, Adapter D ra ft 1 Order no.
en 10.2.3 QLL spare parts kit for (small) bottles 5,6 6 5,6 6 5,6 6 5,6 6 5,6 6 4 ra ft 1,2 2 3 D 5,6 6 Q3 Dosing Module Order no. Designation Remarks 1 30080473 Dosing head liquid QL001 – 2 30251648 Dosing head liquid QL002 – 3 30542814 Dosing head liquid QL003 – 4 30080708 Bottle cap with tube connector and support Thread: GL45 5 30025649 Spare parts for QLL kit Including: Tubing OD 4, ID 2.4 (2m), Tubing OD 3.2, ID 1.
Designation Remarks 30460218 Spare parts for QLL kit small Including: Tubing OD 4, ID 2.4 (2m), Tubing OD 1.6, ID 0.8 (3m), 10 Sealing ring flangeless ferrule 1/16" gb P200X, 5 Fastening nut flangeless ferrule P247X, 5 Closure pin ISO 2338 4H8x20 A1, Suction filter for 1/8" OD, Tube adapter D ra ft 6 Order no.
en 11 Appendix 11.1 Compliance information European Union The instrument complies with the directives and standards listed on the EU Declaration of Conformity. ft United States of America This equipment has been tested and found to comply with the limits for a Class A digital device, pursuant to part 15 of the FCC Rules. These limits are designed to provide reasonable protection against harmful interference when the equipment is operated in a commercial environment.
ft ra D 52 Appendix Q3 Dosing Module
I A Antistatic kit 22 B Bottle Changing Changing liquid Empty Filling 14 24 24 23 23 C 24 24 L Liquid dosing Location 39, 40 41 12 12, 20, 21, 33 12 10 12 11 11 10 10 E Electrostatic charge Environmental conditions External gas 22 31 18 F Fastening nut Q3 Dosing Module 14, 23, 24, 25 13 M Manual weighing Materials Micro dosing valve Muffler 25 33 28 17 O 15 19 3 12 D Dimensions Disposal Dosing cycle Dosing head Data Holder Liquid Powder Powder test head Dosing lift Dosing module 20 28 17
S Safety information Signal words Warning symbols Scope of delivery Sealing insert Sealing ring Selecting the location Signal words Software version Spare cap Storage conditions Storage container Suction filter Symbols and conventions 5 5 13 21, 26 28 13 5 3 11, 21 31 11, 22 27 3 V 31 32 11 12 10 14, 15 ra Technical data Liquid module Test Powder test head Weight test head Top panel Tubes ft T Vial detection W 5 12 D Warning symbols Weight test head 11 54 Index Q3 Dosing Module
ft ra D
ft ra D www.mt.com/quantos For more information Mettler-Toledo GmbH Im Langacher 44 8606 Greifensee, Switzerland www.mt.com/contact Subject to technical changes.