709 47 0210.A1 58 AF-2 Canon 29.07.
709 47 0210.A1 58 AF-2 Canon Ķ 1 2 3 3.1 3.2 3.3 3.4 3.5 4 5 5.1 5.2 5.3 5.4 5.5 5.6 5.7 6 6.1 6.2 6.3 6.4 6.5 6.6 7 7.1 7.2 7.3 7.4 7.5 7.6 7.7 7.8 7.9 7.10 7.11 7.12 7.13 8 2 29.07.2010 10:21 Uhr Seite 2 Sicherheitshinweise . . . . . . . . . . . . . . . . . . . . . . . . . . . . . . . . . . . . . . . . . . 3 Dedicated-Blitzfunktionen . . . . . . . . . . . . . . . . . . . . . . . . . . . . . . . . . . . . . 4 Blitzgerät vorbereiten . . . . . . . . . . . . . . . . . . . . . . . . . . . . . . . . . .
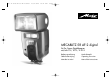
709 47 0210.A1 58 AF-2 Canon 29.07.2010 10:21 Uhr Seite 3 Vorwort Vielen Dank, dass Sie sich für ein Metz Produkt entschieden haben. Wir freuen uns, Sie als Kunde begrüßen zu dürfen. Natürlich können Sie es kaum erwarten, das Blitzgerät in Betrieb zu nehmen. Es lohnt sich aber, die Bedienungsanleitung zu lesen, denn nur so lernen Sie, mit dem Gerät problemlos umzugehen. Dieses Blitzgerät ist geeignet für: • Analoge und digitale Canon EOS- und PowerShot - Kameras mit Systemblitzschuh.
709 47 0210.A1 58 AF-2 Canon Ķ 29.07.2010 10:21 Uhr Seite 4 2 Dedicated-Blitzfunktionen 3 Blitzgerät vorbereiten Die Dedicated-Blitzfunktionen sind speziell auf das Kamerasystem abgestimmte Blitzfunktionen. In Abhängigkeit vom Kameratyp werden dabei verschiedene Blitzfunktionen unterstützt.
709 47 0210.A1 58 AF-2 Canon 29.07.2010 10:21 Uhr Seite 5 • Power Pack P76 mit Verbindungskabel V58-50 (Sonderzubehör) ☞ Wenn Sie das Blitzgerät längere Zeit nicht benutzen, entfernen Sie bitte die Batterien bzw. Akkus aus dem Gerät. Batterien austauschen Die Akkus/Batterien sind leer bzw. verbraucht, wenn die Blitzfolgezeit (Zeit vom Auslösen eines Blitzes mit voller Lichtleistung, z.B. bei M, bis zum erneuten Aufleuchten der Blitzbereitschaftsanzeige ) über 60 Sekunden ansteigt.
Ķ 29.07.2010 10:21 Uhr Seite 6 Blitzgerät wird durch Drücken einer beliebigen Taste bzw. durch Antippen des Kameraauslösers (Wake-Up-Funktion) wieder eingeschaltet. ☞ Wenn das Blitzgerät längere Zeit nicht benötigt wird, sollte das Gerät grundsätzlich immer mit dem Hauptschalter ausgeschaltet werden! Bei Bedarf kann die automatische Geräteabschaltung bereits nach 1 Minute erfolgen oder ausgeschaltet werden (siehe 7.11). 4 Displaybeleuchtung Bei jedem Tastendruck am Blitzgerät wird für ca. 10 Sek.
29.07.2010 10:21 Uhr Seite 7 Der TTL-Blitzbetrieb wird von allen Kamerabetriebsarten (z.B. Programm „P“, Zeitautomatik „A“, Blendenautomatik „Tv“, Vari- bzw. Motiv-Programme, Manuell „M“ usw.) unterstützt. Einstellvorgang: • Taste Mode so oft drücken, bis im Display „Mode“ angezeigt wird. • Mit den Tasten und die Blitzbetriebsart TTL einstellen. Die ausgewählte Blitzbetriebsart wird dabei von einem Balken hinterlegt. Die Einstellung wird sofort wirksam. • Die Taste drücken.
709 47 0210.A1 58 AF-2 Canon 10:21 Uhr Seite 8 5.6 Manueller Blitzbetrieb Im Automatik-Blitzbetrieb A misst der Fotosensor des Blitzgerätes das vom Motiv reflektierte Licht. Der Fotosensor hat einen Messwinkel von ca. 25° und misst nur während der eigenen Lichtabgabe. Bei ausreichender Lichtmenge schaltet die Belichtungsautomatik des Blitzgerätes das Blitzlicht ab. Der Fotosensor muss auf das Motiv gerichtet sein. Am Display wird die maximale Reichweite angezeigt.
29.07.2010 10:21 Uhr Seite 9 5.7 Stroboskop-Blitzbetrieb ☛ Der Stroboskop-Betrieb ist eine manuelle Blitzbetriebsart. Dabei können mehrere Blitzbelichtungen auf einem Bild gemacht werden. Das ist besonders interessant bei Bewegungsstudien und Effektaufnahmen. Beim Stroboskop-Betrieb werden mehrere Blitze mit einer bestimmten Blitzfrequenz abgegeben. Die Funktion ist daher nur mit einer Teillichtleistung von max. 1/4 oder weniger realisierbar.
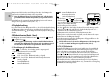
709 47 0210.A1 58 AF-2 Canon Ķ 29.07.2010 10:21 Uhr Seite 10 Im Display wird die zu den eingestellten Parametern gültige Entfernung angezeigt. Durch Verändern des Blendenwertes oder der Teillichtleistung kann der angezeigte Entfernungswert an die Entfernung zum Motiv angeglichen werden. Einstellvorgang: • Taste Para so oft drücken, bis im Display der F 4.0 gewünschte Blitzparameter (F = Blendenwert oder P MZoom 24 4,6 m P1/1 = manuelle Teillichtleistung) angezeigt wird. – + ☛ Para 2.
29.07.2010 10:21 Uhr Seite 11 • Taste Para so oft drücken, bis im Display der gewünschte Blitzparameter angezeigt wird.
709 47 0210.A1 58 AF-2 Canon 10:21 Uhr Seite 12 6.3 Hauptreflektorposition (Zoom) 6.4 Blitzbelichtungskorrektur (EV) Wenn keine digitale Datenübertragung zwischen Kamera und Blitzgerät stattfindetkönnen die Reflektorpositionen 24 mm - 28 mm - 35 mm - 50 mm - 70 mm - 85 mm - 105 mm (Kleinbildformat 24 x 36) manuell eingestellt werden. Im Display wird MZoom angezeigt. Einstellvorgang: • Taste Para so oft drücken, bis im Display „MZoom“ A F 8.0 angezeigt wird.
709 47 0210.A1 58 AF-2 Canon 29.07.2010 10:21 Uhr Seite 13 6.5 Lichtempfindlichkeit (ISO) Wenn keine digitale Datenübertragung zwischen Kamera und Blitzgerät stattfindet, können die ISO–Werte für die Lichtempfindlichkeit von 6 bis 6400 manuell eingestellt werden. Für den Automatik-Blitzbetrieb A und manuellen Blitzbetrieb M müssen Kamera und Blitzgerät auf den gleichen ISO-Wert eingestellt werden.
10:21 Uhr Seite 14 7 Sonderfunktionen (Select-Menü) Die Sonderfunktionen werden mit der Taste Sel (Select) ausgewählt. Je nach Kameratyp und eingestellter Blitzbetriebsart stehen verschiedene Sonderfunktionen zur Auswahl. Bei Kameras die bestimmte Sonderfunktionen nicht unterstützen, werden diese im Menü eventuell nicht angezeigt! Beachten Sie hierzu auch Tabelle 2! 7.1 Einstellvorgang für die Sonderfunktionen ☞ Beim ersten Tastendruck wird zunächst die Select Displaybeleuchtung aktiviert.
10:21 Uhr Seite 15 ☛ ☛ Blenden- und ISO-Einstellung zu einer Überschreitung des zulässigen Lichtregelbereiches führen würde. Die Automatik-Blende wird automatisch auf den nächstliegenden zulässigen Wert geändert. Einstellvorgang: • Taste Sel so oft drücken, bis im Display „Select“ Select angezeigt wird. Beep Remote • Mit den Tasten und den Menü-Punkt Set „BEEP“ auswählen. Der ausgewählte Menü-Punkt wird dabei mit einem dunklen Balken hinterlegt.
TTL 7.7 m F 5.1 FB1 AZoom 28 10:21 Uhr Seite 16 • Die erste Aufnahme wird ohne Korrekturwert ausgeführt. Im Display wird zusätzlich „FB1“ angezeigt. • Die zweite Aufnahme erfolgt mit MinusKorrektur. Im Display wird zusätzlich AZoom 28 „FB2“ und der Minus-Korrekturwert (EV) 7.7 m EV– 1/3 angezeigt. • Die dritte Aufnahme erfolgt mit Plus-Korrektur. Im Display wird zusätzlich „FB3“ und der Plus-Korrekturwert (EV) angezeigt. • Nach der dritten Aufnahme wird die Blitzbelichtungsreihe automatisch gelöscht.
29.07.2010 10:21 Uhr Seite 17 ☞ Die REAR-Funktion kann nur beim Betrieb mit einer geeigneten Kamera eingestellt werden! Bei vielen Kompakt - Kameras (z.B. PowerShot) erfolgt die Einstellung an der Kamera (siehe Kamerabedienungsanleitung)! Der REAR-Betrieb wird nur dann am Blitzgerät angezeigt, wenn die Einstellung am Blitzgerät erfolgt ist. 7.
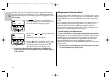
709 47 0210.A1 58 AF-2 Canon 10:21 Uhr Seite 18 Einstellvorgang Set ☛ ☛ Zoom Ext Zoom Size m/ft Size ON Set ☛ TTL SZoom • Mit den Tasten und die gewünschte Einstellung vornehmen. Die Einstellung wird sofort wirksam. • Taste so oft drücken, bis im Display die normale Anzeige erfolgt. Wenn die Taste nicht gedrückt wird, schaltet das Display nach ca. 5s automatisch auf die normale Anzeige zurück. F 5.
709 47 0210.A1 58 AF-2 Canon 29.07.2010 10:21 Uhr Seite 19 Der Zweitreflektor dient zur Frontalaufhellung bei indirekter Beleuchtung wenn der Hauptreflektor seitlich oder nach oben abgeschwenkt ist (siehe 10.3). Ist die Lichtmenge des Zweitreflektors zu groß so kann diese verringert werden. • Einstellung „ Off“: Zweitreflektor ausgeschaltet. • Einstellung „ P1/1“: Zweitreflektor arbeitet mit voller Lichtleistung.
709 47 0210.A1 58 AF-2 Canon 10:21 Uhr Seite 20 7.10 Einstelllicht (ML) „Modelling Light“ Beim Einstelllicht handelt es sich um ein Stroboskop-Blitzlicht mit hoher Frequenz. Bei einer Dauer von ca. 3 Sekunden entsteht der Eindruck eines QuasiDauerlichtes. Mit dem Einstelllicht kann die Lichtverteilung und Schattenbildung bereits vor einer Aufnahme beurteilt werden. • Bei der Anzeige „ML ON“ ist das Einstelllicht aktiviert. • Bei der Anzeige „ML OFF“ ist das Einstelllicht deaktiviert.
10:21 Uhr Seite 21 ☛ ☛ Das Blitzgerät schaltet dann, wenn es nicht benutzt wird, nach einer bzw. nach zehn Minuten in den Strom sparenden Standby–Zustand. Zum Wiedereinschalten eine beliebige Taste drücken, bzw. den Kameraauslöser antippen (Wake-Up-Funktion). Einstellvorgang: • Taste Sel so oft drücken, bis im Display „Select“ Select FB angezeigt wird. Standby ML • Mit den Tasten und den Menü-Punkt Set „Standby“ auswählen. Der ausgewählte Menü-Punkt wird dabei mit einem dunklen Balken hinterlegt.
709 47 0210.A1 58 AF-2 Canon Ķ 29.07.2010 10:21 Uhr Seite 22 7.13 AF-BEAM (AF-Hilfslicht) Wenn das AF-Meßsystem einer digitalen AF-Spiegelreflexkamera wegen mangelnder Umgebungshelligkeit nicht scharf stellen kann, so wird von der Kamera das im Blitzgerät eingebaute AF-Hilfslicht aktiviert. Dieses projiziert ein Streifenmuster auf das Motiv, auf das die Kamera dann scharf stellt. Die Funktion „AF-BEAM“ kann im Select-Menü des Blitzgerätes gezielt ausgeschaltet werden.
709 47 0210.A1 58 AF-2 Canon 29.07.2010 10:21 Uhr Seite 23 Manuelle Verstellung der Zoomposition bei AZoom Die Zoomposition des Haupteflektors kann auch beim Betrieb des Blitzgerätes mit einer Kamera, die Daten überträgt, verändert werden, um z.B. bestimmte Beleuchtungseffekte zu erzielen (z.B. hot-spot usw.). Siehe auch 6.3. Nach dem Speichern wird „MZoom“ im Display angezeigt. Rückstellung auf AZoom-Betrieb • Kameraauslöser antippen damit ein Datenaustausch zwischen Blitzgerät und Kamera stattfindet.
709 47 0210.A1 58 AF-2 Canon Ķ 29.07.2010 10:21 Uhr Seite 24 10.3 Indirektes Blitzen mit Zweitreflektor 10.5 Manuelle Blitzbelichtungskorrekturen Bei geschwenktem Hauptreflektor kann für eine Frontalaufhellung des Motivs der Zweitreflektor im Select-Menü zusätzlich aktiviert werden (siehe 7.9). ist grundsätzlich nur bei indirektem Blitzen mit Der Einsatz des Zweitreflektors sinnvoll und möglich.
709 47 0210.A1 58 AF-2 Canon 29.07.2010 10:21 Uhr 11 Blitzbereitschaftsanzeige Seite 25 ✴ Bei aufgeladenem Blitzkondensator leuchtet am Blitzgerät die Blitzbereitschaftsanzeige auf und zeigt damit die Blitzbereitschaft an. Das bedeutet, dass für die nächste Aufnahme Blitzlicht verwendet werden kann. Die Blitzbereitschaft wird auch an die Kamera übertragen und sorgt im Kamerasucher für eine entsprechende Anzeige (siehe 14).
709 47 0210.A1 58 AF-2 Canon Ķ 29.07.2010 10:21 Uhr Seite 26 15 Reichweitenanzeige Im Display des Blitzgerätes wird der Wert für die maximale Reichweite des AZoom 70 14 m Blitzlichtes angezeigt. Der angezeigte Wert 14 m bezieht sich auf einen Reflexionsgrad von 25% des Motivs, was für die meisten Aufnahmesituationen zutrifft. Starke Abweichungen des Reflexionsgrades, z.B. bei sehr stark oder sehr schwach reflektierenden Motiven können die Reichweite beeinflussen.
709 47 0210.A1 58 AF-2 Canon 29.07.2010 10:21 Uhr Seite 27 17 Blitzsynchronisation 17.1 Normalsynchronisation Bei der Normalsynchronisation wird das Blitzgerät zum Beginn der Verschlusszeit ausgelöst (Synchronisation auf den 1.Verschlussvorhang). Die Normalsynchronisation ist der Standardbetrieb und wird von allen Kameras ausgeführt. Sie ist für die meisten Blitzaufnahmen geeignet. Die Kamera wird abhängig von ihrer Betriebsart auf die Blitzsynchronzeit umgeschaltet.
709 47 0210.A1 58 AF-2 Canon Ķ 29.07.2010 10:21 Uhr Seite 28 geschränkt! Beachten Sie daher die Reichweitenanzeige am LC-Display des Blitzgerätes! Die Kurzzeitsynchronisation HSS wird automatisch ausgeführt, wenn an der Kamera manuell oder automatisch durch das Blichtungsprogramm eine kürzere Verschlusszeit als die Blitzsynchronzeit eingestellt ist. ☞ Beachten Sie, dass die Leitzahl des Blitzgerätes bei der Kurzzeitsynchronisation HSS zusätzlich von der Verschlusszeit abhängig ist.
709 47 0210.A1 58 AF-2 Canon 29.07.2010 10:21 Uhr Seite 29 19.1 Einstellen und Ausschalten des Remote-Betriebes BEEP Remote FB Select Set ☛ ☛ • Taste Sel so oft drücken, bis im Display „Select“ angezeigt wird. • Mit den Tasten und den Menü-Punkt „Remote“ auswählen. Der ausgewählte Menü-Punkt wird dabei mit einem dunklen Balken hinterlegt. • Taste Set drücken und damit die Auswahl von „Remote“ bestätigen.
709 47 0210.A1 58 AF-2 Canon Ķ 29.07.2010 10:21 Uhr Seite 30 Einstellvorgang für Slave-Gruppe C • Taste Para so oft drücken bis im Display C bzw. C TTL (für Slave-Gruppe C) angezeigt wird. • Zum Aktivieren der Slave-Gruppe C die Taste Mode so oft drücken bis im Display C TTL (für Slave-Gruppe C) angezeigt wird.
709 47 0210.A1 58 AF-2 Canon 29.07.2010 10:21 Uhr Seite 31 Einstellvorgang für Slave-Gruppe C • Taste Para so oft drücken bis im Display C bzw. C M (für Slave-Gruppe C) angezeigt wird. • Zum Aktivieren der Slave-Gruppe C die Taste Mode so oft drücken bis im Display C M (für Slave-Gruppe C) angezeigt wird. Während der Anzeige C M kann mit den Tasten – und + eine Teillichtleistung von 1/1 bis 1/128 für die Slave-Blitzgeräte der Gruppe B eingestellt werden.
Seite 32 19.5 Servo-Betrieb Der SERVO-Betrieb ist ein einfacher Slave-Betrieb mit Vorblitzunterdrückung, bei dem das Slave-Blitzgerät immer einen Blitz abgibt, sobald es einen Lichtimpuls des Kamerablitzgerätes empfängt. Einstellvorgang für den Servo–Blitzbetrieb • Stellen Sie an der Kamera die Betriebsart E-TTL ein. Select BEEP Set ☛ ☛ Remote FB • Taste Sel so oft drücken, bis im Display „Select“ angezeigt wird. • Mit den Tasten und den Menü-Punkt „REMOTE“ auswählen.
709 47 0210.A1 58 AF-2 Canon 29.07.2010 10:21 Uhr Seite 33 20 Wartung und Pflege 21 Hilfe bei Störungen Entfernen Sie Schmutz und Staub mit einem weichen, trockenen Tuch. Verwenden Sie keine Reinigungsmittel - die Kunststoffteile könnten beschädigt werden. ☞ Sollte es einmal vorkommen dass z.B. im Display des Blitzgerätes unsinni- 20.
709 47 0210.A1 58 AF-2 Canon Ķ 29.07.2010 10:21 Uhr Seite 34 Im Display erscheint eine Batteriewarnanzeige • Bei Erscheinen der Batteriewarnanzeige steht noch so viel Energie zur Verfügung, dass einige Blitze abgegeben werden können. Siehe auch Kap. 3.2 „Batterien austauschen“. Es gibt aber auch Batteriechargen, bei denen die Batteriewarnanzeige relativ früh erscheint, obwöhl noch bis zu 50% der Blitze verfügbar sein können.
709 47 0210.A1 58 AF-2 Canon 29.07.2010 10:21 Uhr Seite 35 Der E TTL Blitzbetrieb lässt sich nicht einstellen. • Es hat kein Datenaustausch zwischen Blitzgerät und Kamera stattgefunden. Kameraauslöser antippen. • Die Kamera unterstützt den E-TTL-Blitzbetrieb nicht. Die Einstellung für die manuelle TTL-, E-TTL-Blitzbelichtungskorrektur wird nicht wirksam. • Die Kamera unterstützt die manuelle TTL-, E-TTL-Blitzbelichtungskorrektur am Blitzgerät nicht.
709 47 0210.A1 58 AF-2 Canon Ķ 29.07.2010 10:21 Uhr Seite 36 22 Technische Daten max.
709 47 0210.A1 58 AF-2 Canon 29.07.2010 10:21 Uhr Seite 37 23 Sonderzubehör Batterie-Entsorgung ☞ Batterien/Akkus gehören nicht in den Hausmüll! Bitte bedienen Sie sich bei der Rückgabe verbrauchter Batterien/Akkus eines vorhandenen Rücknahmesystems. Bitte geben Sie nur entladene Batterien/Akkus ab. Batterien sind in der Regel dann entladen, wenn das damit betriebene Gerät - abschaltet und signalisiert „Batterien leer“ - nach längerem Gebrauch der Batterien nicht mehr einwandfrei funktioniert.
709 47 0210.A1 58 AF-2 Canon Ķ 29.07.2010 10:21 Uhr Seite 38 Garantiebestimmungen Bundesrepublik Deutschland 1. Die Garantiebestimmungen gelten ausschließlich für Käufe in der Bundesrepublik Deutschland. 2. Im Ausland gelten die Gewährleistungsregelungen des jeweiligen Landes bzw. die Garantieregelungen des Verkäufers. 3. Die nachfolgenden Bestimmungen haben nur für den privaten Gebrauch Gültigkeit. 4. Die Garantiezeit - 24 Monate - beginnt mit dem Abschluss des Kaufvertrages bzw.
709 47 0210.A1 58 AF-2 Canon 29.07.
709 47 0210.A1 58 AF-2 Canon ĸ 1 2 3 3.1 3.2 3.3 3.4 3.5 4 5 5.1 5.2 5.3 5.4 5.5 5.6 5.7 6 6.1 6.2 6.3 6.4 6.5 6.6 7 7.1 7.2 7.3 7.4 7.5 7.6 7.7 7.8 7.9 7.10 7.11 7.12 7.13 8 40 29.07.2010 10:21 Uhr Seite 40 Consignes de sécurité . . . . . . . . . . . . . . . . . . . . . . . . . . . . . . . . . . . . . . . . . . 41 Fonctions flash dédiées . . . . . . . . . . . . . . . . . . . . . . . . . . . . . . . . . . . . . . . . . 42 Préparation du flash . . . . . . . . . . . . . . . . . . . . . . . . . . . . .
709 47 0210.A1 58 AF-2 Canon 29.07.2010 10:21 Uhr Seite 41 Avant-propos Nous vous remercions d’avoir choisi un produit Metz et sommes heureux de vous saluer au sein de la grande famille de nos clients. Nous savons que vous brûlez d’envie d’essayer votre flash. Prenez tout de même le temps de lire le mode d’emploi. C’est la seule manière de découvrir les potentialités de votre flash et d’apprendre à les utiliser.
709 47 0210.A1 58 AF-2 Canon ĸ 29.07.2010 10:21 Uhr Seite 42 2 Fonctions flash dédiées 3 Préparation du flash Les fonctions flash dédiées sont des fonctions de flash adaptées spécialement à un système d’appareil photo. Les fonctions de flash supportées dépendent alors du type d’appareil.
709 47 0210.A1 58 AF-2 Canon 29.07.2010 10:21 Uhr Seite 43 • 4 piles au lithium de 1,5 V, type CEI FR6 (AA / Mignon), source de courant sans entretien à haute performance et avec une perte de capacité minime. • Power Pack P76 avec câble de connexion V58-50 (accessoire spécial) ☞ Si le flash reste inutilisé pendant une longue période, retirez les piles ou accus de l’appareil.
709 47 0210.A1 58 AF-2 Canon 29.07.2010 10:21 Uhr Seite 44 touche quelconque ou en enfonçant à mi-course le déclencheur de l’appareil photo (fonction de réveil). prolongée, il est conseillé de ☞ Si le flash reste inutilisé pendant une période couper le flash avec l’interrupteur général 5.1 Procédure de réglage des modes de fonctionnement du flash 5.
29.07.2010 10:21 Uhr Seite 45 Le mode flash TTL est pris en charge par tous les modes de fonctionnement de l’appareil photo (par ex. programme „P“, priorité au diaphragme „A“, priorité à la vitesse „Tv“, Vari, programmes-résultats, manuel „M“, etc.). Procédure de réglage: • Appuyez à plusieurs reprises sur la touche Mode jusqu’à ce que „Mode“ apparaisse sur l’écran. • Réglez le mode de fonctionnement du flash TTL avec les touches et .
29.07.2010 10:21 Uhr Seite 46 ☞ Veillez à ce que la source en contre-jour ne frappe pas directement l’objectif, car cela fausserait la mesure TTL de l’appareil photo ! 5.4 Mode flash automatique ☛ ĸ En mode flash automatique A, le capteur photographique du flash mesure la lumière réfléchie par le sujet. Le capteur photographique a un angle de mesure de 25° environ et ne mesure qu’au cours de sa propre émission de lumière.
29.07.2010 10:21 Uhr Seite 47 • Appuyez sur la touche . L’écran revient à l’affichage normal. Si vous n’appuyez pas sur la touche , l’écran revient automatiquement à l’affichage normal après 5 secondes environ. La distance flash-sujet à respecter pour obtenir une photo correctement exposée au flash s’affiche à l’écran. appareils photo ne prennent en charge le mode flash manuel ☞ Différents M que dans le mode de fonctionnement de l’appareil photo manuel M ! 5.
709 47 0210.A1 58 AF-2 Canon 10:21 Uhr Seite 48 La distance valable pour les paramètres réglés s’affiche à l’écran. Il est possible d’adapter la valeur de la distance affichée à la distance au sujet en modifiant l’ouverture du diaphragme ou la puissance partielle. Procédure de réglage : • Appuyez à plusieurs reprises sur la touche Para F 4.0 jusqu’à ce que le paramètre du flash souhaité MZoom 24 4,6 m P1/1 (F = Ouverture du diaphragme ou P = Puissance + Para – partielle manuelle) apparaisse sur l’écran.
10:21 Uhr Seite 49 • Appuyez à plusieurs reprises sur la touche Para jusqu’à ce que le paramètre du flash souhaité (voir ci-dessous) apparaisse sur l’écran. Les paramètres suivants sont possibles : TTL/E-TTL/A/E-TTL-HSS M/M HSS Tableau 1 N Nombre d’éclairs du stroboscope — f Fréquence des éclairs du stroboscope P P Puissance partielle manuelle F Ouverture — — — — F F Zoom Zoom EV — — Correction manuelle d’exposition au flash ISO ISO ISO Sensibilité Zoom Position du réflecteur 6.
709 47 0210.A1 58 AF-2 Canon 10:21 Uhr Seite 50 6.3 Position du réflecteur principal (zoom) 6.4 Correction d’exposition au flash (IL) S’il n’y a pas de transmission numérique des données entre l’appareil photo et le flash, il est possible de régler manuellement les positions suivantes du réflecteur : 24 mm - 28 mm - 35 mm - 50 mm - 70 mm - 85 mm - 105 mm (film de petit format 24 x 36). „MZoom“ s’affiche à l’écran. Procédure de réglage : • Appuyez à plusieurs reprises sur la touche Para A F 8.
709 47 0210.A1 58 AF-2 Canon 29.07.2010 10:21 Uhr Seite 51 6.5 Sensibilité (ISO) 6.6 Puissance partielle manuelle (P) S’il n’y a pas de transmission numérique des données entre l’appareil photo et le flash, il est possible de régler manuellement des valeurs ISO pour les sensibilités de 6 à 6400. Pour le mode flash automatique A et le mode flash manuel M , l’appareil photo et le flash doivent être réglés sur la même valeur ISO.
709 47 0210.A1 58 AF-2 Canon 29.07.2010 10:21 Uhr Seite 52 7 Fonctions spéciales (menu „Select „ (Sélectionner)) ĸ 7.1 Procédure de réglage pour les fonctions spéciales ☞ La première touche enfoncée active tout d’abord Select l’éclairage de l’écran. • Appuyez à plusieurs reprises sur la touche Sel Mode Para Sel jusqu’à ce que „Select“ apparaisse sur l’écran. • Réglez l’option de menu ou la fonction spéciale souhaitée avec les touches et .
10:21 Uhr Seite 53 7.2 Fonction bip (Beep) L’utilisateur peut souhaiter que certaines fonctions de l’appareil du flash soit signalées par un bip sonore. Le photographe peut ainsi concentrer toute son attention sur le sujet et la prise de vue et ne doit pas faire attention à des affichages visuels supplémentaires de l’état de l’appareil ! La fonction bip signale acoustiquement que le flash est prêt à fonctionner, que l’exposition au flash est correcte ou une mauvaise manipulation.
709 47 0210.A1 58 AF-2 Canon 29.07.2010 10:21 Uhr Seite 54 7.3 Séries d’expositions au flash (FB - Flash-Bracketing) ☛ ☛ ĸ Dans les modes flash TTL , E TTL et automatique A , il est possible d’effectuer une série d’expositions au flash (FB - Flash-Bracketing). Une série d’expositions au flash est composée de trois prises de vue au flash qui se succèdent mais avec des valeurs de correction d’exposition au flash différentes.
10:21 Uhr Seite 55 7.4 Synchronisation sur le 2ème rideau (REAR) En synchronisation normale, le flash est déclenché au début du temps de pose (synchronisation sur le 1er rideau). La synchronisation normale est le mode de fonctionnement standard et est effectuée par tous les appareils photo. Certains appareils photo offrent la possibilité de synchroniser sur le 2ème rideau (mode REAR). Dans ce cas, l’éclair n’est déclenché que sur la fin du temps de pose.
709 47 0210.A1 58 AF-2 Canon 29.07.2010 10:21 Uhr Seite 56 7.5 Mode zoom étendu (Zoom Ext) ☛ ☛ ĸ Dans le mode zoom étendu, la focale du réflecteur principal est décalée automatiquement d’un cran vers les grands-angles par rapport à la focale réglée sur l’objectif de l’appareil photo. L’élargissement du faisceau procure en intérieur davantage de lumière diffuse (réflexions) et adoucit ainsi l’éclairage au flash. Exemple : La focale de l’objectif monté sur le reflex est de 50 mm.
709 47 0210.A1 58 AF-2 Canon 29.07.2010 10:21 Uhr Seite 57 Procédure de réglage : Set Size ON Set ☛ TTL SZoom 12 m • Appuyez sur la touche Set et confirmez ainsi la sélection de la fonction spéciale. • Procédez au réglage souhaité avec les touches et . Le réglage prend immédiatement effet. • Appuyez sur la touche . L’écran revient à l’affichage normal. Si vous n’appuyez pas sur la touche , l’écran revient automatiquement à l’affichage normal après 5 secondes environ.
709 47 0210.A1 58 AF-2 Canon 10:21 Uhr Seite 58 7.9 Réflecteur secondaire La portée peut être affichée sur l’écran du flash soit en mètres (m) soit en pieds (feet = ft). Le réglage a lieu à l’option du menu „m / ft“. Procédure de réglage : • Appuyez à plusieurs reprises sur la touche Sel Select Zoom Ext jusqu’à ce que „Select“ apparaisse sur l’écran. m/ft AF-BEAM • Sélectionnez l’option de menu „m / ft“ (mètres-pieds) Set avec les touches et .
709 47 0210.A1 58 AF-2 Canon 29.07.2010 10:21 Uhr Seite 59 7.10 Lumière pilote (ML - Modelling Light) ☛ ☛ La lumière pilote est une séquence d’éclairs stroboscopiques à haute fréquence d’une durée de 3 secondes donnant l’impression d’une lumière pour ainsi dire continue. La lumière pilote permet de mieux apprécier la répartition de la lumière et des ombres avant même la prise de vue. • Lorsque „ML ON“ apparaît sur l’écran, „Lumière pilote „ est activée.
709 47 0210.A1 58 AF-2 Canon 29.07.2010 10:21 Uhr Seite 60 Procédure de réglage : Set ☛ ☛ ĸ • Appuyez sur la touche Set et confirmez ainsi la sélection de la fonction spéciale. • Procédez au réglage souhaité avec les touches et . Set Le réglage prend immédiatement effet. • Appuyez sur la touche . L’écran revient à l’affichage normal. Si vous n’appuyez pas sur la touche , l’écran revient automatiquement à l’affichage normal après 5 secondes environ.
709 47 0210.A1 58 AF-2 Canon 29.07.2010 10:21 Uhr Seite 61 7.13 AF-BEAM (lumière auxiliaire AF) Lorsque le système de mesure AF d’un appareil photo reflex numérique AF ne peut pas effectuer la mise au point faute d’une luminosité ambiante suffisante, l’appareil photo active la lumière auxiliaire AF intégrée dans le flash. Celle-ci projette sur le sujet un réseau de bandes qui permet à l’appareil photo de réaliser la mise au point.
709 47 0210.A1 58 AF-2 Canon ĸ 29.07.2010 10:21 Uhr Seite 62 Réglage manuel de la position du zoom pour le „AZoom“ Il est possible de modifier la position du zoom du réflecteur principal en cas d’utilisation du flash avec un appareil photo qui transmet des données pour par ex. obtenir des effets d’éclairage spéciaux tels que hot-spot, etc. Voir aussi 6.3. „MZoom“ s’affiche à l’écran après la mémorisation.
709 47 0210.A1 58 AF-2 Canon 29.07.2010 10:21 Uhr Seite 63 10.3 Éclairage indirect au flash avec un réflecteur secondaire 10.5 Corrections manuelles d’exposition au flash Il est également possible d’activer le réflecteur secondaire dans le menu „Select“ pour déboucher frontalement les ombres du sujet lorsque le réflecteur principal est basculé (voir 7.9).
709 47 0210.A1 58 AF-2 Canon 29.07.2010 10:21 Uhr 11 Témoin de disponibilité du flash ĸ Seite 64 ✴ Lorsque le condensateur du flash est chargé, le témoin s’allume sur le flash pour signade disponibilité ler que la prochaine photo peut être prise avec l’éclairage par le flash. La disponibilité du flash est aussi transmise à l’appareil photo et est signalée dans le viseur (voir 14).
709 47 0210.A1 58 AF-2 Canon 29.07.2010 10:21 Uhr Seite 65 Dans les différents programmes d’exposition ou automatiques, les raisons de mauvaise exposition peuvent être variées. ☞ Pour l’interprétation des signalisations dans le viseur, veuillez vous reporter au mode d’emploi de votre appareil photo. 15 Affichage de la portée L’écran du flash affiche la valeur de la porA F 4.5 AZoom 70 tée maximale de l’éclair.
709 47 0210.A1 58 AF-2 Canon 29.07.2010 10:21 Uhr Seite 66 ☞ Les modifications intervenant dans la situation d’éclairage après le déclenchement de l’éclair de mesure FE ne sont plus prises en considération au moment de prendre la photo ! Sur certains appareils photo, la mémorisation de l’exposition au flash FE n’est pas supportée dans le programme tout auto “carré vert” ni dans les programmes-résultats (voir le mode d’emploi de l’appareil photo) ! Synchronisation du flash ĸ 17 17.
709 47 0210.A1 58 AF-2 Canon 29.07.2010 10:21 Uhr Seite 67 17.4 Synchronisation haute vitesse automatique HSS Différents appareils photo prennent en charge la synchronisation automatique haute vitesse (voir le mode d'emploi de l'appareil photo). Ce mode flash permet d'utiliser un flash même en cas de temps de pose plus court que le temps de synchronisation du flash.
709 47 0210.A1 58 AF-2 Canon 29.07.2010 10:21 Uhr Seite 68 Pour éviter que plusieurs systèmes remote se dérangent mutuellement dans le même espace, il existe quatre canaux remote autonomes. Les flashs maître et esclaves qui font partie du même système remote doivent être réglés sur le même canal remote. Les flashs esclaves doivent pouvoir recevoir la lumière du flash maître avec le senseur pour mode multi-flash sans fil intégré .
709 47 0210.A1 58 AF-2 Canon 29.07.2010 10:21 Uhr Seite 69 Procédure de réglage pour le groupe esclave C • Appuyez à plusieurs reprises sur la touche Para jusqu'à ce que C ou C TTL (pour le groupe esclave C) apparaisse sur l'écran. • Pour activer le groupe esclave C, appuyez à plusieurs reprises sur la touche Mode jusqu'à ce que C TTL (pour le groupe esclave C) apparaisse sur l'écran.
9 47 0210.A1 58 AF-2 Canon ĸ 29.07.2010 10:21 Uhr Seite 70 Procédure de réglage pour le groupe esclave C • Appuyez à plusieurs reprises sur la touche Para jusqu'à ce que C ou C M (pour le groupe esclave C) apparaisse sur l'écran. • Pour activer le groupe esclave C, appuyez à plusieurs reprises sur la touche Mode jusqu'à ce que C M (pour le groupe esclave C) apparaisse sur l'écran.
10:21 Uhr Seite 71 19.5 Mode Servo Le mode SERVO est un mode esclave simple lors duquel un flash est toujours généré à partir du moment où le flash esclave reçoit une impulsion lumineuse. Procédure de réglage pour le mode flash slave • Régler un mode sans pré-éclairage pour le flash de l’appareil. BEEP Remote FB Select Set ☛ ☛ Servo Set ☛ ☛ • Presser la touche affiche «Select». Sel jusqu’à ce que l’écran • Sélectionner l’option de menu « REMOTE » avec les touches et .
709 47 0210.A1 58 AF-2 Canon 29.07.2010 10:21 Uhr Seite 72 20 Maintenance et entretien 21 Remède en cas de mauvais fonctionnement Éliminez la poussière et la saleté au moyen d’un chiffon doux, sec ou siliconé. N’utilisez pas de détergent sous risque d’endommager la matière plastique. ☞ S’il devait arriver que l’écran de contrôle ACL du flash affiche des valeurs 20.
709 47 0210.A1 58 AF-2 Canon 29.07.2010 10:21 Uhr Seite 73 Un signal d'épuisement de batterie s'affiche à l'écran. • Lorsque le signal d'épuisement de batterie s'affiche, celle-ci contient encore suffisamment d'énergie pour fournir quelques éclairs. Voir aussi chap. 3.2 " Remplacer les piles ". Il existe également des piles avec lesquelles le signal d'épuisement apparaît relativement tôt bien que 50% des flashes soient encore disponibles.
709 47 0210.A1 58 AF-2 Canon ĸ 29.07.2010 10:21 Uhr Seite 74 Il est impossible de régler le dosage automatique flash/ambiance en mode E TTL . • Il n’y a pas eu d’échange de données entre le flash et l’appareil photo. Enfoncez à mi-course le déclencheur de l’appareil photo ! • L’appareil photo ne prend pas en charge le mode flash E-TTL. Le réglage de la correction manuelle d’exposition au flash en mode TTL-/E–TTL ne prend pas effet.
709 47 0210.A1 58 AF-2 Canon 29.07.2010 10:21 Uhr 22 Caractéristiques techniques Nombre-guide max. pour ISO 100/21°, Zoom 105 mm : pour mètres : 58 pour pieds : 192 Modes flash: TTL standard non pré-éclair de mesure, E-TTL, E-TTL II, Manuel M, Mode flash stroboscope, Mode flash automatique, Mode remote 12 diaphragmes auto pour ISO 100/21° : 1 -1,4 - 2 - 2,8 - 4 - 5,6 - 8 - 11 - 16 - 22 - 32 - 45 Réglage automatique du diaphragme pour ISO 100/21°: F1.0 hasta F45 incl.
709 47 0210.A1 58 AF-2 Canon ĸ 29.07.2010 10:21 Uhr Seite 76 23 Accessoires en option Elimination des batteries ☞ Nous déclinons toute responsabilité pour le mauvais fonctionnement et l’endommagement du flash dus à l’utilisation d’accessoires d’autres constructeurs ! • Mecabounce 58-90 (réf. 000058902) Ce diffuseur offre un moyen simple pour obtenir un éclairage doux. L’effet est sensationnel en raison de l’effet soyeux des photos. La teinte des visages est rendue avec plus de naturel.
709 47 0210.A1 58 AF-2 Canon 29.07.
709 47 0210.A1 58 AF-2 Canon ń 1 2 3 3.1 3.2 3.3 3.4 3.5 4 5 5.1 5.2 5.3 5.4 5.5 5.6 5.7 6 6.1 6.2 6.3 6.4 6.5 6.6 7 7.1 7.2 7.3 7.4 7.5 7.6 7.7 7.8 7.9 7.10 7.11 7.12 7.13 8 78 29.07.2010 10:21 Uhr Seite 78 Veiligheidsinstructies . . . . . . . . . . . . . . . . . . . . . . . . . . . . . . . . . . . . . . . . . . . 79 Dedicated flitsfuncties . . . . . . . . . . . . . . . . . . . . . . . . . . . . . . . . . . . . . . . . . . 80 Flitser gereedmaken . . . . . . . . . . . . . . . . . . . . . . . . . . .
709 47 0210.A1 58 AF-2 Canon 29.07.2010 10:21 Uhr Seite 79 Voorwoord Hartelijk dank voor uw beslissing om een product van Metz aan te schaffen. Wij verheugen ons, u als klant te mogen begroeten. Natuurlijk kunt u nauwelijks wachten, de flitser in gebruik te nemen.
709 47 0210.A1 58 AF-2 Canon ń 29.07.2010 10:21 Uhr Seite 80 2 Dedicated flitsfuncties 3 Flitser gereedmaken Dedicated flitsfuncties zijn speciaal op het camerasysteem ingestelde flitsfuncties. Afhankelijk van het type camera worden daarbij verschillende flitsfuncties ondersteund.
709 47 0210.A1 58 AF-2 Canon 29.07.2010 10:21 Uhr Seite 81 • 4 Lithiumbatterijen 1,5 V, type IEC FR6 (AA / Penlight), onderhoudsvrije voeding met hoge capaciteit en geringe zelfontlading. • Power-Pack P76 met verbindingskabel V58-50 (optioneel accessoire). ☞ Als u denkt, de flitser gedurende een langere tijd niet te gebruiken, haal de batterijen er dan s.v.p. uit. Batterijen verwisselen De accu’s / batterijen zijn leeg, c.q. verbruikt.
29.07.2010 10:21 Uhr Seite 82 wordt door op een willekeurige toets te drukken, c.q. door het aantippen van de ontspanknop op de camera (Wake-Up-functie) weer ingeschakeld. ☞ Als u de flitser langere tijd niet gaat gebruiken, schakel hem dan in principe altijd via zijn hoofdschakelaar uit! Indien noodzakelijk kan de automatische uitschakeling reeds na 1 minuut plaatsvinden of worden gedeactiveerd (zie 7.11). 4 Displayverlichting Bij elke druk op de betreffende toets wordt gedurende ong.
29.07.2010 10:21 Uhr Seite 83 Het instellen: • Druk zo vaak op de toets Mode , dat in het display ‘Mode’ wordt aangegeven. • Stel met de toetsen en de flitsfunctie TTL in. De geselecteerde flitsfunctie wordt daarbij tegen een balkje geplaatst. De instelling treedt onmiddellijk in werking. • Druk op de toets . Het display schakelt naar de normale weergave terug. Als u niet op de toets drukt, schakelt het display na ong. 5 sec. automatisch naar de normale weergave terug.
✴ 29.07.2010 10:21 Uhr Seite 84 Bij een correct belichte opname licht de aanduiding van de flitscontrole “o.k.’ gedurende 3 seconden op (zie 13). ☞ Let er op, dat de bron van het tegenlicht niet rechtstreeks in het objectief schijnt. Het meetsysteem van de camera zou daardoor in de war kunnen raken! 5.4 Automatisch flitsenfunctie A ☛ ń In de automatisch-flitsenfunctie A meet de fotosensor van de flitser het door het onderwerp gereflecteerde licht. De fotosensor heeft een meethoek van ong.
29.07.2010 10:21 Uhr Seite 85 In het display wordt de afstand aangegeven, waarbij het onderwerp correct wordt belicht. ☞ SommigeMcamera’s ondersteunen de functie van Mflitsen met manual-instellingen alleen in de cameramodus Manual ! 5.7 Stroboscopisch flitsen ☛ De functie stroboscopisch flitsen is een flitsfunctie met handinstelling (manual). Hierbij kunnen meerdere flitsbelichtingen op één enkel beeld gemaakt worden. Dat is bijzonder interessant bij bewegingsstudies en effectopnamen.
709 47 0210.A1 58 AF-2 Canon 29.07.2010 10:21 Uhr Seite 86 ☛ In het display wordt de bij de ingestelde parameters geldende afstand aangegeven. Door het veranderen van de diafragmawaarde of het deelvermogen kan de waarde van de afstand tot het onderwerp worden aangepast. Het instellen: • Druk zo vaak op de toets Para , dat in het display F 4.0 de gewenste flitsparameter (F= diafragmawaarde of MZoom 24 P= met de hand in te stellen deelvermogen) wordt 4,6 m P1/1 + aangegeven.
29.07.2010 10:21 Uhr Seite 87 • Druk zo vaak op de toets Para , dat in het display de gewenste flitsparameter (zie hieronder) wordt aangegeven.
709 47 0210.A1 58 AF-2 Canon 29.07.2010 10:21 Uhr Seite 88 6.3 Stand van de hoofdreflector (Zoom) 6.4 Correcties op de flitsbelichting (EV) Als er geen digitale overdracht van gegevens tussen camera en flitser plaats heeft gevonden kunnen de reflectorstanden 24 mm – 28 mm – 35 mm – 50 mm – 70 mm – 85 mm – 105 mm (kleinbeeldformaat 24 x 36) met de hand worden ingesteld. In het display wordt MZoom aangegeven. Het instellen: • Druk zo vaak op de toets Para , dat in het display A F 8.
709 47 0210.A1 58 AF-2 Canon 29.07.2010 10:21 Uhr Seite 89 6.5 Lichtgevoeligheid (ISO) 6.6 Met de hand in te stellen deelvermogen (P) Als er geen digitale overdracht van gegevens tussen camera en flitser plaats heeft gevonden, kunnen de ISO-waarden voor de lichtgevoeligheid van 6 tot 6400 met de hand worden ingesteld. Voor de automatisch-flitsenfunctie A en de manual flitsfunctie M moeten camera en flitser op dezelfde ISO-waarden worden ingesteld.
29.07.2010 10:21 Uhr Seite 90 7 Extra functies (menu ‘Select’) De extra functies worden met de toets Sel (Select) gekozen. Afhankelijk van het type camera en de ingestelde flitsfunctie staan er verschillende extra functies ter beschikking. Bij camera’s die bepaalde extra functies niet ondersteunen, worden deze in het menu eventueel n iet aangegeven! Zie hiervoor ook Tabel 2! 7.
10:21 Uhr Seite 91 ☛ ☛ Beep-signalen bij de instellingen in de automatisch-flitsenfunctie: • Een korte piep als alarm treedt op, wanneer bij de automatisch-flitsenfunctie de diafragma- en ISO-instellingen tot het overschrijden van het regelbereik van het flitslicht zou leiden. Het automatiekdiafragma wordt dan automatisch in de dichtstbij liggende, toelaatbare waarde veranderd. Het instellen: • Druk zo vaak op de toets Sel , dat in het display Select ‘Select’ aangegeven wordt.
TTL 7.7 m AZoom 28 Seite 92 • De eerste opname wordt zonder correctie uitgevoerd. In het display verschijnt bovendien ‘FB 1’. • De tweede opname volgt met een minuscorrectie . In het display wordt bovendien AZoom 28 ‘FB 2’ aangegeven en daarbij tevens de 7.7 m EV– 1/3 minus-correctiewaarde (EV). • De derde opname wordt met een plus-correctie uitgevoerd. In het display wordt bovendien ‘FB 3’ aangegeven en daarbij tevens de plus-correctiewaarde (EV).
29.07.2010 10:21 Uhr Seite 93 ☞ De REAR-functie kan alleen worden ingesteld bij een camera die daar- voor geschikt is! Bij veel compactcamera’s (PowerShot) moet de instelling op de camera zelf plaatsvinden (zie de gebruiksaanwijzing van uw camera)! De REAR-functie wordt alleen op de flitser aangegeven, als de instelling ervan ook op de flitser plaats heeft gevonden. 7.
10:21 Uhr Seite 94 ☛ ☛ - door de zoomstand van 70mm resulteert dat in een brandpuntsafstand van 70mm : 1,5 = 46,6mm, in het display van de mecablitz wordt daarom "SZoom 47" aangegeven. Het instellen: • Druk zo vaak op de toets Sel , dat in het display Select Zoom Ext ‘Select’ wordt aangegeven. Zoom Size m/ft • Kies met de toetsen en het item Set ‘ZoomSize’. Het geselecteerde staat tegen een donker balkje.
709 47 0210.A1 58 AF-2 Canon 29.07.2010 10:21 Uhr Seite 95 7.9 Hulpreflector De aanduiding van de reikwijdte in het display van de flitser kan naar keuze in meters m of in feet ft plaatsvinden. De instelling vindt in het item m / ft plaats. Het instellen: • Druk zo vaak op de toets “SEL’, dat in het display Select Zoom Ext “Select’ wordt aangegeven. m/ft AF-BEAM • Kies met de toetsen en het item ‘m/ft’ uit. Set Het geselecteerde item wordt tegen een donker balkje getoond.
709 47 0210.A1 58 AF-2 Canon 29.07.2010 10:21 Uhr Seite 96 7.10 Instellicht (ML) ‘Modelling Light’ ☛ ☛ ń Bij het instellicht gaat het om een stroboscopisch flitslicht met hoge frequentie. Bij een duur van ong. 3 seconden ontstaat de indruk van een quasi continu licht. Met het instellicht kan de lichtverdeling reeds vóór de opname worden beoordeeld. • Bij de aanduiding ‘ML ON’ is het instellicht geactiveerd. • Bij de aanduiding ‘ML OFF’ is het instellicht gedeactiveerd.
709 47 0210.A1 58 AF-2 Canon 29.07.2010 10:21 Uhr Seite 97 Het instellen: Standby 10 min ☛ Set • Druk op de toets Set om uw keuze van deze extra functie te bevestigen. • Stel met de toetsen en de gewenste instelling in. De in stelling treedt onmiddellijk in werking. • Druk zo vaak op de toets , dat het display naar de normale weergave terugschakelt. Als u niet op de toets drukt, schakelt het display na ong 5 sec. terug naar de normale weergave.
709 47 0210.A1 58 AF-2 Canon 29.07.2010 10:21 Uhr Seite 98 7.13 AF-BEAM (AF-hulplicht) Als het AF-meetsysteem van een digitale AF-spiegelreflexcamera vanwege te weinig omgevingslicht niet kan scherpstellen wordt door de camera het in de flitser ingebouwde AF-hulplicht geactiveerd. Dit projecteert een streeppatroon op het onderwerp, waarpop de camera dan scherpstelt. Deze functie ‘AF-BEAM’ kan in het keuzemenu van de flitser ook worden uitgezet.
709 47 0210.A1 58 AF-2 Canon 29.07.2010 10:21 Uhr Seite 99 Met de hand verstellen van de zoomstand bij AZoom De zoomstand van de hoofdreflector kan ook bij het gebruik op een camera die de gegevens doorgeeft, veranderd worden, bijv. om bepaalde verlichtingseffecten te verkrijgen (bijv. hot-spot enz.). Zie ook 6.3 Na het opslaan wordt „MZoom“ in het display aangegeven.
709 47 0210.A1 58 AF-2 Canon 29.07.2010 10:21 Uhr Seite 100 10.3 Indirect flitsen met de hulpreflector 10.5 Met de hand in te stellen correcties op de flitsbelichting Bij gezwenkte hoofdreflector kan als extra voor frontale opheldering van het onderwerp de hulpreflector via het menu ‘Select’ worden geactiveerd. Het gebruiken van de hulpreflector is in principe alleen zinvol en mogelijk als de hoofdreflector gezwenkt is.
709 47 0210.A1 58 AF-2 Canon 29.07.2010 11 Aanduiding van flitsparaatheid 10:21 Uhr Seite 101 ✴ Zodra de flitscondensator opgeladen is, licht op de flitser de aanduiding van flitsparaatheid ) op en geeft daarmee aan, dat de flitser gereed is. Dat betekent, dat bij de volgende opname flitslicht kan worden gebruikt. Het signaal van de flitsparaatheid wordt naar de camera overgebracht en zorgt in de zoeker daarvan voor de overeenkomstige aanduiding (zie 14).
709 47 0210.A1 58 AF-2 Canon 29.07.2010 10:21 Uhr Seite 102 15 Aanduiding van de flitsreikwijdte In het display van de flitser wordt de waarde van de maximale reikwijdte van het AZoom 70 14 m flitslicht aangegeven. De aangegeven 14 m waarde is gebaseerd op een reflectiegraad van 25% van het onderwerp, die voor de meeste opnamesituaties geldt. Sterke afwijkingen van de reflectiegraad, bijv. bij zeer sterk of zeer zwak reflecterende onderwerpen kunnen de reikwijdte beïnvloeden.
709 47 0210.A1 58 AF-2 Canon 29.07.2010 10:21 Uhr Seite 103 17 Flitssynchronisatie 17.1 Normale synchronisatie Bij de normale synchronisatie wordt de flits aan het begin van de belichting ontstoken (synchronisatie bij het opengaan van de sluiter). De normale synchronisatie is de standaardfunctie die dan ook door alle camera’s wordt ondersteund. Voor de meeste flitsopnamen is dit de meest geschikte synchronisatie.
709 47 0210.A1 58 AF-2 Canon 29.07.
709 47 0210.A1 58 AF-2 Canon 29.07.2010 10:21 Uhr Seite 105 19.1 Instellen en uitschakelen van de remote-functie BEEP Remote FB Select Set ☛ ☛ • Druk zo vaak op de toets Sel , dat in het display ‘Select’ aangegeven wordt. • Kies met de toetsen en het menupunt ‘Remote’. Het geselecteerde wordt tegen een donker balkje getoond. • Druk op de toets Set , waarmee u de keuze van ‘Remote’ bevestigt.
709 47 0210.A1 58 AF-2 Canon ń 29.07.2010 10:21 Uhr Seite 106 Het instellen van slaafgroep C • Druk zo vaak op de toets Para , dat in het display C, c.q. C TTL (voor slaafgroep C) wordt aangegeven. • Druk, om slaafgroep C te activeren, zo vaak op de toets Mode , dat in het display C TTL (voor slaafgroep C) wordt aangegeven.
709 47 0210.A1 58 AF-2 Canon 29.07.2010 10:21 Uhr Seite 107 Het instellen van groep C • Druk zo vaak op de toets Para , dat in het display C, c.q. C M (voor slaafgroep C) wordt aangegeven. • Druk, om slaafgroep C te activeren zo vaak op de toets Mode , dat in het display C M (voor slaafgroep C) wordt aangegeven. Zolang de aanduiding C M aangegeven is, kan met de toetsen – en + een deelvermogen van 1/1 tot 1/128 voor de slaafflitsers van groep C worden ingesteld.
709 47 0210.A1 58 AF-2 Canon 29.07.2010 10:21 Uhr Seite 108 19.5 Servo-functie De SERVO-functie is een eenvoudige slaaffunctie waarbij de flitser altijd een flits ontsteekt zodra hij een lichtimpuls ontvangt. Het instellen van de Servo-functie • Stel voor de flitser op de camera een functie flits zonSelect BEEP der flits vooraf in. Remote FB Set • Kies met de toetsen en het menupunt ‘REMOTE’ uit. Het uitgekozen menupunt wordt hierbij tegen een donker balkje aangegeven.
709 47 0210.A1 58 AF-2 Canon 29.07.2010 10:21 Uhr Seite 109 20 Onderhoud en verzorging 21 Troubleshooting Verwijder vuil en stof met een zachte, droge of met siliconen behandelde doek. Gebruik geen schoonmaakmiddel – de kunststofonderdelen zouden beschadigd kunnen worden. ☞ Zou het ooit voorkomen, dat bijv. in het display van de flitser onzinnige 20.
709 47 0210.A1 58 AF-2 Canon ń 29.07.2010 10:21 Uhr Seite 110 In het display verschijnt een batterijwaarschuwing • Bij het verschijnen van de waarschuwingsaanduiding is er nog zoveel energie, dat slechts enkele flitsen kunnen worden ontstoken. Zie ook par. 3.2 "Batterijen vervangen". Er zijn echter ook oplaadapparaten waarbij de batterijwaarschuwing relatief vroeg verschijnt, hoewel er nog zo'n 50% van het aantal flitsen kan worden ontstoken.
709 47 0210.A1 58 AF-2 Canon 29.07.2010 10:21 Uhr Seite 111 De TTL-invulflitsfunctie E TTL laat zich niet instellen. • Er heeft geen uitwisseling van gegevens tussen camera en flitser plaatsgevonden. Tip de ontspanknop op de camera even aan. • De camera ondersteunt de E-TTL-invulflitsfunctie niet. De instelling voor met de hand in te stellen correcties op de TTL-f/E-TTL–litsbelichting werkt niet. • De camera ondersteunt de met de hand in te stellen correctiesop de TTL-flitsbelichting op de flitser niet.
709 47 0210.A1 58 AF-2 Canon 29.07.
709 47 0210.A1 58 AF-2 Canon 29.07.2010 10:21 Uhr Seite 113 23 Bijzondere toebehoren Afvoeren van de batterijen ☞ Batterijen horen niet bij het huisvuil. S.v.p. de batterijen bij een daarvoor bestemd inzamelpunt afgeven. S.v.p. alleen ontladen batterijen / accu’s afgeven. Batterijen / accu’s zijn in de regel ontladen wanneer het daarvoor gebruikte apparaat - uitschakelt en aangeeft „batterijen leeg“ - de batterijen na langer gebruik niet meer goed functioneren.
709 47 0210.A1 58 AF-2 Canon ķ 1 2 3 3.1 3.2 3.3 3.4 3.5 4 5 5.1 5.2 5.3 5.4 5.5 5.6 5.7 6 6.1 6.2 6.3 6.4 6.5 6.6 7 7.1 7.2 7.3 7.4 7.5 7.6 7.7 7.8 7.9 7.10 7.11 7.12 7.13 8 114 29.07.2010 10:21 Uhr Seite 114 Safety instructions. . . . . . . . . . . . . . . . . . . . . . . . . . . . . . . . . . . . . . . . . . . . 115 Dedicated flash functions. . . . . . . . . . . . . . . . . . . . . . . . . . . . . . . . . . . . . . . 116 Preparing the flash unit for use . . . . . . . . . . . . . . . . . . . . . .
709 47 0210.A1 58 AF-2 Canon 29.07.2010 10:21 Uhr Seite 115 Introduction Thank you for purchasing a Metz product. We are happy to welcome you as a customer. Of course, you are excited to start using the flash unit right away. However, it is worthwhile reading the operating instructions first to learn how to use the flash correctly. This flash unit is suited for: • Analog and digital Canon EOS and PowerShot cameras with system flash shoe. ☞ This flash unit is not suited for other brands of cameras.
709 47 0210.A1 58 AF-2 Canon ķ 29.07.2010 10:21 Uhr Seite 116 2 Dedicated flash functions 3 Preparing the flash unit for use Dedicated flash functions are flash functions that have been specially adapted to a given camera system. Depending on the type of camera, different flash functions are supported.
709 47 0210.A1 58 AF-2 Canon 29.07.2010 10:21 Uhr Seite 117 • Power Pack P76 with connecting cable V58-50 (optional accessory) ☞ If your flash unit is not going to be used for an extended period of time, remove the batteries. Replacing batteries The batteries are flat or dead if the recycling time (elapsing from the triggering of a full-power flash, e.g. in the M mode, to the moment the flash ready indicator lights up again) exceeds 60 seconds. • Turn off the flash unit at the main switch .
709 47 0210.A1 58 AF-2 Canon 29.07.2010 10:21 Uhr Seite 118 If necessary, the Auto OFF function can be set to occur after 1 minute of inactivity, or can be deactivated (see 7.11). 5.1 Adjusting procedure for flash operating modes 5.2 TTL-/E-TTL- flash mode 4 Display illumination Every time a button on the flash unit is pressed, the flash display illumination is activated for 10 seconds. When a flash is fired via the camera or a hand release, the display lightning on the flash unit is switched off.
29.07.2010 10:21 Uhr Seite 119 Setting procedure: • Press the Mode button until „Mode“ flashes on the LC display. • Set the TTL flash mode using the and keys. The flash mode you choose is then highlighted. The setting takes effect immediately. • Press the button to change the display back to the normal view. If the button is not pressed, the display will change back to the normal view after about 5 seconds. ☞ The standard TTL flash mode is only supported by analogue cameras.
709 47 0210.A1 58 AF-2 Canon 29.07.2010 10:21 Uhr Seite 120 ☞ Ensure that the contre-jour light source does not shine directly into the This has a graduated lightening effect on shadowy areas, which has a natural appearance on the photograph. 5.4 Automatic flash mode 5.6 Manual flash mode ☛ ķ In the automatic flash mode A, the flash unit sensor measures the light that reflects back from the subject.
29.07.2010 10:21 Uhr Seite 121 ☞ Some cameras only support the M manual flash mode when the camera is set to the manual operating mode M. 5.7 Strobe flash mode ☛ The strobe flash mode is a manual flash mode. It allows several flash exposures to be made on a single photo, which can be especially interesting for movement studies or special effect images. In strobe flash mode, several flashes at a certain flash frequency are emitted.
709 47 0210.A1 58 AF-2 Canon 29.07.2010 10:21 Uhr Seite 122 Setting procedure: F 4.0 MZoom 24 4,6 m P1/1 – + ☛ Para 2.1 m P1/32 ☛ Para ķ☞ 122 – + • Press the Para button (Parameters) until the desired flash parameter (F=f-stop or P=partial light output) appears on the LC display. • Set the desired value using the + / – buttons. The setting takes effect immediately. • Press the button to change the LC display back to the normal view.
10:21 Uhr TTL/E-TTL/A/E-TTL-HSS M/M HSS Table 1 — — N Number of strobe flashe — — f Strobe flash frequency — P P Manual partial light output F Aperture F F Zoom Zoom Seite 123 Zoom Mainreflektor position EV — — Manual flash exposure correction ISO ISO ISO Light sensitivity • Set the desired value using the + / – buttons. The setting takes effect immediately. • Press the button to change the LC display back to the normal view.
709 47 0210.A1 58 AF-2 Canon 29.07.2010 10:21 Uhr Seite 124 6.3 Main reflector position (Zoom) 6.4 Flash exposure correction (EV) If there is no digital data transfer between the camera and flash unit, the reflector positions 24 mm - 28 mm - 35 mm - 50 mm - 70 mm - 85 mm - 105 mm (35mm format 24 x 36) can be set manually. MZoom will then appear in the LC display. Setting procedure: • Press the Para button (Parameters) until „Zoom“ A F 8.0 appears on the LC display.
709 47 0210.A1 58 AF-2 Canon 29.07.2010 10:21 Uhr Seite 125 6.5 Light sensitivity (ISO) 6.6 Manual partial light output (P) If there is no digital data transfer between the camera and flash unit, the ISO can be manually set from 6 to 6400. For flash modes A (automatic) and M (manual), the camera and flash unit have to be set to the same ISO value. Setting procedure: • Press the Para button (Parameters) until „ISO“ flasA F 8.0 hes on the LC display.
29.07.2010 10:21 Uhr Seite 126 7 Special functions (Select menu) Special functions are selected using the Sel button. Depending on the camera model and flash mode set, various special functions are available. If certain special functions are not supported by your camera, these functions may not be displayed in the menu. Also see table 2 for more information. 7.
709 47 0210.A1 58 AF-2 Canon 29.07.2010 10:21 Uhr Seite 127 Setting procedure: Select Set ON Set ☛ ☛ ☛ • Press the Set key to confirm the special function selection. • Choose the setting desired using the and keys. The setting takes effect immediately. A series of flash exposures (flash-bracketing FB) can be carried out in the TTL , E TTL and automatic A flash modes. A flash bracketing series consists of three successive flash shots with different flash exposure correction values.
TTL 7.7 m AZoom 28 Seite 128 • The first shot is taken without a correction value. „FB 1“ will also appear on the display. • The second shot is taken with minus correction. „FB 2“ and the minus correction AZoom 28 value (EV) will also appear on the 7.7 m EV– 1/3 display. • The third shot is taken with plus correction. „FB 3“ and the plus correction value (EV) will also appear on the display. • After the third shot, the flash bracketing series is automatically deleted.
29.07.2010 10:21 Uhr Seite 129 ☞ The REAR function can only be used with a camera suitably equipped for this mode. For many compact cameras (PowerShot), this setting is done directly on the camera (see camera's operating instructions). The REAR mode is indicated on the flash unit only when it has been set on the flash unit. 7.5 Extended Zoom Mode (Zoom Ext) ☛ ☛ In the extended zoom mode, the focal length of the main reflector is reduced to one level below the focal length of the camera lens.
709 47 0210.A1 58 AF-2 Canon 29.07.2010 10:21 Uhr Seite 130 Setting procedure: Set ☛ ☛ Size ON Set ☛ ķ TTL SZoom • Confirm the selection of the special function by pressing the Set button. • Select the desired setting with the and keys. The setting takes effect immediately. • Press the button repeatedly until the screen is reset to its normal view. If the button is not pressed, the display is automatically reset to its normal view after about 5 seconds. F 5.
709 47 0210.A1 58 AF-2 Canon 29.07.2010 10:21 Uhr Seite 131 7.9 Secondary reflector The maximum flash range indicated by the flash unit’s display can either be shown in meters or feet. The setting can be adjusted under the menu option m/ft. Setting procedure: • Press the Sel button repeatedly until „Select“ appeSelect Zoom Ext ars on the display. m/ft AF-BEAM • Select the „m/ft“ menu option by pressing the Set and keys. The selected menu option will be highlighted.
709 47 0210.A1 58 AF-2 Canon 29.07.2010 10:21 Uhr Seite 132 ☞ When the flash unit functions as master in the cordless remote system, the 7.10 Modelling Light (ML) ☛ ☛ The modelling light is a high-frequency stroboscopic flash. It creates the impression of a semi-permanent light for a duration of about 3 seconds. The modelling light enables the user to assess light distribution and the formation of shadows before taking pictures. • The modelling light is activated when „ML ON“ is displayed.
709 47 0210.A1 58 AF-2 Canon 29.07.2010 10:21 Uhr Seite 133 Setting procedure: Set Standby 10 min Set ☛ • Confirm the selection of the special function by pressing the Set button. • Select the desired setting with the and keys. The setting takes effect immediately. - When „Standby 10min“ is displayed, the Auto OFF function will be activated after 10 minutes. - When „Standby 1 min“ is displayed, the Auto OFF function will be activated after 1 minute.
709 47 0210.A1 58 AF-2 Canon 29.07.2010 10:21 Uhr Seite 134 7.13 AF-BEAM (AF auxiliary light) If the AF metering system of a digital AF reflex camera is unable to focus due to insufficient ambient lighting, the camera activates the AF auxiliary light built into the flash unit. This projects a stripe pattern onto the subject which the camera uses to focus. The “AF BEAM” function can be specifically turned off in the select menu of the flash unit.
709 47 0210.A1 58 AF-2 Canon 29.07.2010 10:21 Uhr Seite 135 Manual adjustment of the zoom position with AZoom The zoom position of the main reflector can also be changed when the flash unit is used with a camera capable of data transmission, in order to achieve special lighting effects (such as hot-spot, etc.). See also 6.3. Once saved, „MZoom“ will be indicated on the display. Resetting to AZoom mode • Touch the shutter release to begin a data transfer between the flash unit and the camera.
709 47 0210.A1 58 AF-2 Canon 29.07.2010 10:21 Uhr Seite 136 10.3 Bounce flash with secondary reflector 10.5 Manual flash exposure corrections When the main reflector is swivelled or tilted, the secondary reflector can also be activated in the Select Menu for frontal fill-in lighting of the subject (see 7.9). Using the secondary reflector is generally practical and feasible only for bounce flash with a swivelled or tilted main reflector .
709 47 0210.A1 58 AF-2 Canon 29.07.2010 11 Flash readiness indication 10:21 Uhr Seite 137 ✴ When the flash capacitor is charged, the flash readiness symbol lights up on the flash unit, indicating that the flash is ready to fire. This means that flash light can be used for the next shot. Flash readiness is also transmitted to the camera and indicated accordingly in the camera’s viewfinder (see 14).
709 47 0210.A1 58 AF-2 Canon 29.07.2010 10:21 Uhr Seite 138 15 Flash range indication The maximum flash range is indicated on the display panel of the flash unit. The AZoom 70 14 m value indicated relates to subjects with a 14 m reflection factor of 25%, which applies to most photographic situations. Strong deviations from this reflection factor, as in the case of highly reflective or poorly reflective subjects, may affect the flash range.
709 47 0210.A1 58 AF-2 Canon 29.07.2010 10:21 Uhr Seite 139 17 Flash synchronisation 17.1 Normal synchronisation In normal synchronisation the flash unit is triggered at the beginning of the shutter time (first curtain synchronisation). Normal synchronisation is the standard mode on all cameras. It is suitable for most flash shots. The camera, depending on the mode being used, is switched to the flash sync speed. Speeds between 1/30 sec. and 1/125 sec.
709 47 0210.A1 58 AF-2 Canon ķ 29.07.2010 10:21 Uhr Seite 140 18 Multi-zone AF measuring beam 19 Wireless remote flash mode The multi-zone AF measuring beam is activated in the flash unit by the camera when the ambient lighting conditions become inadequate for automatic focusing. It projects onto the subject a striped pattern that the camera can use to focus. Depending on the camera’s activated AF sensor, the AF beam has a range of approximately 6 m to 9 m (with a standard 1.7/50 mm lens).
709 47 0210.A1 58 AF-2 Canon 29.07.2010 10:21 Uhr Seite 141 19.1 Switching the remote flash mode on and off BEEP Remote FB Select Set ☛ ☛ Remote Master M A TTL B TTL+1/3 Set Para CH1 Sel Set key to confirm the selection of • Use the and keys to select "Remote Master" for master operation, "Remote Slave" for slave operation, or "Remote OFF" to deactivate remote flash mode. The setting is effective immediately. AZoom 28 F32 • Use the and keys to select "Remote" from the menu.
709 47 0210.A1 58 AF-2 Canon 29.07.2010 10:21 Uhr Seite 142 Adjusting the settings for slave group C • Press the key repeatedly until C or C TTL (for slave group C) appears on the LC display. Para • To activate slave group C, press the Mode key repeatedly until C or C TTL (for slave group C) appears on the LC display.
709 47 0210.A1 58 AF-2 Canon 29.07.2010 10:21 Uhr Seite 143 • To deactivate slave group C, press the Mode key repeatedly until only C appears on the LC display. Setting the remote channel • Press the Para key repeatedly until "Ch" flashes on the LC display. • Set the remote channel using the – and + keys. Setting the zoom position of the reflector • Press the Para key repeatedly until "Zoom" appears on the LC display. • Set the zoom position using the – and + keys.
10:21 Uhr Seite 144 19.5 Servo mode The Servo mode is a simple slave mode in which the slave flash unit always triggers a flash as soon as it receives a light pulse. Adjustment procedure for servo flash mode • Select a mode for the camera flash unit without preSelect BEEP flash. Set Servo Set ☛ ☛ ķ Servo MZoom 35 P1/1 Para • Press the Sel key repeatedly until "Select" appears on the display. • Use the and keys to select the menu item "Remote".
709 47 0210.A1 58 AF-2 Canon 29.07.2010 10:21 Uhr Seite 145 20 Care and maintenance 21 Troubleshooting Remove dust and grime with a soft dry cloth or silicon-treated cloth. Do not use cleaning agents as these may damage the plastic parts. ☞ Should the flash unit fail to function properly or meaningless content 20.1 Firmware updates The flash unit’s firmware can be updated through the USB port and adjusted to the technical requirements of future cameras (Firmware Update).
709 47 0210.A1 58 AF-2 Canon ķ 29.07.2010 10:21 Uhr Seite 146 A battery symbol appears on the display • There is a Metz Power Pack P76 connected to the mecablitz and there are batteries in the battery compartment of the mecablitz. Remove batteries from the mecablitz. The AF measuring beam of the flash unit is not activated. • The flash unit is not ready for firing. • The camera is not in Single AF mode (S-AF). • The camera supports only its own internal AF measuring beam.
709 47 0210.A1 58 AF-2 Canon 29.07.2010 10:21 Uhr Seite 147 Automatic switching to the flash sync speed fails to occur. • The camera has a between-the-lens shutter (as do most compact cameras), Switching to sync speed is therefore unnecessary. • The camera operates with FP high-speed synchronisation (camera setting). In this case no switching to sync speed occurs. • The camera operates with shutter speeds that are slower than the flash syncspeed.
709 47 0210.A1 58 AF-2 Canon 29.07.2010 10:21 Uhr Seite 148 22 Technical data Max. guide numbers at ISO 100/21°, zoom 105 mm: In the metric system: 58 In the imperial system: 192 ķ Flash modes: TTL without measuring preflash, E-TTL / E-TTL-II flash mode, Manuel M, Automatic A, Strobe flash mode, Wireless remote operation, Servo mode 12 auto apertures at ISO 100/21°: f/1, f/1.4, f/2, f/2.8, f/4, f/5.6, f/8, f/11, f/16, f/22, f/32, f/45 Automatic aperture adjustment at ISO 100/21°: f1.
709 47 0210.A1 58 AF-2 Canon 29.07.2010 10:21 Uhr Seite 149 23 Optional accessories Disposal of batteries ☞ We accept no liability for malfunctions of or damage to the flash unit caused by the use of accessories of other manufacturers. • Mecabounce 58-90 (Order No. 000058902) With this diffuser, soft lighting can be achieved in a very simple manner. It gives your pictures a marvellous soft appearance. Skin tones are captured more faithfully.
709 47 0210.A1 58 AF-2 Canon ƴ 1 2 3 3.1 3.2 3.3 3.4 3.5 4 5 5.1 5.2 5.3 5.4 5.5 5.6 5.7 6 6.1 6.2 6.3 6.4 6.5 6.6 7 7.1 7.2 7.3 7.4 7.5 7.6 7.7 7.8 7.9 7.10 7.11 7.12 7.13 8 150 29.07.2010 10:21 Uhr Seite 150 Per la vostra sicurezza . . . . . . . . . . . . . . . . . . . . . . . . . . . . . . . . . . . . . . . . 151 Funzioni flash dedicate . . . . . . . . . . . . . . . . . . . . . . . . . . . . . . . . . . . . . . . . 152 Preparazione del flash . . . . . . . . . . . . . . . . . . . . . . . . . . . .
709 47 0210.A1 58 AF-2 Canon 29.07.2010 10:21 Uhr Seite 151 Premessa Grazie per aver scelto un prodotto Metz! Siamo lieti di potervi dare il benvenuto tra i nostri Clienti. Sicuramente non vedrete l’ora di poter provare il vostro flash. Vi consigliamo, però, di leggere prima le istruzioni per l’uso perché solo così imparerete a usare correttamente l’apparecchio. Questo lampeggiatore è adatto per: • Fotocamere Canon EOS e PowerShot analogiche e digitali con slitta per il flash.
709 47 0210.A1 58 AF-2 Canon ƴ 29.07.2010 10:21 Uhr Seite 152 2 Funzioni flash dedicate 3 Preparazione del flash Le funzioni flash dedicate sono funzioni messe a punto specificatamente per i diversi sistemi di camera. Le funzioni del flash supportate dipendono dal tipo di camera.
709 47 0210.A1 58 AF-2 Canon 29.07.2010 10:21 Uhr Seite 153 • 4 batterie al litio 1,5 V, tipo IEC FR6 (AA/Mignon), una fonte di energia esente da manutenzione, ad elevata capacità e autoscarica contenuta. • Power Pack P76 con cavo di connessione V58-50 (accessorio a richiesta). ☞ Se prevedete di non usare il flash per lungo tempo, togliete le batterie dall’apparecchio.
29.07.2010 10:21 Uhr Seite 154 tocca leggermente il pulsante di scatto della camera (funzione Wake-Up). ☞ Se prevedete di non utilizzare il flash per lungo tempo è opportuno spegnere l’apparecchio sempre con l’interruttore principale ! Se si desidera, è possibile impostare lo spegnimento automatico dell’apparecchio dopo 1 minuto o disattivare la funzione, per maggiori informazioni leggere il punto 7.11).
29.07.2010 10:21 Uhr Seite 155 Procedura per l’impostazione: • Premete il tasto Mode finché nel display non comparirà „Mode“. • Impostate il modo flash TTL con i tasti e . La modalità del flash selezionata viene dunque evidenziata rendendo l’impostazione attiva da subito. • Premete il tasto . Il display ritorna alla schermata normale. Se non premete il tasto il display torna comunque automaticamente alla schermata normale dopo circa 5 secondi.
29.07.2010 10:21 Uhr ☞ Se la fotocamera non supporta alcuni parametri flash questi dovranno essere impostati a mano sull'apparecchio! Seite 156 ✴ 5.4 Modo flash Automatico ☛ ƴ Con il modo flash Automatico A il fotosensore del lampeggiatore misura la luce riflessa dal soggetto. Il fotosensore ha un angolo di rilevazione di circa 25° e procede alla misurazione solamente durante la propria emissione del lampo.
F 4.0 M MZoom 24 P1/2 10 m Mode Para Sel ☞ 29.07.2010 10:21 Uhr Seite 157 Alcune camere supportano il modo flash manuale M solo se impostate anch’esse sulla modalità manuale M! 5.7 Modo flash Stroboscopico ☛ Il modo flash Stroboscopico è un modo manuale. Con questa funzione è possibile fare diverse esposizioni su una foto unica. Si rivela particolarmente interessante per gli studi di movimento e le riprese d’effetto.
709 47 0210.A1 58 AF-2 Canon 29.07.2010 10:21 Uhr Seite 158 ☛ Sul display viene indicata la distanza valida in funzione dei parametri impostati. Modificando l’apertura del diaframma o la potenza ridotta il valore della distanza indicato può essere adeguato alla distanza dal soggetto. Procedura per l’impostazione: • Premete il tasto Para più volte finché sul display F 4.
29.07.2010 10:21 Uhr Seite 159 • Premete il tasto Para più volte finché sul display non compare il parametro flash desiderato (vedi sotto). Possono essere selezionate i seguenti parametri: TTL/E-TTL/A/E-TTL-HSS M/M HSS Tabella 1 — — N Numero lampi stroboscopici — — f Frequenza lampi stroboscopici — P P Potenza ridotta manuale F F F Diaframma Zoom Zoom 6.
709 47 0210.A1 58 AF-2 Canon 10:21 Uhr Seite 160 6.3 Posizione della parabola (Zoom) 6.4 Correzione dell’esposizione (EV) Se non avviene alcuna trasmissione dati digitale tra camera e flash, le posizioni della parabola possono essere impostate a mano su 24 mm - 28 mm - 35 mm - 50 mm - 70 mm - 85 mm - 105 mm (formato piccolo 24 x 36) Sul display si visualizzerà Zoom M. Procedura per l’impostazione: • Premete il tasto Para più volte finché sul display non A F 8.0 compare „Zoom“.
709 47 0210.A1 58 AF-2 Canon 29.07.2010 10:21 Uhr Seite 161 6.5 Sensibilità alla luce (ISO) 6.6 Potenza ridotta manuale (P) Se non avviene alcuna trasmissione dati digitale tra camera e flash, i valori ISO per la sensibilità alla luce possono essere impostati manualmente da 6 a 6400. Per il modo flash automatico A e il modo flash manuale M occorre impostare lo stesso valore ISO su camera e flash. Procedura per l’installazione: • Premete il tasto Para più volte finché sul display non A F 8.
29.07.2010 10:21 Uhr Seite 162 7 Funzioni speciali (Menu Select) Le funzioni speciali vengono selezionate con il tasto Sel (Select). Secondo il tipo di camera e del modo flash impostato sono disponibili diverse funzioni speciali. Le funzioni speciali non supportate da determinate camere non verranno visualizzate nel menu! Per maggiori informazioni vedere la Tabella 2! 7.1 Procedura per l’impostazione delle funzioni speciali ☞ Alla prima pressione di qualsiasi tasto si illumina il display.
10:21 Uhr Seite 163 ☛ ☛ Segnali bip nelle impostazioni in modo flash automatico: • Si ha un breve segnale bip di allarme se nel modo flash automatico l’impostazione di diaframma e ISO porterebbe a superare l’intervallo consentito di regolazione luce. Il diaframma automatico passa automaticamente al successivo valore ammesso. Procedura per l’impostazione: • Premete il tasto Sel più volte finché sul display non Select compare „Select“.
TTL 7.7 m F 5.1 FB1 AZoom 28 10:21 Uhr Seite 164 • La prima ripresa viene effettuata senza valore di correzione. Sul display si visualizzerà in aggiunta „FB1“. • La seconda ripresa viene effettuata con correzione negativa. Sul display si visuaAZoom 28 lizzerà in aggiunta „FB2“ e il valore di 7.7 m EV– 1/3 correzione negativa (EV). • La terza ripresa viene effettuata con correzione positiva. Sul display si visualizzerà in aggiunta „FB3“ e il valore di correzione positiva (EV).
29.07.2010 10:21 Uhr Seite 165 ☞ La funzione REAR può essere impostata solo in abbinamento con una fotocamera adeguata! In diverse fotocamere compatte (PowerShot) l'impostazione avviene direttamente sulla fotocamera (vedi le relative istruzioni per l'uso)! La funzione REAR viene visualizzata sul flash solo se l'impostazione è avvenuta proprio sull'apparecchio. 7.
10:21 Uhr Seite 166 ☛ ☛ zoom a 70 mm al fine di assicurare un'illuminazione completa. - dalla posizione di zoom a 70 mm risulta una distanza focale pari a 70 mm: 1,5 = 46,6, il display del mecablitz riporta quindi "SZoom 47". Procedura per l’impostazione: • Premete il tasto Sel più volte finché sul display non Select Zoom Ext compare „Select“. Zoom Size m/ft • Selezionate il punto del menu „ZoomSize“ con i tasti Set e . Il punto del menu verrà evidenziato in scuro.
709 47 0210.A1 58 AF-2 Canon 29.07.2010 10:21 Uhr Seite 167 7.9 Parabola ausiliaria Il campo di utilizzo può essere visualizzato sul display a scelta in metri „m“ o in piedi „ft“. L’impostazione avviene attraverso il punto del menu m/ft. Procedura per l’impostazione: • Premete il tasto Sel più volte finché sul display non Select Zoom Ext compare „Select“. m/ft AF-BEAM • Selezionate il punto del menu „m/ft“ con i tasti Set e . Il punto del menu verrà evidenziato in scuro.
709 47 0210.A1 58 AF-2 Canon 29.07.2010 10:21 Uhr Seite 168 7.10 Luce pilota (ML) „Modelling Light“ ☛ ☛ La luce pilota è un flash stroboscopico ad alta frequenza. Con una durata di circa 3 secondi si ha l’impressione di una luce quasi permanente. Con il tasto luce pilota è possibile valutare già prima di una fotografia la distribuzione della luce e la creazione di ombre. • Quando si visualizza „ML ON“ la luce pilota è attivata. • Quando si visualizza „ML OFF“ la luce pilota è disattivata.
10:21 Uhr Seite 169 ☛ ☛ Il flash passa quindi allo stato a risparmio energetico stand-by dopo uno o dieci minuti di inattività. Per riaccenderlo basta premere un tasto qualsiasi o toccare leggermente il pulsante di scatto della camera (funzione Wake-Up). Procedura per l’impostazione: • Premete il tasto Sel più volte finché sul display non Select FB compare „Select“. Standby ML • Selezionate il punto del menu „Standby“ con i tasti Set e . Il punto del menu verrà evidenziato in scuro.
709 47 0210.A1 58 AF-2 Canon 29.07.2010 10:21 Uhr Seite 170 7.13 AF-BEAM (Illuminatore ausiliario AF) Se il sistema di misurazione AF di una fotocamera reflex digitale AF non riesce a mettere a fuoco a causa della scarsa luminosità dell’ambiente, verrà attivato l’illuminatore ausiliario AF integrato nel flash della fotocamera. L’illuminatore proietta un fascio di raggi luminosi sul soggetto la cui riflessione consente alla fotocamera di operare la messa a fuoco.
709 47 0210.A1 58 AF-2 Canon 29.07.2010 10:21 Uhr Seite 171 Esempio: State utilizzando un obiettivo zoom con un intervallo di focali da 35 mm a 105 mm. In questo esempio mettete la posizione della parabola zoom su 35 mm! Regolazione manuale della posizione zoom con AZoom La posizione zoom della parabola principale può essere modificata anche quando il flash funziona con una camera che trasmette i dati, ad esempio per ottenere determinati effetti luminosi (ad es. hot-spot ecc.).
709 47 0210.A1 58 AF-2 Canon 29.07.2010 10:21 Uhr Seite 172 10.3 Lampo riflesso con parabola ausiliaria 10.5 Correzioni manuali dell’esposizione flash Quando la parabola principale è inclinata, per ottenere una luce frontale di schiarita sul soggetto è possibile potete azionare anche la parabola ausiliaria dal menu Select (vedi il punto 7.9). L’impiego della parabola ausiliaria è sensato, e possibile, solo con lampo riflesso e parabola inclinata.
709 47 0210.A1 58 AF-2 Canon 29.07.2010 10:21 Uhr Seite 173 11 Indicazione di stato del flash ✴ Quando il condensatore flash è carico, sul flash si per indicare accende la spia di carica del flash che il flash è pronto. Ciò significa che per la prossima ripresa si può utilizzare il flash. L’indicazione di flash carico viene trasmessa alla camera che presenta a sua volta il simbolo corrispondente nel mirino (vedi il punto15).
709 47 0210.A1 58 AF-2 Canon 29.07.2010 10:21 Uhr Seite 174 Indicazioni generali in caso di esposizione non corretta: • In caso di sovraesposizione: non usare il flash! • In caso di sottoesposizione: accendete il flash o utilizzate uno stativo e un tempo di esposizione più lungo. Nei diversi programmi automatici e d’esposizione, l’esposizione non corretta può dipendere da fattori di diversa natura.
709 47 0210.A1 58 AF-2 Canon 29.07.2010 10:21 Uhr Seite 175 ☞ Eventuali modifiche dell’esposizione successive al lampo di prova FE non verranno prese in considerazione durante la ripresa per motivi insiti al sistema!. Su alcune camere la funzione di memorizzazione dell’esposizione flash FE non viene supportata nel programma completamente automatico “quadratino verde” o nei programmi Motivo (vedi istruzioni d’uso della camera)! 17 Sincronizzazione del lampo 17.
709 47 0210.A1 58 AF-2 Canon 29.07.2010 10:21 Uhr Seite 176 lizzare il flash anche con tempi di posa più rapidi di quelli di sincronizzazione. È interessante ad es. nei primi piani con luce ambiente molto chiara, quando la profondità di campo deve essere limitata con aperture del diaframma relativamente grandi (ad es. F 2,0)! Il flash supporta la sincronizzazione ad alta velocità nei modi di funzionamento E-TTL (E-TTL HSS) e M (M HSS).
709 47 0210.A1 58 AF-2 Canon 29.07.2010 10:21 Uhr Seite 177 19.1 Impostazione e disattivazione del controllo a distanza BEEP Remote FB Select Set ☛ ☛ M A TTL B TTL+1/3 Para CH1 AZoom 28 F32 Sel Set e confermate così la selezione • Con i tasti e impostate "Remote Master" per il modo controller, "Remote Slave" per il modo slave o "Remote OFF" per disattivare il modo remoto. L'impostazione è immediatamente attiva. Set ☛ • Selezionate il punto del menu "Remote" con i tasti e .
709 47 0210.A1 58 AF-2 Canon 29.07.2010 10:21 Uhr Seite 178 Procedura per l'impostazione del gruppo slave C Procedura per l'impostazione del flash controller • Premete il tasto Para più volte finché sul display non compare C, ovvero C TTL (per il gruppo slave C). • Premete il tasto Para più volte finché sul display non compare M ovvero M TTL (per il flash controller). • Per attivare il gruppo slave C premete il tasto Mode più volte finché sul display non compare C TTL (per il gruppo slave C).
709 47 0210.A1 58 AF-2 Canon 29.07.2010 10:21 Uhr Seite 179 Procedura per l'impostazione del gruppo slave C • Premete il tasto Para più volte finché sul display non compare C ovvero C M (per gruppo slave C). • Per attivare il gruppo slave C premete il tasto Mode più volte finché sul display non compare C M (per gruppo slave C). Mentre rimane visualizzato C M, con i tasti – e + potete impostare una potenza luminosa ridotta da 1/1 a 1/128 per i flash slave del gruppo C.
29.07.2010 10:21 Uhr Seite 180 19.5 Modo Servo Il modo SERVO è un semplice modo slave in cui il flash slave emette sempre un flash non appena riceve un impulso luminoso. Procedura per l’impostazione del modo flash SERVO • Impostare per il flash della fotocamera una modalità Select BEEP senza pre-lampi. Set Servo Set ☛ ☛ ƴ Servo MZoom 35 P1/1 Sel finché non compa- Sel • Premere il tasto Set e poi selezionare la voce di menu “Servo” con i tasti e .
709 47 0210.A1 58 AF-2 Canon 29.07.2010 10:21 Uhr Seite 181 20 Cura e manutenzione 21 In caso di anomalie di funzionamento Eliminate lo sporco e la polvere con un panno morbido, asciutto o trattato al silicone. Non utilizzate prodotti detergenti, in quanto potrebbero provocare danni alle parti di plastica. ☞ Nel caso in cui il display del flash dovesse per esempio fornire indicazioni 20.
709 47 0210.A1 58 AF-2 Canon ƴ 29.07.2010 10:21 Uhr Seite 182 Il display mostra un avviso per la batteria • In caso di visualizzazione dell'avviso per la batteria rimane comunque energia sufficiente per emettere alcuni flash. Vedere anche Cap. 3.2 "Sostituzione delle batterie". Esistono tuttavia alcune ricariche di batteria per le quali l'avviso compare relativamente presto, benché siano ancora a disposizione circa il 50% dei flash.
709 47 0210.A1 58 AF-2 Canon 29.07.2010 10:21 Uhr Seite 183 Non è possibile impostare il modo flash di schiarita E TTL • Non ha avuto luogo lo scambio dati tra flash e fotocamera. Premere leggermente lo scatto della fotocamera. • La fotocamera non supporta il modo flash di schiarita E-TTL. L’impostazione per la compensazione manuale dell’esposizione TTL non è possibile. • La fotocamera non supporta la compensazione manuale dell’esposizione TTL sul flash.
709 47 0210.A1 58 AF-2 Canon 29.07.
709 47 0210.A1 58 AF-2 Canon 29.07.2010 10:21 Uhr Seite 185 23 Accessori opzionali Smaltimento delle batterie ☞ l cattivo funzionamento e i danni eventualmente provocati al flash dall’utilizzo di accessori non prodotti dalla Metz non sono coperti dalla nostra garanzia! • Mecabounce 58-90 (art. no. 000058902) Questo diffusore permette di realizzare con estrema semplicità un’illuminazione tenue. L’effetto che se ne ricava è straordinario poiché crea un’immagine morbida.
709 47 0210.A1 58 AF-2 Canon į 1 2 3 3.1 3.2 3.3 3.4 3.5 4 5 5.1 5.2 5.3 5.4 5.5 5.6 5.7 6 6.1 6.2 6.3 6.4 6.5 6.6 7 7.1 7.2 7.3 7.4 7.5 7.6 7.7 7.8 7.9 7.10 7.11 7.12 7.13 8 186 29.07.2010 10:21 Uhr Seite 186 Indicaciones de seguridad . . . . . . . . . . . . . . . . . . . . . . . . . . . . . . . . . . . . . . 187 Funciones dedicadas del flash. . . . . . . . . . . . . . . . . . . . . . . . . . . . . . . . . . . . 188 Preparación del flash . . . . . . . . . . . . . . . . . . . . . . . . . . . . . . .
709 47 0210.A1 58 AF-2 Canon 29.07.2010 10:21 Uhr Seite 187 Introducción Le agradecemos que se haya decidido por un producto Metz y nos complace saludarle como usuario de nuestra marca. Como es natural, deseará empezar a utilizar el flash lo antes posible, pero le recomendamos que lea primero estas instrucciones pues sólo así sabrá cómo manejarlo correctamente. Este flash es apropiado para: • Cámaras analógicas y digitales Canon EOS y PowerShot con zapata de flash.
709 47 0210.A1 58 AF-2 Canon į 29.07.2010 10:21 Uhr Seite 188 2 Funciones dedicadas del flash 3 Preparación del flash Las funciones dedicadas del flash son las que se adecuan de manera especial al sistema de la cámara. Así, las funciones del flash serán compatibles dependiendo del modelo de cámara.
709 47 0210.A1 58 AF-2 Canon 29.07.2010 10:21 Uhr Seite 189 • 4 pilas de litio de 1,5 V, tipo IEC FR6 (AA/ Mignon), que suministran energía sin necesidad de mantenimiento con una capacidad mayor y una menor autodescarga. • Power Pack P76 con cable de conexión V58-50 (accesorio opcional). ☞ Cuando no se vaya a utilizar el flash durante un periodo prolongado de tiempo, retirar las pilas del aparato.
29.07.2010 10:21 Uhr Seite 190 ☞ Cuando no se vaya a utilizar el flash durante un periodo de tiempo prolongado, debe apagarse siempre mediante el interruptor général En caso necesario, se puede activar la desconexión automática un minuto después de la conexión o desactivar esta función (consultar 7.11). 4 Iluminación de la pantalla La pantalla del flash se ilumina aprox. 10 seg. cuando se pulsa cualquier tecla del flash.
29.07.2010 10:21 Uhr Seite 191 Configuración: • Pulsar la tecla Mode hasta que aparezca „Mode“ en la pantalla. • Ajustar el modo de flash TTL con las teclas y . El modo de flash seleccionado aparece resaltado por una barra. El ajuste se aplica de forma inmediata. • Pulsar la tecla . La pantalla regresa a la indicación normal. Si no se pulsa la tecla , la pantalla regresa automáticamente a la indicación normal aprox. 5 seg. después. ☞ El modo TTL estándar solo es soportado por cámaras analógicas.
✴ 29.07.2010 10:21 Uhr Seite 192 Si la toma se ha iluminado correctamente aparece la indicación „o.k.“ en la indicación de control de la exposición (consultar 13). ☞ Si la cámara no transmitiera determinados parámetros de flash, estos deberán introducirse manualmente en el flash. ☛ En el modo automático A, el fotosensor del flash mide la luz reflejada por el motivo. El fotosensor tiene un ángulo de medición de aprox. 25° y mide únicamente durante el disparo de luz propia.
29.07.2010 10:21 Uhr Seite 193 En la pantalla aparece la distancia a la que debería estar el motivo para que la exposición fuera correcta. ☞ Varias cámaras son compatibles con el modo manual M únicamente cuando la cámara también se encuentra en modo manual M. 5.7 Modo estroboscópico ☛ El modo estroboscópico es un modo de funcionamiento del flash manual. Con este modo se disparan varios destellos durante una toma.
709 47 0210.A1 58 AF-2 Canon 29.07.2010 10:21 Uhr Seite 194 En la pantalla aparece la distancia adecuada según los parámetros seleccionados. Si se cambia la apertura o la potencia parcial, se puede ajustar la distancia mostrada a la distancia real del motivo. Configuración: • Pulsar la tecla Para hasta que aparezca en la panF 4.0 talla el parámetro de flash deseado (F = Apertura o MZoom 24 P = Potencia parcial manual). 4,6 m P1/1 – + ☛ Para 2.1 m ☞ Al pulsar cualquier tecla, se ilumina la pantalla.
29.07.2010 10:21 Uhr Seite 195 • Pulsar la tecla Para hasta que aparezca en la pantalla el parámetro de flash deseado (consultar a continuación).
709 47 0210.A1 58 AF-2 Canon 10:21 Uhr Seite 196 6.3 Posición del reflector principal (zoom) 6.4 Corrección de la exposición del flash (EV) Si no existe transmisión digital de datos entre la cámara y el flash, se pueden ajustar las posiciones del reflector 24 mm - 28 mm - 35 mm - 50 mm - 70 mm - 85 mm - 105 mm (pequeño formato 24 x 36) de forma manual. En la pantalla aparece MZoom. Configuración: • Pulsar la tecla Para hasta que aparezca „Zoom“ en A F 8.0 la pantalla.
709 47 0210.A1 58 AF-2 Canon 29.07.2010 10:21 Uhr Seite 197 6.5 Sensibilidad de la película (ISO) 6.6 Potencia parcial manual (P) Si no existe transmisión digital de datos entre la cámara y el flash, se pueden ajustar manualmente los valores de sensibilidad ISO desde 6 hasta 6400. Con los modos de flash automático A y manual M , la cámara y el flash deben ajustarse con el mismo valor ISO. Configuración: • Pulsar la tecla Para hasta que aparezca „ISO“ en A F 8.0 la pantalla.
29.07.2010 10:21 Uhr Seite 198 7 Funciones especiales (menú Select) Las funciones especiales se seleccionan con la tecla Sel . Según el modelo de cámara y el modo de funcionamiento del flash seleccionado, están disponibles distintas funciones especiales. Cuando una cámara no dispone de una determinada función especial, ésta no se muestra en el menú. Consultar al respecto la tabla 2. 7.
10:21 Uhr Seite 199 ☛ ☛ Pitido al ajustar el modo de flash automático: • Se oye un breve pitido de aviso cuando, estando seleccionado el modo de funcionamiento automático, se ajusta la apertura y la sensibilidad más allá del margen de regulación de luz. La apertura automática cambia automáticamente al siguiente valor permitido. Configuración: • Pulsar la tecla Sel hasta que aparezca „Select“ en Select la pantalla. Beep Remote • Seleccionar el menú „BEEP“ con las teclas y Set .
TTL 7.7 m F 5.1 FB1 AZoom 28 10:21 Uhr Seite 200 • La primera toma se realiza sin valor de corrección. En la pantalla aparece „FB1“. F 5.1 FB2 • La segunda toma se realiza con la corrección negativa. En la pantalla aparece AZoom 28 7.7 m EV– 1/3 „FB2“ y el valor de corrección negativo (EV). • La tercera toma se realiza con la corrección positiva. En la pantalla aparece „FB3“ y el valor de corrección positivo (EV). • Tras la tercera toma, se borra el horquillado del flash automáticamente.
29.07.2010 10:22 Uhr Seite 201 ☞ La función REAR se puede seleccionar solamente usando una cámara apropiada. En muchas cámaras compactas (PowerShot) el ajuste se realiza en la cámara (consultar el manual de instrucciones de la cámara). El modo REAR aparece indicado en el flash solo si la configuración se ha efectuado en el flash. 7.
10:22 Uhr Seite 202 ☛ ☛ - La iluminación se consiguió cuando se llevó el reflector principal del mecablitz a la posición de zoom de 50 mm. x 1,5 = 75 mm. Como el mecablitz sólo tiene las posiciones de Zoom 70 mm. u 85 mm., se ajusta el zoom a 70 mm., de manera que consigamos una iluminación completa adecuada. - Con el ajuste del zoom a 70 mm. se consigue una distancia focal de 70 mm.: 1,5 = 46,6, en la pantalla del mecablitz se mostrará por tanto "SZoom 47".
709 47 0210.A1 58 AF-2 Canon 29.07.2010 10:22 Uhr Seite 203 El reflector adicional i sirve para la iluminación frontal, mediante iluminación indirecta, cuando el reflector principal g está inclinado lateralmente o hacia arriba (véase 10.3). Si la cantidad de luz del segundo reflector es demasiado grande se puede reducir a 1/2 o 1/4.
709 47 0210.A1 58 AF-2 Canon 29.07.2010 10:22 Uhr Seite 204 7.10 Luz de modelado (ML) ☛ ☛ Se trata de una secuencia de destellos estroboscópicos a alta frecuencia con una duración de aprox. 3 segundos, que produce la impresión de una iluminación casi continua. Con la luz de modelado se puede evaluar la distribución de la luz y la formación de sombras incluso antes de la toma. • Si aparece „ML ON“ en la pantalla, la luz de modelado está activada.
709 47 0210.A1 58 AF-2 Canon 29.07.2010 10:22 Uhr Seite 205 Configuración: Set Standby 10 min Set ☛ • Pulsar la tecla Set para confirmar la selección de la función especial. • Establecer el ajuste deseado con las teclas y . El ajuste se aplica de forma inmediata. - Cuando aparece la indicación „Standby 10min“, la desconexión automática se produce tras 10 minutos. - Cuando aparece la indicación „Standby 1min“, la desconexión automática se produce tras 1 minuto.
709 47 0210.A1 58 AF-2 Canon 29.07.2010 10:22 Uhr Seite 206 7.13 AF-BEAM (luz auxiliar AF) Cuando el sistema de medición AF de una cámara réflex AF digital no puede enfocar con nitidez debido a una luminosidad ambiente insuficiente, la cámara activa la luz auxiliar AF integrada en el flash. Esta proyecta un dibujo de franjas sobre el motivo para que la cámara pueda enfocar. En el menú Select del flash es posible apagar individualmente la función "AF-BEAM".
709 47 0210.A1 58 AF-2 Canon 29.07.2010 10:22 Uhr Seite 207 Ajuste manual de la posición del zoom con AZoom La posición de zoom del reflector principal también se puede modificar cuando se utiliza el flash con una cámara que transmite los datos, por ejemplo, para conseguir determinados efectos de iluminación, como puntos calientes, etc. Consultar también 6.3. Después de guardar, aparece „MZoom“ en la pantalla.
709 47 0210.A1 58 AF-2 Canon 29.07.2010 10:22 Uhr Seite 208 10.3 Destellos indirectos con segundo reflector 10.5 Corrección manual de la exposición del flash Con el reflector principal girado, se puede activar el segundo reflector en el menú Select (consultar 7.9) para conseguir un relleno frontal del motivo. La utilización del segundo reflector sólo es posible y aconsejable básicamente con destellos indirectos cuando el reflector principal está girado.
709 47 0210.A1 58 AF-2 Canon 29.07.2010 10:22 Uhr Seite 209 11 Indicación de disponibilidad del flash ✴ Cuando el condensador del flash está cargado, se enciende la indicación de disponibilidad en el flash , que indica que está listo para disparar. Esto significa que en la próxima toma se puede utilizar el flash. La disponibilidad del flash se transmite a la cámara y en el visor de la cámara aparece también la indicación correspondiente (consultar 15).
709 47 0210.A1 58 AF-2 Canon 29.07.2010 10:22 Uhr Seite 210 Las causas de las exposiciones erróneas pueden encontrarse en los diversos programas de exposición y automatismo. ☞ Para las indicaciones en el visor de la cámara, leer en las instrucciones de manejo de la cámara, lo que es válido para ese tipo de cámara. 15 Indicación del alcance En la pantalla del flash se indica el máximo alcance de la luz del flash.
709 47 0210.A1 58 AF-2 Canon 29.07.2010 10:22 Uhr Seite 211 17 Sincronización del flash 17.1 Sincronización normal En la sincronización normal, el flash se dispara al principio del tiempo de obturación (sincronización con la primera cortinilla). Este es el funcionamiento estándar que siguen todas las cámaras. La sincronización normal es apropiada para la mayoría de las tomas con flash. La cámara cambia a la velocidad de sincronización del flash dependiendo del modo de funcionamiento.
709 47 0210.A1 58 AF-2 Canon 29.07.2010 10:22 Uhr Seite 212 Por motivos físicos, sin embargo, mediante la sincronización de alta velocidad se restringe sensiblemente el número guía y por ello el alcance del flash. Tenga en cuenta el indicador de alcance en la pantalla LC del flash.
709 47 0210.A1 58 AF-2 Canon 29.07.2010 10:22 Uhr Seite 213 19.1 Configurar y desactivar el modo remoto BEEP Remote FB Select Set ☛ ☛ M A TTL B TTL+1/3 Set Para CH1 AZoom 28 F32 Sel hasta que en la pantalla apa- Set para confirmar la selección de • Mediante las teclas y seleccionar “Remote Maestro“ para el modo de flash de cámara o maestro, “Remote Slave“ para el modo esclavo o “Remote OFF“ para desactivar el modo remoto. La configuración se activa inmediatamente.
709 47 0210.A1 58 AF-2 Canon 29.07.2010 10:22 Uhr Seite 214 • Guardar la configuración mediante la tecla . Si no se pulsa la tecla los ajustes se guardarán automáticamente después de aproximadamente 5 seg. Procedimiento de ajuste para el grupo esclavo C , • Guardar la configuración mediante la tecla . Si no se pulsa la tecla , los ajustes se guardarán automáticamente después de aproximadamente 5 seg.
709 47 0210.A1 58 AF-2 Canon 29.07.2010 10:22 Uhr Seite 215 • Durante la indicación B M es posible configurar mediante las teclas – y + una potencia de luz parcial desde 1/1 hasta 1/128 para los flashes del grupo esclavo B. Procedimiento de ajuste para el grupo esclavo C • Pulsar la tecla Para hasta que en la pantalla aparezca C o C M (para el grupo esclavo C). • Para activar el grupo esclavo C pulsar la tecla Mode hasta que en la pantalla aparezca C M (para el grupo esclavo C).
Seite 216 19.5 Modo Servo El modo SERVO es un modo esclavo simple en el que el flash esclavo emite siempre un disparo tan pronto como recibe un impulso lumínico. Configuración del modo Servo de flash • Configure para el flash de la cámara un modo de funSelect BEEP cionamiento sin predestello. Remote FB Set Servo Sel hasta que en la pantalla apa- • Pulsar la tecla Set y seleccionar la opción de menú "Servo" mediante las teclas y . El ajuste se aplica de forma inmediata.
709 47 0210.A1 58 AF-2 Canon 29.07.2010 10:22 Uhr Seite 217 20 Mantenimiento y cuidados 21 Ayuda en caso de problemas Retirar la suciedad y el polvo con un paño suave, seco o tratado con silicona. No utilizar detergentes, ya que podrían dañar los elementos de plástico. ☞ Si alguna vez aparecen en la pantalla, por ejemplo, indicaciones sin sen- 20.
709 47 0210.A1 58 AF-2 Canon 29.07.2010 10:22 Uhr Seite 218 En la pantalla aparece un símbolo de aviso sobre la batería • Con este aviso se expresa que hay carga suficiente para efectuar unos pocos disparos del flash. Consulte el capítulo 3.2 "Cambio de baterías". No obstante, también existen baterías en los que el aviso aparece antes, incluso con el 50 % de la carga disponible. En el funcionamiento a distancia inalámbrico, no es posible usar un indicador de consumo de la batería.
709 47 0210.A1 58 AF-2 Canon 29.07.2010 10:22 Uhr Seite 219 El modo de relleno E TTL no se puede ajustar. • No se produce transmisión de datos entre la cámara y el flash. Pulsar el disparador de la cámara. • La cámara no es compatible con el modo de relleno E-TTL. La configuración de la corrección manual de la exposición del flash TTL / E-TTL no tiene ningún efecto. • La cámara no es compatible con la corrección manual de la exposición del flash TTL / E-TTL.
709 47 0210.A1 58 AF-2 Canon 29.07.2010 10:22 Uhr Seite 220 22 Características técnicas Máximo número guía con ISO 100/21°, zoom 105 mm: En metros: 58 En pies: 192 Tipos de funcionamiento del flash: į TTL estándar con predestello de medición, Modo E-TTL / Modo E-TTL II, Modo manual, Modo automático, Modo estroboscópico, Modo remoto inalámbrico, Modo Servo Apertura automática ajustable manualmente a ISO 100/21°: 1 - 1.4 - 2 - 2.8 - 4 - 5.
709 47 0210.A1 58 AF-2 Canon 29.07.2010 10:22 Uhr Seite 221 23 Accesorios especiales Eliminación de las baterías ☞ Metz no asume ninguna garantía por funcionamientos erróneos o daños en el flash, causados al utilizar accesorios de otros fabricantes. • Mecabounce 58-90 (Nº ref. 000058902) Mediante este difusor se consigue, de forma sencilla, una iluminación suave. El efecto es extraordinario dado que las imágenes adquieren un aspecto delicado. El color de la piel de las personas resulta muy natural.
709 47 0210.
709 47 0210.A1 58 AF-2 Canon Teillichtleistung Niveaux de puissance Deelvermogensstappen Partial light output Livello di potenza Potencia parcial (P=Flash Power) P 1/1 P 1/1 -1/3 P 1/1 -2/3 P 1/2 P 1/2 -1/3 P 1/2 -2/3 P 1/4 P 1/4 -1/3 P 1/4 -2/3 P 1/8 P 1/8 -1/3 P 1/8 -2/3 P 1/16 P 1/16 -1/3 P 1/16 -2/3 P 1/32 P 1/32 -1/3 P 1/32 -2/3 P 1/64 P 1/64 -1/3 P 1/64 -2/3 P 1/128 P 1/128 -1/3 P 1/128 -2/3 P 1/256 29.07.
709 47 0210.
709 47 0210.A1 58 AF-2 Canon Batterietyp Type de pile/accu Type voeding Battery type Tipo batterie Tipo de pila 29.07.2010 Blitzfolgezeiten Temps de recyclage Flitsvolgtijden Recycling times Tempi di ricarica Tiempo de secuencia de dest. M A / TTL High Power Alkali-Mangan Alcaline au Mg hautes perf. High Power alkalimangaan High-power 5s alkaline-manganese Alcal. al mangan.
709 47 0210.A1 58 AF-2 Canon Ķ ĸ ń 226 29.07.2010 10:22 Uhr Seite 226 Ihr Metz-Produkt wurde mit hochwertigen Materialien und Komponenten entworfen und hergestellt, die recycelbar sind und wieder verwendet werden können. Dieses Symbol bedeutet, dass elektrische und elektronische Geräte am Ende ihrer Nutzungsdauer vom Hausmüll getrennt entsorgt werden müssen. Bitte entsorgen Sie dieses Gerät bei Ihrer örtlichen kommunalen Sammelstelle oder im Recycling Centre.
709 47 0210.A1 58 AF-2 Canon Hinweis: Ķ Im Rahmen des CE-Zeichens wurde bei der EMV-Prüfung die korrekte Belichtung ausgewertet. SCA-Kontakte nicht berühren ! In Ausnahmefällen kann eine Berührung zur Beschädigung des Gerätes führen. ĸ Remarque: L’exposition correcte a été évaluée lors des essais de CEM dans le cadre de la certification CE. Ne pas toucher les contacts du SCA ! Il paut arriver que le contact avec les doigts provoque la dégradation de l’appareil. 29.07.
58 AF-2 - Klappseite 27.07.
58 AF-2 - Klappseite 27.07.2010 11:36 Uhr Seite 2 Display Werkseinstellung (Reset) Display Mode Para Mode Para Sel Sel Select-Menü (Sonderfunktionen**) ☛ Display 5 sec. Set Display Mode-Menü* Parameter-Menü** Display Display Sel Para — F E-TTL-HSS*/ P-TTL-HSS* A M M-HSS* 1,0 . . . 45 *abhängig vom Kameratyp Suivant le type d’appareil Afhankelijk van het type camera Depending on the camera model Con alcuni tipi di fotocamera Según el tipo de cámara EV -3 . . . .
709 47 0210.A1 58 AF-2 Canon 29.07.2010 10:22 Uhr Seite 228 Metz - Werke GmbH & Co KG • Postfach 1267 • D-90506 Zirndorf • info@metz.de • www.metz.de Consumer electronics Metz - always first class. Photoelectronics Plastics technology 709 47 0210.