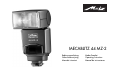
MECABLITZ 44 MZ-2 Bedienungsanleitung Gebruiksaanwijzing Manuale istruzioni Mode d’emploi Operating instruction Manual de instrucciones
1. 2. 3. 3.1 3.2 3.3 3.4 3.5 3.6 3.6.1 3.6.2 3.7 3.8 4. 4.1 4.2 4.3 5. 5.1 5.1.1 5.1.2 5.2 5.2.1 5.3 5.3.1 5.3.2 6. 6.1 6.1.1 6.1.2 6.1.3 6.2 6.2.1 6.2.2 6.3 6.3.1 6.3.2 6.4 2 Ķ Sicherheitshinweise . . . . . . . . . . . . . . . . . . . . . . . . . . . . . . . . . . .3 Übersicht der Blitzfunktionen . . . . . . . . . . . . . . . . . . . . . . . . . . . .4 Tabelle 1: Übersicht der Blitzfunktionen . . . . . . . . . . . . . . . . . . . . .4 mecablitz vorbereiten . . . . . . . . . . . . . . . . . . . . . . . .
Vorwort Vielen Dank, dass Sie sich für ein Metz Produkt entschieden haben. Wir freuen uns, Sie als Kunde begrüßen zu dürfen. Natürlich können Sie es kaum erwarten, das Blitzgerät in Betrieb zu nehmen. Es lohnt sich aber, die Bedienungsanleitung zu lesen, denn nur so lernen Sie, mit dem Gerät problemlos umzugehen. Dieses Blitzgerät ist geeignet für: • alle Kameras mit Blitzschuh und Mittenkontakt. • alle Kameras mit Blitzschuh ohne Mittenkontakt, unter Verwendung eines Synchronkabels (siehe Sonderzubehör).
Tabelle 1: Übersicht der Blitzfunktionen 4 • = Blitzfunktion wird von mecablitz unterstützt. x = Blitzfunktion wird von mecablitz nur unterstützt, wenn die Einstellung dieser Funktion an der Kamera selbst erfolgt. ∆ = nur mit Minolta-Digitalkameras Dimage 5, 7, 7i • x • • • x • • • • • SCA 3002-Adapter SCA 300-Adapter SCA 301 • • • • • • • • • • • • • • • • • • • • • • • • • ∆ TTL-Blitzbetrieb Automatisches TTL-Aufhellblitzen Manuelle TTL-Blitzbelichtungskorrektur Automatik-Blitzbetrieb Man.
3. mecablitz vorbereiten 3.1 Befestigung des mecablitz an der Kamera ☞ Kamera und mecablitz vor der Montage oder Demontage mit dem Hauptschalter ausschalten! Der mecablitz kann nur mit dem Standardfuß 301 oder einem SCA-Adapter aus dem System SCA 300 bzw. SCA 3002 (Sonderzubehör) auf der Kamera befestigt werden. Der mecablitz ist standardmäßig mit dem Standardfuß 301 für einfache Blitzsynchronisation ausgestattet.
Ķ 3.6.2 Batterien austauschen (Bild 1) Die Akkus/Batterien sind leer bzw. verbraucht, wenn die Blitzfolgezeit (Zeit vom Auslösen eines Blitzes mit voller Lichtleistung, z.B. bei M, bis zum erneuten Aufleuchten der Blitzbereitschaftsanzeige) über 60 Sekunden ansteigt. • mecablitz mit dem Hauptschalter ausschalten. • Den Batteriefachdeckel in Pfeilrichtung schieben und aufklappen. • Batterien bzw. Akkus in Längsrichtung entsprechend den angegebenen Batteriesymbolen einsetzen und Batteriedeckel schließen.
Nach ca. 5 s wird das Symbol bzw. der Blitzparameter stetig (ohne Blinken) angezeigt. ☞ Bei Verwendung eines SCA-Adapters aus dem System 3002 und einer Kamera, welche die Daten für die erforderlichen Blitzparameter überträgt, werden diese am mecablitz automatisch eingestellt. Dabei ist es z.B. möglich, dass Blenden- und ISO-Wert nicht angezeigt werden bzw. sich nicht verändern lassen.
Ķ (siehe Kapitel 10.1). Bei einer korrekt belichteten Blitzlichtaufnahme erscheint für ca. 3 s am LC-Display des mecablitz die „o.k.“-Anzeige (siehe Kapitel 9). Der TTL-Blitzbetrieb wird in der Regel von allen Kamerabetriebsarten, z.B. Programm P (Vollprogramm bzw. „grüne Einstellung“), Zeitautomatik („A“ bzw. „Av“), Blendenautomatik („T“, „Tv“ oder „S“), Motiv-Programme (Landschaft, Porträt, Sport usw.), Manuell „M“ usw. unterstützt.
Deaktivierung des „Matrixgesteuerten TTL-Aufhellblitzbetriebs“ am mecablitz: • mecablitz mit dem Hauptschalter einschalten. • Auslöser der Kamera antippen, damit ein Datenaustausch zwischen Blitz und Kamera stattfinden kann. • Taste „Mode“ so oft drücken, bis im LC-Display „TTL“ und blinken. • Während „TTL“ blinkt, Taste „-“ drücken und damit den Aufhellblitzbetrieb deaktivieren. Im Display verlischt dabei das Symbol für diese Betriebsart. • Die Einstellung wird sofort wirksam. Nach ca.
Ķ Dabei ist darauf zu achten, dass die Kameraverschlusszeit gleich oder länger der kürzesten Blitzsynchronzeit (siehe Kamerabedienungsanleitung) der Kamera ist. Beispiel: Ermittelte Blende = 8; Ermittelte Kameraverschlusszeit = 1/60 Sek. Blitzsynchronzeit der Kamera z. B. 1/100 Sek. (siehe Kameraanleitung). Die beiden ermittelten Werte für Blende und Verschlusszeit können an der Kamera eingestellt werden, da die Kameraverschlusszeit länger ist als die Blitzsynchronzeit der Kamera.
☞ Beim Betrieb des mecablitz mit einem Adapter aus dem System SCA 300 bzw. dem Standardfuß 301 müssen die Blitzparameter von Hand am mecablitz eingestellt werden. 6.1 Zoomposition des Blitzreflektors Die Anpassung der Zoomposition des Blitzreflektors kann für Objektivbrennweiten ab 28 mm (Kleinbildformat 24 x 36) erfolgen. Für Objektive mit Brennweiten ab 20 mm kann eine Weitwinkelstreuscheibe (Sonderzubehör, siehe Kapitel 14) verwendet werden.
Ķ position die Aufnahme an den Bildrändern nicht vollständig ausgeleuchtet wird. Wählen Sie in diesem Fall einen kleineren Wert für die Zoomposition des mecablitz. Rückstellung auf Auto-Zoom-Betrieb • Drücken Sie die Vorwahltaste , bis die Anzeige für die Reflektorposition (mm) blinkt. • Während die Anzeige blinkt, die Taste „+“ so oft drücken, bis im Display Auto Zoom angezeigt wird. Dabei muss das Belichtungssystem der Kamera aktiviert sein (dazu z.B.
☞ Der mecablitz muss auf den ISO-Wert eingestellt werden, der an der 6.4.2 Manuelle Blitzbelichtungskorrektur im Automatik-Blitzbetrieb A 6.4 Manuelle Blitzbelichtungskorrektur 6.4.3 Einstellvorgang Kamera eingestellt ist. Beachten Sie dabei die Filmempfindlichkeit ISO des eingelegten Films! Die TTL-Blitzbelichtungsautomatik der meisten Kameras und die AutomatikLichtregelung des mecablitz ist auf einen Reflexionsgrad des Motivs von 25 % (durchschnittlicher Reflexionsgrad von Blitzmotiven) abgestimmt.
Ķ Einstellvorgang • mecablitz mit dem Hauptschalter einschalten. • Vorwahltaste so oft drücken, bis im LC–Display die Anzeige P und die Teillichtleistung blinkt. • Während die Anzeige blinkt, stellen Sie mit den Tasten „+“ und „-“ den Wert für die gewünschte Teillichtleistung (in nebenstehendem Beispiel P 1/8) ein. • Die Einstellung wird sofort wirksam. • Nach ca. 5 s wird die Anzeige für die Teillichtleistung stetig (ohne Blinken) angezeigt.
Einschalten des REAR-Betriebes • Taste Select so oft drücken, bis im LC-Display REAR erscheint. • Taste „+“ so oft drücken, bis im LC-Display On blinkt. • Die Einstellung wird sofort wirksam. Nach ca. 5 s schaltet das LC-Display auf die normale Anzeige zurück. Das Symbol REAR für die Synchronisation auf den zweiten Verschlussvorhang bleibt nach der Einstellung im LC-Display des mecablitz angezeigt! ☞ Verwenden Sie bei langen Verschlusszeiten ein Stativ, um verwackelte Aufnahmen zu vermeiden.
Ķ ☞ Beachten Sie, dass sich durch die breitere Ausleuchtung im ExtendedZoom-Betrieb eine geringere Blitzreichweite ergibt! Ausschalten des Extended-Zoom-Betriebes • Taste Select so oft drücken, bis im LC-Display „Ex“ erscheint. • Taste „-“ so oft drücken, bis im LC-Display “OFF” blinkt. • Die Einstellung wird sofort wirksam. Nach ca. 5 s schaltet das LC-Display auf die normale Anzeige zurück.
nach dem Betriebsstatus. So sind z.B. einige Anzeigen nur während bestimmter manueller Einstellvorgänge möglich (z.B. ISO). ☞ Je nach Kameratyp und SCA-Adapter kann die Anzeige im LC-Display Ihres mecablitz von den in dieser Anleitung abgedruckten Beispielen etwas abweichen. Dies ist keine Fehlfunktion, sondern durch die Anpassungsmöglichkeit an die zahlreichen Kamerasysteme (Hersteller) und Kameratypen unvermeidlich! 10.1 Reichweitenanzeige 10.1.
Ķ 10.1.6 Ausblendung der Reichweitenanzeige Wird der Reflektorkopf aus seiner Normalposition nach oben bzw. unten abgeschwenkt, erfolgt keine Entfernungsanzeige im LC-Display des mecablitz! 10.1.7 Meter - Feet - Umschaltung (m - ft) Die Reichweitenanzeige im LC-Display des mecablitz kann wahlweise in Meter (m) oder Feet (ft) erfolgen. Zum Wechsel der Anzeige verfahren Sie, wie nachfolgend beschrieben: • mecablitz mit dem Hauptschalter ausschalten. • Taste Select gedrückt halten.
12. Blitztechniken 12.1 Indirektes Blitzen Direkt geblitzte Bilder sind nicht selten an ihrer typisch harten und ausgeprägten Schattenbildung zu erkennen. Oft wirkt auch der physikalisch bedingte Lichtabfall vom Vordergrund zum Hintergrund störend. Durch indirektes Blitzen können diese Erscheinungen weitgehend vermieden werden, weil das Objekt und der Hintergrund mit zerstreutem Licht weich und gleichmäßig ausgeleuchtet werden können.
Ķ Bei blitzbereitem mecablitz blinkt der AF-Messblitz. Im Slave-Betrieb erfolgt keine Anzeige für Blende und Entfernung im Display des mecablitz. ☞ Beachten Sie, dass der mecablitz 44 MZ-2 als SLAVE im drahtlosen Metz-Remote-System nur den Remote-Kanal „Ad1“ unterstützt! Nähere Hinweise zum Slave-Betrieb entnehmen Sie der Bedienungsanleitung des Slave-Adapters! 14.2 Deaktivierung des Slave-Betriebes • mecablitz mit dem Hauptschalter ausschalten und Slave-Adapter demontieren.
17. Wartung und Pflege Entfernen Sie Schmutz und Staub mit einem weichen, trockenen oder siliconbehandelten Tuch. Verwenden Sie keine Reinigungsmittel - die Kunststoffteile könnten beschädigt werden. Formieren des Blitz-Kondensators Der im Blitzgerät eingebaute Blitzkondensator erfährt eine physikalische Veränderung, wenn das Gerät längere Zeit nicht eingeschaltet wird. Aus diesem Grund ist es notwendig, das Gerät im vierteljährlichen Abstand für ca. 10 Min. einzuschalten (beachten Sie hierzu 2.4!).
Ķ Batterie-Entsorgung Batterien/Akkus gehören nicht in den Hausmüll! Bitte bedienen Sie sich bei der Rückgabe verbrauchter Batterien/Akkus eines vorhandenen Rücknahmesystems. Bitte geben Sie nur entladene Batterien/Akkus ab. Batterien/Akkus sind in der Regel dann entladen, wenn das damit betriebene Gerät - abschaltet und signalisiert „Batterien leer“ - nach längerem Gebrauch der Batterien nicht mehr einwandfrei funktioniert.
Garantiebestimmungen Ķ Bundesrepublik Deutschland 1. Die Garantiebestimmungen gelten ausschließlich für Käufe in der Bundesrepublik Deutschland ab 01.01.2002. 2. Im Ausland gelten die Gewährleistungsregelungen des jeweiligen Landes bzw. die Garantieregelungen des Verkäufers. 3. Die nachfolgenden Bestimmungen haben nur für den privaten Gebrauch Gültigkeit. 4. Die Garantiezeit - 24 Monate - beginnt mit dem Abschluß des Kaufvertrages bzw.
1. 2. ĸ 3. 3.1 3.2 3.3 3.4 3.5 3.6 3.6.1 3.6.2 3.7 3.8 4. 4.1 4.2 4.3 5. 5.1 5.1.1 5.1.2 5.2 5.2.1 5.3 5.3.1 5.3.2 6. 6.1 6.1.1 6.1.2 6.1.3 6.2 6.2.1 6.2.2 6.3 6.3.1 6.3.2 6.4 24 ĸ Consignes de sécurité . . . . . . . . . . . . . . . . . . . . . . . . . . . . . . . .25 Vue d’ensemble des fonctions du flash . . . . . . . . . . . . . . . . . . . .26 Tableau 1: Vue d’ensemble des fonctions du flash . . . . . . . . . . . . .26 Préparation du mecablitz . . . . . . . . . . . . . . . . . . . . . . . . . . . . .
Avant-propos Nous vous félicitons de l’achat de ce flash et vous remercions de la confiance que vous témoignez aux appareils METZ. Nous savons que vous brûlez d’envie d’essayer votre flash. Prenez tout de même le temps de lire le mode d’emploi. C’est la seule manière de découvrir les potentialités de votre flash et d’apprendre à les utiliser.
• = La fonction est supportée par le mecablitz. x = La fonction n’est supportée par le mecablitz que si le réglage de cette fonction s’effectue sur l’appareil Dimage 5, 7, 7i.
3. Préparation du mecablitz 3.1 Fixation du mecablitz sur l’appareil ☞ Avant le montage et le démontage, couper l’appareil photo et le mecablitz avec l’interrupteur général ! Le mecablitz ne peut être monté sur l’appareil photo que moyennant le sabot standard 301 ou un adaptateur SCA 300 ou SCA 3002 (options). Le mecablitz est équipé en standard du sabot standard 301 pour une simple synchronisation du flash. La vitesse d’obturation doit être plus lente ou au plus égale à la vitesse de synchro-flash.
ĸ • Introduire les piles ou les accus dans le sens de la longueur en vous conformant aux symboles de piles puis refermer le couvercle. ☞ A la mise en place des piles ou accus, respecter la polarité (voir les symboles de piles figurant dans le compartiment des piles).
Suivant le mode sélectionné pour le flash (TTL / A / M) ou l’adaptateur utilisé, il se peut que certains des paramètres de flash mentionnés ne soient pas réglables ou pas accessibles. ☞ Les réglages des différents paramètres de flash sont expliqués au chapitre 6. 4.3 Sélection et réglage des fonctions spéciales La touche Select permet de sélectionner des fonctions spéciales dans chaque mode du flash: L’appui sur la touche Select appelle successivement les fonctions spéciales, par ex.
ĸ Réglages pour le mode TTL • Mettre en marche le mecablitz avec l’interrupteur général. • Répéter l’appui sur la touche Mode jusqu’à ce que TTL clignote sur l’écran ACL. • Le réglage prend effet immédiatement. Après env. 5 s, l’écran ACL retourne à l’affichage normal.
• Tant que “TTL” clignote, appuyer sur la touche “-” pour désactiver le dosage flash/ambiance. Le pictogramme de ce mode disparaît de l’écran ACL. • Le réglage prend effet immédiatement. Après env. 5 s, l’écran ACL retourne à l’affichage normal. 5.2 Mode flash automatique non TTL En mode flash automatique, le senseur incorporé au mecablitz mesure la lumière réfléchie par le sujet et commande l’interruption de l’éclair dès que la quantité de lumière est suffisante pour une exposition correcte.
ĸ Les valeurs d’ouverture et de vitesse ainsi déterminées peuvent être réglées sur l’appareil puisque la vitesse reste en deçà de la vitesse de synchro-flash de l’appareil. Pour obtenir un éclairage d’appoint réduit, par exemple pour conserver le caractère des ombres, il est recommandé de régler sur le flash une valeur de correction manuelle de -1 EV (division de diaphragme) à -1,7 EV (voir chapitre 6.4.3).
6.1 Position de la tête zoom La position de la tête zoom peut être asservie à la distance focale de l’objectif pour des focales à partir de 28 mm (en 24 x 36). Pour les objectifs grandsangulaires entre 20 mm et 28 mm, on pourra utiliser le diffuseur grand-angle (accessoire en option, voir chapitre 14). La tête zoom peut prendre les positions suivantes : 28 mm - 35 mm - 50 mm - 70 mm - 85 mm - 105 mm. 6.1.
☞ Le diaphragme réglé sur le mecablitz doit correspondre à la valeur • Tant que la valeur clignote, répéter l’appui sur la touche “+” jusqu’à ce qu’Auto Zoom s’affiche sur l’écran ACL. Pour ce faire, le système de mesure de l’appareil photo doit être activé (à cet effet, enfoncer par ex. le déclencheur à mi-course), afin qu’un échange de données puisse avoir lieu. • Le réglage est repris immédiatement par le mecablitz. • Après env. 5 s, l’écran ACL retourne à l’affichage normal. 6.
réfléchissants (par ex. contre-jour) peuvent se traduire respectivement par une sous-exposition ou une surexposition. Pour rattraper l’erreur d’exposition mentionnée, l’automatisme d’exposition peut être adapté à la situation de prise de vue en introduisant une valeur de correction manuelle. La valeur de la correction dépend du contraste entre le sujet et le fond ! ☞ Sujet sombre sur fond clair : valeur de correction positive (1 à 2 IL env.).
ĸ Procédure de réglage • Mettre en marche le mecablitz avec l’interrupteur général. • Répéter l’appui sur la touche de présélection jusqu’à ce que P et la puissance partielle clignotent sur l’écran ACL. • Tant que la valeur clignote, les touches “+” et “-” permettent de régler la puissance partielle désirée (dans l’exemple ci-contre P 1/8). • Le réglage prend effet immédiatement. • Après env. 5 s, l’affichage de la puissance partielle cesse de clignoter.
Activation de la fonction REAR • Répéter l’appui sur la touche Select jusqu’à ce que REAR s’affiche sur l’écran ACL. • Répéter l’appui sur la touche “+” jusqu’à ce que “On” clignote sur l’écran ACL. • Le réglage prend effet immédiatement. Après env. 5 s, l’écran ACL retourne à l’affichage normal.
ĸ • Répéter l’appui sur la touche “+” jusqu’à ce que “On” clignote sur l’écran ACL. • Le réglage prend effet immédiatement. Après env. 5 s, l’écran ACL retourne à l’affichage normal.
10. Ecran de contrôle ACL du mecablitz L’écran ACL du mecablitz sert à afficher le mode de fonctionnement du flash, les paramètres du flash (position de la tête zoom, diaphragme, sensibilité ISO), la portée de l’éclair, le niveau de puissance partielle et les fonctions spéciales sélectionnées. Le nombre de symboles affichés dépend entre autres du mode sélectionné, de l’adaptateur SCA et du modèle d’appareil photo mais aussi de l’état de fonctionnement.
10.1.5 Dépassement de la capacité d’affichage de portée Le mecablitz peut afficher une portée maximale de 199 m ou 199 ft. Pour des valeurs élevées de sensibilité ISO (par ex. ISO 6400) et de grandes ouvertures du diaphragme, il peut arriver que la portée maximale affichable soit dépassée. Ceci est signalé par une flèche (triangle) derrière la valeur de portée affichée. ĸ 10.1.
cette situation et utilisent pour l’éclair de mesure l’illuminateur AF intégré (voir le mode d’emploi de l’appareil photo). 12. Techniques de photographie au flash 12.1 Eclairage indirect au flash ☞ La distance d’éclairage minimale est d’environ 10 % de la portée affichée sur l’écran ACL du mecablitz. Or, comme le flash n’affiche pas de portée lorsque le réflecteur est basculé vers le bas, on se basera sur la portée affichée par le mecablitz lorsque le réflecteur se trouve en position normale.
de l’illuminateur AF. En mode esclave, l’écran ACL du mecablitz n’affiche ni valeur d’ouverture ni portée. ☞ Remarque : le mecablitz 44 MZ-2 en SLAVE dans une configuration multiflash Metz ne supporte que le canal de télécommande-”Ad1” ! Pour plus de détails sur le mode esclave, veuillez consulter le mode d’emploi de l’adaptateur esclave ! ĸ 14.2 Désactivation du mode esclave • Couper le mecablitz avec l’interrupteur général et détacher l’adaptateur esclave.
17. Entretien Eliminez la poussière et la saleté au moyen d’un chiffon doux, sec ou siliconé. N’utiliser pas de détergent sous risque d’endommager la matière plastique. Formation du condensateur de flash Si le flash reste longtemps sans être mis sous tension, le condensateur de flash subit une modification physique. Pour éviter ce phénomène, il est nécessaire de mettre le flash en marche pendant 10 minutes env. à intervalles de trois mois environ (voir à ce propos 2.4!).
Elimination des batteries ĸ Ne pas jeter les batteries dans les ordures ménagères. Veuillez rendre vos batteries usées là où elles sont éventuellement reprises dans votre pays. Veillez à ne rendre que des batteries/accus déchargés. En règle générale, les batteries/accus sont déchargés lorsque l’appareil qu’elles alimentaient : - arrête de fonctionner et signale “batteries vides” - ne fonctionne plus très bien au bout d’une longue période d’utilisation des batteries.
ĸ 45
1. 2. ń 3. 3.1 3.2 3.3 3.4 3.5 3.6 3.6.1 3.6.2 3.7 3.8 4. 4.1 4.2 4.3 5. 5.1 5.1.1 5.1.2 5.2 5.2.1 5.3 5.3.1 5.3.2 6. 6.1 6.1.1 6.1.2 6.1.3 6.2 6.2.1 6.2.2 6.3 6.3.1 6.3.2 6.4 46 ń Veiligheidsaanwijzingen . . . . . . . . . . . . . . . . . . . . . . . . . . . . . .47 Overzicht van de flitsfuncties . . . . . . . . . . . . . . . . . . . . . . . . . . .48 Tabel 1: Overzicht van de flitsfuncties . . . . . . . . . . . . . . . . . . . . .48 Voorbereiden van de mecablitz . . . . . . . . . . . . . . . . . . . .
Voorwoord Wij danken u voor uw aankoop van een Metz product. Wij verheugen ons, u als klant te mogen begroeten. Natuurlijk kunt u nauwelijks wachten, de flitser in gebruik te nemen. Het loont echter wel de moeite de gebruiksaanwijzing te lezen want alleen op die manier leert u om zonder problemen met het apparaat om te gaan. Deze flitser is geschikt voor: • alle camera’s met flitsschoen en middencontact.
Tabel 1: Overzicht van de flitsfuncties 48 • = Deze flitsfunctie wordt ondersteund door de mecablitz. x = Deze flitsfunctie wordt door de mecablitz alleen ondersteund als hij op de camera zelf wordt ingesteld. ∆ = Alleen met de digitale Minolta-camera’s Dimage 5, 7, 7i • x • • • x • • • • • SCA 3002-adapter SCA 300-adapter SCA 301 TTL-flitsregeling Automatisch TTL-invulflitsen Met de hand in te stellen corr. op de TTL-flitsbel.
3. Voorbereiden van de mecablitz 3.1 Bevestigen van de mecablitz op de camera ☞ Schakel camera en mecablitz vóór het aanbrengen of afnemen van de camera via hun hoofdschakelaar uit! De mecablitz kan met alleen zijn standaardvoet 301 of een SCA-adapter van het systeem SCA 300, c.q. SCA 3002 (accessoire) op de camera worden bevestigd. De mecablitz is standaard met zijn standaardvoet 301 voor eenvoudige flitssynchronisatie uitgerust.
3.6.2 Batterijen vervangen (Afb. 1) ń De accu’s / batterijen zijn leeg, c.q. verbruikt, als de flitsvolgtijd (= de tijd tussen het ontsteken van een flits met vol vermogen, bijv. bij M tot het opnieuw oplichten van de aanduiding van flitsparaatheid) langer dan 60 seconden gaat duren. • Schakel de mecablitz via zijn hoofdschakelaar uit. • Schuif het deksel van het batterijvak in de richting van de pijl en open het.
Terwijl de aanduiding knippert stelt u met de toetsen “+” en “-” de waarde voor de gewenste parameter in. De instelling wordt onmiddellijk door de mecablitz overgenomen. Na ong. 5 s. wordt het symbool continu (zonder te knipperen) aangegeven. ☞ Bij gebruik van een SCA-adapter van het systeem 3002 en een camera die de gegevens voor de vereiste flitsparameters doorgeeft worden deze parameters automatisch op de mecablitz ingesteld. Daarbij is het bijv.
u de aanduiding in het display in acht (zie paragraaf 10.1). Bij een correct belichte flitsopname verschijnt ong. 3 s. in het LC–display van de mecablitz de “o.k.”-aanduiding (zie hoofdstuk 9). De TTL-flitsregeling wordt in de regel door alle camerafuncties, bijv. Program P (volautomatisch, c.q. “groene instelling”), tijdautomatiek (“A”, c.q. “Av”), diafragma-automatiek (“T”, “Tv” of “S”), de onderwerpsprogramma’s (landschap, portret, sport enz.), manual “M” enz. ondersteund.
• De instelling is onmiddellijk werkzaam. Na ong. 5 s. schakelt het LC-display terug naar de normale weergave. Het deactiveren van de “matrixgestuurde TTL-invulflitsfunctie” op de mecablitz: • Schakel de mecablitz via zijn hoofdschakelaar in. • Tip de ontspanknop op de camera aan, zodat er een uitwisseling van gegevens tussen camera en flitser kan plaatsvinden. • Druk zo vaak op de toets “Mode”, dat in het LC-display “TTL” en knippert.
5.2.1 Invulflits in de automatisch-flitsenfunctie ń Bepaal met de belichtingsmeter van de camera of met een externe belichtingsmeter de benodigde waarden voor diafragma en belichtingstijd voor een normale belichting. Meet, als dat mogelijk is, onderwerp en achtergrond met de belichtingsmeter apart van elkaar. Let er daarbij op, dat de belichtingstijd gelijk of langer moet zijn dan de flitssynchronisatietijd van de camera (zie de gebruiksaanwijzing van de camera).
6. Flitsparameters van de mecablitz Om de mecablitz correct te laten functioneren in het noodzakelijk dat verschillende flitsparameters zoals de zoomstand van de flitsreflector, diafragmawaarde en filmgevoeligheid ISO aan de instellingen op de camera worden aangepast. Bovendien is bij verschillende flitsfuncties de instelling van een, met de hand in te stellen correctie op de flitsbelichting EV, c.q. een met de hand in te stellen deelvermogen P mogelijk.
Voorbeeld: U gebruikt een zoomobjectief met een bereik aan brandpuntsafstanden van 35 tot 105 mm. In dit voorbeeld zet u de zoomreflector in de stand van 35 mm! 6.1.3 Met de hand verstellen van de zoomstand bij Auto Zoom ń De zoomstand van de reflector kan ook bij het werken met de mecablitz met een adapter van het systeem SCA 3002 en een camera die wel de gegevens van de brandpuntsafstand naar de mecablitz doorgeeft, worden veranderd om bepaalde verlichtingseffecten te bereiken (bijv. hot-spot e.d.
6.3 Filmgevoeligheid ISO 6.3.1 Automatische aanpassing aan de ISO-waarde Als de mecablitz met een SCA-adapter van het systeem SCA 3002 is uitgerust en met een camera wordt gebruikt die de gegevens van de ingestelde filmgevoeligheid ISO aan de flitser doorgeeft past de ISO-waarde van de mecablitz zich automatisch aan. ☞ Bij sommige cameratypes wordt de ISO-waarde niet in het LC-display aangegeven, c.q. laat de ISO-waarde zich niet verstellen (zie de gebruiksaanwijzing van de SCA-adapter). 6.3.
6.4.3 Het instellen • Op de mecablitz de TTL-flitsfunctie, c.q. de automatisch-flitsenfunctie A instellen. • Druk zo vaak op de voorkeuzetoets van de mecablitz, dat in het display EV en de correctiewaarde (in plaats van de diafragmawaarde) knipperend verschijnen. • Stel, terwijl de betreffende aanduidingen knipperen met de toetsen “+” en “-” de gewenste correctiewaarde in (in het voorbeeld correctiewaarde = -0,7 stop). • De instelling is onmiddellijk werkzaam. • Na ong. 5 s.
• De instelling is onmiddellijk werkzaam. Na ong. 5 s. schakelt het LC-display terug naar de normale weergave. 7.2 Flitssynchronisatie 7.2.1 Normale synchronisatie (Afb. 6) ☞ Met SCA-adapter en standaardvoet 301 mogelijk. Bij de normale synchronisatie wordt de mecablitz ontstoken op het moment dat de sluiter het filmvlakje geheel vrijgegeven heeft (synchronisatie zodra de sluiter geheel open staat). Deze normale synchronisatie is de standaardfunctie en wordt door elke camera uitgevoerd.
worden door de camera langere belichtingstijden dan de flitssynchronisatietijd ingesteld. Bij sommige camera’s wordt deze synchronisatie bij lange belichtingstijden in bepaalde onderwerpsprogramma’s (bijv. het nachtopname-progamma) automatisch geactiveerd (zie de gebruiksaanwijzing van de camera). Op de mecablitz hoeft niets te worden ingesteld en er vindt voor deze functie ook geen aanduiding plaats.
9. Aanduiding van de belichtingscontrole 10. LC-display van de mecablitz De aanduiding van de belichtingscontrole “o.k.” wordt gedurende ong. 3 s. in het display aangegeven als de opname in de TTL-flitsfunctie of in de automatisch-flitsenfunctie A correct belicht wordt / werd. Daarbij wordt tegelijkertijd automatisch de verlichting van het LC-display geactiveerd.
10.1.2 Met de hand aanpassen van de aanduiding van de flitsreikwijdte Als de mecablitz met een SCA-adapter van het systeem SCA 300 of de standaardvoet 301 of er met een camera wordt gewerkt die de gegevens van de flitsparameters niet doorgeeft, dan moeten voor een betrouwbare opgave van de reikwijdte de flitsparameter of flitsparameters voor zoomstand, filmgevoeligheid ISO en de diafragmawaarde met de hand op de mecablitz worden ingesteld (zie hoofdstuk 6). 10.1.
belicht, dan wordt gedurende de “o.k.” aanduiding de LC-displayverlichting automatisch geactiveerd. ☞ Bij de eerste bediening van de bovengenoemde toetsen vinden er geen veranderingen van de instellingen op de mecablitz plaats! Als de fotograaf met de hand, of de camera zelfstandig een decentrale AF-sensor kiest, wordt de schijnwerper van de AF-meetflits van de mecablitz niet geactiveerd.
Bij opnamen in het dichtbijbereik moet u er op letten, dat bepaalde minimumafstanden moeten worden aangehouden om te ruime belichting te vermijden. ☞ De minimale verlichtingsafstand bedraagt ong. 10 % van het LC-display aangegeven de maximale flitsreikwijdte. Daar er bij het naar beneden zwenken gaan aanduiding voor de reikwijdte in het: LC-display wordt aangegeven moet u zich orienteren op de reikwijdte die de mecablitz aangeeft als de reflector zich in de normal positie bevindt. 13.
15. Bijzondere accessoires ☞ Voor verkeerd functioneren en/of schade aan de mecablitz, veroorzaakt door het gebruik van accessoires van andere fabrikanten nemen wij geen garantie! • SCA-adapters van het systeem SCA 300 voor flitsen met systeemcamera’s. • SCA-adapters van het systeem SCA 3002 voor flitsen met systeemcamera’s met digitale overdracht van de gegevens van de SCA-functies. Meer uitgebreide functies ten opzichte van het SCA 300-systeem. • Slave-adapter SCA 3083 digital (Bestelnr.
18. Technische gegevens Max. richtgetal bij ISO 100 / 21°; zoom 105 mm: In meters: 44 In feet: 144 Flitsfuncties: • TTL • Automatisch-flitsen (12 automatiekdiafragma’s bij ISO 100 / 21°): 1 - 1,4 - 2 - 2,8 - 4 - 5,6 - 8 - 11 - 16 - 22 - 32 - 45 • Met de hand (8 deelvermogens) Fotosensor-meethoek: Ong. 25° ń Flitsduur: ong. 1/200 s. ... 1/20.000 s. bij TTL-flitsregeling Bij de functie van met de hand instellen M: • bij 1/1 (vol) vermogen ong. 1/200 s. • bij 1/2 vermogen ong. 1/600 s.
Afvoeren van de batterijen Batterijen horen niet bij het huisvuil. S.v.p. de batterijen bij een daarvoor bestemd inzamelpunt afgeven. S.v.p. alleen ontladen batterijen / accu’s afgeven. Batterijen / accu’s zijn in de regel ontladen wanneer het daarvoor gebruikte apparaat - uitschakelt en aangeeft „batterijen leeg“ - de batterijen na langer gebruik niet meer goed functioneren. Om kortsluiting te voorkomen, moeten de batterijpolen met plakband worden afgeplakt.
1. 2. ķ 3. 3.1 3.2 3.3 3.4 3.5 3.6 3.6.1 3.6.2 3.7 3.8 4. 4.1 4.2 4.3 5. 5.1 5.1.1 5.1.2 5.2 5.2.1 5.3 5.3.1 5.3.2 6. 6.1 6.1.1 6.1.2 6.1.3 6.2 6.2.1 6.2.2 6.3 6.3.1 6.3.2 6.4 68 ķ Safety instructions . . . . . . . . . . . . . . . . . . . . . . . . . . . . . . . . . . .69 Overview of the flash functions . . . . . . . . . . . . . . . . . . . . . . . . .70 Table 1: Overview of the flash functions . . . . . . . . . . . . . . . . . . .70 Preparing the mecablitz for use . . . . . . . . . . . . . . . . . . .
Foreword We congratulate you on purchasing this flash unit and thank you for your confidence in Metz products. It is only natural that you should want to use your flash unit right away. However, we recommend that you study these Operating Instructions beforehand to be able to fully exploit and utilize all the capabilities offered. This flash unit is compatible with: • all cameras featuring a hot shoe contact.
Table 1: Overview of the flash functions 70 • = Flash function is supported by the mecablitz. x = Flash function in only supported by the mecablitz if this function is set on the camera. ∆ = Only with Minolta digital cameras Dimage 5, 7, 7i • x • • • x • • • • • SCA 3002-Adapter SCA 300-Adapter SCA 301 • • • • • • • • • • • • • • • • • • • • • • • • • ∆ TTL flash mode Automatic TTL fill-in flash Manual TTL flash exposure correction Auto flash mode Man. flash exposure corr.
3. Preparing the mecablitz for use 3.1 Attaching the mecablitz to the camera ☞ Before mounting or removing the flash unit, switch off both the camera and the mecablitz by their main switch. The mecablitz can only be mounted on the camera with the standard foot 301 or an adapter of the SCA 300/SCA 3002 system (optional extra). As standard, the mecablitz is fitted with the SCA 301 foot for simple flash synchronisation. The shutter speed must be the same or slower than the flash sync speed.
• Insert the batteries lengthwise in conformity with the indicated battery symbols and close the battery compartment cover. ☞ When loading batteries ensure correct polarity as indicated by the symbols in the battery compartment. Mixed up battery poles may destroy the flash unit. Replace all batteries at a time and make sure that the batteries are of the same brand and type and have the same capacity.
☞ The settings for the individual flash parameters are explained in Chapter 6. 4.3 Selecting and setting special functions Additional special functions can be selected in each flash mode with the Select key. Continue depressing the Select key to set, for example, Auto-OFF (automatic switch-off), Extended Zoom Ex or other special functions (such as REAR, 2nd curtain synchronisation), depending on the SCA adapter or camera system.
5.1.1 Automatic fill-in flash in daylight (Fig. 4 and 5) Most camera models automatically activate the fill-in flash mode in daylight when in Full Auto Mode, Program P, “Green Square”, or the picture modes (see operating instructions for the given camera). Fill-in flash overcomes troublesome dense shadows and produces a more balanced exposure between subject and background with contre-jour shots.
☞ Some cameras will not support the mecablitz in automatic flash mode 5.2.1 Fill-in flash in automatic mode Set the aperture priority mode (“A” or “Av”) or the manual mode “M” on the camera. Then select a suitable aperture and shutter speed (for mode “M”) for the existing shooting situation (see operating instructions for the camera).
match the given photographic situation (see the camera’s operating instructions). Setting procedure for the manual flash mode M • Switch on the mecablitz by its main switch. • Depress the Mode key repeatedly until M and the manual partial light output level P (1/1 for full light output in our example) flash on the LC display. • The setting becomes immediately effective. The LC display returns to its normal state after approx. 5 sec.
• Use the “+” and “-” keys to set the required position of the zoom reflector while the display is flashing. The setting is immediately taken over by the mecablitz. • After approx. 5 sec. the LC display switches back to its normal state. • The choice of the zoom reflector position depends on the focal length of the camera lens (35 mm format). The zoom reflector should be set to the focal length of the lens in use or the next smaller value.
6.3 ISO film speed 6.3.1 Automatic adaptation of the ISO film speed If the mecablitz is equipped with an adapter of the SCA 3002 system, and is used in conjunction with a camera that is capable of transmitting ISO film speed data to the flash unit, then the ISO speed on the mecablitz will automatically be adapted accordingly. ☞ With some camera models the ISO speed will not be indicated on the mecablitz LC display or the ISO value cannot be changed (see operating instructions for the given SCA adapter). 6.
• The display changes after approx. 5 sec.: The displayed correction value is replaced by the aperture. EV will flash on the display to indicate that a correct value has been set. 6.4.4 Cancelling the correction value • Continue depressing the preselect key on the mecablitz until EV and the correction value (instead of the f-stop) flash on the display. • While the corresponding displays are flashing set the 0.0 correction value with the “+” and “-” keys. • The setting becomes immediately effective.
7.2.2 2nd curtain synchronisation (REAR mode) (Fig. 7) ☞ Only possible with a suitable SCA adapter and a suitable camera! Various cameras offer the facility of second-curtain synchronisation (REAR mode) triggering the mecablitz by the end of the exposure time. Second-curtain synchronisation is particularly advantageous when using slow shutter speeds (slower than 1/30 s) or when shooting moving objects that have their own source of light.
The extended zoom mode is only possible in the “Auto Zoom” mode with a focal length setting as of 35 mm (35 mm format). Since the start position of the zoom reflector is 28 mm, a focal length of less than 35 mm will cause “28” mm to flash on the LC display, thereby warning the user that the required 24 mm reflector position for extended zoom mode cannot be set.
☞ If the mecablitz is equipped with a suitable SCA adapter, a correct exposure confirmation signal will, depending on the camera type, automatically be transmitted to the camera for indication in the camera’s viewfinder (please refer to the operating instructions for the SCA adapter and the camera). 10.
Example: In our example on the left the main subject should be at a distance of 6.2 m from the mecablitz. 10.1.5 Exceeding the capacity of maximum flash range indication The mecablitz can indicate a maximum range of 199 m or 199 ft. In the event of high ISO values (e.g. ISO 6400) and large aperture openings the display range may be exceeded. This will be signalled by an arrow or triangle after the indicated flash range. 10.1.
12. Flash techniques 12.1 Bounce flash ķ Photos shot with full frontal flash are easily recognized by their harsh, dense shadows. This is often associated with a sharp drop in light from the foreground to the background. This phenomenon can be avoided with bounce flash because the diffused light will produce a soft and uniform rendition of both the subject and the background. For this situation the reflector is turned in such a manner that the flash is bounced off a suitable reflection surface (e.g.
slave mode, the mecablitz LC display will neither indicate the aperture nor the distance. ☞ Please note that the mecablitz 44 MZ-2 as SLAVE will only support the remote channel “Ad1” in the cordless Metz-Remote-System. For more details about the slave mode please refer to the operating instructions for the slave adapter. 14.2 Deactivating the slave mode • Switch off the mecablitz by its main switch and remove the slave adapter. • Equip the mecablitz with the SCA adapter or the standard foot 301.
16. Troubleshooting 18. Technical data Should the LC display indicate meaningless information or should the flash unit not work properly in the individual modes, then switch off the mecablitz for about 10 seconds by its main switch. Check the camera settings and find out if the flash unit’s foot is correctly mounted in the camera’s accessory shoe. The mecablitz must operate properly when it is switched on again. Contact your local dealer should this not be the case. Max.
Number of flashes: approx. 85 with NiCad batteries (600 mAh) approx. 205 with NiMH batteries (1600 mAh) approx. 240 with high-capacity alkaline manganese batteries approx. 370 with lithium batteries (at full light output) Disposal of batteries Recycling time: approx. 4 s with NiCad batteries approx. 4 s with NiMH batteries approx. 5 s with high-capacity alkaline manganese batteries approx.
1. 2. 3. 3.1 3.2 3.3 3.4 3.5 3.6 3.6.1 3.6.2 3.7 3.8 4. 4.1 4.2 4.3 5. 5.1 5.1.1 5.1.2 ƴ 5.2 5.2.1 5.3 5.3.1 5.3.2 6. 6.1 6.1.1 6.1.2 6.1.3 6.2 6.2.1 6.2.2 6.3 6.3.1 6.3.2 6.4 88 ƴ Per la vostra sicurezza . . . . . . . . . . . . . . . . . . . . . . . . . . . . . . .89 Panoramica delle funzioni del flash . . . . . . . . . . . . . . . . . . . . . .90 Tabella 1: Panoramica delle funzioni del flash . . . . . . . . . . . . . . .90 Preparazione del mecablitz . . . . . . . . . . . . . . . . . . . . . . . . . .
Premessa Vi ringraziamo vivamente per aver acquistato un prodotto Metz e siamo lieti di poterVi accogliere come nostri Clienti. Comprendiamo il vostro desiderio di provare subito il nuovo lampeggiatore. Prima di utilizzarlo, Vi consigliamo tuttavia di leggere con attenzione queste istruzioni: sarà ben speso il tempo che trascorrerete ad approfondire questo manuale. Esso vi metterà infatti nelle condizioni di utilizzare il flash correttamente e senza problemi e di sfruttarne appieno l’enorme potenziale.
ƴ 90 • = Funzione supportata dal mecablitz. x = La funzione viene supportata dal mecablitz solo se questa funzione viene impostata dalla camera stessa. ∆ = Solo con camere digitali Minolta Dimage 5, 7, 7i Tabella 1: Panoramica delle funzioni del flash • x • • • x • • • • • Adattatore SCA 3002 Adattatore SCA 300 SCA 301 • • • • • • • • • • • • • • • • • • • • • • • • • ∆ Modo flash TTL Lampo di schiarita automatico TTL Compensazione man.
3. Preparazione del mecablitz 3.1 Fissaggio del mecablitz alla camera ☞ Spegnete la camera e il mecablitz prima del montaggio o dello smontaggio con l’interruttore principale! Il mecablitz può essere fissato sulla camera solo con la base standard 301 oppure con un adattatore SCA 300 o SCA 3002 (accessori opzionali). Il mecablitz è dotato di serie della base standard 301 per la semplice sincronizzazione del flash.
☞ Se prevedete di non utilizzare il mecablitz per lungo tempo, togliete le batterie dall’apparecchio. 3.6.2 Sostituzione delle batterie (Fig. 1) Le batterie sono vuote o esaurite, quanto il tempo di ricarica (tempo che intercorre dall’emissione del lampo a piena potenza, ad es. con M, fino alla successiva accensione della spia di carica del flash) supera i 60 secondi. • Spegnete il mecablitz con l’interruttore principale. • Spingete il coperchio vano batterie in direzione della freccia e apritelo.
L’impostazione viene ripresa immediatamente dal mecablitz. Dopo ca. 5 s il simbolo o il parametro flash rimane visualizzato senza lampeggiare. ☞ Impiegando un adattatore del sistema SCA 3002 e una camera che trasmette i dati per i parametri flash, questi dati vengono impostati automaticamente sul mecablitz. In questo caso è possibile, per esempio, che il valore dell’apertura del diaframma e il valore ISO non vengano visualizzati o che non possano essere modificati.
capitolo 10.1). Se l’esposizione è corretta sul display LC del mecablitz compare per circa 3 s l’indicazione “o.k.” (vedi capitolo 9). Il Modo flash TTL viene supportato generalmente da tutti i modi della camera, ad es. dal programma P (programma completamente automatico o “impostazione verde”), dall’Automatismo dei tempi (“A” o “Av”), dall’Automatismo del diaframma (“T”, “Tv” o “S”), dai Programmi scene (paesaggio, ritratto, sport ecc.), dal Modo Manuale “M” ecc.
• Mentre “TTL” lampeggia, premete il tasto “+” e attivate il modo lampo di schiarita. Sul display compare il simbolo di questo modo . • L’impostazione ha effetto immediato. Dopo ca. 5 s sul display LC ritorna l’indicazione normale. Disattivazione del “Modo lampo di schiarita TTL con controllo a matrice” sul mecablitz: • Accendete il mecablitz con l’interruttore principale. • Premete leggermente il pulsante di scatto della camera, in modo che tra il flash e la camera possa aver luogo uno scambio di dati.
5.2.1 Lampi di schiarita nel modo automatico Stabilite con l’esposimetro della camera o con un esposimetro manuale esterno l’apertura del diaframma e il tempo d’otturazione necessari per una normale esposizione. Se possibile, misurate lo sfondo separatamente dal motivo con l’esposimetro. Accertatevi che il tempo d’otturazione della camera sia lo stesso o sia più lungo del tempo sincro-flash della camera (vedi istruzioni per l’uso della camera).
Con determinati modi di funzionamento, inoltre, è possibile impostare manualmente la compensazione dell’esposizione flash EV o la potenza ridotta P. Impiegando il mecablitz con un adattatore del sistema SCA 3002 si possono trasmettere automaticamente (dalla camera al mecablitz) ed impostare diversi parametri flash, come la posizione zoom, il diaframma e l’ISO. Per far ciò la camera deve supportare uno scambio di dati digitale con l’adattatore SCA o il mecablitz.
Dopo aver effettuato la memorizzazione, sul display compare M.Zoom accanto alla posizione zoom (mm). Se la posizione zoom continua a lampeggiare sul display dopo la memorizzazione automatica significa che con la posizione zoom selezionata la ripresa non può essere illuminata completamente sui bordi. Selezionate in questo caso un valore più piccolo per la posizione zoom del mecablitz.
☞ Sul mecablitz deve essere impostato lo stesso valore ISO della camera. Osservate il valore ISO della pellicola inserita! 6.4 Compensazione manuale dell’esposizione flash I sistemi di esposizione automatica flash TTL della maggior parte delle camere e la regolazione automatica della luce del mecablitz sono regolati per un fattore di riflessione del motivo pari al 25 % (il fattore medio di riflessione per i soggetti ripresi con flash).
• Dopo ca. 5 s l’indicazione cambia: al posto del valore di compensazione viene visualizzata nuovamente l’apertura del diaframma. Sul display non compare più il segnale di avvertimento per il valore di compensazione EV. 6.5 Impostazione di una potenza manuale ridotta In questa modalità, il flash emette sempre un lampo non dosato con potenza parziale. L’adattamento alla situazione di ripresa va effettuato selezionando una potenza ridotta e regolando il diaframma sulla camera.
si avrà così l’effetto di una riproduzione “naturale” della situazione di ripresa con fonte di luce in movimento! In funzione del modo d’esercizio e dell’adattatore SCA, la camera comanda tempi di otturazione più lunghi del suo tempo sincro. ☞ Con determinati tipi di camere la funzione REAR deve essere attivata sulla camera stessa. Un’impostazione sul mecablitz non è in questo caso possibile o non ha alcun effetto.
☞ Le riprese con focali dell’obiettivo che vanno da 28 mm a 35 mm ven- ☞ Se il mecablitz è dotato di un adattatore SCA adeguato, lo stato di gono illuminate correttamente dal mecablitz anche nel modo zoom esteso! Accensione del modo zoom esteso • Premete il tasto Select finché sul display LC non compare “Ex”. • Premete il tasto “+” finché sul display non comincia a lampeggiare “On”. • L’impostazione ha effetto immediato. Dopo ca. 5 s sul display LC ritorna l’indicazione normale.
zione “o.k.” non compare in questi casi dopo avere premuto il pulsante di scatto della camera. Ripetete la ripresa con il valore di apertura del diaframma successivo inferiore ( ad es. selezionate al posto del valore 11 il valore 8). ☞ Se il mecablitz è dotato di un adattatore SCA adeguato, in funzione del tipo di camera, viene trasmesso automaticamente alla camera un segnale per il controllo dell’esposizione.
alle diverse situazioni di ripresa può essere raggiunto modificando l’apertura del diaframma dell’obiettivo e scegliendo tra una potenza piena e una potenza ridotta “P” (vedi capitolo 5.2.1). Esempio: Nell’esempio a fianco il motivo principale dovrebbe trovarsi ad una distanza di 6,2 m dal mecablitz. 10.1.5 Superamento del campo d’utilizzo indicato Il mecablitz può visualizzare campi d’utilizzo massimi di 199 m o 199 ft. Con valori ISO elevati (ad es.
☞ Alcune camere dispongono di diversi sensori AF nel mirino della camera. Il lampeggiatore AF del mecablitz supporta solo il sensore AF centrale della camera. Nelle camere con diversi sensori AF, vi consigliamo di attivare soltanto il campo di misurazione centrale della camera (vedi istruzioni per l’uso della camera). Se viene selezionato un sensore AF decentrato dal fotografo o automaticamente dalla camera, la parabola per l’illuminatore AF del mecabliltz non viene attivata.
14. Modo asservito (slave) nel controllo Metz a distanza senza cavi Il mecablitz supporta il modo asservito (slave) nel controllo Metz a distanza senza cavi. Il mecablitz deve essere in questo caso dotato di un adattatore slave SCA 3083 digital o SCA 3082 (accessori opzionali vedi capitolo 14.2). Il lampeggiatore Controller (solo mecablitz 40 MZ-..., 50 MZ-5, 54 MZ-3, 70 MZ-...) controlla sulla camera senza cavi l’emissione della luce dello/degli slave nel modo TTL o Automatico A. 14.
• Mecabounce 44-90 (art. N° 000044900) Questo diffusore permette di realizzare con estrema semplicità un’illuminazione tenue. L’effetto che se ne ricava è straordinario poiché crea un’immagine morbida.Il colore della pelle del viso risulta molto naturale. I valori di portata limite si riducono della metà in funzione della perdita di luce. • Schermo riflettente 54-23 (art. N° 000054236) riflette una luce diffusa per ammorbidire le ombre. 16.
Numero lampi: ca. 85 con batterie NiCd (600 mAh) ca. 205 con batterie al nichel metallidruro (1600 mAh) ca. 240 con batterie alcaline al manganese di elevata capacità ca. 370 con batterie lithium di elevata capacità (rispettivamente a piena potenza) Tempo di ricarica: ca. 4 s con batterie NiCd ca. 4 s con batterie al nichel metallidruro ca. 5 s con batterie alcaline al manganese di elevata capacità ca.
ƴ 109
1. 2. į 3. 3.1 3.2 3.3 3.4 3.5 3.6 3.6.1 3.6.2 3.7 3.8 4. 4.1 4.2 4.3 5. 5.1 5.1.1 5.1.2 5.2 5.2.1 5.3 5.3.1 5.3.2 6. 6.1 6.1.1 6.1.2 6.1.3 6.2 6.2.1 6.2.2 6.3 6.3.1 6.3.2 6.4 110 į Indicaciones de seguridad . . . . . . . . . . . . . . . . . . . . . . . . . . .111 Resumen de las funciones del flash . . . . . . . . . . . . . . . . . . . . .112 Tabla 1: Resumen de las funciones del flash . . . . . . . . . . . . . . .113 Preparación del mecablitz . . . . . . . . . . . . . . . . . . . . . . . . . . .
Preámbulo Le agradecemos que se haya decidido por un producto de Metz y nos complace saludarle como usuario de nuestra marca. Seguramente deseará conectarlo cuanto antes, pero le recomendamos leer estas instrucciones para que su flash funcione correctamente. Este flash es apropiado para: • todas las cámaras con pie estándar y contacto central. • todas las cámaras con pie estándar sin contacto central, pero utilizando un cable sincro (vea Accesorios especiales). • todas las cámaras del sistema.
į Tabla 1: Resumen de las funciones del flash 112 • = Función del flash soportada por el mecablitz. x = Función del flash solamente soportada por el mecablitz cuando el ajuste de esa función se realiza en la propia cámara. ∆ = Solamente con cámaras digitales Minolta Dimage 5, 7, 7i • x • • • x • • • • • SCA 3002-Adaptador SCA 300-Adaptador SCA 301 • • • • • • • • • • • • • • • • • • • • • • • • • ∆ Funcionamiento TTL del flash Destellos de aclaración TTL automáticos Corrección manual de la expos.
3. Preparación del mecablitz 3.1 Fijación del mecablitz en la cámara ☞ ¡Antes del montaje o desmontaje, desconectar la cámara y el mecablitz, mediante el interruptor principal! El mecablitz solamente se puede fijar en la cámara, mediante el pie standard 301 o un adaptador SCA del Sistema SCA 300 o SCA 3002 (accesorio opcional). El mecablitz viene equipado de fábrica con el pie standard 301, para una fácil sincronización del flash.
3.6.2 Recambio de las pilas (Grabado 1) Se considera que las pilas o acumuladores están descargados o usados, cuando el intervalo entre destellos (tiempo desde el disparo de un destello, con plena potencia luminosa, por ej. en modo M, hasta que se ilumina de nuevo la indicación de disposición de disparo), sobrepasa los 60 segundos. • Desconectar el mecablitz mediante el interruptor principal. • Deslizar la tapa del compartimento de las pilas en el sentido de la flecha y abrir.
Mientras que la indicación parpadea, ajustar con las teclas “+” y “-” el valor para el respectivo parámetro del flash. El mecablitz asume inmediatamente el ajuste. Después de aprox. 5 seg., el símbolo o el parámetro del flash se visualiza permanentemente (sin parpadear). ☞ Cuando se utiliza un adaptador SCA del Sistema 3002 y una cámara que transmite los datos para los parámetros necesarios del flash, se ajustan automáticamente en el mecablitz. Sin embargo, por ej.
objetivos zoom, extensiones en primeros planos, etc.), son tenidos en cuenta automáticamente en la regulación de la luz del flash. No es necesario pues, preocuparse por el ajuste del flash, ya que la electrónica de la cámara se ocupa automáticamente de la dosificación correcta de la luz del flash. Para el alcance de la luz del flash, observar el correspondiente indicador en el display LC del mecablitz (ver capítulo 10.1). Cuando hay una toma por luz de flash, correctamente expuesta, aparece durante aprox.
cámara y las del adaptador SCA). En este caso, el ajuste y la indicación no es posible en el mecablitz. Proceso de ajuste para el “Funcionamiento de aclaración TTL, por control matricial” en el mecablitz: • Conectar el mecablitz mediante el interruptor principal. • Pulsar el disparador de la cámara, con lo que puede tener lugar un intercambio de datos entre el flash y la cámara. • Pulsar repetidamente la tecla “Mode”, hasta que en el display LC parpadee “TTL”.
• Conectar el mecablitz mediante el interruptor principal. • Pulsar repetidamente la tecla “Mode”, hasta que en el display parpadee A. • El ajuste es efectivo inmediatamente. Después de aprox. 5 seg., el display LC conmuta de nuevo a las indicaciones normales. ☞ El sujeto debe encontrarse en el ámbito entre aprox. el 40 % y el 70 % del máximo valor para la distancia, indicada en el display LC (ver capítulo 10.1). Con ello, se da a la electrónica el margen suficiente para la adaptación.
5.3.1 Funcionamiento manual del flash M con plena potencia luminosa 6.1 Posición zoom del reflector del flash En este modo de funcionamiento, el flash libera siempre un destello no regulado, con plena potencia luminosa (P 1/1). La adaptación a la situación de la toma, se lleva acabo mediante el ajuste del diafragma en la cámara. En el display LC del mecablitz se indica la distancia del flash al sujeto, que hay que mantener para una correcta exposición del flash (ver también el capítulo 10.1).
• La selección de la posición del reflector zoom está en función de la distancia focal del objetivo empleada (correspondiente al pequeño formato 24 x 36). La posición zoom del reflector debe corresponder a la distancia focal del objetivo o al inmediato valor inferior. Cuando se utiliza un objetivo zoom y no es siempre imprescindible el pleno número - guía y alcance del mecablitz, se puede dejar la posición del reflector zoom en la distancia focal más pequeña del objetivo zoom.
6.3 Sensibilidad ISO de la película 6.3.1 Adaptación automática del valor ISO Cuando el mecablitz está equipado con un adaptador SCA del Sistema SCA 3002 y funciona con una cámara que comunica al flash los datos de la sensibilidad ISO de la película, se adapta automáticamente el valor ISO en el mecablitz. ☞ Con algunos tipos de cámara, el valor ISO no se visualiza en el display del mecablitz o no se puede reajustar el valor ISO (ver las instrucciones de empleo del adaptador SCA). 6.3.
6.4.3 Proceso de ajuste • Ajustar en el mecablitz el funcionamiento TTL o el funcionamiento automático A. • Pulsar en el mecablitz repetidamente la tecla de preselección , hasta que en el display parpadee EV y el valor de corrección (en lugar del valor del diafragma). • Mientras que parpadean las correspondientes indicaciones, ajustar mediante las teclas “+” y “-” el valor de corrección que se desee (en el ejemplo, valor de corrección = -0,7 valor de diafragma). • El ajuste es efectivo inmediatamente.
• El ajuste es efectivo inmediatamente. Después de aprox. 5 seg., el display LC conmuta de nuevo a las indicaciones normales. 7.2 Sincronización del flash 7.2.1 Sincronización normal (Grabado 6) ☞ Posible con el adaptador SCA y el pie standard 301. En la sincronización normal, el mecablitz se dispara al comienzo del tiempo de obturación, (sincronización a la 1ª cortinilla). La sincronización normal es el modo de funcionamiento estándar y se lleva a cabo en todas las cámaras.
7.2.3 Sincronización de velocidad lenta / SLOW Algunas cámaras, en determinados modos de funcionamiento, ofrecen la posibilidad del modo flash con sincronización de velocidad lenta. Con este modo de funcionamiento se puede resaltar fuertemente el fondo de la imagen con reducida luminosidad ambiente. Esto se consigue mediante velocidades de obturación en la cámara, adaptadas a la luz ambiente.
8. Indicación de disposición de disparo Cuando el condensador del flash está cargado, luce en el mecablitz la indicación de que está dispuesto para disparar , lo cual significa que en la siguiente toma se puede hacer uso de la luz del flash. Si se hace una toma antes de que aparezca la indicación de disposición de disparo, entonces el flash no dispara y la toma puede salir con una exposición no adecuada.
10.1 Indicación del alcance 10.1.1 Adaptación automática del alcance ☞ Para una adaptación automática del alcance, el mecablitz debe estar equipado con un adaptador del sistema SCA 3002. Adicionalmente, la cámara debe transmitir los parámetros del flash necesarios (ver abajo) al adaptador SCA o al mecablitz (ver aquí las instrucciones de empleo del adaptador SCA y de la cámara)! Entre la cámara y el mecablitz tiene que tener lugar un intercambio de datos (por ej.
10.1.7 Conmutación de metros a pies (m - ft) La indicación del alcance en el display LC del mecablitz se puede realizar, a elección, en metros (m) o en pies (ft). Para conmutar el indicador, proceder como se describe a continuación: • Desconectar el mecablitz mediante el interruptor principal. • Mantener pulsada la tecla Select. • Conectar el mecablitz mediante el interruptor principal. • Soltar la tecla Select. • La indicación cambia. Ahora solamente se visualizan ft (respect. m).
12. Técnicas de destello 12.1 Destellos indirectos Las imágenes tomadas con destellos directos se reconocen, generalmente, por la típica formación de sombras marcadamente pronunciadas. Con frecuencia, también es molesta la gran diferencia de intensidad luminosa entre el primer plano y el fondo, debido a las leyes de la física. Gracias a la iluminación indirecta, es posible evitar, en gran manera, estos fenómenos, ya que el sujeto y el fondo se pueden iluminar de una forma suave y uniforme con luz difusa.
14.1 Activación del funcionamiento esclavo en el sistema MetzRemote sin cables • Desconectar el mecablitz mediante el interruptor principal. • Equipar el mecablitz con un adaptador esclavo SCA 3083 digital o SCA 3082. • Conectar el mecablitz. En el mecablitz se activa automáticamente el modo de funcionamiento del flash TTL. En el display se visualiza SL y el canal remoto Ad1. El reflector del mecablitz se lleva automáticamente a la posición 28 mm.
• Difusor Mecabounce 44-90 (código 000044900) Con este difusor se consigue, de manera sencilla, una iluminación suave. El efecto es extraordinario, dado que las imágenes logran un aspecto delicado. El color de la piel de las personas se representa de forma muy natural. Los alcances límite se reducen aprox. a la mitad, según la pérdida de luz. • Paraguas de reflexión 54-23 (código 000054236) Disminuye sombras duras dirigiendo una luz suave. 16. Ayuda en caso de problemas Si alguna vez, por ej.
Cantidad de destellos: aprox. 85 con acum. NC (600 mAh) aprox. 205 con acum. NiMH (1600 mAh) aprox. 240 con pilas alcalino-manganesas de alta capacidad aprox. 370 con pilas lithium de alta capacidad (con la respectiva plena potencia de luz) Intervalo entre destellos: aprox. 4 seg. con acum. NC aprox. 4 seg. con acum. NiMH aprox. 5 seg. con pilas alcalino-manganesas de alta capacidad aprox. 6 seg.
ISO į 6/9° 8/10° 10/11° 12/12° 16/13° 20/14° 25/15° 32/16° 40/17° 50/18° 64/19° 80/20° 100/21° 125/22° 160/23° 200/24° 250/25° 320/26° 400/27° 500/28° 650/29° 800/30° 1000/31° 1250/32° 1600/33° 2000/34° 2500/35° 3200/36° 4000/37° 5000/38° 6400/39° 132 28 6,4 7,4 8,2 9 10 12 13 15 16 18 21 23 26 29 33 37 41 47 52 58 66 74 82 92 104 116 130 147 164 184 208 35 6,9 7,9 8,9 10 11 13 14 16 18 20 22 25 28 31 35 40 44 50 56 63 71 79 89 99 112 125 140 158 177 198 224 Zoom 50 8,3 10 11 12 14 15 17 19 22 24 27 3
ISO 6/9° 8/10° 10/11° 12/12° 16/13° 20/14° 25/15° 32/16° 40/17° 50/18° 64/19° 80/20° 100/21° 125/22° 160/23° 200/24° 250/25° 320/26° 400/27° 500/28° 650/29° 800/30° 1000/31° 1250/32° 1600/33° 2000/34° 2500/35° 3200/36° 4000/37° 5000/38° 6400/39° 28 2,2 2,5 2,8 3,1 3,6 4,0 4,5 5,1 5,7 6,4 7,2 8,1 9,0 10,1 11,4 12,7 14,2 16 18 20 23 25 28 32 36 40 45 51 57 64 72 35 2,4 2,7 3,1 3,4 3,9 4,3 4,8 5,5 6,1 6,9 7,8 8,7 9,7 10,8 12,3 13,7 15 17 19 22 25 27 31 34 39 43 48 55 61 69 78 Zoom 50 2,9 3,3 3,7 4,1 4,7 5,3
Vorwahltaste für Sonderfunktionen Présélection des fonctions spéciales Voorkeuzetoets voor bijzondere functies Preselector for special functions Tasto di preselezione delle funzioni speciali Tecla de selección de funciones especiales Betriebsartenwahl Sélecteur de mode Functieschakelaar Mode selector Selettore del modo di funzionamento Selección de modos de funcionamiento Handauslösetaste und Blitzbereitschaftsanzeige Bouton d’essai et témoin de recyclage Ontspanknop voor handbediening en flitsaparaat-aan
Entriegelungsknopf Hauptreflektor Bouton de déverrouillage pour réflecteur Ontgrendelingsknop Hoofdreflector Unlocking button for the main reflector Pulsante di sblocco della parabola principale Botón de desbloqueo del reflector principal 44 AF-03 Hauptschalter Interupteur général Hoofdschakelaar Main switch Interruttore principale Interruptor principal Batteriefachdeckel Couvercle du compartiment des piles Deksel batterijvak Battery compartment lid Coperchio del vano batteria Tapa del compartimento de p
Sensor Senseur Sensor Sensore Bild 1 / Fig. 1 / Afb. 1 / Grab. 1 m Bild 2 / Fig. 2 / Afb. 2 / Grab. 2 Bild 3 / Fig. 3 / Afb. 3 / Grab.
Bild 4 / Fig. 4 / Afb. 4 / Grab. 4 Bild 6 / Fig. 6 / Afb. 6 / Grab. 6 Bild 5 / Fig. 5 / Afb. 5 / Grab. 5 Bild 7 / Fig. 7 / Afb. 7 / Grab.
Hinweis: Ķ Im Rahmen des CE-Zeichens wurde bei der EMV-Prüfung die korrekte Belichtung ausgewertet. SCA-Kontakte nicht berühren ! In Ausnahmefällen kann eine Berührung zur Beschädigung des Gerätes führen. ĸ Remarque: L’exposition correcte a été évaluée lors des essais de CEM dans le cadre de la certification CE. Ne pas toucher les contacts du SCA ! Il paut arriver que le contact avec les doigts provoque la dégradation de l’appareil.
Metz - Werke GmbH & Co KG • Postfach 1267 • D-90506 Zirndorf • info@metz.de • www.metz.de Consumer electronics Metz. Always first class. Photoelectronics Plastics technology Industrial electronics 703 47 0114.