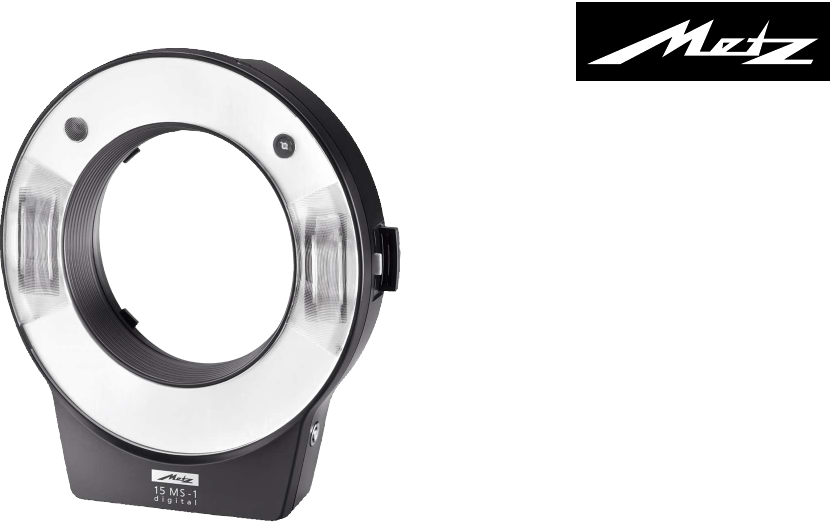
708 47 0018.A3 15 MS-1 01.04.
708 47 0018.A3 15 MS-1 1 2 2.1 2.2 2.3 2.4 2.5 3 4 4.1 ķ 4.2 5 5.1 5.2 6 7 8 9 9.1 10 11 68 01.04.2010 9:56 Uhr Safety instructions . . . . . . . . . . . . . . . . . . .69 Preparation . . . . . . . . . . . . . . . . . . . . . . .70 Power supply . . . . . . . . . . . . . . . . . . . . . .70 Insertion and replacement of batteries . . . . .71 Installation / Deinstallstion . . . . . . . . . . . .71 Switching the flash unit on and off . . . . . . .72 The infrared clamp . . . . . . . . . . . . . . . . . .
708 47 0018.A3 15 MS-1 01.04.2010 1 Safety instructions • The flash unit is exclusively designed and authorised for use in photographic applications. • Do not flash directly into eyes from a close distance! Direct flashing into the eyes of persons or animals can cause damage to the retina and severe disruption of the vision – up to and including permanent blindness! • The flash unit may in no event be activated in the vicinity of inflammable gases or liquids (petroleum, solvents etc.).
708 47 0018.A3 15 MS-1 01.04.2010 9:56 Uhr Seite 70 2 Preparation Repairs should only be performed by authorised service personnel. • Do not touch the electrical contacts of the flash unit. • If the housing has been damaged in such a way that internal components are exposed, the flash unit may no longer be used. Remove the batteries! Do not touch any internal components. HIGH VOLTAGE! • Do not use any toxic batteries or rechargeable batteries! 2.
708 47 0018.A3 15 MS-1 01.04.2010 9:56 Uhr • Close battery compartment cover and slide against the housing. above 60 seconds. If you do not use the flash unit for a prolonged period, you should remove the batteries from the unit. 2.3 Installation /Deinstallation Carefully screw an adapter ring of the appropriate size into the filter thread of the objective. 2.2 Insertion and replacement of batteries • Turn off the flash unit via the main switch .
708 47 0018.A3 15 MS-1 01.04.2010 9:56 Uhr The flash unit can be rotated (turned) on the adapter ring. Removal Press both the release buttons on the flash unit, keep them pressed, and at the same time carefully pull the flash unit off the adapter ring of the objective. 2.4 Switching the flash unit on and off To switch-on, move the main switch to the “ON” position. To switch-off, move the main switch to the left.
08 47 0018.A3 15 MS-1 01.04.2010 9:56 Uhr Seite 73 3 Starting up for the first time 4 Camera-specific remote operation When the flash unit is switched on for the first time or when a “RESET” is performed (see Chapterir 14.2), the following display appears after the main switch is activated: This remote operating mode is only possible if the camera supports remote operation with an integrated flash or if an additional flash unit is mounted on the camera (e.g.
708 47 0018.A3 15 MS-1 01.04.2010 9:56 Uhr only with Canon, Nikon, Olympus). Each group can in turn consists of one or more slave flash units. Four independent remote channels (Channels 1-4) are available, so that several remote systems in the same space do not cause mutual disruption. The setting “Channel ALL” controls all slave flash units. Slave flash units that belong to the same remote system must be set to the same remote channel.
708 47 0018.A3 15 MS-1 01.04.2010 9:56 Uhr Seite 75 „PEN REMOTE“ (Pentax) or „SAM REMOTE“ (Samsung) or „SON REMOTE“ (Sony) • Press the OK button, thus the selected remote mode is set, in the example “OLY REMOTE” (Olympus). The ratio of the reflectors is 1:1. Group A (only with CAN, NIK and OLY) is automatically set if another group has not been selected for a previous application.
708 47 0018.A3 15 MS-1 ☞ 01.04.2010 9:56 Uhr set if a fixed channel is not used in the remote system. In the case of “CHANNEL ALL”, all set channels are activated. In the remote operating modes, groups can be set in addition to the channels (CHANNEL) in order to control the desired slave flash unit of a specific group. The setting of groups (GROUP A, B, C) is only possible in Canon, Nikon and Olympus remote control modes.
708 47 0018.A3 15 MS-1 01.04.2010 Several digital cameras fire one or more measuring pre-flashes and/or flashes for a fraction of a second before the picture is taken in order to reduce the „red-eye effect“. The measuring pre-flashes cannot usually be deactivated on the camera. When starting up the camera for the first time, changing the camera or RESET, select the “Learn function” (see Chapter 5.1).
708 47 0018.A3 15 MS-1 SYSTEM NIK REMOTE Ch ALL Gr A S E L OK SYSTEM S L AV E SEL LEARN NO NO YES SEL LEARN OK OK YES SEL OK 01.04.2010 9:56 Uhr • Press the button S E L on the flash unit. The most recently used setting appears in the display, e.g.: • Press the button until “SYSTEM SLAVE” appears in the display. LEARN 78 OK SL P/R SL Ratio 4:1 • Switch-on (YES) the “LEARN” function with the button.
708 47 0018.A3 15 MS-1 01.04.2010 9:56 Uhr Seite 79 5.2 Slave mode • Press the button S E L on the flash unit. The most recently used setting appears in the display, e.g.: “Slave mode” reflects the setting that has been learnt in the “Learn function”. This function is retained until a “Learn function” or a “RESET” is performed again. • Press the button until “SYSTEM SLAVE” appears in the display.
708 47 0018.A3 15 MS-1 ☞ 01.04.2010 9:56 Uhr For Remote Control mode , the slave flash unit must be able to register the light from the camera flash unit immediately and without restriction so that it is fired! The operating range of the arrangement depends on the intensity of the light impulse of the camera flash unit, the reflection characteristics of the object and ambient lighting. Please note that the operating range is reduced outside and when the ambient light is bright.
708 47 0018.A3 15 MS-1 01.04.2010 • If both the reflectors should be set at an unequal ratio (Ratio) then press the buttons to change the ratio. The ratio can be adjusted in steps. In the display appears, for example. • If you wish to use partial lighting, then press the button P / R . Following display appears: • To set partial lighting, press the buttons or and thus change the value. In the display appears, for example. The setting thus made will be automatically saved.
708 47 0018.A3 15 MS-1 01.04.2010 9:56 Uhr Seite 82 inwards by 10°, at the second position by 20°. ☞ The working distance is the distance between the object and the front edge of the flash unit. As a guideline, we recommend : • Working distance of approx. 2-10cm: Swivel reflectors by 20° and set the bounce diffuser (see 9.1) in front of reflectors. At distances over 10 cm, the reflectors can be swivelled to a greater or lesser extent to achieve a centre weighted average or a balanced illumination.
708 47 0018.A3 15 MS-1 01.04.2010 9:56 Uhr Seite 83 11 Modelling Light (ML) • As a confirmation that the “Modelling Light” is switched on, the manual release button blinks. The modelling light (setting light) is a high frequency, stroboscopic flash light. The effect of a quasi continuous light is created for a duration of approx. 2 seconds. The setting light can be used to assess the light distribution and shadow formation before taking a picture.
708 47 0018.A3 15 MS-1 01.04.2010 9:56 Uhr 12 Synchronisation on the 1st or 2nd shutter curtain (REAR) Some cameras support synchronisation with the 2nd shutter curtain (REAR). Thus, the flash unit is not fired until the shutter has closed. This is especially advantageous when lighting with slow shutter speeds (> 1/30s) and moving objects with their own light sources since moving light sources leave behind a trail of light, instead of in the front as with synchronisation on the 1st shutter curtain.
01.04.2010 Slow synchronisation SLOW is set on the camera (see camera’s operating instructions)! Use a tripod when shooting with slow shutter speeds to avoid blurred images! 13.1 Using a tripod The tripod thread of the flash unit may only be used for setting up the flash unit as a slave unit without camera. If the camera has a mecablitz 15MS-1 digital attached to it, only then the tripod thread on the camera may be used to mount it on a tripod.
708 47 0018.A3 15 MS-1 ☞ 01.04.2010 9:56 Uhr This will not affect firmware updates for the flash unit! normally when switched on. If this is not the case, then contact your dealer. 14.3 Conditioning the flash capacitor 16 Technical data The flash capacitor built into the flash unit undergoes a physical change when the device has not been used for a long time. For this reason it is necessary to switch the device every three months for approx. 10 mins.
708 47 0018.A3 15 MS-1 01.04.2010 Manual partial lighting: P1/1 to P1/64 Colour temperature: Approx. 5.600 K Synchronisation: Low voltage – IGBT – ignition Flash counts: With NiCd batteries (250 mAh) approx. 50 With high performance alkali-manganese batteries approx. 140 With NiMH rechargeable batteries (1000 mAh) approx. 200 With lithium batteries approx. 250. (at full light power in each case) Recycling times: Depending on the light output: approx. 0.3-5 s.
708 47 0018.A3 15 MS-1 01.04.2010 9:56 Uhr Battery disposal Germany: As a consumer, you are legally obliged to return used batteries. You will find this symbol on batteries that contain harmful substances: Pb = Battery contains lead Cd = Battery contains cadmium Hg = Battery contains mercury Li = Battery contains lithium ķ 88 Seite 88 Your Metz product was developed and manufactured with high-quality materials and components which can be recycled and/or re-used.
708 47 0018.
708 47 0018.A3 15 MS-1 01.04.2010 9:56 Uhr Seite 135 Ķ AF Start ☛ SELECT SELECT SEL 3 Sek.
708 47 0018.A3 15 MS-1 SEL Seite 136 Diagramm: SYSTEM SLAVE + LEARN SELECT SELECT 3 Sek. ĸ 9:56 Uhr AF Start ☛ Ķ 01.04.
708 47 0018.A3 15 MS-1 01.04.2010 9:56 Uhr AF Start ☛ SELECT SEL Ķ Diagramm: SYSTEM SYNC-CORD SELECT 3 Sek.
708 47 0018.A3 15 MS-1 01.04.2010 9:56 Uhr Seite 138 Garantiebestimmungen Bundesrepublik Deutschland 1. Die Garantiebestimmungen gelten ausschließlich für Käufe in der Bundesrepublik Deutschland. 2. Im Ausland gelten die Gewährleistungsregelungen des jeweiligen Landes bzw. die Garantieregelungen des Verkäufers. 3. Die nachfolgenden Bestimmungen haben nur für den privaten Gebrauch Gültigkeit. 4. Die Garantiezeit - 24 Monate - beginnt mit dem Abschluss des Kaufvertrages bzw.
708 47 0018.A3 15 MS-1 01.04.2010 Hinweis: Ķ Im Rahmen des CE-Zeichens wurde bei der EMV-Prüfung die korrekte Belichtung ausgewertet Remarque: ĸ L’exposition correcte a été évaluée lors des essais de CEM dans le cadre de la certification CE. 9:56 Uhr Seite 139 Opmerking: ń In het kader de CE-markering werd bij de EMV-test de correcte belichting bepaald.
708 47 0018.A3 15 MS-1 01.04.2010 9:56 Uhr Seite 140 Metz - Werke GmbH & Co KG • Postfach 1267 • D-90506 Zirndorf • info@metz.de • www.metz.de Consumer electronics Photoelectronics Plastics technology 708 47 0018.A3 Metz - always first class.