
User guide


27
CHAPTER 3
Importing a Network Database
If you have upgraded to a new version of RMS, if you have
moved your database files to a new RMS host computer,
you will need to import your RMS database.
Perform the following steps to import an RMS database:
1. If RMS is running, shut it down.
2. Locate your backed-up RMSNET folder. Copy it into
the C:\meyer\rms folder.
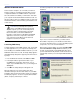
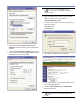
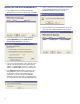
3. Restart RMS and open the RMS Network Manager.
Click Add. The Add RMS/LNS Network dialog
appears.
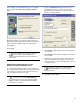
4. If you are importing a database for the RMSNET
default network (using a PCLTA-20 or PCC-10
interface), click the Default network (RMSNET)
accessed with a PCLTA-20 or PCC-10 Interface
radio button. If you are importing i.LON 10 database,
click the Remote network (RMSNET) accessed with
an i.Lon Remote Network Interface radio button.
5. If you are importing an i.LON 10 database, you must
also type in the sequential number of the i.LON 10 on
the network in the Assigned Network Number field.
For example, an i.LON adapter named ilon-1 with an
IP address of 192.168.1.101 means you would type a
1.
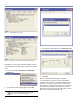
6. Click Add Network only (for Import).
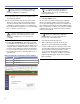
7. You will be prompted with two warnings. Click OK and
Yes, respectively, to dismiss both warning dialogs.
8. This will take several moments as the speaker
nodes are found and imported into the folder. Once
completed, you have successfully imported a network
database.