
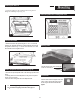
Owner`s manual


T
o
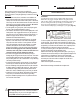
Leak Testing & Lighting
Leak Testing
LEAK TEST ALL GAS CONNECTIONS BEFORE USING
YOUR GRILL.
DO NOT SMOKE WHILE LEAK TESTING.
DO NOT LEAK TEST WITH A MATCH OR OPEN
FLAME.
DO NOT USE A GRILL THAT IS LEAKING GAS.
YOU SHOULD TEST FOR GAS LEAKS EVERY TIME
YOU DISCONNECT AND RECONNECT A GAS FITTING.
PERFORM A LEAK TEST EVEN IF YOUR GRILL WAS
DEALER OR STORE ASSEMBLED.
DO NOT IGNITE BURNERS WHEN LEAK TESTING.
LEAK TESTING
1. For LP models, leak test with a full propane cylinder.
2. For systems other than self-contained LP cylinders:
A. The grill and its individual shut-off valve must be discon-
nected from the gas supply piping systems during any
pressure testing of that system at test pressures in ex-
cess of 1/2 psi (3.5 kPa).
B. The grill must be isolated from the gas supply piping
system by closing its own manual shut off valve during
any pressure testing of the gas supply piping system at
pressures equal to or less than 1/2 psi (3.5 kPa).
1. Grill burner control valves should be turned off and the gas
turned on at source.
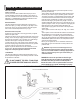
2. Apply soap solution to all gas connections.
To make soap solution, mix together equal amounts
of liquid detergent and water.
3. Soap bubbles will appear if there is a leak.
4. Tighten the connection to make proper seal. And recheck
for soap bubbles.
If you cannot stop a gas leak by tightening, turn gas supply off.
Take leaking joint apart, clean it, reconnect and test again. If
leak persists, contact the dealer or gas utility.
A gas system MUST be tested yearly, or whenever the LP cylin-
der or any other gas system part is replaced.
Lighting Your Grill
ALWAYS OPEN GRILL BEFORE LIGHTING THE
BURNER.
DO NOT LEAN OVER AN OPEN GRILL. KEEP YOUR
HEAD AND BODY AT LEAST ONE FOOT AWAY WHEN
LIGHTING THE GRILL.
IF BURNER DOES NOT LIGHT, IMMEDIATELY TURN
BURNER CONTROL KNOBS TO OFF. WAIT FIVE MIN-
UTES TO LET GAS CLEAR BEFORE YOU TRY LIGHT-
ING AGAIN.
14
To Extinguish your grill: Turn each burner control knob to
OFF position. Turn gas supply OFF at the source.
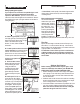
LIGHTING
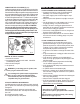
1. Open Lid. Examine the interior to be sure it appears normal.
2. Turn burner control knobs to OFF position.
3. Turn gas ON at LP tank or supply. Wait 5 seconds for
regulator to set itself.
4. Turn either burner control knob to HIGH and rotate the igni-
tor knob CLOCKWISE several times. One half of the burner
should light. Turn the other burner control knob to HIGH and
the other half of the burner will light automatically.
5. Check that the burner is lit by looking through the match light
hole on the lower right hand side. The burner flame should
be a hard blue cone with a minimum amount of yellow flame,
although some yellow dust flicks may occur.
6. Close the grill lid and pre-heat the grill for five to ten minutes
before cooking.
WARNING: If burner fails to light, turn control knobs OFF
and wait five minutes for gas to clear and try lighting pro-
cedure again.
To light burner manually, use a paper book match or other
hand held ignitor. Insert match through lower right side match
hole. Turn on the RIGHT burner control knob to the high set-
ting. Light burner.