MICRO-AIR AIR CLEANER INSTALLATION AND OPERATION MANUAL MX3510 Includes Installation, Operation, and Service Instructions CAUTION Read complete instructions before operating. Please file for future reference.
MICRO AIR CLEAN AIR SYSTEMS MX3510 ® MODEL MX 3510 SPECIFICATIONS ELECTRICAL CONNECTIONS Input volts: 1. 120/208-230/460/575v, 60Hz Max current: 20 Amps (at 120V, 1 1⁄2 HP, single phase) 5.2 Amps (at 208-230V, 1 1⁄2 HP, 3 phase) 2.6 Amps (at 460V, 1 1⁄2 HP, 3 phase) 6.8 Amps (at 208-230V 2 HP, 3 phase) 3.4 Amps (at 460V, 2 HP,3 phase) 9.6 Amps (at 208-230V, 3 HP, 3 phase) 4.8 Amps (at 460V,3 HP, 3 phase) 3.
MX3510 MICRO AIR CLEAN AIR SYSTEMS 4. Adjusting the motor pulley may require a size larger or smaller belt, depending on the application. 5. Replace belt and check belt tension. Proper tension should be between 1⁄2” and 3⁄4” deflection when belt is squeezed with normal pressure between fingers. 6. 5. ® Using 15⁄16” hex bolts and washers re-secure motor/blower module with filter module. ! CAUTION: Due to relocation of internal components, some wiring may be loose.
MICRO AIR CLEAN AIR SYSTEMS MX3510 ® UNITS WITH HEPA OR CHARCOAL OPTIONS FOR MX3510 1. HEPA OR CHARCOAL AS SECOND MAIN FILTER On units with optional HEPA or charcoal filters, an adjustable filter track kit is used to complete the seal of these filters to the filter stop (See FIG. 4 & 5). If the unit was ordered with either a HEPA or charcoal filter, this adjustable filter track kit was included with the unit.
MX3510 MICRO AIR CLEAN AIR SYSTEMS ® HEPA OR CHARCOAL AS FIRST AND SECOND MAIN FILTERS 1. Place supports k in cabinet at a dimension of 24 15⁄16” and secure with self tapping screws. 2. Place track j in cabinet so it rests upon supports and 1⁄2” diameter pin is located behind brackets on supports. 3. Place handle l on supports so that it rests in notches. 4. Lock 1⁄2” diameter rods on handle and track in place with brackets m and self tapping screws. 5.
MICRO AIR CLEAN AIR SYSTEMS MX3510 ® FILLING OF RCM MODULES 1. Remove bulk charcoal or purasorb from shipping carton by removing plastic bags within carton. 2. set module on level surface. Remove fill cover by removing six 10-32 phillip head screws, that secure cover. Set cover aside (See FIG. 6). 3. Open the plastic bag by removing the tape, holding close. Pour the material from the plastic bag into the module through the slots.
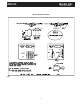
MX3510 MICRO AIR CLEAN AIR SYSTEMS OPTIONAL SILENCER INSTALLATION 1. Remove Exhaust Grille from unit as shown in FIG. 7. 2. Slide Silencer over Blower Assembly. 3. Align holes from Silencer with those located on sides of the Blower Assembly. 4. Attach Silencer to Blower Assembly using 3⁄8” bolt, lockwasher, & flat washer. 5. Center Exhaust Grille over hole in Silencer & attach using 8-32 self tapping machine screws.
MICRO AIR CLEAN AIR SYSTEMS MX3510 ® Wrap Around Pre-filter INSTALLATION This Kit Includes: 1 Each 38086-01 WAP Pre-filter Assembly 1 Each Hardware Package - Containing: 15 ” 6 Each P114 ⁄16 -18 X 0.75 Hex Bolt 15 ” 6 Each P222 ⁄16 -18 Hex Nut 6 Each P233 15 ⁄16” Flat Washer INSTALLATION: 1. Align six (6) holes from WAP with holes located on bottom of Air Filter Unit. 2. Attach Wrap Around Pre-filter with six (6) ea. 15⁄16”-18 hex bolt, 15⁄16”-18 hex nut, and 15⁄16” flat washer. 5/16”X.
MX3510 MICRO AIR CLEAN AIR SYSTEMS MX3510 WIRING DIAGRAM FIG.
MICRO AIR CLEAN AIR SYSTEMS MX3510 ® MX3510 PARTS LIST 5 14 10 13 4 6 2 12 3 9 1 11 8 7 ITEM PART NO. 1. P1977 2. 38010-01 3. DESCRIPTION ITEM PART NO. 10. P3545 1 1/2 HP, 115V, 1 Phase Motor ITEM PART NO. 12. P1710 Blower Access Panel P3546 4.95” Blower Pulley 1 1/2 HP, 208-230/460V, 3 Phase Motor P1974 P1429 Light (120V) 5.93” Blower Pulley P1966 2 HP, 208-230/460V, 3 Phase Motor P1711 P1481 6.
MX3510 MICRO AIR NOTES: 11 CLEAN AIR SYSTEMS ®
MICRO AIR CLEAN AIR SYSTEMS MX3510 ® TROUBLESHOOTING CHART ! CAUTION: Before disassembling the unit or doing any inspection of the parts, make certain that the power has been cut off and the blower has come to a complete stop. Never run the unit with the access door open or removed.