GX Auto Printer For Mac OS X Users Manual Microboards Technology LLC Version 1.
MICROBOARDS TECHNOLOGY, LLC GX Auto Printer TABLE OF CONTENTS INTRODUCTION ..............................................................................................................................................................5 WHAT’S INCLUDED ...........................................................................................................................................................5 SYSTEM REQUIREMENTS ..................................................................................
MICROBOARDS TECHNOLOGY, LLC GX Auto Printer Introduction The Microboards GX Auto Printer is an auto-loading CD, DVD, and BD disc printer with a 50 disc capacity. Microboards and HP co-developed the printer technology, allowing up to 4800 x 1200 dpi printing.
System Requirements The Microboards GX Auto Printer has the following minimum requirements and compatibilities: Operating System Mac OS 10.3.9 or above. Processors G 4 Power PC Processor, running at 1.2 GHz or faster; -or- Intel Processor. System Memory Minimum 512 MB of system memory. 1GB is recommended for DVD recording operation. Hard Drive A separate internal 7200 RPM hard drive is recommended for storing your data.
MICROBOARDS TECHNOLOGY, LLC GX Auto Printer Installing Ink Cartridges Supported Ink Cartridges The GX Auto Printer uses a single color ink cartridge. The part number for this cartridge is GX300HC. If other cartridges are installed, the GX Auto Printer will not function. These cartridges are available from any Microboards reseller. Refill kits or non-Microboards ink cartridges are not recommended for use in the GX Auto Printer system. Use of these types of cartridges will cause the printer to fail.
Installation of Drivers and Software Driver Installation Drivers must be installed on a hard disk. Once you have installed the software, store the original installer disc in a safe place. 1. Insert the Installation CD in your system’s disc drive. Open the disc icon when it appears on the desktop. 2. Double-click on the Microboards Installer.pkg icon. Follow the on-screen instructions, read and agree to the end user license agreement. 3. When prompted, enter your administrator password. 4.
MICROBOARDS TECHNOLOGY, LLC GX Auto Printer Setting Printer Alignment Alignment The GX Auto Printer system has been aligned at the factory. The factory alignment values are on a label on the back of the GX Auto Printer. Follow these steps to enter the factory values: • Click System Preferences in the Dock. • Select Print & Fax. • Click the Set Up Printers… button. • Highlight the Microboards GX Series icon. • Click the Utility button to open the Microboards Toolbox.
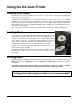
Using the GX Auto Printer Creating Disc Labels The first step is to create a disc label of the correct size, 12cm x 12cm. You may use any application you prefer to create your labels. Included on the Installation disc are 2 eps-format templates for you to use. These are essentially blank files of the correct size that show where the outer edge of the disc and the inner hub will the image when your disc label designs are printed.
MICROBOARDS TECHNOLOGY, LLC GX Auto Printer Microboards Toolbox Access the Toolbox by selecting the System Preferences from the Dock. Select Print & Fax. Highlight the Microboards GX Series icon and click the Utility icon. The Toolbox pages will appear in the following order. Ink Level The Ink Levels show how much remains of all 3 colors, Cyan, Magenta and Yellow. NOTE: If you place a used cartridge in the GX Auto Printer, the ink level may not be reported correctly.
Clean The Clean page allows you to run a cleaning cycle on the ink cartridge. Like the Test disc, a disc must be placed directly on the belts below the input hopper for the utility to function. Click the Clean button once a disc has been loaded to the belts. If the resulting disc shows streaks similar to those shown in the image on this page, you may need to run the Clean utility again. Utility The Alignment values will move the print image on the disc in 0.1 mm increments.
MICROBOARDS TECHNOLOGY, LLC GX Auto Printer Troubleshooting Printer not printing 1. Confirm the GX Auto Printer is plugged into a power source and is turned on. The ON/OFF switch is located at the back of the unit, above the power cable connector. 2. Confirm the green light on the power button is lit on the front panel. If AC power is on and the green light is off, press the power button firmly and wait for several seconds. If the light still does not come on, contact Microboards Technical Support. 3.
Printing Specifications Print Speed: Depends upon percentage of coverage and print mode selected Approx. 45 seconds for 100% full-color coverage, Photo Normal Mode Approx. 20 seconds for 100% full-color coverage, Text & Graphics Best Mode Approx. 12 seconds for 20% coverage Text & Graphics, Normal Mode Ink Cartridge Types: Microboards GX-300HC Media Types: Printable-surface 120mm CD-R or DVD-R Maximum Print Width: 4.