
User manual


Tutorial
© 2008 Microchip Technology Inc. DS51616B-page 37
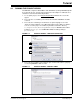
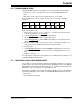
Additional files can be added to the project using the project window. Right click on any
line in the project window tree to pop up a menu with additional options for adding and
removing files.
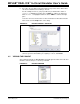
4.6 CREATING A HEX FILE
To create a hex file for debugging:
• On the Project toolbar, select “Debug” from the Build Configuration drop-down list.
•Select Project>Build All
or right click on the project name in the project window
and select “Build All” from the popup menu.
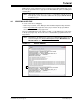
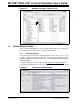
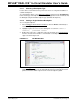
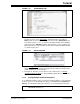
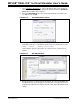
The project will build (Figure 4-6), and the resulting .hex file will have the same name
as the project (Figure 4-7). The hex file is the code that will be programmed into the
target device.
FIGURE 4-6: OUTPUT WINDOW
Note: Although the header file
p24FJ128GA010.h and a linker script file are used
in the project, you do not need to add them to the project; MPLAB IDE will
find them for you.
Note: Depending on the build options selected, your Output window may look dif-
ferent from Figure 4-6 (Project>Build Options>Project
, MPLAB C30 and
MPLAB LINK30 tabs.)