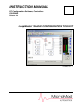
INSTRUCTION MANUAL PC Configuration Software, Controllers 53HC2600 Release 4.0 LoopMaster™ SL6000 CONFIGURATION TOOLKIT PN26003 Rev.
MicroMod Automation, Inc. The Company MicroMod Automation is dedicated to improving customer efficiency by providing the most ost-effective, application-specific process solutions available. We are a highly responsive, application-focused company with years of expertise in control systems design and implementation. We are committed to teamwork, high quality manufacturing, advanced technology and unrivaled service and support.
53HC2600 INSTRUCTION MANUAL TABLE OF CONTENTS READ FIRST ............................................................................... vii 1.0 - INTRODUCTION ................................................................... 1 1.1 LoopMaster™ ................................................................................................ 1 1.2 What You Will Need....................................................................................... 1 1.3 About This Manual.................................
53HC2600 INSTRUCTION MANUAL 3.12 Configuring the FNC Block ........................................................................ 26 3.13 Using the Interactive Training Screens...................................................... 27 4.0 - ONLINE CONFIGURATIONS.............................................. 31 4.1 LoopMaster Online ...................................................................................... 31 4.2 Connecting A Micro-Mite Controller To Your PC....................................
3HC2600 INSTRUCTION MANUAL 7.0 - TROUBLESHOOTING ........................................................ 55 7.1 SERIAL.386 File Installation Instructions .................................................... 55 7.2 Documenter Problems................................................................................. 56 7.3 Display Problems......................................................................................... 56 7.3.1 THREED.VBX Display Problems ............................................
53HC2600 INSTRUCTION MANUAL Figure 4-5. Online or Offline? Dialog Box ......................................................... 36 Figure 4-6. Select a Controller Dialog Box ....................................................... 37 Figure 4-7. Control Strategy Window and Front Panel Window ....................... 37 Figure 4-8. Online Standard AI Dialog Box ....................................................... 38 Figure 4-9. FNC Function Block, A Input Selected ..........................................
53SU6000 INSTALLATION AND SETUP GUIDE READ FIRST ∆ WARNING: INSTRUCTION MANUALS Do not install, maintain, or operate this equipment without reading, understanding and following the proper MicroMod Automation Inc. instructions and manuals, otherwise injury or damage may result. Read these instructions before starting installation; save these instructions for future reference.
53SU6000 INSTALLATION AND SETUP GUIDE viii Read First
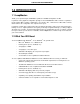
53HC2600 INSTRUCTION MANUAL 1.0 INTRODUCTION 1.1 LoopMaster™ Thank you for purchasing the 53HC2600 LoopMaster™ SL6000 Configuration Toolkit! LoopMaster is the graphical configuration package for the 53SL6000 Micro-Mite controller. LoopMaster produces Micro-Mite controller configurations, saves them to files, sends them to a Micro-Mite controller, and documents the configuration in a comprehensive report.
53HC2600 INSTRUCTION MANUAL 1.3 About This Manual This manual provides information to install and use the LoopMaster SL6000 Configuration Toolkit. It is assumed that you are familiar with Microsoft Windows™ and have a basic knowledge of process control terminology.
53HC2600 INSTRUCTION MANUAL 1.5 SL6000 Configuration Toolkit Model Numbers Refer to the product data sheet or data tag for the model number of the product furnished. The details of a specific number are as follows: 53 HC26 0 A _ 0 Controllers Design Designator System Type Windows 3.
53HC2600 INSTRUCTION MANUAL 4 Introduction
53HC2600 INSTRUCTION MANUAL 2.0 INSTALLATION 2.1 Installing LoopMaster The LoopMaster setup utility installs the program, help file, and the necessary support files onto your hard drive. 2.1.1 To Install LoopMaster for Windows 3.1 or Windows 95/98 1. Insert the LoopMaster diskette into the floppy drive. 2. From Program Manager, click on the File menu and select Run. 3. In the Run dialog (Figure 2-1), type a:setup and click OK. Type b:setup if installing from the b: drive.
53HC2600 INSTRUCTION MANUAL 9. After all the files are installed, Setup adds five icons to the LoopMaster program group. Setup also creates the group if it does not exist. • LoopMaster icon • LoopMaster Help icon • Readme icon • Uninstall icon • Documents icon 10. Before starting LoopMaster, double-click on the Readme icon to view up-to-date information on this version. This completes the LoopMaster installation. Section 3.0 provides a brief guided tour of LoopMaster. 2.1.
53HC2600 INSTRUCTION MANUAL 2.1.3 To Install LoopMaster for Windows 2000 Professional/Windows XP Professonal 1. Set up the Base PC by connecting all peripheral hardware units to the base PC, including the monitor, keyboard, mouse, and CD-ROM unit (if it is an external CD-ROM unit). Connect the base PC and all peripheral units to a power source. See the instructions that are included with the PC for setting up these components. 2. Verify or install the Windows operating system software.
53HC2600 INSTRUCTION MANUAL 2.1.4 Hardware Installation 2.1.4.1 Installing the Hardware Key A “Hardware Key” is supplied when the standalone version is specified in the model number. The LoopMaster software is licensed by MicroMod Automation Inc. The license is protected by a hardware key, shown in Figure 2-3, which must be attached to the PC’s parallel port. The hardware key does not functionally compromise the parallel port.
53HC2600 INSTRUCTION MANUAL 2.1.5 LoopMaster Software Installation Now the process of installing the LoopMaster software can begin. 1. Pre-Setup Procedure • Check that the LoopMaster hardware key is connected to the parallel port of the computer. • Have the LoopMaster license key ready. • Turn on power to the base PC and boot the Windows operating system software. • Log on to the Windows operating system software with administrative privileges.
53HC2600 INSTRUCTION MANUAL • The Select Program Folder window appears. Select the program Folder you want the program icons added to. The Micro-DCI Comm Services folder is selected by default as the folder for the program icons. You can accept the default, select an existing program folder, or type a new program folder. • Click the Next button. • A Setup window with a progress bar appears and the Micro-DCI files begin to install.
53HC2600 INSTRUCTION MANUAL The following license keys may be provided: • udci - licenses MIcro-DCI Communication Services for 300 tags udciunlim - licenses MIcro-DCI Communication Services for unlimited tags loopmaster - licenses the LoopMaster product features ✎ Entry of the License Keys is not case-sensitive. NOTE Select Exit from the File menu when finished. 9. Adding Micro-DCI Networks If you would like to add Micro-DCI instrument networks, click on the Yes button when given the choice.
53HC2600 INSTRUCTION MANUAL • If you clicked the Browse button, enter both the drive and directory you want to use as the destination directory in the Choose Directory field. • If the directory does not exist, Setup will ask you if it should be created. If this window appears, click the Yes button. • Click the Next button. • The Setup window progress bar reactivates and the Micro-DCI files begin to install. 11.
53HC2600 INSTRUCTION MANUAL • When the Installation is Complete window appears, click on the OK button. • At this point the Notepad application opens and a LoopMaster Read Me file appears containing LoopMaster release information. When you have finished reading this document, close Notepad using the Close button in the upper right-hand corner of the window. • Any windows remaining open may be closed, if desired, using the Close button in the upper right-hand corner.
53HC2600 INSTRUCTION MANUAL 2.3 Uninstalling LoopMaster Under Windows 2000 Professional or Windows XP Professional 2.3.1 Removing the LoopMaster Software There are two ways to remove the LoopMaster software and its associated files from your system. 2.3.1.1 Method 1 1. Click the START button. 2. Select this sequence of menu items: PROGRAMS > LOOPMASTER > UNINSTALL LOOPMASTER. (See menus illustrated in Figure 2-4.) Figure 2-4.
53HC2600 INSTRUCTION MANUAL 2.3.1.2 Method 2 1. Click on the START button. 2. Select CONTROL PANEL. 3. Double-click on the ADD OR REMOVE PROGRAMS icon. 4. Select the item (LoopMaster) to uninstall, as illustrated in Figure 2-5. 5. Click on the CHANGE OR REMOVE PROGRAMS button to begin the uninstall procedure. Figure 2-5.
53HC2600 INSTRUCTION MANUAL 16 Installation
53HC2600 INSTRUCTION MANUAL 3.0 GUIDED TOUR 3.1 Starting LoopMaster In this section, we will take a brief tour through LoopMaster and generate a simple offline configuration. 3.1.1 To start LoopMaster 1. From Program Manager, double-click on the LoopMaster icon. The main LoopMaster window will be drawn while the application initializes. ✎ NOTE If a warning message appears indicating LoopMaster detected a faulty version of THREED.VBX, the startup will terminate. If this message appears, see Section 7.3.
53HC2600 INSTRUCTION MANUAL To create a new offline configuration: 1. In the Online or Offline? dialog, click on the Offline: Develop configuration in memory radio button. 2. Click OK. 3.3 Offline Configuration Since offline configurations can be developed without a controller, you can start with a brand new configuration of factory defaults, or edit one that was previously created. For this example, we will create a new configuration.
53HC2600 INSTRUCTION MANUAL 3.6 Main LoopMaster Window The Title Bar, Main Menu and Toolbar go across the top of the main window, and the Main Status Bar runs along the bottom. Inside is the Control Strategy Window entitled Offline Control Strategy for SAMPLE. Title Bar Main Menu Toolbar Control Strategy Window Main Status Bar Figure 3-3. Main LoopMaster Window - Example 3.
53HC2600 INSTRUCTION MANUAL 3.8 Typical Offline Parameter Value Change To configure a function block’s parameters, click on its button. We’ll start by configuring the first analog input. 1. Click on AI1. 2. The Standard AI dialog opens, as shown in the example in Figure 3-4. Figure 3-4. Standard AI Dialog Box The dialog title shows the tagname, and the function block mnemonic found in the Micro-Mite controller.
53HC2600 INSTRUCTION MANUAL When you click OK, LoopMaster writes all the parameters in the dialog to the configuration database. You’ll see your change in the Standard AI dialog because the text below the Digital Filter button now reads 1.5 s. Leave the Standard AI dialog open for one more step. 3.8.3 Adding DOCUMENTER Information Since this is an offline configuration, we can take advantage of storing additional information for the Documenter Report. 1. Click on the Doc Info...
53HC2600 INSTRUCTION MANUAL 3.9 Viewing the DOCUMENTER Report Since the Documenter Report is automatically generated using the File > Print command, we can use the Windows print previewing capability to view the Documenter Report. 1. Select Print Preview... from the File menu, or click on the print preview toolbar button. Print Preview toolbar button. The first page of the Documenter is displayed with title and function block overview. Figure 3-6.
53HC2600 INSTRUCTION MANUAL 2. Click on Next Page to advance to the next page in the Documenter Report. This is a parameter listing page. Following the title page is a complete list of parameters involved in this configuration. Parameters are grouped in the same order as they appear in the controller. 3. Continue to click on Next Page until the button grays out when you reach the last page. The last page of this Documenter Report is a rear connections diagram.
53HC2600 INSTRUCTION MANUAL information you entered for AI1. ✎ NOTES The wiring of AI1 changes, depending upon the type of transmitter you selected. The text you entered earlier labels this connection. By using the Doc Info... button, you can create informative and valuable configuration reports. The final appearance of your Documenter Report depends upon the installed Windows Printer Driver. Make sure you have the latest driver for your printer.
53HC2600 INSTRUCTION MANUAL 1. Click on the C Scheme A input button as shown in Figure 3-8. Figure 3-8. Selecting the C Scheme A Input Button 2. The Input Selection dialog shows the currently selected source as Analog Input AI1. Change the PV input to come from FNC: 3. In the Input Selection dialog, click on the down arrow button to view the list of possible sources. 4. Select FNC Output X. 5. Click OK.
53HC2600 INSTRUCTION MANUAL 6. There are four analog inputs and two digital inputs to the FNC block. Connect AI1 to FNC input A: 7. Click on the FNC A input button which is on the left of the FNC block next to input A. 8. In the Input Selection dialog for FNC Input A, click on the down arrow to drop down the list. 9. Click on Analog Input AI1, then click OK. A connection is drawn from AI1 to FNC input A, as illustrated in fig. Figure 3-10. Connection Drawing Example, AI1 Source 10.
53HC2600 INSTRUCTION MANUAL Figure 3-11. Equation Constant Configuration Example 4. Click OK to write the changes into the configuration database. 5. Save the modified database by clicking on the disk toolbar button, or by selecting File > Save. Your new configuration database replaces the old one in TOUR.S6D. 3.13 Using the Interactive Training Screens The LoopMaster interactive training screens enable you to configure a database while you learn about the parameters.
53HC2600 INSTRUCTION MANUAL 1. Click on the C Scheme button to open the Control Scheme dialog. This dialog shows the selected control scheme, control switches, and a graphical representation of the Control Scheme block (Figure 3-12). Figure 3-12. Sample Control Scheme Window 2. Since the current control scheme is Cascade Control, both cn1 and cn2 loops are shown. To configure the control output of cn1, click on Output1 to display the SAMPLE.cn1.Output1 dialog (Figure 3-13). Figure 3-13. SAMPLE.cn1.
53HC2600 INSTRUCTION MANUAL 4. Parameters section below it. The interactive training screens explain the meaning of each parameter, then prompt you for an action to configure it. • The first screen explains the RSW reverse switch. Notice in the Output Parameters section that the RSW box is checked. Click No and you’ll see the RSW box become unchecked. • The next screen states that RSV (reverse valve) can invert the output signal. Click Yes to invert the output and watch the RSV box become checked.
53HC2600 INSTRUCTION MANUAL 30 Guided Tour
53HC2600 INSTRUCTION MANUAL 4.0 ONLINE CONFIGURATIONS 4.1 LoopMaster Online Before LoopMaster can be operated online, you must make a physical communications connection between the personal computer and a controller or controller network. The simplest communications connection for a single Micro-Mite controller is to cable a personal computer COM port to the RS-232 module on the back of the controller.
53HC2600 INSTRUCTION MANUAL The RS-232/485 and Communications ITBs should be mounted on 2.90 inch (73.7 mm) track. Clearance specifications for ITB track mounting are provided in Figure 4-4. Figure 4-1.
53HC2600 INSTRUCTION MANUAL Figure 4-2.
53HC2600 INSTRUCTION MANUAL Figure 4-3.
53HC2600 INSTRUCTION MANUAL Figure 4-4.
53HC2600 INSTRUCTION MANUAL 4.4 Starting An Online Configuration To start the LoopMaster software: 1. From Program Manager, double-click on the LoopMaster icon. The main LoopMaster window will be drawn while the application initializes. ✎ NOTE If a warning message appears indicating LoopMaster detected a faulty version of THREED.VBX, the startup will terminate. If this message appears, see Section 7.3.1, THREED.VBX Display Problems. 2.
53HC2600 INSTRUCTION MANUAL When the Select the Controller dialog appears, select a COM port, and a controller address, then click OK. (The controller tagname [for example, SL6000] originally assigned to the controller appears last in the dialog.) Figure 4-6. Select a Controller Dialog Box 4.4.3 Main LoopMaster Window with Front Panel Window The main window appears, which contains the Control Strategy for SL6000 window.
53HC2600 INSTRUCTION MANUAL As in offline operation, the online Control Strategy Window provides a function block overview, showing inputs on the left and outputs on the right. This window has its own title bar across the top and its own status bar along the bottom. The status bar reminds you that the Control Scheme is a Single Loop Controller, and RUN indicates that this is an online configuration. The function blocks are drawn as standard Windows push buttons with an extra outline and drop shadow.
53HC2600 INSTRUCTION MANUAL ✎ NOTES Because this dialog has a Cancel/Close button, each parameter value change immediately takes affect in the controller. Clicking on the Cancel button in online operation causes that dialog to end before the changes can be entered. Pressing the ESC key is the same as clicking on Cancel. The dialog title shows the tagname, and the function block mnemonic found in the Micro-Mite controller.
53HC2600 INSTRUCTION MANUAL Figure 4-9. FNC Function Block, A Input Selected ✎ NOTE Altering function block connections causes the controller to stop. In the stop state, all of the controller outputs are held where they were when the stop state was entered. To resume control action, click on the toolbar Run button. 1. Click on the C Scheme A input button as shown in Figure 4-9. 2. The Input Selection dialog shows the currently selected source as Analog Input AI1.
53HC2600 INSTRUCTION MANUAL Figure 4-10. FNC Function Block, Connection Example 4.4.6 Configuring the FNC Block Online The FNC function block contains nine mathematical equations and can operate on up to four analog inputs (A through D) and two digital inputs (E and F). Use this procedure to configure the FNC equation and constants: 1. As in offline operation, click on the FNC button to open the FNC dialog.
53HC2600 INSTRUCTION MANUAL 4.4.6.1 Using the Interactive Training Screens Online As in offline operation, the LoopMaster interactive training screens enable you to configure a controller database online while you learn about the parameters. These screens explain parameters in plain language and provide step-by-step instructions on how to configure the Micro-Mite controller. In this section, we will use the interactive training screens to configure the control output. 1.
53HC2600 INSTRUCTION MANUAL The SL6000.cn1.Output1 dialog shows the Output Parameters. The yellow box is an interactive training screen, and the parameters are shown in the Output Parameters section below it. The interactive training screens explain the meaning of each parameter, then prompt you for an action to configure it. 3. The first screen explains the RSW reverse switch. Notice in the Output Parameters section, the RSW box is checked. Click No and you’ll see the RSW box become unchecked. 4.
53HC2600 INSTRUCTION MANUAL Figure 4-14. Upload Dialog Window 2. As stated in the Upload dialog, select a file name and a controller, then click on Execute to initiate the transfer. When you click on Select A Controller..., a dialog box appears (fig). Note the similarity to the one illustrated in Figure 4-6. All data in the controller’s configuration database is uploaded, including calibration constants, and written to the file. Figure 4-15. Upload From Controller Window 4.
HC2600 INSTRUCTION MANUAL sequence provides the option to send calibration values to the controller, which is not provided for the upload. (See Section 6, Advanced Topics, Download Selectivity.) 1. To initiate a download sequence, click on the Download toolbar button. Download toolbar button. 2. Select a file name and a controller, then click on Execute to initiate the transfer. When you click on Select A Controller..., a dialog box (Figure 4-16) appears.
53HC2600 INSTRUCTION MANUAL 46 Online Configurations
53HC2600 INSTRUCTION MANUAL 5.0 USING THE DOCUMENTER 5.1 Documenter Report The Documenter Report is a permanent record of a particular configuration database which includes: • Title page with function block overview. • Several pages of parameters and their settings. Parameters are grouped and listed in the same order as they appear in the controller. • Characterizer (CHR) graph and Math Function Block (FNC) equation. If both CHR mode and FNC mode are off, then this page is omitted.
53HC2600 INSTRUCTION MANUAL 5.1.4.1 Documenter Title You can specify up to four lines of text to appear as the title of the report. Each line is centered between the left and right margins. Decrease the title font size if your title does not fit between the margins. The Documenter Title will be stored in the .S6D offline configuration file when you do a File > Save operation, and therefore will only affect this report. 5.1.4.
53HC2600 INSTRUCTION MANUAL 6.0 ADVANCED TOPICS 6.1 How to Start An Online Configuration Directly LoopMaster accepts one command line argument. For LoopMaster to start with an online configuration, the command line argument is a forward slash (/), followed by the desired COM port, a comma, then the instrument address. For example, to connect to instrument zero on COM2, the command line argument would be: /COM2,0 To setup LoopMaster to start with an online configuration: 1.
53HC2600 INSTRUCTION MANUAL 6.3 LoopMaster File Format Whenever you perform a File > Save or File > Save As, LoopMaster writes the configuration database and other information to the .S6D file. The .S6D files are text files and can be viewed by a text editor. The current version of the LoopMaster software creates three sections in the .S6D file. ✎ NOTE Variables that are not used or have default values do not appear in the listing. 6.3.
53HC2600 INSTRUCTION MANUAL Table 6-2.
53HC2600 INSTRUCTION MANUAL 6.3.3 [Database] Section The third section in the .S6D file holds the configuration database in Intel Hex format. Each line begins with a colon (:) and has the following format: It is not advisable to edit the [Database] section. 6.4 Downloading A File The process of downloading a file to a target controller requires two steps: 1. Open and load the file into PC memory. 2. Send the contents of memory to the target controller.
53HC2600 INSTRUCTION MANUAL and passkeys are loaded. After the file is loaded, the Strategy Assistant then makes the necessary changes to implement the desired strategy. To change the strategy assistant start base file, you must make the following entry in the LOOPMSTR.INI file under [Settings]: [Settings] StartFile=c:\loopmstr\newfile.s6d where newfile.s6d is the name of the new file downloaded during the Strategy Assistant operation.
53HC2600 INSTRUCTION MANUAL 54 Advanced Topics
53HC2600 INSTRUCTION MANUAL 7.0 TROUBLESHOOTING 7.1 SERIAL.386 File Installation Instructions LoopMaster requires a version of SERIAL.386 dated February 17, 1994 or later. Microsoft’s Product Support Application Note regarding SERIAL.386, which resides in LoopMaster’s install disk MSREADME.TXT file, is provided below. ✎ NOTE Ignore Step 3 of Microsoft’s instructions, where it states the WG1001 disk should be inserted into the floppy drive.
53HC2600 INSTRUCTION MANUAL The WG1001 disk included with this Application Note contains an updated SERIAL.386 driver that corrects both of these problems. To install the updated SERIAL.386 file: 1. Quit Windows for Workgroups. 2. To make a backup copy of the currently installed SERIAL.386 file: a. At the MS-DOS command prompt, type: ren :\serial.386 serial.old where : is the location of your Windows SYSTEM subdirectory. b. Press ENTER.
53HC2600 INSTRUCTION MANUAL 7.3.1 THREED.VBX Display Problems During startup, LoopMaster may detect a faulty version of the THREED.VBX file. As of this writing, according to the manufacturer, only two versions of THREED.VBX exist: the faulty version dated 4/28/93 and the corrected version dated 7/16/93. LoopMaster provides and uses the corrected version. If, during startup, LoopMaster detects the faulty version of THREED.
53HC2600 INSTRUCTION MANUAL 58 Troubleshooting
53HC2600 INSTRUCTION MANUAL 8.0 MICRO-MITE CONTROLLER OPTIONS 8.1 Connecting the Option Modules The Micro-Mite controller has a 10-pin communications connector and two 10-pin option connectors, option A and option B, as shown in Figure 8-1. Figure 8-1. Micro-Mite Controller Connectors This version of LoopMaster supports the Universal Analog Input Module in the option A connector and the 2DI/2DO Module in the option B connector. 8.
53HC2600 INSTRUCTION MANUAL The option is automatically detected during online configurations. LoopMaster recognizes this module when it is plugged into Micro-Mite option B connector. For offline configurations, you may add or remove this option using the Options > Micro-Mite Option Modules... menu selection sequence. 8.4 Universal Ananlog Input Module The Universal Analog Input Module adds up to two analog input blocks to the Micro-Mite controller.
53HC2600 INSTRUCTION MANUAL Appendix A GLOSSARY OF TERMS Configuration [Database] All Micro-Mite controller parameters used to configure the controller. Control Strategy Window Configuration window providing a function block overview to configure all Micro-Mite controller function blocks and interconnections. Datapoint A Micro-Mite controller parameter specified by its format type location (e.g., L24). Parameter format types are L, A, F, B, C, and H.
53HC2600 INSTRUCTION MANUAL 62 Glossary
53HC2600 INSTRUCTION MANUAL Appendix B DATABASE CROSS REFERENCE ACCESS DATABASE DIALOG Values can be entered into parameter datapoint locations with the Access Database... dialog from the Options pull-down menu of the Main Menu bar. Selecting this dialog invokes the Accessing the SL6 Database dialog, illustrated in Figure B-1. It provides the capability to directly read and write the controller database parameters without parameter validation.
53HC2600 INSTRUCTION MANUAL PROMPT-TO-DATAPOINT NUMBER CROSS REFERENCE To use the Options > Access Database... menu selection, a prompt-to-datapoint number cross reference table is provided in Table B-1. Table B-1.
53HC2600 INSTRUCTION MANUAL Table B-1.
53HC2600 INSTRUCTION MANUAL Table B-1. Prompt-to-Datapoint Number Cross Reference List (Continued) 66 Glossary DBase Module DBase Parameter Prompt Network Reference (Datapoint Number) cn.
53HC2600 INSTRUCTION MANUAL Table B-1. Prompt-to-Datapoint Number Cross Reference List (Continued) DBase Module DBase Parameter Prompt Network Reference (Datapoint Number) cn.
53HC2600 INSTRUCTION MANUAL Table B-1. Prompt-to-Datapoint Number Cross Reference List (Continued) 68 Glossary DBase Module DBase Parameter Prompt Network Reference (Datapoint Number) cn.
53HC2600 INSTRUCTION MANUAL Table B-1. Prompt-to-Datapoint Number Cross Reference List (Continued) DBase Module DBase Parameter Prompt Network Reference (Datapoint Number) cn.
53HC2600 INSTRUCTION MANUAL Table B-1.
53HC2600 INSTRUCTION MANUAL Table B-1. Prompt-to-Datapoint Number Cross Reference List (Continued) DBase Module DBase Parameter Prompt Network Reference (Datapoint Number) Fnc K01 C082 K02 C083 K03 C084 K04 C085 K05 C086 K06 C087 Ai.E L123 ALM.E L124 di7.E L120 di8.E L121 EZ.E L127 hLc.E L126 Pid.E L125 StP.E L122 Ao1.i B043 Ao2.i B044 Ao3.i B045 chr.M B038 chr.A B039 chr.b B053 chr.c B054 do1.i B067 do2.i B068 do3.i B069 do4.i B070 do5.i B071 do6.
53HC2600 INSTRUCTION MANUAL Table B-1. Prompt-to-Datapoint Number Cross Reference List (Continued) 72 Glossary DBase Module DBase Parameter Prompt Network Reference (Datapoint Number) PrG (cont) FiX B000 Fnc.M B033 Fnc.A B034 Fnc.b B035 Fnc.c B036 Fnc.d B037 Fnc.E B046 Fnc.F B047 LG1.M B055 LG1.A B056 LG1.b B057 LG2.M B058 LG2.A B059 LG2.b B060 LG3.M B061 LG3.A B062 LG3.b B063 LG4.M B064 LG4.A B065 LG4.b B066 PVt B040 PVt.2 B052 SchM B026 cS.A B027 cS.
53HC2600 INSTRUCTION MANUAL Table B-1. Prompt-to-Datapoint Number Cross Reference List (Continued) DBase Module DBase Parameter Prompt Network Reference (Datapoint Number) PrG (cont) cS.K B050 cS.
53HC2600 INSTRUCTION MANUAL 74 Glossary
53HC2600 INSTRUCTION MANUAL Appendix C MENUS AND TOOLBAR BUTTONS The LoopMaster SL6000 Configuration Toolkit has six menus and 18 toolbar buttons. Three of the toolbar buttons (Front Panel, Run, and Stop) are applicable to online configurations only and appear in graytone for offline operation. The menus and toolbar buttons are illustrated in Figure C-1. Figure C-1.
53HC2600 INSTRUCTION MANUAL File Menu The File menu provides a command suite to open, close, save, and print files. The LoopMaster program can also be exited from this menu. *Start online session... *New offline file *Open offline file... Close *Save Save As *Print... *Print Preview Print Setup... filename.S6D Exit START ONLINE SESSION... Used to initiate an online session.
53HC2600 INSTRUCTION MANUAL PRINT... It immediately invokes the Print dialog, which solicits page range and print quality selections for the Documenter Report. PRINT PREVIEW It displays the Documenter Report for the current active online or offline configuration session. NEXT PAGE is selected from the window toolbar until the entire report is viewed. PRINT SETUP...
53HC2600 INSTRUCTION MANUAL Data Transfer The Data Transfer menu provides four dynamic commands to move a specified configuration file from the personal computer to an addressed controller; to copy the configuration from an addressed controller as a .S6D file in the personal computer; to change the controller function index to a one for dynamic operation; and to change the function index in the controller to a zero, whereby control action stops and the last output value is continuously transmitted.
53HC2600 INSTRUCTION MANUAL Documenter The Documenter menu provides the command suite to style and print the Documenter Report. Title Page Fonts... Format... Margins... Header & Footer... Rear Panel Window Print... Print Preview... TITLE PAGE It immediately invokes the Documenter Title Page dialog, which solicits input for the title page four text lines. FONTS...
53HC2600 INSTRUCTION MANUAL PRINT... It immediately invokes the Print dialog, which solicits page range and print quality selections for the Documenter Report. PRINT PREVIEW... It displays the Documenter Report for the current active online or offline configuration session. NEXT PAGE is selected from the window toolbar until the entire report is viewed. Options The Options menu provides a command suite to style the onscreen presentations of the LoopMaster configuration toolkit. Number Format...
53HC2600 INSTRUCTION MANUAL DIGITAL COLOR... It immediately invokes the Color dialog, which solicits color selection inputs for the digital alphanumerics of all the control strategy windows. ACCESS DATABASE... This menu selection is only recommended for users with expert knowledge of the Datalink protocol and 53SL6000 Micro-Mite Controller database assignments.
53HC2600 INSTRUCTION MANUAL CASCADE A display presentation of overlapping windows for the control strategy, front panel, and rear panel displays. TILE HORIZONTALLY A display presentation whereby the control strategy, front panel, and rear panel window displays are stacked one above the other. TILE VERTICAL A display presentation whereby the control strategy, front panel, and rear panel window displays are stacked side-by-side.
53HC2600 INSTRUCTION MANUAL Help The Help menu command suite provides a search engine, help contents, and a description of the LoopMaster configuration toolkit help system. It also provides access to the LoopMaster program version number and copyright information display. *Contents Search for...
53HC2600 INSTRUCTION MANUAL 84 Menus and Toolbar Buttons
The Company’s policy is one of continuous product improvement and the right is reserved to modify the information contained herein without notice, or to make engineering refinements that may not be reflected in this bulletin. Micromod Automation assumes no responsibility for errors that may appear in this manual. © 2005 MicroMod Automation, Inc. MicroMod Automation, Inc. 140 Mushroom Blvd Rochester, NY USA 14623 Tel. 585-292-6050 Fax 585-273-6969 www.micromodautomation.