
Manual

© 2015 Microsoft Page 11
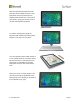
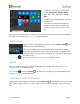
Surface Pen (Surface Pro 4 version)
Use the Surface Pen included with your Surface Book to open OneNote and Cortana, take
screenshots, mark up presentations, sign documents, and enjoy art apps.
Click the top of the Surface Pen and start writing a Quick Note—like a yellow sticky that you’ll
never lose. You don’t even need to unlock your Surface. Click again to write another note or press
the power button on your Surface to put the screen back to sleep.
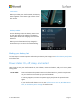
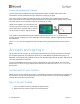
While you’re signed in on your Surface, click
the top of the pen to open your most recent
notes. While you’re using OneNote, click the
top of the pen to open a new Quick Note.
Your notes are saved automatically in OneNote and synced to your OneDrive (online cloud
storage) so you can keep your notes, clippings, sketches, photos, and files organized and accessible
from anywhere.
See Surface Pen later in this guide for more info about using the Surface Pen with your Surface
Book.
Accounts and signing in
The account you use to sign in on your Surface Book stores your settings, preferences, and more.
For the best experience, use a Microsoft account (an email address and password) to sign in. A
Microsoft account gives you seamless access to your Windows apps and social media and backs up
your files and photos in the cloud.
You can create additional accounts for family and friends on your Surface Book. That way each
person using it can set it up just the way he or she likes. For more info, see All about accounts on
Surface.com.
First account on your Surface
When you set up your Surface, an account is created for you based on information you supply. The
first account is set up as an administrator account. From this account, you can create, modify, or
remove other accounts on your Surface.
Sign in to your Surface
1. Turn on or wake Surface by pressing the power button.
2. Swipe up on the screen or tap a key on the keyboard.