Surface Pro 3 Deployment and Administration Guide Published: December 2014 Version 1.
© 2014 Microsoft. All rights reserved. Surface is a trademark of Microsoft Corporation. Computrace is a trademark of Absolute Software Corporation Reader is a trademark of Adobe Systems Incorporated Java is a trademark of Oracle Corporation This document is provided “as-is.” Information in this document, including URL and other Internet website references, may change without notice.
Contents PART I – DEPLOYMENT OVERVIEW Chapter 1 – Overview ................................................................................................................................................ 9 Purpose of This Guide ............................................................................................................................................ 9 Audience ....................................................................................................................................
Planning for Deployment ..................................................................................................................................... 31 Laboratory Testing ........................................................................................................................................... 31 Pilot Deployments ........................................................................................................................................... 32 Staggered Deployments ......
Customizing the Start Screen .......................................................................................................................... 86 Creating a Capture Task Sequence....................................................................................................................... 88 Creating an Image from the Reference System ................................................................................................... 90 Testing the Image......................................
Importing the Operating System Image............................................................................................................. 135 Creating the Deployment Task Sequence .......................................................................................................... 136 Specifying Drivers to Use in the Deployment Task Sequence ....................................................................... 140 Specifying the CopyProfile setting in the Answer Profile ......................
Pen Pairing ......................................................................................................................................................... 159 Migrating User Data ........................................................................................................................................... 160 Migrating Data in Replace Scenarios .............................................................................................................
PART I DEPLOYMENT OVERVIEW © 2014 Microsoft Page 8
Chapter 1 – Overview Purpose of This Guide This guide was constructed to show you best practices for deploying Windows to Surface Pro 3 devices. This may sound like a simple enough statement, but due to the vast number of scenarios and concepts, deployment can be quite complex. This guide is organized in a way that minimizes the learning curve for you to understand how to deploy Windows to the Surface Pro 3 devices to your organization.
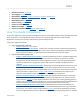
BitLocker Encryption – Chapter 8 Asset Tagging – Chapter 8 Network Boot – Chapter 3, Chapter 4, Chapter 5, Chapter 6, and Chapter 8 Deployment Planning – Chapter 2 Offline Deployment – Chapter 5 System Tracking – Chapter 8 Surface Pro 3 Features – Chapter 7 Windows Store Apps – Chapter 4 Surface Pro 3 Administration – Chapter 7 and Chapter 8 How This Guide is Organized This guide is organized in a series of parts and chapters that present increasingly complex concepts that build upon eac
with applications and drivers, is configured for central management through SCCM, and is ready for use by the end user. PART III: ADMINISTRATION o Chapter 7: Administration Overview – Describes Surface Pro 3 administration and concepts.
Chapter 2 – Deployment Introduction Deployment Concepts This section discusses the concepts you’ll need to gain an overall understanding of the deployment process for the Windows operating system and the tools available to your organization. Please read this section before continuing with the rest of this deployment guide. Deployment and Imaging The simplest way to transfer an operating system onto a single computer is known as installation.
the Preboot Execution Environment (PXE) standard. The Surface Pro 3 supports PXE boot through the docking station or Surface Ethernet Adapter. Your reference computer is likely to boot to the hard disk first, so you often need to change the boot order in the system firmware to boot to the boot media containing the alternative operating system. Most computers, including Surface Pro 3, provide a boot menu that enables a device to be selected at startup.
entered manually. Another example is the pairing wizard for the Surface Pen for Surface Pro 3, which is covered in more detail in the Pen Pairing section of Chapter 8. In other cases, many of the answers to question prompts are known in advance and are therefore predetermined. In these cases Windows Setup can be configured to supply these predetermined answers to avoid prompting the user. Answers to the setup questions are stored in an Answer File.
Licensing An important consideration when deploying the Windows operating system is how licensing will be managed for the deployed devices. There are four standard solutions for the management of licenses and each has implications for the deployment process.
Note: The deployment of images in organizations with Volume Licensing agreements for Windows 8.1 Professional is governed by the Reimaging Rights conferred with that Volume Licensing agreement. This agreement enables reimaging from volume license media to devices with preinstalled versions of the same product. For example, an organization with a pre-existing Windows 8.1 Professional image created from volume license media can deploy that image to the Surface Pro 3 licensed for Windows 8.
which eliminates the need for separate installation or configuration. The deployment can be fully automated but still have to be manually initiated. The Microsoft Deployment Toolkit (MDT) is the recommended tool for LTI deployments. The scenarios covered in Chapter 3, Chapter 4, and Chapter 5 are all lite-touch deployments. Zero-Touch Installation In a zero-touch installation (ZTI) deployment there is no human interaction on the client computer.
For larger deployments, there are additional scalability considerations, such as: Selecting technologies that maximize performance by minimizing network traffic Do the technologies cover multiple scenarios, such as: o Deployment to field or disconnected workers o Distribution across sites or subnets o Bring Your Own Device (BYOD) scenarios o Virtual Desktop Infrastructure (VDI) scenarios Automation Automation refers to the ability of a deployment task to be performed without human interaction.
to perform only a single task, others are complete solutions that can perform every step of a deployment. Most of the tools can be integrated into a complete solution accessed through a single interface, providing a combination of functionality and ease of administration. More details about these tools and solutions are provided in the following sections.
Windows Preinstallation Environment (WinPE) User State Migration Tool (USMT) Volume Activation Management Tool (VAMT) Application Compatibility Toolkit (ACT) Table 2.2: Windows ADK Tools.
to meet a wide variety of tasks. Windows PE is runs exclusively from RAM to make sure no files are locked in the disk to which we are deploying a new Operating System. User State Migration Tool The User State Migration Tool (USMT) is a command line utility that is used to back up and restore user-specific data and settings. USMT includes two processes, ScanState and LoadState.
MDT is also highly automated, with an extensive set of preconfigured scripts and a process for scripting each step of a deployment through task sequences. Task sequences are series of steps, where each step is performed by a command or script that advances the deployment process. It even lends this automation to the serviceability of the images it manages.
Caution: The first item under the Deployment Workbench is the Information Center, where you will find the documentation for MDT, a getting started guide, and a list of components. It is not recommended to update MDT from the list of components because the incorrect version of the components may be installed. To ensure the latest tools are available to MDT, ensure that the latest version of the Windows ADK is installed.
deployment share must be capable of deploying to an entire organization. In other cases, deployment shares may be only a limited deployment desired for a handful of users or a new set of hardware. Consider the scenario where a fully developed and implemented solution is available for deploying notebooks and desktops in the organization, but where a handful of Surface Pro 3 devices are being purchased for select users.
Another deployment share could be used to provide a full-featured deployment across the organization, but is secured so that it is only available to the IT department. Even a third share could be configured with another select deployment configuration and made available only to select groups or users to help facilitate a staggered deployment.
Driver Management As the Microsoft Deployment Toolkit is able to manage drivers independently of the operating system image, there is a separate section for Drivers in each deployment share. In some scenarios, like a share designed only to deploy to one make and model of computer, you can simply place the available drivers in this section and MDT will automatically select the most up to date applicable drivers for use at the time of deployment.
Note: MDT provides full support for the management and sideloading of Windows Store apps (APPX). Sideloading is the process of installing modern apps without downloading from the Windows Store. Chapter 4 shows how to manage Windows Store apps with your Windows deployments. Package Management Note: The MDT deployment share package management section is, perhaps surprisingly, not provided for management of application packages.
MDT can also be used to manage packages that contain features or packs. Through the selection profile functionality available in MDT, these packages can be targeted to specific computers. An example usage would be to deploy Remote Server Administration Tools (RSAT) for system administrators. Task Sequences One of the key mechanisms by which actions are performed by MDT are task sequences.
o Applications: A pre-selected set of applications including Office, accounting software, and the custom developed application o Drivers: Drivers are provided for multiple makes/models o BitLocker: Encryption enabled during deployment and enforced by group policy Design Department Task Sequence o Image: Windows 8.
actually included on the original installation media (either OEM or volume license media) for the operating system. This image file name is install.wim, and is sometimes referred to as the vanilla image. Although the vanilla install.
example, some applications cannot be configured through installation or scripts and require that they be configured in the base image, or as mentioned before there are times when it is simply easier to create a fully configured image for a project where deployment will only be to one type of device with one set of applications. When selecting the applications to include in an image, there are some points which warrant consideration. Among the most important is the interaction of an application with Sysprep.
NO Start Import Deployment Into Production Develop Deployment Process Test Deployment Pilot Deployment (Limited Scope) NO Deployment Successful? Deployment Successful? YES YES Production Deployment End Figure 2.2: Process for Testing and Piloting a Deployment. Pilot Deployments Once you have tested your deployments in a lab or VM, it is a good idea to deploy into production on a limited basis.
of the production environment. For example, if you are deploying organization wide, but you pilot the deployment only to the financial department, the pilot does not provide a reasonable indication that the deployment will likewise be successful in the graphics department where hardware and software configurations may be different. Pilot duration The more complex an environment, the more time you should give to pilot a deployment.
A recommended tactic to help the end user adjust to the new experience is a “white glove” delivery, in which IT or support staff deliver the new device. When delivering the device, they review with the user the new features or functionality, and assist the user in this adjustment process. When a user adjusts to a new Surface Pro 3 device, it may encompass multiple scenarios at the same time (new form factor, touch, and new operating system).
PART II DEPLOYMENT STEP-BY-STEP © 2014 Microsoft Page 35
Chapter 3 – Manual Deployment with MDT This chapter shows you how to perform a basic deployment, which includes no customization. It simply shows you how to install and configure all required deployment tools, then deploy a preconfigured image, install.wim, to a Surface Pro 3 device from a deployment computer, known throughout this chapter as a manual deployment. In a manual deployment, the user is prompted to input many fields, such as administrator password, domain, etc.
Deployment Server Surface Pro 3 Device Figure 3.1: Overview of Lab Environment. The overall process is that deployment server running the deployment tools is responsible for deploying install.wim as a base image to the Surface Pro 3 device. Any desired customizations will need to be performed directly on the device(s) after deployment, or you can customize your deployments by incorporating elements of more complex scenario examples in later chapters of this guide.
Figure 3.2: Downloading Windows ADK. To permit downloads in Internet Explorer (IE) on Windows Server 2012 R2, you’ll need to disable Internet Explorer Enhanced Security Configuration (IE ESC), which is shown in Figure 3.3. This can be done in Windows Server 2012 R2 in the Local Server tab of Server Manager. Figure 3.3: Disabling Enhanced Security Configuration.
The Windows ADK download includes a small setup file that is used to select and download only the desired components. It presents you with a screen where you select the desired products you would like to install, as shown in Figure 3.4. The bare minimum required for MDT are the Deployment Tools and Windows Preinstallation Environment (WinPE) options. Figure 3.4. Windows ADK Installation Options.
Figure 3.5: Downloading Microsoft Deployment Toolkit (MDT) 2013. When downloading MDT, the only required component is the installer for the processor architecture on which MDT will be installed. The installers are the MSI files designated as x64 for 64-bit and x86 for 32-bit architectures respectively. Also available is an extensive set of documentation including the standard deployment guides for Windows. These options are shown in Figure 3.6. Figure 3.6: MDT 2013 Download Options.
After you download and run the applicable MSI setup application, follow the prompts and accept all of the defaults. Windows Deployment Services After Windows ADK and MDT are installed, you need to install and configure Windows Deployment Services (WDS) to allow network boot in the environment. Each is described in the following sections. Installing WDS Because WDS is a role within Windows Server rather than a separate application, it does not need to be downloaded.
Figure 3.8: Add Roles and Features Wizard. 4. The Add Roles and Features Wizard presents a series of steps, as follows: Before You Begin – Presents an introductory page. Click Next. Installation Type – Select from one of these installation types: o Role-based or feature-based installation. Ensure this option is selected and click Next. o Remote Desktop Services installation. This option is used in a Virtual Desktop Infrastructure (VDI) environment, but is out of scope for this guide.
Figure 3.9: Add Roles and Feature Wizard Additional Features Prompt. Click Add Features to accept the new features and return to the Add Roles and Features Wizard main page. Click Next. Features – Click Next to accept the newly selected required features. WDS – Description page for WDS. Read this page and click Next. Role Services – Ensure both Deployment Server and Transport Server are selected. Confirmation – Displays a summary of the options selected.
Figure 3.10: Windows Deployment Services Configuration Wizard. 3. The Windows Deployment Services Configuration Wizard presents a series of steps, as follows: Before You Begin – Shows a description of WDS and the prerequisites. Click Next. Install Options – Select the Standalone server option to install WDS without active directory. Click Next.
Figure 3.11. PXE Server Initial Settings. Task Progress – Displays a progress bar during the configuration of WDS. Click Finish to close the Windows Deployment Services Configuration Wizard. Creating a Deployment Share The main user interface in MDT is the Deployment Workbench, which is where you will create task sequences and lists of actions that MDT will perform. Sequences provide the workflow for deployment.
Figure 3.12: New Deployment Share Wizard. The New Deployment Share Wizard presents a series of sequential steps, as follows: Path – Enter the path to your deployment share. It can reside anywhere you would locate a shared folder, but for this scenario, you can accept the default path of C:\DeploymentShare. Click Next. Share – Enter the name of the deployment share.
Note: Single license keys must be entered individually on each computer, so this option should be checked in most scenarios. However, MAK volume license keys are specified in MDT task sequences, so this option should not be checked in those scenarios. If you are using KMS volume license activation, this option should be unselected because activation is an automatic process.
After the deployment share is created, you’ll see many sub-folders under the name of the deployment share in the Deployment Shares tree, as shown in Figure 3.14. Figure 3.14: Folders Created For New Deployment Share. Importing an Operating System A newly created deployment share is empty and contains no operating system files, drivers, or any other configurations.
Figure 3.15: Import Operating System Wizard. 5. The Import Operating System Wizard presents a series of steps, as follows: OS Type – Select the type of operating system to add. Select the Full set of source files option. A full set of files is required for each operating system you will deploy. More details about the other options is discussed in Chapter 4. Click Next. Source – Enter or browse to the path containing the full set of source files.
Confirmation – Displays confirmation of success or errors generated while importing the operating system files. Click Finish to close the Import Operating System Wizard. After you import the operating system files and close the Import Operating System Wizard, the MDT Deployment Workbench will look similar to the one shown in Figure 3.16. Figure 3.16: Deployment Workbench after Importing Operating System.
Downloading the Surface Pro 3 Firmware and Driver Pack For Surface Pro 3, as well as Surface Pro and Surface Pro 2, drivers are made available through the Microsoft Download Center, on the Surface Pro 3, Surface Pro 2, and Surface Pro firmware and driver packs page. This page can be accessed at http://go.microsoft.com/fwlink/?LinkID=301483, and is shown in Figure 3.17. Figure 3.17: Microsoft Download Center Page for Firmware and Driver Packs.
Importing Drivers for Windows PE When configuring a deployment share for an organization that uses many computer models, each using different drivers, it is advisable to create a separate selection profile for the WinPE boot media. This will help to prevent any conflicts with drivers and functionality that is not provided in WinPE. The drivers most frequently required by WinPE are network and storage drivers.
8. Select the Import Drivers option from the Actions pane to launch the Import Driver Wizard, as shown in Figure 3.19. Figure 3.19: Import Driver Wizard. 9. The Import Driver Wizard presents a series of steps. Specify Directory – Enter or browse to the folder in which the extracted drivers are located and click Next. Note: Drivers are imported at the folder level. Therefore, when you import drivers and specify a folder, all drivers in that folder are imported.
General Settings – Specify the name WinPE for the selection profile and any desired comments, then click Next. Folders – Expand the deployment share tree and the Out-of-Box Drivers folder and check the box next to the WinPE folder as shown in Figure 3.20. Figure 3.20: WinPE Folder Selected In Selection Profile. Summary – Confirm the specified options and click Next. Progress – A progress bar will be displayed as the selection profile is created.
Figure 3.21: Windows PE Selection Profile. Click OK to apply the changes and close the window. Note: Repeat step 5 for the x86 platform if you are using boot media for 32 bit systems. Importing Drivers for Windows 8.1 Now that the drivers are configured for the boot media to enable Surface Pro 3 devices to launch the deployment process from network boot, the drivers for the operating system need to be supplied.
7. 8. 9. 10. 11. 12. Confirmation – Confirmation of the successful creation of the folder will be displayed here. Click Finish. Select the Windows 8.1 x64 folder. Select the New Folder option from the Actions pane to launch the New Folder dialog box. The New Folder dialog box presents the following options: General Settings – Specify the name Surface Pro 3 and any desired comments and then click Next. Summary – Confirm the specified options and click Next.
Figure 3.22: Deployment Share Showing Surface Pro 3 Firmware Drivers. Creating the Surface Pro 3 Win 8.1 x64 Selection Profile In a production deployment share with multiple makes and models of computers, there may incompatible drivers available. You need to ensure that only Surface Pro 3 drivers are deployed to Surface Pro 3 devices. The mechanism to specify which drivers are to be deployed to specific computers is to configure another selection profile, by following these steps: 1. 2. 3. 4.
Figure 3.23: Windows 8.1 x64 Folder Selected In Selection Profile. Summary – Confirm the specified options and click Next. Progress – A progress bar will be displayed as the selection profile is created. Confirmation – Confirmation of the successful selection profile creation will be displayed here. Click Finish. Creating the Task Sequence You have now installed the deployment tools, created a deployment share, and imported operating system files and drivers.
Figure 3.24: New Task Sequence Wizard. 3. The New Task Sequence Wizard presents a series of steps, as follows: General Settings – Enter the Task sequence ID and Task sequence name. These fields are used to uniquely differentiate this task sequence from others in the deployment share. For example, a task sequence to deploy Windows 8.1 Update Enterprise, you can enter a Task sequence ID of DplyWin8.1Ent and a Task sequence name of Deploy Windows 8.1 Update Enterprise. Click Next.
Confirmation – Displays confirmation of success or errors generated while creating the task sequence. Click Finish to close the New Task Sequence Wizard. Configuring Driver Selection To configure the task sequence to use the selection profile, follow these steps: 1. 2. 3. 4. Right-click the production deployment task sequence and select Properties. Select the Task Sequence tab. Expand the Preinstall folder and select the Inject Drivers step as shown in Figure 3.25.
Note: Specifying the selection profile in the deployment task sequence will make the task sequence applicable to Surface Pro 3 only. Selection profiles can also be specified with model specific deployment share rules. See the Customizing Rules for Automation section of Chapter 5. Preparing Boot Media Preparing boot media is comprised of two separate steps, each of which is described in this chapter: Generating boot media – creates the media that the target deployment computer boots from.
3. The Update Deployment Share Wizard presents a series of steps, as follows: Options – Enables you to select the desired option for updating the boot media. For this scenario, you can simply click Next because there is no boot image to update. Summary – Review the summary of updating the deployment share and click Next. Progress – Displays a progress bar of updating the deployment share. Note: Both 32-bit and a 64-bit boot images are created. By default, these images are named LiteTouchPE_x86.
Figure 3.27: WDS Console Showing Imported Boot Image. Deploying the Basic Scenario After creating the deployment share in MDT and configuring WDS, you are ready to deploy to the target Surface Pro 3 device. The deployment method is specific to the manual deployment scenario because it requires several prompts to be addressed on the target computer during the deployment process.
Figure 3.28: Surface Pro 3 Device Booting from the Network. 6. The network adapter will receive an IP address from a DHCP server and after the WDS PXE service is detected, will prompt the user to press ENTER to begin the network boot process as shown in Figure 3.29. Figure 3.29: Confirmation of Successful Connection to WDS Server. Note: In order to press the Enter key, the Surface Type Cover or a USB keyboard should be connected.
Windows Deployment Wizard After the boot image is loaded onto the target Surface Pro 3 device, the Microsoft Deployment Toolkit Welcome Page launches. You can start the Windows Deployment Wizard by following these steps: 1. Select the Run the Deployment Wizard to install a new Operating System option, as shown in Figure 3.31. Figure 3.31: Microsoft Deployment Toolkit Welcome Page. 2.
o Keep existing partitions – Indicates that any existing partitions should be preserved and not formatted or partitioned. o Move user data and settings – Indicates user data and settings should be preserved. User Data (Restore) – Select the option to control whether user data should be restored with the following options, then click Next: o Do not restore user data and settings – No user data is restored from a network location or USMT backup.
Figure 3.32: Installation Progress Bar. At the completion of a successful deployment, a Deployment Summary page is displayed, as shown in Figure 3.33. After review, the Deployment Summary page can be closed and the computer and operating system are ready for use or further customization. Figure 3.33: Deployment Summary Page. Note: The system is logged in using the local Administrator account specified in the Windows Deployment Wizard.
Chapter 4 – Reference Deployment with MDT One of the most common deployment tasks required by an organization is the creation of custom images. Sector-based imaging tools, such as many third-party tools, have no mechanism to customize an image during the deployment process. On the other hand, file-based imaging tools, such as MDT, can provide customization at the time of deployment.
Instructions for installation of the deployment tools are provided in Chapter 3. Virtual Machine (VM) 2: Reference System o Generation 1 Virtual Machine o Legacy network Adapter o No operating system installed Virtual Machine (VM) 3: Test System o Generation 1 Virtual Machine o Legacy network Adapter o No operating system installed The conceptual process of capturing and deploying images is described in Chapter 2.
Note: It is recommended to use generation 1 virtual machines for image creation because the resulting images are compatible with a wider range of potential clients. To support PXE boot, generation 1 virtual machines must use a legacy network adapter. Configuring Deployment Share Rules In Chapter 3, you learned how to create a new deployment share on the deployment server. If necessary, refer to Chapter 3 to learn how to navigate to and create the deployment share.
Figure 4.2: New Deployment Share Options. 3. Continue clicking Next to complete and close the New Deployment Share Wizard as you did in Chapter 3. Configuring Windows Deployment Wizard Rules The values for the options on the deployment share Options page, shown in Figure 4.2, are specified as settings, known as rules. These rules are stored in a file named customsettings.ini. Each deployment share contains this file, so each can be configured differently. The five options on the page shown in Figure 4.
Figure 4.3: Original Deployment Share Rules. Notice that the options in the [Default] section correspond to the options selected in the GUI screen in Figure 4.2. 3. Specify additional customizations by replacing the text shown in Figure 4.3 with the text shown in Listing 4.1.
SkipTimeZone=YES TimeZoneName=Pacific Standard Time UserDomain=SP3DEPLOY UserID=MDT UserPassword=P@ssw0rd SkipFinalSummary=YES Listing 4.1: Specifying Additional Customizations in the customsettings.ini File. Note: This guide does not outline every possible customization option in the customsettings.ini file. For more details about what can be customized and the values that can be specified, refer to the MDT Toolkit Reference, available in the MDT documentation.
Configuring Boot Media Rules In the same way that rules defined in customsettings.ini control the behavior of the Windows Deployment Wizard, rules defined in the file bootstrap.ini control the way the boot media for a deployment share behaves. The default behavior when booting to the MDT boot media is: 1. Before the Windows Deployment Wizard is launched, the MDT Welcome Screen is displayed and shows a Run the Deployment Wizard to install a new Operating System button. 2.
[Default] DeployRoot=\\SP3DEPLOY\LabDeploymentShare UserDomain=SP3DEPLOY UserID=MDT UserPassword=P@ssw0rd SkipBDDWelcome=YES Listing 4.2: Additional Rules in Bootstrap.ini. The additional settings specified in Listing 4.2 are: SkipBDDWelcome – Setting this value to YES bypasses the MDT Welcome Page when the boot media is launched. These settings are used to specify the credentials used by the boot media to connect to the deployment share.
OS Info – Contains information regarding the operating system used by the task sequence and a button to edit the answer file that is used by the task sequence. Enabling Windows Updates To instruct the deployment process to run Windows Updates, follow this procedure: 1. Expand the lab deployment share in the Deployment Share tree in the Deployment Workbench and click the Task Sequences folder. 2. Right-click the reference deployment task sequence created earlier in this chapter. 3. Click Properties. 4.
Note: Enabling Windows Update during deployment will significantly increase the time required to perform the deployment task sequence. The increase in time is dependent on how many updates must be installed. The task sequence is now configured to install Windows Updates on the reference system. Deploying to the Reference System Network boot is required to deploy to the reference system.
Figure 4.7: WDS PXE Boot Screen. 4. Press Enter to boot from the network. This launches the MDT boot media and processes the bootstrap.ini and customsettings.ini configuration files. You’ll notice a progress bar on the screen. 5. The Task Sequence page is displayed. Select the reference deployment task sequence created earlier in this chapter, as shown in Figure 4.8. Click Next. Figure 4.8: Selecting the Task Sequence.
6. Enter the desired computer name on the Computer Details page as shown in Figure 4.9 and click Next. Figure 4.9: Entering the Computer Name. The Installation Progress window appears to show the progress of the deployment. The deployment process will write the image to the reference computer and automatically manage the installation of Windows Updates, as shown in Figure 4.10. Figure 4.10: Progress of Windows Updates Installation.
When complete, the Windows Deployment Wizard will close automatically and the system will be logged in as the Administrator account with the password supplied during task sequence creation. The reference system is now ready for application installation, customization, and tweaking before it is captured back to the deployment share as an image.
Figure 4.11: Configured Microsoft Surface Wallpaper. Customizing the Default User Account Picture The default user account picture is used as the default picture for each new account created on a computer, unless the user changes it. The default user account picture is not configured as a component of the user profile, but as a separate set of images stored in the C:\ProgramData\Microsoft\User Account Pictures folder. To customize the default user account picture, follow these steps: 1. Open File Explorer.
Figure 4.12: User Account Picture Before Replacement. 3. For the default user account, these four images must be provided in the specified format and size: user.bmp (448x448 pixels) user.png (448x448 pixels) user-40.png (40x40 pixels) user-200.png (200x200 pixels) 4. Replace all four image files with your desired customized image, as shown in Figure 4.13. Figure 4.13: User Account Picture After Replacement.
5. When prompted to Replace or Skip Files, select Replace the files in the destination. 6. When the Destination Folder Access Denied dialog box appears, check the Do this for all current items checkbox to provide administrator permission to copy files to the folder and click Continue. 7. Close File Explorer. After customization, the default user account picture is shown in Figure 4.14. Figure 4.14: Customized User Account Picture.
Figure 4.15: Start Screen Before Customization. As an example, this procedure shows you to uninstall and un-provision the Sports app, but the same procedure works for any other Windows Store app as well: 1. Open an Administrative PowerShell session. 2.
Figure 4.16: Get-AppxPackage Output. Note: The output from this statement can be written to a text file to make it easier to reference, search, or copy from. This is done by adding > c:\report.txt to the end of the statement. For example: get-appxpackage –alluser | format-list -property packagefullname > c:\users\administrator\desktop\installedappx.txt 3. If you scroll through the list of returned apps, you’ll see Microsoft.BingSports_3.0.4.212_x64__8wekyb3d8bbwe in the list.
Figure 4.17 shows the same Start Screen as in Figure 4.15, but with the Sports app removed. Figure 4.17: Start Screen After Sports App Removed. Customizing the Start Screen Customizing the Start Screen involves the arrangement of the tiles on the screen and grouping them into logical sections and alternatively naming those sections. You do this by simply dragging the tiles into the desired location on the screen, resizing them, or any other action that configures the screen any way you like.
Figure 4.18: Start Screen Before Customization. To export and import a Start Screen layout template, follow these steps: 1. On the computer with the app(s) installed, open an Administrative PowerShell session. 2. To generate the template, run the Export-StartLayout cmdlet with the following statement: export-startlayout –path c:\startscreenlayout.bin -as bin 3. Close the PowerShell session window. 4. Copy the generated c:\startscreenlayout.
Figure 4.19: Start Screen After Customization. Note: The same PowerShell cmdlets can also be used to generate an XML export of a Start Screen layout for use with the Start Screen Layout group policy setting. Creating a Capture Task Sequence After the reference system is customized the system must be prepared for deployment and captured into an image file. Capturing an image is controlled by using a task sequence. To create a task sequence to capture an image of the reference system, follow these steps: 1.
Figure 4.20: Capture Task Sequence. Select Template – Select the Sysprep and Capture template and click Next. Select OS – Select the operating system that was originally deployed to the reference system and click Next. Specify Product Key – When capturing an image, you do not specify a product key. Click Next. OS Settings – Enter the desired registration information and home page and click Next.
Figure 4.21: Capture and Reference Deployment Task Sequences. Note: It is possible to perform the deployment and capture steps in the same task sequence. To accomplish this, the task sequence must automate customization to the reference image. However, automation is not possible for some tasks. Therefore, the task sequence will need to be paused to enable user interaction. MDT includes a script named LTISuspend.wsf, which pauses a task sequence for this purpose.
Note: Another advantage in using a virtual machine as a reference system is the ability to use checkpoints or snapshots. Checkpoints store the exact state of a virtual machine at the specified point of time. A virtual machine can be easily reverted to this state, if necessary. For example, the Sysprep process makes irreversible changes to the reference system, so creating a checkpoint gives you the ability to restore to a specific point in time. Launch the Windows Deployment Wizard via the litetouch.
Testing the Image After the image has been captured, it is ready to be used to deploy to other computers. To verify the successful application of the customizations in the resulting image, a test deployment to a second virtual machine in the lab is recommended. To perform this test deployment, follow these steps: 1. Import the captured image in the deployment share 2. Create a new test deployment task sequence 3.
General Settings – Enter the desired task sequence ID, name, and comments. Click Next. Select Template – Select the Standard Client Task Sequence and click Next. Select OS – Select the operating system you imported from your custom image. Click Next. Specify Product Key – Select Do not specify a product key at this time and click Next. OS Settings – Enter the desired registration information and home page and click Next.
5. Select the EditFind menu or press Ctrl+F to launch the Find dialog box. Note: With a large number of available components, it is typically quicker to find a specific setting by searching rather than expanding the components tree under the Windows Image pane. 6. Enter the term copyprofile and click Find Now to locate the Microsoft-Windows-Shell-Setup component. 7.
When the image is applied to the target system, the specialize pass will run, which copies the Administrator profile to the local Default User profile, enabling new users to receive the customizations made to the Administrator profile in the reference system.
Chapter 5 – Automated Deployment with MDT The automated deployment scenario in this chapter builds upon the reference deployment scenario discussed in Chapter 4. The automated deployment scenario decreases the level of interaction required by the user/technician and also includes apps and drivers. The automated deployment produces a computer that is production-ready.
Production Deployment Server PC1 (Connected Device) PC2 (Offline Device) Figure 5.1: Offline Deployment Scenario Computers. Note: A USB stick with at least 10GB of storage is required for the offline deployment outlined in this chapter. The USB drive must be reported as a fixed drive to support multiple partitions. A Windows To Go certified drive is recommended. Disabling WDS PXE Boot In Chapter 4, the lab deployment server was configured for PXE boot.
Figure 5.2: Disabling PXE Response to Clients. 5. Close Windows Deployment Services. Creating the Production Deployment Share The production deployment share will contain the applications, drivers, and custom images for deployment across the organization and will share these components with the offline deployment share. The deployment production share and offline deployment share will use the same apps, drivers, and images, so instead of duplicating effort, deployment shares can be linked.
Priority=Default Properties=MyCustomProperty [Default] OSInstall=Y SkipCapture=YES SkipAdminPassword=YES SkipProductKey=YES SkipComputerBackup=YES SkipBitLocker=YES SkipBDDWelcome=YES SkipUserData=YES UserDataLocation=AUTO SkipApplications=YES SkipPackageDisplay=YES SkipComputerName=YES SkipDomainMembership=YES JoinDomain=contoso.
selection profile in the task sequence. Selection profiles are covered in the Importing Drivers section in this chapter. SkipDomainMembership – This setting is still configured as YES to prevent the display of the domain or workgroup join fields on the Computer Details page, but rather than specifying a workgroup to join, the following settings specify a domain to be joined along with the required credentials: o JoinDomain – This setting is used to specify the domain for the deployed computer to join.
Figure 5.3: WMI Model Name for Surface Pro 3. To add automatic selection of a task sequence for Surface Pro 3 devices, follow these steps: 1. 2. 3. 4. Expand the Deployment Shares tree in the Deployment Workbench. Right-click the production deployment share and select Properties. Select the Rules tab.
SkipTaskSequence – Setting SkipTaskSequence to YES will bypass the Task Sequence page of the Windows Deployment Wizard. When this setting is enabled, a task sequence must be specified using TaskSequenceID setting. TaskSequenceID – This setting is used to specify the ID of the task sequence to be used by the Windows Deployment Wizard. The final configuration of the rules should match Listing 5.
Importing the Custom Image To use the custom image developed in the reference deployment scenario described in Chapter 4, the image needs to reside in the production deployment share. The image WIM file can be copied from the source computer and imported with the Import Operating System Wizard in the same way that it was in the Importing the Captured Image section in Chapter 4, or it can be copied directly between deployment shares.
deployment share to the Operating Systems folder of the production deployment share. Also copy the test deployment task sequence that you created in the Creating the Test Deployment Task Sequence section in Chapter 4 to the production deployment share. Figure 5.5: Deployment Workbench Showing Lab and Production Deployment Shares.
command for installation will vary from application to application, so it is important to consult the documentation provided by the developer for the correct switches and syntax. Importing Adobe Reader Note: Licensing for volume distribution of Adobe Reader and the files required by this process require registration with Adobe at this link: http://www.adobe.com/products/reader/rdr_distribution1.
o Application Name – Enter Reader o Version – Enter 11.0.09 or the version of your Adobe Reader installation files. o Language – Enter en-US or the language/locale of your Adobe Reader installation files. Source – Specify or browse to the directory in which the application installation files are located, then click Next. Note: The import process will include all files and subfolders in the location selected. For Adobe Reader, only the single EXE file is required.
Destination – Specify a name for the folder in which to place the installation files, or leave the folder name default. Click Next. Command Details – Provide the command which will be run to install the application. For Adobe Reader, use the following command to enable silent installation, then click Next: jre-8u25-windows-i586.com /s Summary – Confirm the summary of the options supplied for the application and click Next. Progress – A progress bar is displayed during the import process.
2. Ensure your administrative user account has permission to write to this folder. 3. Download the Office Deployment Tool and place it in the Office15 folder. There should be two files, setup.exe and configuration.xml as shown in Figure 5.8. Figure 5.8: Office Deployment Tool Files. 4.
Figure 5.9: Save As Type Drop Down Menu in Notepad. 7. Name the file download.xml and save it to the Office15 folder. 8. Open a Command Prompt or a PowerShell session. 9. Enter the following command to run setup.exe with the download instruction and specifying the download.xml configuration file, then press Enter: \\sp3proddeploy\office15\setup.exe /download \\sp3proddeploy\office15\download.xml 10. When prompted, allow Microsoft Office ClicktoRun to run with administrative credentials.
2. Select Save As from the File menu. 3. Select All Files from the Save As Type drop down menu. 4. Name the file MDT.xml and save it to the Office15 folder. In this configuration file, no SourcePath value is specified. This is because the default behavior of setup.exe is to look for the source files in the path that contains setup.exe. This will be the directory shown in Figure 5.10, with the imported installation files which is placed locally on the deployed system.
2. Expand the deployment share and select the Applications folder. 3. Select New Application from the Actions pane to launch the New Application Wizard. 4. The New Application Wizard presents the following steps: Application Type – Select Application with source files, then click Next. Details – Provide the following details to identify the application, then click Next: o Publisher – Enter Microsoft. o Application Name – Enter Office 365 Pro Plus. o Version – Enter 15.0.4659.
Creating the Production Deployment Task Sequence To perform the deployment, a new task sequence that specifies the selection profile needs to be created. In this task sequence, select the applicable image file, selection profile, and set the CopyProfile setting in the answer file. This new task sequence needs to use the ID that was specified for Surface Pro 3 models in the customsettings.ini file earlier in this chapter. To create the production deployment task sequence, follow these steps: 1.
Figure 5.12: Three Install Applications Steps. 6. Select the first Install Applications step. 7. Change the name of the step to Install Application (Adobe Reader). 8. Change the setting Install multiple applications to Install a single application as shown in Figure 5.13, then select Browse and chose Adobe Reader from the list of available applications. Figure 5.13: Install Application (Adobe Reader) Step. 9. Select the second Install Applications step. 10.
11. Change the setting Install multiple applications to Install a single application, then select Browse and chose Oracle Java from the list of available applications. 12. Select the third Install Applications step. 13. Change the name of the step to Install Application (Microsoft Office). 14. Change the setting Install multiple applications to Install a single application, then select Browse and chose Microsoft Office from the list of available applications.
therefore will not appear. The Installation Progress window will appear to show the progress of the deployment as it processes the steps of applying the image, installing applications, and installing Windows Updates. Upon completion, the Installation Progress window will close and the computer will be left ready for use logged in as the local administrator account. The computer will be joined to the domain, so an end-user only needs log in to begin using the computer.
Figure 5.14: Deployment Workbench Showing Three Deployment Shares. Linking the Deployment Shares After the offline and production deployment shares are open side-by-side, the components from the production deployment share will need to be copied to the offline deployment share. This can be done manually, through Copy and Paste, as was done between the lab deployment share and production deployment share, or can be done through automated means via linked deployment shares.
Figure 5.15: Deployment Workbench Showing Linked Deployment Share Folder. 3. Select New Linked Deployment Share from the Action pane to launch the New Linked Deployment Share Wizard. 4. The New Linked Deployment Share Wizard presents the following steps: General Settings – Configure the name, selection profile, and replication method for the linked deployment share through the following options as shown in Figure 5.16, then click Next. Figure 5.16: Linked Deployment Share Wizard Options.
o Linked deployment share UNC path – Enter or browse to the location of the offline deployment share. Note: The location used here must be the network share location, not the local location. For example, use \\SP3ProdDeploy\OfflineDeploymentShare$. Do not use: E:\OfflineDeploymentShare o Comments – Enter any desired comments for the linked deployment share. o Selection Profile – Select the Everything selection profile from the drop down menu.
6. The Replicate to Linked Deployment Share dialog box displays a progress bar on the Progress screen as replication is performed. 7. The Confirmation screen is displayed to report successful replication. Click Finish to close the Replicate to Linked Deployment Share dialog box. The custom image, drivers, applications, and task sequence for deployment of Surface Pro 3 devices should now be present in the offline deployment share.
3. Enter the following command and press Enter to launch the Diskpart Command-Line Utility: diskpart 4. Enter the following command and press Enter to list the disks on the computer: list disk 5. Select the disk number that corresponds with your USB stick by entering the following command and pressing Enter, where X is the disk number: sel disk X 6. Enter the following command and press Enter to wipe any existing configuration from the USB stick. This will remove any existing data from the selected disk.
General Settings – Enter the following configuration for the offline media and then click Next. Media Path – Enter or browse to the location where the offline media should be created. This location should be outside the deployment share. Comments – Enter any desired comments for the offline media. Selection Profile – Select the Everything selection profile to include all content from the offline deployment share in the offline media.
6. Right-click and select Paste to overwrite the offline media rules. 7. Alter the following settings: JoinDomain – Replace the JoinDomain setting with JoinWorkgroup=WORKGROUP and remove the associated DomainAdmin, DomainAdminDomain, and DomainAdminPassword settings. A system without connectivity to the corporate network will be unable to join the domain and will fail if JoinDomain is specified. SkipSummary – Change the SkipSummary setting from YES to NO.
SkipSummary=NO SkipFinalSummary=YES Listing 5.3: Offline Media Rules. Add the SkipBDDWelcome setting to the Bootstrap.ini file by following the procedure detailed in the Configuring Boot Media Rules section of Chapter 4. The credentials settings do not need to be configured because the offline boot media will not connect to a separate deployment share.
Figure 5.20: Offline Media Files Selected. 9. Enter or browse to the location of the prepared USB stick. 10. Right-click the prepared USB stick and select Paste. This will copy the boot files for the USB stick. The USB stick is now ready to be booted and to perform the deployment. Deploying from Offline Media On the target Surface Pro 3 device, follow these steps to boot from the USB stick and perform the deployment: 1. 2. 3. 4. 5. 6. 7. 8.
After the deployment process is complete, the Installation Progress dialog box will automatically close and your Surface Pro 3 device will be ready for use. Your Surface Pro 3 will include the customizations that were made to the image in Chapter 4, such as the configured Start Screen and wallpaper. All of the devices and components of your Surface Pro 3 will function as intended using the installed drivers.
Chapter 6 – Automated Deployment with SCCM Unlike the lite-touch scenarios covered in Chapter 3, Chapter 4, and Chapter 5 that all use the Microsoft Deployment Toolkit, the automated deployment scenario covered in this chapter uses zero-touch installation (ZTI) and System Center Configuration Manager (SCCM) as the primary deployment tool. The Microsoft Deployment Toolkit is integrated with SCCM to provide additional functionality and capabilities.
o Microsoft Deployment Toolkit (MDT) o Windows Deployment Services (WDS) Managed Surface Pro 3 o Domain Joined o System Center Configuration Manager (SCCM) Client New/Vanilla Surface Pro 3 o Not Domain Joined o No SCCM Client Currently Managed Surface Pro 3 Device SCCM Server New/Vanilla Surface Pro 3 Device Figure 6.1: Computers for Automated Deployment Scenario with SCCM.
Integrating MDT with SCCM Before the deployment process can be configured, the MDT components will need to be added to SCCM. This is done through a wizard, named Configure ConfigMgr Integration, which is launched outside of either tool. To integrate MDT with SCCM, follow these steps: 1. Launch the Configure ConfigMgr Integration wizard from the Start Screen under Microsoft Deployment Toolkit on your SCCM server. 2.
After the integration has been completed, in SCCM, locate the Create MDT Task Sequence button in the Task Sequences folder under Operating Systems in the Software Library, as shown in Figure 6.3. This button is used to create the deployment process in the Creating the Deployment Task Sequence section later in this Chapter. Figure 6.3: Create MDT Task Sequence Button.
Note: Drivers can be organized into folders and subfolders within the Drivers folder for further organization. 3. Click the Import Drivers button in the Home ribbon to launch the Import Drivers Wizard. 4. The Import Drivers Wizard presents a series of steps: Locate Driver – Provide the location of the driver files on this page through the following options, as shown in Figure 6.4, then click Next. o Import all drivers in the following network path (UNC) – Select this option.
Note: The location of the drivers to be imported must be a network share (UNC). Driver details – A list of the drivers found will appear on this page, specify the following options as shown in Figure 6.5, and then click Next. o The following drivers will be imported – All drivers found should be selected if you imported all drivers from the Surface Ethernet Adapters folder. o Enable these drivers and allow computers to install them – Ensure that this option is selected to allow these drivers to be used.
Name – Name the package Surface Pro 3. Comment – Supply any desired comment. Path – Enter the network path where these drivers will be stored. If no path already exists where you want to store these drivers, create one on the SCCM server. Figure 6.6: Specifying Driver Packages in the Import Drivers Wizard. Add Driver to Boot Image – Select the x64 boot image to add the Surface Ethernet Adapter drivers to that image, as shown in Figure 6.7, then click Next.
Figure 6.7: Specifying Boot Image in Import Drivers Wizard. Summary – Confirm the selected options and then click Next. Progress – A progress bar is displayed during the driver import process. Completion – Confirmation of successful import is shown, click Close to complete the Import New Driver Wizard. Importing the Drivers for Windows 8.1 To import the drivers for the operating system follow these steps: 1. 2. 3. 4. In SCCM, open the Software Library.
Driver details – A list of all of the drivers found will appear on this page, specify the following options as shown in Figure 6.8, and then click Next. o The following drivers will be imported – All drivers found should be selected if you imported all drivers from the Surface Ethernet Adapters folder. o Enable these drivers and allow computers to install them – Ensure that this option is selected to allow these drivers to be used.
Driver Pack and Surface Ethernet Adapter drivers are now included in a package that can be deployed to managed Surface Pro 3 devices to update the drivers and are included in a category that can be specified during deployment. Importing the Operating System Image As described in the introduction to this chapter, even when SCCM is used as the deployment solution for production systems, it is still recommended to capture images through MDT.
Completion – Confirmation of successful import is shown, click Close to complete the Add Operating System Image Wizard. Creating the Deployment Task Sequence Now that the components are available for deployment, the next step is to create the sequence of steps that will be performed during the deployment process. This is where the integration with MDT comes into play. To create the deployment task sequence, follow these steps: 1. In SCCM, open the Software Library. 2.
Figure 6.10: MDT Package Creation. MDT Details – Provide a name and if desired, version, language, manufacturer, and comments for the MDT files that will be created. Click Next. OS Image – Select the Specify an existing OS image option, then click Browse and select the image that was imported from the lab deployment server. Click Next. Deployment Method – Select the Perform a “Zero Touch Installation” OS deployment, with no user interaction option and click Next.
Figure 6.11: ConfigMgr Client Package. USMT Package – Select the Specify an existing USMT package option, then click Browse and select the USMT package used in your organization as shown in Figure 6.12. Click Next.
Figure 6.12: USMT Client Package. For more information about USMT, see the Deployment Tools section of Chapter 2 and the Migrating User Data section of Chapter 8. Settings Package – Select the Create a new settings package option and then click Browse and select the network share path for the settings package, as shown in Figure 6.13. If one does not exist, it will need to be created. Click Next.
Figure 6.13: Settings Package. Settings Details – Provide a name and if desired, version, language, manufacturer, and comments for the settings package that will be created. Ensure the This settings package is for a Server Core operating system installation check box is unselected. Click Next. Sysprep Package – Select No Sysprep package is required and click Next. Summary – Confirm the selected options and click Next. Progress – A progress bar is shown while the task sequence is created.
Figure 6.14: Auto Apply Drivers Step. 6. In the For each hardware device section of the Properties tab, select the Install all compatible drivers option. 7. In the Select drivers from all categories or drivers in specific categories to be made available during Windows setup section, select the Limit driver matching to only consider drivers in selected categories option and then select the Surface Pro 3 category. 8. Close the Task Sequence Editor.
Figure 6.15: Apply Operating System Image Step. 5. Check the Use an unattended or Sysprep answer file for a custom installation check box from the Properties tab for the step. 6. The Package field displays the Settings package that was specified during creation of the task sequence. 7. The File name field displays the name of the answer file that will be used. A file matching this name placed in the settings package location will be used during deployment. 8. Close the Task Sequence Editor.
Deploying the Operating System Task Sequence to the Client This section outlines how to make the component packages available on the SCCM distribution point. It also shows how to deploy to existing Surface Pro 3 SCCM clients and to new Surface Pro 3 devices. Updating Distribution Point Components Before the deployment can be run on client systems, the components that were prepared through the process in this chapter must be updated for the distribution point.
Figure 6.16: Deploy Software Wizard Task Sequence and Collection. Deployment Settings – Define if the deployment will be available or mandatory and if the deployment will be available to existing SCCM clients or via PXE or media through the following options, as shown in Figure 6.17. Click Next. o Purpose – This can be set to Available to make the task sequence available in the Software Center on the clients or set to Required to enforce deployment of the operating system to the clients.
Figure 6.17: Deployment Settings. Scheduling – You can set when the task sequence will be made available, when the deployment should complete by, and for Required applications you can define a schedule or make the task sequence immediately available. For testing, click the New button to create an assignment schedule, then set Assign immediately after this event to As soon as possible as shown in Figure 6.18. Click Next.
Figure 6.18: Deployment Schedule. User Experience – You can configure a number of options as shown in Figure 6.19 for the task sequence on this page, select the Notification Settings options as follows and then click Next: o Notification Settings – Specify whether users should be able to run the task sequence outside of the configured rules and whether Task Sequence progress will be displayed.
Figure 6.19: Deployment User Experience. Alerts – You can configure alerts for success or failure of the deployment, click Next. Distribution Points – You can configure how the client will interact with content on the distribution point. Set Deployment options to Download content locally when needed by running task sequence. Summary – The selected options will appear, click Next. Progress – A progress bar is displayed during the creation of the deployment.
Figure 6.20: Maintenance Period Scheduling in Software Center. You may note that the deployment is performed to a device collection when deploying with SCCM. Before you deploy to a large number of computers, the configuration of your deployment should be tested on a smaller scale. It is recommended that this begin with a test deployment to only one or two computers. To create a device collection for a test deployment to only one computer, follow these simple steps: 1. 2. 3. 4.
To deploy the task sequence to computers which are unknown to SCCM, a new deployment must be created. This new deployment is required because it must be configured for the default All Unknown Computers collection. Follow the steps listed in the prior section for existing SCCM clients, but ensure the following settings are configured: Collection – Select the All Unknown Computers collection. Purpose – Set the deployment to Available, not Required. Make available to the following – Include PXE.
Figure 6.21: PXE Boot Settings. 6. Click OK to close the distribution point properties. Note: If the deployment servers used in Chapter 3, Chapter 4, or Chapter 5 are located on the same network as the SCCM server, the PXE boot services in WDS should be disabled to prevent conflict for PXE boot clients. Now that PXE is configured, new clients that are unknown to SCCM will boot from PXE and be provided with the option to deploy the Surface Pro 3 task sequence as shown in Figure 6.22.
Figure 6.22: PXE Boot Task Sequence Selection.
PART III ADMINISTRATION © 2014 Microsoft Page 152
Chapter 7 – Administration Overview This chapter covers the basics of administering Surface Pro 3 devices in your organization, including an overview of Surface Pro 3 capabilities, tools for administration, and available support. Although the form factor and functionality of Surface Pro 3 devices may differ from other computers in your organization, fundamentally the administration of Surface Pro 3 devices is the same as administration of any other PC, with a few exceptions.
Windows Intune Windows Intune is a cloud based management solution that provides a web-accessible interface for management of your client systems. Unlike SCCM, Windows Intune supports management of Windows clients that are not domain joined and those that do not require connectivity to the corporate network, which can make it an ideal solution for organizations with remote workers or disconnected offices. Windows Intune is not covered further in this guide.
BitLocker Encryption With both Windows 8.1 Professional and Windows 8.1 Enterprise, Surface Pro 3 devices support encryption of the operating system data using BitLocker Drive Encryption (BDE). Surface Pro 3 devices include a Trusted Platform Module (TPM) that can be used as an authentication factor to automatically unlock a device.
Note: Because the Surface Ethernet Adapter has a fixed MAC address, if you share the adapter among multiple computers, this may cause some issues for software that identifies computers by MAC address. A notable example of this is System Center Configuration Manager, as mentioned in Chapter 6. Surface Pro 3 Docking Station The Surface Pro 3 Docking Station provides a stand for Surface Pro 3 devices that includes a power connection and additional connectivity for devices.
Chapter 8 – Administration Scenarios For many organizations, Surface Pro 3 devices provide additional functionality beyond that of other devices. This additional functionality also presents a number of administrative tasks that may be new to IT departments, and therefore may present new challenges. In this chapter, these administration scenarios are outlined, along with a stepby-step examples of how these tasks can be managed.
Enabling PIN Authentication on Surface Pro 3 Although the on-screen keyboard is provided in the preboot environment on Surface Pro 3 devices, keyboard input is not always provided by other touch devices, such as Surface Pro 2.
BDEPin – This rule is used to define a PIN if the setting in BDEInstall is configured to use a PIN protector. BDERecoveryKey – This rule can be set to AD to instruct that the BitLocker recovery key should be backed up to Active Directory. The resulting rules will match the following: [Surface Pro 3] SkipTaskSequence=YES TaskSequenceID=SP3Win8.
5. Type the following command using the /WIMFile: option with DISM to specify the path you located in Step 3 to mount the image in the folder C:\Mount for editing: DISM /Mount-WIM /WIMFile:C:\Install.wim /Index:1 /MountDir:C:\Mount 6. Browse to the C:\Mount\Windows\System32\oobe\info\default\1033 folder in File Explorer. If any of these folders do not exist, they should be created at this time. 7. Copy the files from Step 2 into this folder. 8.
Summary – This page will present a summary of the specified options, click Next. Progress – This page will display a progress bar during task sequence creation. Confirmation – A confirmation of the successful creation of the task sequence will be shown, click Finish to close the New Task Sequence Wizard. 5. Close the Deployment Workbench.
UDDir=%OSDComputerName% This will create a folder with the computer name on the share UserData on the deployment server. The user credentials specified in the rules or when launching the Windows Deployment Wizard must have write permission to this share. Note: The replace computer task sequence requires no image files and thus is very lightweight.
on the hard drive to keep the data during deployment. If there is not enough room, it will fall back on the UDShare and UDDir network location. System Tracking Surface Pro 3 devices include native support for Absolute Computrace device tracking software. This solution includes a separate application that must be installed in the deployed client environment to facilitate tracking. This agent is available through the Customer Center for subscribers to the service at the following link: https://cc.absolute.
PART IV APPENDIX © 2014 Microsoft Page 164
References Description Type Link The Deployment Guys Blog http://blogs.technet.com/b/deploymentguys/ Windows for IT Pros Blog http://blogs.windows.com/itpro/ How to Update the Surface Pro 3 Firmware Offline using a USB Drive Blog Post http://blogs.technet.com/b/askpfeplat/archive/2014/10/20/howto-update-the-surface-pro-3-firmware-offline-using-a-usbdrive.aspx Deploying Drivers and Firmware to Surface Pro Blog Post http://blogs.technet.
Microsoft Premier Support Site Support http://premier.microsoft.com/ Active Directory-Based Activation Overview TechNet Article http://technet.microsoft.com/library/hh852637 Windows 8.1 Deployment Jump Start Video http://www.microsoftvirtualacademy.com/trainingcourses/windows-8-1-deployment-jump-start Windows 8.1 User Readiness Toolkit Video http://www.microsoftvirtualacademy.com/trainingcourses/windows-8-1-user-readiness-toolkit Microsoft Surface Site Web Site http://www.microsoft.