Surface RT User Guide Published: April 9, 2013 Version 1.
© 2013 Microsoft. All rights reserved. BlueTrack Technology, ClearType, Excel, Hotmail, Internet Explorer, Microsoft, OneNote, Outlook, PowerPoint, SkyDrive, Windows, Xbox, and Xbox Live are registered trademarks of Microsoft Corporation. Surface, VaporMg, Skype, and Wedge are trademarks of Microsoft Corporation. Bluetooth is a registered trademark of Bluetooth SIG, Inc. This document is provided “as-is.
Contents Meet Surface RT .................................................................................................................................1 About this guide ........................................................................................................................... 1 Highlights ........................................................................................................................................ 2 What is Windows RT? ...........................................
Accounts ............................................................................................................................................ 34 What type of account do I have? ......................................................................................... 34 Multiple user accounts ............................................................................................................. 35 Manage accounts ..................................................................................
Customize the Start screen .................................................................................................... 53 Sync your settings...................................................................................................................... 55 Notifications ................................................................................................................................. 55 Add languages ................................................................................
Xbox Games ................................................................................................................................. 97 Xbox SmartGlass......................................................................................................................... 99 More built-in apps .................................................................................................................. 100 Additional info you should know ..........................................................
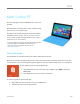
Meet Surface RT Ultra-thin and light, Surface with Windows RT is the on-thego tablet. With Xbox Music and Video, games, email, and web surfing, you’ll never run out of ways to play. And when it’s time to get work done, Surface RT is loaded with Office Home & Student 2013 RT Preview or the final version, which includes touch-optimized versions of Word, PowerPoint, Excel, and OneNote.
Highlights Real quick, here are some features of your Surface RT: Touchscreen Like a smartphone, you can browse the web or your email using touch. The touchscreen, with its 16:9 aspect ratio and ClearType technology, is great for watching HD movies, browsing the web, and using the included Office apps. Keyboard covers And touch isn’t the only option. Choose from two unique keyboards that double as a protective cover. This way you’ll always have a keyboard with you (sold separately).
Kickstand Flip out the kickstand when you want to be productive or kick back and have some fun. Stereo speakers, headset jack, and volume Listen to music, radio stations, podcasts, or audio books using apps from the Windows Store or Internet Explorer. Ports Yes, Surface has ports. Full-size USB 2.0 port Connect USB accessories that have been certified for Windows RT, such as a mouse or printer.
Apps A great collection of built-in apps plus many more apps in the Windows Store. What is Windows RT? Surface RT uses a new version of the Windows operating system called Windows RT. This new version of Windows is optimized for thin and light PCs that have an ARM processor (the processor commonly used in mobile phones). The key benefits are: Great battery life With up to 8 hours of battery life, Surface RT lasts the whole day.
Video adapters Surface video adapters let you connect your Surface to an HDTV, monitor, or projector (adapters are sold separately). Learn more about this in the Connect Surface to a TV, monitor, or projector section of this guide. Power supply Surface RT includes a 24-watt power supply. For more info, see the Battery and power section in this guide.
Setup Ready to set up Surface? Grab your Surface and let’s go! Note It’s best to have a wireless network available when you set up Surface. Plug in and turn on Plug in Surface and turn it on. Here's how: 1. If you have one, attach the Touch Cover or Type Cover keyboard to your Surface. When the keyboard gets close to Surface, it clicks into place. 2. Flip out the kickstand on the back of Surface. 3. Plug the power cord into a wall outlet or power strip. 4.
Surface setup Setup runs the first time you turn on Surface. During setup you'll be able to customize things like the language, color, and name for your Surface. You can change these things later if you'd like. Two key things happen during setup: You connect to a wireless network. Setup finds and displays the available wireless networks so that you can get online. You create a user account for Surface. We recommended using a Microsoft account—an email address and password.
The basics There are a few things you need to know about the new Windows. Important If you read nothing else in this guide, be sure and read this section and practice on your Surface. Start screen: Your favorite things The Start screen is your home base. You can customize Start to have all the info you care about in one place. Each tile on Start is connected to a person, app, website, playlist, or whatever else is important to you. Watch closely! This isn't a wall of static icons.
Charms, commands, and switching apps When you swipe in from the different edges of the screen different things happen: Right edge: Charms Swipe in from the right edge of the screen to see the charms. Charms help you do the things you do most often, like search, share, print, and change settings. The charms are always available on the right side of your screen—just swipe in to see them. Learn about charms later in this section.
Touch: tap, slide, and beyond Now that you know about swiping in from the edge, here are some more things you can do with touch: What we say How to do it Tap Tap once on something. Opens what you tap. Press and hold Press and hold your finger on something for Shows options related to what you’re a couple seconds, and when a box appears let go. doing (the same as a right-click with a mouse). Slide to scroll Drag your finger across the screen. Scrolls through what’s on the screen.
What we say How to do it Rotate Put two or more fingers on an item and then turn your hand. Slide to rearrange Tap and drag an item to a new location, and then let go. What it does Rotates things that can be rotated. Moves an item, just like dragging with a mouse does. To learn how to rearrange tiles on Start, see Customize the Start screen section in this guide. Swipe to select Slide an item a short distance, opposite to Selects an item, like an app tile or photo. how the page scrolls.
How do I right-click using touch? The equivalent of a right-click with your mouse is to press and hold your finger on something for a couple seconds, then let go and tap the option you want. To try this out, try copying and pasting text using touch. Copy, and paste using touch Here’s how to copy and paste text using touch: Select text Tap a word. To extend the selection, press and hold either circle and slide your finger. Let go when the selection is what you want.
Here’s how to open the charms: Touch Swipe in from the right edge, and then tap the one you want. Mouse Move your pointer into the upper-right or lower-right corner, and then move it up or down and click the one you want. Keyboard Press Windows logo key +C. To open a specific charm, press one of the charm keys on Touch Cover or Type Cover (they’re on the top row).
Here's what you can do with the charms: Search Search for anything. Search the app you're in, another app, or search Surface for an app, setting, or file. For more info, see the How to search section in this guide. Share Share files and info with people you know or send info to another app without leaving the app you're in. You can email photos to your mom or send a link to a note-taking app like OneNote. For more info, see the Share photos, links, and more section in this guide.
To get to the desktop: With touch, from the Start screen, tap or click Desktop. (It is a tile.) With a keyboard, press the Windows logo key +D. The Office apps run in the desktop. And you’ll need to go to the desktop to do things like copy files or use Control Panel. File Explorer (formerly called Windows Explorer) is the app you use to browse files and folders, both on Surface or your network. Learn more about this in the Files and Folders section of this guide.
Tips Change search settings: Open the Settings charm, then tap or click Change PC settings. Then tap or click Search. You can also search for files using File Explorer. For more info, see Search for files in File Explorer on Windows.com.
Get to know Surface Now that you know the basics, let’s go a little deeper. Power states: On, off, standby, and restart Here’s what you need to know about the Surface power states. On, off, standby, and restart On or wake When Surface is off, press and release the power button. If nothing happens, Surface might need to be recharged. Connect the power supply and then press the power button again. Off Open the Settings charm, tap or click Power , and then choose Shut down.
2. Tap or click Edit power plan from the search results. 3. Choose the display settings that you want to use when Surface is running on battery and when it's plugged in. 4. Tap or click Save changes. Note A power plan is a collection of hardware and system settings that control how your Surface uses power. For more info about power plans, see the topic Power Plans: Frequently asked questions on Windows.com (Surface RT supports connected standby). Wake To wake up Surface, do this: 1.
The touchscreen The 10.6-inch diagonal, multi-touch screen has a 16:9 aspect ratio—perfect for watching HD videos and optimized for multi-tasking with side-by-side apps. Like a smartphone, you can interact with Surface by touching the screen. For example, you can drag your finger down a page to scroll. To learn more about using touch, see Touch: tap, slide, and beyond in this guide. Screen rotation When you rotate Surface, the screen content automatically rotates to the new orientation.
Screen brightness By default, Surface automatically adjusts screen brightness for the light conditions. You can change this or set the brightness to whatever you’d like. Here’s how: 1. Open the Settings charm, and then tap or click Change PC settings. 2. Tap or click General. 3. Scroll down to Screen and then set Adjust my Screen Brightness Automatically to No. To manually adjust the screen brightness: Open the Settings charm, tap or click Screen, and then move the slider to adjust the brightness.
Add your email accounts You can add your email accounts from Outlook, Gmail, AOL, Yahoo!, and even your work email (Exchange ActiveSync). To add an email account: 1. Open Mail (from the Start screen, tap or click Mail). 2. Swipe in from the right edge of the screen, and then tap or click Settings. 3. Tap or click Accounts. 4. Tap or click Add an account, the type of account you want to add, and then follow the on-screen instructions. 5. Repeat steps 2-4 for each of your email accounts.
Outlook Express, Windows Mail, or Windows Live Mail If you’ve been using Outlook Express, Windows Mail, or Windows Live Mail, you can move your email and address book from your old PC to the cloud. Once you do this, you can access your email and contacts in the Mail and People apps on Surface. For info on how to move your email and address book to the cloud, see Move your mail and contacts off your old PC on Windows.com.
Show the keyboard from the desktop The on-screen keyboard doesn’t automatically appear if you’re in the desktop. Instead, you need to tap or click the Keyboard icon on the taskbar (lower-right corner of the screen). To open the on-screen keyboard manually: 1. Open the Settings charm, and then tap or click Keyboard (lower-right corner). 2. Tap or click Touch keyboard and handwriting panel. Hide the keyboard To hide the on-screen keyboard: Tap an area where text can’t be typed.
Volume rocker Use the volume rocker along the left edge of your Surface. Touch Cover and Type Cover Press the volume down or up down keys (F2 or F3 on Type Cover). Start screen Open the Settings charm, then tap the sound icon and adjust the slider. (This is the same as using the volume rocker.) Desktop Tap the sound icon on the taskbar. Apps Some apps have a volume control within the app. Tips To quickly pause audio, press the volume rocker and then tap the on-screen pause button.
Lock screen When you wake up Surface, the battery status appears on the lock screen (lowerleft corner). Charms When you swipe in from the right-edge of the screen, the battery status appears in the lowerleft corner of the screen (see picture). Desktop taskbar When you’re at the desktop, the battery status appears on the taskbar (lower-right corner). Tap or click the battery icon for info about the charging and battery status, including the percent remaining.
Note The USB port is only for charging. Devices connected to the USB charging port aren’t recognized by Surface. If you want to use a USB device, plug it into the USB port on Surface. Find out more about this in the Add a device section of this guide. You can also purchase an extra 24-watt power supply for your Surface. For info about either power supply, see Power Supply on Surface.com.
With touch Swipe down on a photo to select it. With a mouse Right-click a photo to select. 3. Open the Share charm: Swipe in from the right edge of the screen and then tap Share. –or– Press the Share key on Touch Cover or Type Cover. You'll see a list of the people, apps, and devices you share with most often, plus a list of apps that can share. For example, to share using email, tap Mail, type an email address, and tap or click the Send icon.
Use Search Don’t know where a setting is? No problem! Use search to find a setting. Here’s how: Swipe in from the right edge and then tap or click Search. Type a word or phrase in the search box, and then tap or click Settings (below the search box). Items that match your search are shown. For example, type sound in the search box to find settings related to sound. If the item has a settings icon (a gear), the setting is available in PC settings. Other settings open in Control Panel in the desktop.
Touch, keyboard, mouse, and pen With Surface, you can easily switch between touch, keyboard, mouse, and pen. Use whichever you want, when you want. Touch You can use your fingers to interact with Surface. For example, drag your finger across the Start screen to scroll and tap a tile to open it. To learn about using touch, be sure to read the Touch: tap, slide, and beyond topic in this guide. To learn how to use the on-screen touch keyboard, see the On-screen keyboard topic.
To type text when the cover is folded back, use the onscreen keyboard. Tap in a text field or other area where you can type and the on-screen keyboard appears. For more info, see the Use the on-screen keyboard section in this guide. When you close Touch Cover, the screen turns off. The cover helps protect the touchscreen while you’re in transit. When you open the cover, Surface wakes up. Touch Cover Touch Cover is more than a protective cover for your Surface. It’s also a uniquely designed keyboard.
Type Cover Type Cover is a slim version of a traditional keyboard with moving keys. It gives you the speed and feel of a laptop keyboard. Just like the Touch Cover keyboard, Type Cover magnetically clicks into place and doubles as a cover for your Surface. With Type Cover you go from tablet to laptop in an instant. Trackpad Both Touch Cover and Type Cover include a trackpad that you can use like a mouse. Just like a laptop, you can drag your finger on the trackpad to move the on-screen pointer.
How do I change the trackpad settings? A Trackpad Settings app is available in the Windows Store. To install the app: 1. Open the Store app, and then type trackpad settings. 2. Tap or click Trackpad Settings from the search results and then tap or click Install. 3. Once installed, open the Trackpad Settings app. Here are the settings you can change in the Trackpad Settings app: Trackpad setting What it does Trackpad Turns the trackpad on or off.
Mouse You can use the trackpad on Touch Cover or Type Cover when you need a mouse, or you can connect a USB or Bluetooth mouse. To use a USB mouse, plug the transceiver into the USB port on your Surface. To use a mouse with Bluetooth, see the Add a Bluetooth device section in this guide. Make sure your mouse is certified for Windows RT. Change mouse settings To change how your mouse works, do this: 1. Open the Search charm, type mouse in the search box, and then tap or click Settings. 2.
Accounts A user account is a collection of settings that you use to interact with your Surface and personalize Windows RT to work the way you want. To use your Surface, you sign in with your user account. There are two types of user accounts: a local account or a Microsoft account. We recommend using a Microsoft account. What type of account do I have? To see which type of account you're using: 1. Open the Settings charm, tap or click Change PC settings. 2. Tap or click Users.
the Internet. Many of the settings, preferences, and apps associated with your Microsoft account can "follow" you between different PCs. You might already have a Microsoft account. A Microsoft account (formerly known as a Windows Live ID) is the email address and password that you use to sign in to Microsoft services such as Outlook.com, SkyDrive, Xbox Live, and Windows Phone. If you've used these services, then you already have a Microsoft account.
There are three types of accounts. Each type gives you a different level of control: Standard accounts are for everyday use. Administrator accounts provide the most control. To help protect your Surface (and keep other people from making changes you don't want), administrator accounts should be used sparingly. You'll need to use an administrator account if you're setting up accounts for other people on your Surface. Guest accounts are useful when people need to use your Surface temporarily.
Family Safety, you—or at least one designated parent—needs an administrator account. The kids you choose to monitor each need a standard user account. To find out how to use Family Safety, see the topic Set up your kids' account in Family Safety on Windows.com. Account security It's an excellent idea to help protect your account by adding security info to it.
Sign in and out If you don’t use Surface for a few minutes the screen turns off and locks, just like a smartphone. When this happens, you’ll need to unlock your Surface to use it. Note To find out how to change this, see Change when the screen dims and turns off in this guide. Sign in When you want to use Surface, you’ll need to sign in. Here’s how: 1. Dismiss the lock screen by swiping up from the bottom edge of the screen or by pressing a key. 2. If prompted, type the password for your user account.
Switch to another account If you share your Surface with someone else, you can switch to another account on your Surface without signing out or closing your apps. Here’s how: 1. From the Start screen, tap or click your account picture in the upper-right corner. 2. Tap or click an account. If you don't see the account you want, tap or click Switch account, then sign in to the account you want. You can also switch to another user account from the sign in screen. Here’s how: 1.
Important If you’ve added a work email account to the Mail app, security policies might require you to use a password instead of a PIN or picture password. Account password If you use a strong password and change it regularly, you can help keep your Surface more secure. For more info about strong passwords, see Tips to create strong passwords and passphrases on Windows.com.
1. Open the Settings charm, tap or click PC settings, then tap or click Users. 2. Under Sign-in options, find the Require a password after the display is off for setting. This setting might not be available if you’ve added a work email account to the Mail app. 3. Choose an item from the list: Microsoft account Choose a time frame up to 15 minutes, or Always require a password. Local account Choose a time frame, Always require a password, or Never require a password.
All about apps This section will get you up to speed on using apps. Built-in apps Here are some of the apps included with your Surface (see the Built-in apps section for more info): People SkyDrive See the latest info and start conversations with contacts. Store your files in the cloud Mail Internet Explorer Get email from your accounts in one place. Everything you want to do Video Skype Browse and watch your Use Skype to connect with videos, and movies from Xbox Video.
For info about these apps and a few more, including Office, see the Built-in apps section of this guide. Tip Apps are often updated, so be sure to check out the App updates section of this guide. Find an app To find an app installed on your Surface, do one of the following: Touch or mouse If you have lots of tiles on your Start screen, slide your finger across the screen or use the scroll wheel on your mouse.
Switch to the last app you were using With touch, swipe in from the left edge. With a mouse, move your pointer into the upperleft corner, and then click in the corner. From the keyboard, press Alt+Tab. Switch to a specific app Here’s how to see a list of open apps and switch to an app: With touch, swipe in from the left edge without lifting your finger, and then push back toward the left edge. You'll see the apps you recently used. Tap the app you want.
To switch between all apps (desktop and Windows Store apps), hold down the Alt key and press the Tab key repeatedly to switch between apps. When you get to the app you want, just let go. Use two apps side by side (snap apps) Keep an eye on your music playlist while you work on a report. Compare your favorite team's schedule with your own calendar. You can get more done when you snap a second app to the left or right side of your screen.
However, if you really want to close a Windows Store app, here’s how: Using touch, press and hold at the top of the app, then slide your finger down the screen until the app is off the screen. Using a mouse, click the top of the app and when the pointer changes to a hand, drag the app down off the screen. You can also move the pointer into the upper-left corner, move the pointer straight down to show the open apps, and then right click on an app and click Close.
App settings The Settings charm is context sensitive, meaning that what you can do depends on where you are. When you open Settings, the items in the upper-right corner change depending on where you are. For example, if you open Settings from an app, you’ll see settings for that app. To illustrate, here’s how to change settings for Mail and Internet Explorer: Open the Internet Explorer, then open the Setting charm, and tap or click Internet Options.
Windows Store Discover a variety of great apps in the Windows Store. You can check out the featured apps, or browse apps by category like Surface Picks or Games. In each category you can browse apps in groups such as Top free, Top paid, and New releases. And if you know what app you want, just start typing when you're in the Store—you'll see results for apps that match your search. To access the Windows Store, tap or click the Store tile on your Start screen.
Swipe in from the right-edge of the screen, tap or click the Search charm, and then type the app you’re looking for. 4. Tap or click an app to learn about it and read reviews. 5. Tap or click Buy, Try, or Install. Install is available if an app is free or you’ve already bought it. Try means a trial version of the app is available. You can try before you buy. Buy means that the app isn’t free and the price is shown.
Office apps can’t be uninstalled. App updates Apps are periodically updated by app developers and the Store tile tells you when updates are available. For example, a “4” on the Store tile means that four of your apps have updates. To install app updates: 1. From the Start screen, tap or click Store. 2. Tap or click Updates in the upper-right corner. 3. Tap or click Install to install updates for the selected apps.
2. Tap or click Your account. If you haven't signed in to the Store, sign in using your Microsoft account. 3. Tap or click View billing history. 4. Sign in to the billing website using your Microsoft account. 5. Tap or click transactions, and then choose from the options to view your billing history. To print your billing history, tap or click show print view, and then tap or click print.
Personalize your Surface In this section you’ll learn how to personalize your Surface. Add your accounts One of the first things you’ll want to do with your new Surface is add your accounts—like Outlook.com, Gmail, Skype, Facebook, Twitter, LinkedIn—to your Microsoft account. Once you add your accounts, your contacts, calendar, and email will appear in the Mail, People, and Calendar apps. And you can quickly get to your photos and files from services like SkyDrive, Facebook, or Flickr.
2. Tap or click Personalize. Lock screen Tap or click Lock screen and then Browse to find a picture for your lock screen. Start screen Tap or click Start screen, then choose a color and background. The background shows up only on Start, but the color you pick shows up in a few other places too, like the charms and the sign-in screen. Account picture Tap or click Account picture, then choose Browse to select an existing image or Camera to take a new Account picture.
To move a tile, drag it up or down, and then drag it where you want it. Resize a tile If a tile isn't fitting in the spot you want, you can usually make it larger or smaller. Here’s how: Swipe down on the tile (or right click), then tap or click Larger or Smaller. (Some tiles can't be resized.) Unpin a tile If there are tiles you don't use, you can unpin them. Here’s how: Swipe down on a tile (or right click), and then tap or click Unpin from Start.
Sync your settings When you sign in with a Microsoft account, Surface is connected to the cloud. This means that many of your personal settings and preferences are stored on Microsoft servers online, and are synced to any Windows 8 or Windows RT PC that you sign in to. For example: Your chosen colors, themes, language preferences, browser history and favorites, and Windows Store settings are synced between PCs.
Add languages You can add languages so that you can read and type in different languages. Once you add a language, you can choose your display language—this is the language you see most often in Windows and in your apps—and switch between different languages as you type. To learn more how to add a language and type in different languages, see Languages in Windows RT on Windows.com. If you want to work with different languages in the Office apps, see Office 2013 language options on Office.com.
Pin or unpin a desktop app from the taskbar You can pin or unpin a desktop app (such as the Office apps) to the desktop taskbar. Here’s how: 1. Go to the Start screen and type the Office app that you want to pin to the taskbar (Word, PowerPoint, Excel, or OneNote). 2. Swipe down on the app in the search results. 3. Tap or click Pin to taskbar or Unpin from taskbar.
Printer that is connected to another PC If someone else in your home already has a printer installed, you can join the Homegroup and print to this printer. (The PC that the printer is connected to must be turned on and the printer must be compatible with Windows RT.) See if your printer is already installed 1. Open the Settings charm, tap or click Change PC settings. 2. Tap or click Devices (on the left). 3. Look for your printer in the list of devices.
Can’t print? If you’re having problems printing, see How to solve printing problems on Windows.com. With Windows RT, you can update or install drivers only through Windows Update. Printer compatibility Windows RT is compatible with printers that are certified for Windows RT. These devices are marked with the certified for Windows RT logo and work right out of the box. Some printers are not compatible with Windows RT. To see if your printer is compatible with Windows RT, do the following: 1.
Step 1: Make sure your Bluetooth device is on and discoverable Turn on the device, and then make it discoverable. To learn how to make a device discoverable, check the info that came with your Bluetooth device or go to the manufacturer’s website. Step 2: Make sure Bluetooth is on 1. Open the Settings charm, and then tap or click Change PC Settings. 2. Tap or click Wireless. 3. Make sure Bluetooth is On. Step 3: Add the Bluetooth device 1. In PC Settings, tap or click Devices. 2.
Troubleshooting If you have trouble adding a device, see the following topics on Windows.com: o Why isn't Windows finding my device? o What if a device isn't installed properly? If you see a yellow warning icon next to a device, tap and hold on the device until a box appears, then select Troubleshoot. Device compatibility Surface RT is compatible with devices that are certified for Windows RT. These devices are marked with the certified for Windows RT logo.
Surface video adapters are available online in the Microsoft Store. Connect to a TV, monitor, or projector Follow these steps to connect to a larger screen: 1. Connect a VGA or HDMI cable to the HDMI or VGA port on your TV, monitor, or projector. 2. Connect the other end of the cable to the Surface adapter. 3. Remove the cap from the end of the Surface adapter cable. 4. Plug the adapter into the HD video out port on your Surface (upper-right side).
Notes Open desktop apps (like the Office apps) on both monitors, or apps from the Windows Store on one and desktop apps on the other. When you open Start or the charms on a monitor, all apps from the Store will move to that same monitor. You can use the four corners of either screen to open the charms and your recent apps with your mouse. To open the charms on the second screen, move your mouse pointer to the second screen.
Storage, files, and backup Surface RT has a hard drive that comes in two sizes: 32 GB and 64 GB3. 3 System software uses significant storage space; your storage capacity will be less. See surface.com/storage 1 GB = 1 billion bytes. How much local storage space do I have? To see how much storage space you have available: 1. Open the Settings charm, tap or click Change PC settings. 2. Tap or click General. 3. Scroll down to Available storage, to see how much storage space you have.
2. Tap or click the notification that appears in the upper-right corner of the screen. 3. Tap or click Open folder to view files. File Explorer opens showing you the files on your USB flash drive or hard drive. File Explorer (previously called Windows Explorer) is the app you’ll use to browse, copy, and move files on your Surface. For more info, see the Files and folders section in this guide. microSD memory card The microSD card slot lets you add up to 64 GB of storage to Surface.
Libraries Libraries are collections where you can get to all your documents, music, pictures, and other files in one single place. Windows comes with four libraries: Documents, Music, Pictures, and Videos. It's a good idea to put your files in their corresponding libraries to make sure they show up in your apps. This means putting your music files in the Music folder and your pictures in your Pictures folder. Plus you'll be able to see them in one place whenever you open that library.
To learn more about SkyDrive, see the SkyDrive section in this guide. Use a USB flash drive or microSD memory card You move files to Surface by using a USB flash drive or memory card. Here’s how: 1. Copy files onto a USB flash drive or memory card on your other computer. 2. Insert a USB flash drive or microSD memory card into Surface. 3. Tap or click the notification that appears in the upper-right corner of the screen. 4. Tap or click Open folder to view files. File Explorer opens. 5.
Networking Surface has built-in Wi-Fi that you can use to get online. Once you connect to a wireless network, you can browse the Internet, get apps from the Windows Store, send email, and access other computers and devices on your network. Connect to a wireless network Use the following steps to connect to a wireless network: 1. Swipe in from the right-edge of the screen, tap Settings, and then tap or click the wireless network icon ( ). A list of available wireless networks appears. 2.
3. Tap or click Disconnect. If you want to remove connection info for a network (such as a password or connect automatically), tap and hold the network name until a box appears, then let go and choose Forget this network. Join a homegroup A homegroup is a group of PCs on a home network that can share devices (such as printers), and libraries (your Documents, Pictures, Music, and Video libraries). Homegroups make sharing easier. If a homegroup already exists on your home network, Surface can join it.
Airplane mode Turn on Airplane mode when you’re traveling on an airplane or when you don’t need Wi-Fi or Bluetooth for a while. Airplane mode extends the amount of time you have before your battery needs to be recharged. To turn Airplane mode on and off: 1. Open the Settings charm, then tap or click the wireless network icon ( 2. Set Airplane mode to On or Off. ). When Airplane mode is on, both Wi-Fi and Bluetooth are turned off.
Built-in apps Surface includes a great set of pre-installed apps, such as Xbox Music, Xbox Video, Skype, Mail, and Internet Explorer. And when it’s time to get some work done, Surface is loaded with Office Home & Student 2013 RT Preview, which includes touch optimized versions of Word, PowerPoint, Excel, and OneNote. This section highlights some of the apps included with your Surface. Note: Some features may not be available in all markets.
Notes Office Home & Student 2013 RT has almost the same features as Office Home & Student 2013 on Windows 7 or Windows 8, but there are some differences. To learn about the differences, go to Office.com/OfficeRT. If you have Microsoft Office Home & Student 2013 RT Preview version, Office should update to the final version through Windows Update (free download; ISP fees apply). If the update doesn’t happen, see the Update to the final Office release topic below.
other people. (If they don't have Office, they can view and edit documents that you share using free Office Web Apps.) For more info, see Work together on Office documents in SkyDrive on Office.com. If you’d rather, you can still save Office docs on your Surface by choosing Computer when you choose save from any Office app. File compatibility Office 2013 apps can open files created with previous versions of Office.
OneNote OneNote is a digital notebook that provides a single place for all of your notes and information—everything you need to remember and manage in your life. You can create to-do lists with check boxes, add pictures to notes, and format notes with things like tables, bullets, and colors. When you sign in with a Microsoft account, your notes are saved in the cloud so that you can access them from anywhere—your computer, phone, or on the web.
Quick access to a page Pin a page to the Start screen so you can open it quickly. In OneNote, tap and hold a page in the left pane until a box appears, then let go and tap Pin to Start. Open the Settings charm and then tap or click Help. How do I… OneNote on your phone You can also use OneNote on your phone to take and access your notes on the go.
Find the Address bar If you're looking for the Address bar, swipe down from the top of the screen (or right-click the trackpad). The Address bar appears at the bottom of your screen and the Tabs bar appears at the top. To go to a specific website: Tap or click the Address bar to see your pinned, frequent, and favorite sites. Swipe across the tiles to see more options. When you see the one you want, tap or click the tile. Type a web address or search term in the Address bar.
Your browser favorites and history can by synced across Windows RT and Windows 8 PCs if you use a Microsoft account. For more info, see Sync your settings in this guide. Flip ahead through sites Turning on flip ahead makes going from page to page and article to article more fluid. If you're reading an article on a news site that supports flip ahead, you can swipe across the page (or click the Forward button the next page of content.
HTML5 compatibility HTML 5 functionality is built into Internet Explorer. With HTML5 it’s possible to embed audio and video, animation, charts, and many other types of rich content without using plug-ins and third party programs. This gives you a faster, cleaner experience. Java and Silverlight plug-in compatibility Java and Silverlight plug-ins are not supported on Surface RT.
1. Open the Mail app and then open the Settings charm (swipe in from the right edge of the screen and then tap Settings). 2. Tap or click Accounts and then choose the account that you want to change. 3. Settings appear in a window along the right edge. Here you can change things like your email password, how much email is downloaded, and your email signature. 4. Tap or click the back arrow.
Delete messages Copy and paste Select one of more messages and then tap or click the Trash icon in the upper-right corner. With touch Tap a word then drag the circles at each end of the word to extend the selection. Tap the selected text, then tap Copy or Copy/Paste on the app commands bar. With a mouse or the trackpad Select text and then right-click to choose Copy or Paste. Create and manage folders With the keyboard Press Ctrl+C for Copy and Ctrl+V for Paste.
much email is downloaded, open the Settings charm, tap or click Accounts, select an account, and then change your settings. Change your email signature Open the Settings charm, tap or click Accounts, choose an email account, and find the Use a signature option. Change the text in the box. Add attachments In a new email message, tap or click the paper clip icon in the upperright corner. Select the files you want to add to the message, and then tap or click Attach.
People The People app is more than just an address book. It keeps you up to date with your social networks and helps you stay in touch with the people you care about most. When you connect your accounts, like Facebook, Twitter, and LinkedIn, you’ll get all the latest updates, Tweets, and pictures in one place. Comment on an update or retweet a Tweet without switching apps. Add people Here's how to add people from your existing contact lists and address books: 1. From the Start screen, tap or click People.
Jump to a letter of the alphabet In People, zoom out to see just the alphabet. Select a letter to go right to people whose names begin with that letter. Pin them to Start When you pin people to Start, you’ll see their updates and Tweets as they happen, and then can go straight to their contact info and updates (see Pin a contact to Start).
Write on someone’s Facebook wall Here's how to write on someone's Facebook wall: 1. Open the People app and tap or click a contact. 2. If you're in the What's new section, tap or click a person's name. You can use the Share charm to share links or photos with social networks. See Share photos, links, and Tip more in this guide. Calendar The Calendar app brings all your calendars together so that you can stay on top of your schedule and make the most of your free time.
Note As of January 30, 2013, Google no longer supports new EAS (Exchange ActiveSync) connections. If you’re using the latest version of the Calendar app, your Google calendar will not sync with the Calendar app. For more info, see How to sync Google services on Windows.com. Change your options You can choose which calendars you see in the colors you like. For example, you can hide the birthday calendar from social networks. To change your calendar options: 1.
3. Tap or click Notifications (on the left), then make sure notifications are on for the Calendar app. To learn more, see Calendar app: Frequently asked questions on Windows.com. For info on how to get notified about upcoming events, see How to manage notifications for Mail, Calendar, People, and Messaging on Windows.com. Camera Surface has two cameras. You can use the front camera to have a video chat with a friend, and the rear-facing camera to record meetings and events hands-free.
Take a picture 1. From the Start screen, tap or click Camera. 2. Make sure Video mode is not selected. 3. Tap or click Change camera to switch between the front and back cameras. 4. Tap the screen to take a photo. Tips Tap or click Camera options to change settings like resolution, brightness, or contrast. The pictures that you take with Surface are saved in the Camera Roll album in the Pictures library. Use the Photos app to see your photos.
1. Open the Music app from the Start screen. 2. Scroll left, and then tap or click my music. 3. Pick the song or album that you want to play or add it to a playlist. (Swipe down from the top of the screen to see all your options.) No music? If my music is empty, add songs to your Music library or join a homegroup. For help copying music to your Music library, see Move files to your Surface in this guide. To play music stored on other PCs, see Access files on other computers in this guide.
Use Smart DJ Smart DJ automatically creates a playlist of songs with characteristics similar to the artist that you enter. Songs for the playlist are pulled from your collection as well as the Xbox Music store. In the now playing area of the Music app, tap or click New Smart DJ, type an artist’s name, and then tap the play (>) icon. Create a playlist You can create and save playlists for easy access to your favorite songs. Here’s how: 1. Scroll left in the Music app, and then tap or click my music. 2.
Photos You can use the Photos app to browse and search photos in your Pictures library. You can also add your account info for your favorite sites to the Photos app—like Facebook, Flickr, and SkyDrive—so those photos show up, too. It’s one place to browse and see all of your photos. To see your photos, go to the Start screen and open the Photos app. To see photos and videos taken with your Surface, tap or click Pictures library, and then tap or click Camera Roll.
If you have many photos or videos, you can store them on SkyDrive and access them from any webconnected device, including Surface. For more info about this, see the SkyDrive topic in this guide. For info on taking videos and photos with Surface, see the Camera topic. Xbox Video Use the Xbox Video app to download or stream your favorite movies and TV shows. You can also use the Video app to watch videos from your Video library.* *Xbox Video is not available in all countries and all regions.
1. From the Start screen, tap or click Video. 2. Do one of the following: 3. Click Sign in (in the upper-right corner). Swipe in from the right edge of the screen and tap Settings, then tap or click Account. Click Sign in. Type your Microsoft account info (email and password) and tap or click Save. Browse, buy, and rent movies and TV shows Use the Video app to buy or rent the latest movies or buy TV shows (where available).
Skype Skype is the always-on app that makes staying in touch with your contacts easier than ever. Stay informed about what’s happening with your friends through video and voice calls and instant messaging, all from one app. You can stay in touch with anyone, on almost any device, pretty much anywhere in the world, for free. You can also call landlines and mobile phones for a low cost. Set up Skype 1. Install the Skype app from the Windows Store: Open the Store app and type Skype.
SkyDrive With SkyDrive, you'll never be without the documents, photos, and videos that matter to you. Your Microsoft account includes 7 GB of free cloud storage that’s accessible from any PC, Mac, iPad, or phone. By default, documents that you create with Office 2013 apps are saved on SkyDrive. Use the SkyDrive app to upload or access the files that you saved on your SkyDrive. To do this, go to the Start screen and tap or click SkyDrive. All of the files that you’ve saved on your SkyDrive appear.
4. Open the Share charm, and then tap or click SkyDrive. 5. Tap or click the folder you want to upload your picture or pictures to. 6. Tap or click Upload. Of course you can also use the SkyDrive app to upload files. Open the SkyDrive app, then swipe down from the top edge of the screen to see the app commands (including Upload and Download). Share photos or videos on SkyDrive With SkyDrive, it’s easy to share files securely and easily with your friends or coworkers.
Zoom in and out To zoom in, spread your thumb and forefinger apart on the map. To zoom out, pinch your fingers together. Really zoom in Double-tap the map to automatically center and zoom in on a spot. Double-tap again to get even closer. Go to your current location Swipe down from the top of the screen or right-click, then tap or click My location. Get directions Use the directions feature in Maps to guide you to your destination.
Troubleshooting If your location doesn’t appear in the Maps app, you might need to change your privacy settings. Here’s how: 1. Open the Settings charm, then tap or click Change PC settings. 2. Tap or click Privacy, and make sure Let apps use my location is On. To learn more, see Bing Maps app: Frequently asked questions on Windows.com. Xbox Games Even if you don't own an Xbox 360, you can use the Xbox Games app to get games and socialize with your friends.
Tips Tap or click a game to see options like buy, play, and explore. Open the Search charm to find a particular game. Set a beacon to let your friends know that you want to play a game. Xbox games might take advantage of Xbox features such as achievements, leaderboards, multiplayer modes, and connecting with friends. Games in the Windows Store You can also install games for Surface using the Store app. Here’s how: Open the Store app, scroll to Games, and then tap or click Games.
Xbox SmartGlass Xbox SmartGlass turns your Surface into a second screen that interacts with your Xbox 360 to enhance your favorite TV shows, movies, music, sports, and games.3 To see what you can do with SmartGlass, go to Xbox.com/SmartGlass. Step 1: Set up SmartGlass on Xbox 360 Set up SmartGlass on your Xbox 360 console using the steps on this Xbox.com page: Set up and use SmartGlass on the Xbox 360. Step 2: Connect Surface to your Xbox 360 1.
3. Tap or click Play on Xbox 360. The SmartGlass app starts and the item starts playing on your Xbox 360.5 In addition to playing content, Xbox SmartGlass might show you info about the movies, TV shows, games, and music that you’re enjoying (a second-screen companion). Broadband Internet required; ISP fees apply. Not all games and Xbox content is SmartGlass enabled. Xbox Live Gold membership, additional fees and/or requirements apply for some content, including Xbox Music.
Travel Sports Get inspired to travel along with all the tools you Follow the sports, teams, and players you care need to plan your next trip. With a quick tap or click you can explore destinations all over the world. about. Swipe through the app to get an overview of the headlines, scores, schedules, stats, and more. Weather Bing Prepare for the latest conditions with hourly, daily, The Bing app opens the Bing home page with the and 10-day forecasts.
Additional info you should know This section includes a few more things that we think you should know. Keep Surface up to date Learn how to keep your Surface up to date with Windows Update. Windows updates You don't have to search for updates online or worry that critical fixes might be missing from your Surface. Windows Update automatically installs important updates as they become available.
1. Open the Search charm, type view update history, and then tap or click Settings. 2. Tap or click View update history from the search results. A list of updates is shown. Having problems installing updates? If you’re having a problem installing updates, search Windows Help for topics. Here’s how: 1. From the Start screen, type Help, and then tap or click Help and Support. 2. Type Windows update in the search box. Firmware updates Firmware is software that controls how the hardware functions.
Step 1: Share your phone’s Internet connection Follow your phone’s instructions to share your phone’s Internet connection. Windows Phone See Windows Phone 8: Share my connection or Windows Phone 7: Share my connection. iPhone See iOS: Understanding Personal Hotspot. Android Check the materials that came with your phone or the manufacturer’s website. Step 2: Select your phone as a network 1. Open the Settings charm on your Surface and tap the wireless network icon. 2.
Press this key To do this Windows logo key +F Open the Search charm to search files. Windows logo key +H Open the Share charm. Windows logo key +I Open the Settings charm. Windows logo key +J Switch the main app and snapped app. Windows logo key +K Open the Devices charm. Windows logo key +O Lock the screen orientation (portrait or landscape). Windows logo key +Q Open the Search charm to search apps. Windows logo key +W Open the Search charm to search settings.
Speech recognition Windows Speech Recognition makes using a keyboard and mouse optional. You can control your Surface with your voice and dictate text instead. Speech Recognition is available for the following languages: English (United States and United Kingdom), French, German, Japanese, Korean, Mandarin (Chinese Simplified and Chinese Traditional), and Spanish. For more info, see Using Speech Recognition on Windows.com.
Refresh Surface If your Surface isn't performing as well as it once did, you can refresh it. Refreshing your Surface reinstalls Windows while keeping your personal files, settings, and apps. To refresh your Surface: 1. Open the Settings charm, and then tap Change PC settings. 2. Tap or click General. 3. Under Refresh your PC without affecting your files, tap or click Get started, and follow the on-screen instructions.
BitLocker recovery key Data on your Surface hard drive is automatically encrypted to help keep it secure. This way if your Surface is lost or stolen, someone else can’t access your data. If a security event or hardware failure locks your Surface, you’ll need a BitLocker recovery key to sign in. If you sign in to your Surface with a Microsoft account, a copy of your BitLocker recovery key is automatically backed up to that account. To get your recovery key, go online to BitLocker Recovery Keys.
connections on your cover get dirty or stained, apply a small amount of isopropyl alcohol (also called rubbing alcohol) to a soft, lint-free cloth to clean. Battery care Operating temperature Surface is designed to work between 32°F and 95°F (or 0°C to 35°C). Lithium-ion batteries are sensitive to high temperatures, so keep your Surface out of the sun and don’t leave it in a hot car. Recharge anytime The battery doesn’t need to be empty or low before you recharge.