DiscView® PRO User Guide A GUIDE TO USING DISCVIEW PRO SOFTWARE
Conventions Used in This Guide Please note the following conventions concerning drive names, bold lettering, italicized notation, and action terminology: Convention Meaning C: Disk drives, such as drive A, drive C, or network drives are referred to as A:, C:, etc.
Table of Contents T Table of Contents Introduction Introducing DiscView® PRO ..................................................... ix Chapter One – Using DiscView PRO Using the DiscView Interface .................................................... 3 Automatic Volume Configuration .......................................... 4 Changing Volume Configurations (NetWare Only) .............. 7 The Configure Options Tab Section .................................. 8 The Disc Information Tab Section .............
DiscView PRO User Guide Configuration ........................................................................ 34 DiscPort Host Configuration ........................................... 34 Fileserver Configuration .................................................. 35 Set Security .......................................................................... 37 Fileserver Security (NetWare Only) ............................... 38 CD-ROM Volume Security ...............................................
Table of Contents Using CD-ROMs from DiscView PRO ................................. 66 CD-ROM Collection .......................................................... 66 CD-ROM Groups .............................................................. 67 Information Fields ........................................................... 69 Attaching Personal Notes ................................................ 69 Okay, So Now What Do I Do? ..................................................
DiscView PRO User Guide Technical Stuff ........................................................................ 102 WebLaunch Enhancements to SmartLaunch ................... 102 Customizing a WebLaunch Web Page ................................... 104 Chapter Seven – FastCD Introduction ............................................................................ 107 Configuring FastCD ............................................................... 108 Building a FastCD Image ...............................
Introduction
DiscView PRO User Guide Overview This chapter introduces DiscView PRO, its features, and requirements.
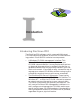
Introduction Introduction Introducing DiscView® PRO The DiscView PRO software, which comes with Microtest CD-ROM networking products, drives the CD-ROM networking product. DiscView PRO contains two components: • A Windows CD-ROM management interface: This Microsoft Windows program allows you to see your CD-ROM network devices. You use simple menu options or drag and drop operations to configure the devices, regardless of where they are physically located in your network environment.
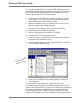
DiscView PRO User Guide For common management, DiscView PRO allows you to perform the following types of operations on your CD-ROM and DVD-ROM devices (references to CD-ROM devices in this manual apply also to DVD-ROM devices): 1. Configure the CD-ROM as a network volume or share (from now on, we will use the term volumes to describe both NetWare volumes and NT shares). 2. Mount and dismount the CD-ROM to bring it on-line or off-line, respectively (NetWare only). 3.
Introduction read-only hard disk on the server. This way, no new tools, TSRs, or programs need to be learned by your network users to utilize networked CD-ROMs. DOS drive letters can be set up by the system administrator, or they can be done by your users. Drive mappings can be set up in your system login script, AUTOEXEC.BAT file, through Windows File Manager’s network interface, or they can be typed at the DOS command line.
DiscView PRO User Guide 7. SmartLaunch™: This Windows application provides your network CD-ROM users with point and click access to CDROMs on your network, without requiring that your users understand networks, Server Components, CD-ROMs, or DOS drive letters.
Introduction umes across intranets and run applications using standard web browsers by directly cooperating with web servers. 10. Automatic Periodic CD-ROM updates (NetWare only): If you get periodic updates to certain CD-ROMs, DiscView PRO makes it easy to update to the latest version. 11. Support for CD-ROM Jukeboxes: DiscView PRO enables popular CD-ROM jukeboxes to operate on the DiscPort Executive (IntranetWare) server products. 12.
DiscView PRO User Guide The DiscView PRO Map Window: This screen shows you a graphical representation of all your CD-ROM devices and products, so that you can see the state of your CD-ROMs at a glance. Most management operations are performed from this screen. As network administrator or designated DiscView manager, you will be using this screen most often to manage your network CD-ROMs.
Chapter One – Using DiscView PRO
DiscView PRO User Guide Overview This chapter introduces you to DiscView PRO and its many features and options.
Chapter One – Using DiscView PRO Using DiscView PRO Using the DiscView Interface It is assumed that you have already installed the DiscView PRO Server Components when you installed your CD-ROM host (DiscPort, DiscPort XL, DiscPort PRO, DiscPort Tower, or DiscPort Executive). If you have any questions about installing the Server Components, please refer to the installation guide – Getting Started – that came with your Microtest CD-ROM product for more information.
DiscView PRO User Guide Automatic Volume Configuration DiscView’s Automatic Volume Configuration feature, when enabled (the default), automatically configures any new volumes it detects on attached CD-ROM drives, changers, jukeboxes, or jukebox magazines. Automatically configured volumes are dynamically added, again by default, as members of a volume set called CDROMS (on NetWare), or DPCDROMS (on NT).
Chapter One – Using DiscView PRO Automatic Volume Configuration, whose features are displayed in the CD-ROM Volume Configuration dialog, has a number of default settings that are automatically applied to every new CD-ROM volume on the network, so that you won't have to define them individually. The default settings include: Default Name Fileserver Assigned Name Allow Users to mount...
DiscView PRO User Guide Default configuration values are also found and can be changed from the Automatic Volume Configuration tab on the Fileserver Configuration dialog shown below. You can access this dialog by right-clicking on a fileserver, selecting Configuration... from the pop-up menu, and clicking on the Automatic Volume Configuration tab.
Chapter One – Using DiscView PRO • The Auto Mount feature is disabled by default. This control cannot be changed when the Configure Volume as Member of Volume Set option is selected in the CD-ROM Volume Configuration dialog, as new volumes will be mounted as volume set members. Only when the Single Volume radio button is selected will you be able to select the Auto Mount feature.
DiscView PRO User Guide Right-click on the CD-ROM to display a pop-up menu. Select the Configure option. 1. From the DiscView PRO Map window, select the CD for which you want to change the configuration. Click on the Configuration icon on the toolbar. Either right-click on the CD and select Configure from the pop-up menu, or click on the CD and select Configure from the Options menu.
Chapter One – Using DiscView PRO 5. In the Title field, type a brief description of the CD-ROM. This makes it easier for users to recognize the CD-ROM volume they are looking for. 6. You can indicate this volume is to be mounted automatically every time it is loaded by clicking on the Auto Mount checkbox. Automated volume mounting can also be addressed on a fileserver basis in the Fileserver Configuration dialog. 7.
DiscView PRO User Guide volumes created on a network server by a DiscView PRO manager. If enabled, Macintosh Client support allows Mac users to view the contents of CD-ROMs from their Macintosh desktop — as they would any other Macintosh file folder. 9. If the CD-ROM will be updated periodically, as in the case of information databases, books of lists, etc., click the Periodic Update CD-ROM Volume checkbox to authorize periodic updates of the CD-ROM volume. 10.
Chapter One – Using DiscView PRO When a CD-ROM volume is configured for the first time, DiscView PRO reads the CD-ROM description and the file/ directory structure. The DiscView Server Components retain this information, making subsequent mounts of the CD-ROM volume much faster. 12. When the selection of configuration options is complete, click OK. DiscView PRO will configure and mount the CD. The CD-ROM volume name now displays on the DiscView PRO Map (below) and Selector windows as a mounted volume.
DiscView PRO User Guide Updating CD-ROM Volumes (NetWare Only) Some CD-ROMs contain information which may be updated periodically: catalogs, databases, and so on. If you have such a CD, and it was configured to allow periodic updates, it is a simple matter to update that CD with its latest revision. ■ To update a CD-ROM volume: 1. From the Map view, select the drive that contains the latest CD-ROM release. 2. Select Update CD-ROM Volume from the Tools menu. The Update Volume dialog displays.
Chapter One – Using DiscView PRO Dynamic Volume Sets A Volume Set is a collection of CD-ROMs that can be mounted as a single volume. The use of volume sets reduces the number of mounted volumes on your network. Previously, each individual volume had to be mounted so that users could access it. With DiscView’s volume set function, CD-ROM discs are grouped into a set that has a single volume name.
DiscView PRO User Guide ■ To create a CD-ROM volume set: 1. Select a fileserver, host, or drive, including changer, jukebox, or magazine, on the DiscView PRO Map window. Select Create CD-ROM Volume Set from the Tools menu. The Create New CD-ROM Volume Set dialog displays. Click on the Volumes tab. um The Vol es sect ion DiscView PRO examines each CD-ROM volume attached to the selected server, host, or drive.
Chapter One – Using DiscView PRO 6. Click the Configure Options tab to display additional options for this dialog. You can use this section of the dialog to enter a descriptive title for the volume set (up to 48 characters), set Auto Mount and user mount options, and enable Macintosh support and long file name support for the volume set. eO nfigur o C e h T section ptions 7. Set the appropriate options, as desired. 8.
DiscView PRO User Guide Setting CD-ROM Security on NetWare When a CD-ROM volume is configured and mounted for the first time, the NetWare group EVERYONE has access to it. If desired, you can restrict access to a CD-ROM volume. This comes in handy, for instance, when you have departments that use CD-ROMs that are specific to their departmental operations. Only users in those departments need access to their CD-ROM volumes. Access rights to departmental CDs are given only to authorized departmental users.
Chapter One – Using DiscView PRO To remove users from the User List, select the desired name (notice the Remove button is now activated), and click on the Remove button. The deleted user moves back to the list of Possible, or Available (Netware 4.x) Users. Setting CD-ROM Security on Windows NT Share security is set by using NT native security, or through the DiscView security option. The Microtest Administrator supports native NT security.
DiscView PRO User Guide 3. Click the List Names From drop-down button and select a server or domain (a group of NT servers) name from the list. The user names on the selected server or domain will display in the Possible Users list box. 4. In the Possible Users list box, highlight the name(s) for which you want to assign share permissions, and click on the Add button. You can select multiple users by holding down the Shift key, or the Ctrl key while clicking on the names. 5.
Chapter One – Using DiscView PRO D-ROM C x . 4 Ware log The Net Security dia e Volum 3. This dialog works in much the same way as a NetWare Directory Services (NDS) dialog works. Click in the Directory Context and Available Users boxes to select the users or groups to whom you are granting access to this volume set. 4. Click the Add button to move the name(s) to the User List. 5. Click OK. You have just assigned security rights to the specified CD-ROM volume set.
DiscView PRO User Guide Where To Go From Here Chapter Two – DiscView PRO Map To familiarize yourself with the DiscView PRO Map window, its features, menus, and dialog boxes, read Chapter Two. Chapter Three – DiscView PRO Selector To familiarize yourself with the DiscView PRO Selector window, its features, menus, and dialog boxes, read Chapter Three.
Chapter Two – DiscView PRO Map
DiscView PRO User Guide Overview This chapter discusses the DiscView PRO Map window and its features.
Chapter Two – DiscView PRO Map DiscView PRO Map The DiscView PRO Map Window As a network administrator equivalent or DiscView PRO manager, you are able to view both the DiscView PRO Selector and DiscView PRO Map windows. The DiscView PRO Map window is a graphic representation of all the currently attached fileservers, CD-ROM hosts, and CD-ROM drives on the LAN to which you have manager rights.
DiscView PRO User Guide Menu bar and Toolbar Device Map section CD-ROM drives CD-ROM jukebox DiscPort Tower DiscPort XL Status Bar DiscPort Executive with IntranetWare fileserver Identifies you as a manager or user on the selected server The Menu Bar and the Toolbar The menu bar contains drop-down menus where you will find all the commands used by DiscView PRO.
Chapter Two – DiscView PRO Map Device Map Section Below the tool bar is the device map section of the Map window. It is a graphic representation of the attached fileservers, the CD-ROM hosts (DiscPort, DiscPort XL, DiscPort PRO, DiscPort Tower, or DiscPort Executive), and the CD-ROM drives and volumes to which you have manager rights on the LAN. Th e Map e Devic p w ico windo The Ma section ns The DiscPort is configured. The DiscPort is not configured.
DiscView PRO User Guide A fileserver that has the DiscView Server Components installed and running, as indicated by the CD on the bottom half of the server icon. If there is a crown above the icon, it indicates this is the controlling fileserver. The indo Map w w icon s A NetWare fileserver with DiscView Server Components either not loaded or not installed. If the Server Components are installed but not running, this image displays. An NT fileserver with no DiscView Server components loaded.
Chapter Two – DiscView PRO Map The DiscPort PRO is configured. The DiscPort PRO is not configured. The indo Map w w icon s The DiscPort PRO is not connected, or is in a poweroff condition. The 7-drive DiscPort Tower is configured. The 7-drive DiscPort Tower is not configured. The 7-drive DiscPort Tower is not connected or is in a power-off condition. The 14-drive DiscPort Tower is configured. The 14-drive DiscPort Tower is not configured.
DiscView PRO User Guide The NSM CDR 100XA jukebox. The Ma p win ons dow ic The NSM Mercury 40 jukebox. The Pioneer DRM-5004X jukebox. The Pioneer DRM-1004X jukebox. A Pioneer jukebox magazine. An NSM jukebox magazine. An available CD-ROM drive. A CD-ROM drive with a CD mounted and ready to use. A locked CD-ROM drive with a CD mounted and ready to use. A CD-ROM drive with a CD loaded. It needs to be mounted, or was previously mounted.
Chapter Two – DiscView PRO Map A locked CD-ROM drive with a CD loaded. It needs to be mounted, or was previously mounted. A deactivated drive. The indo Map w w icon s A CD-ROM that is mounted in a volume set. All CD-ROMs show up as subdirectories under the volume name. A Pioneer 604x CD-ROM disc changer. A locked Pioneer disc changer. A Pioneer 1804x CD-ROM disc changer. A Nakamichi disc changer. A Regal disc changer.
DiscView PRO User Guide The Toolbar Icons More Information ■ To view information on a fileserver, CD-ROM drive, or CD-ROM host: 1. From the DiscView PRO Map window, click on the fileserver, CD-ROM host, or CD-ROM drive for which you want to view more information. 2. Select More Info from the Tools menu, or click on the More Info icon. A dialog box displays more information for the selected object. The DiscView PRO More Information dialog box for a fileserver.
Chapter Two – DiscView PRO Map The More Information dialog box for a CD-ROM drive The Drive Information tab section displays the unique SCSI ID number of the LUN drive (from 0 through 6) and the LUN (logical unit number) of the SCSI device. A CDROM drive usually has a LUN of 0. However, each drive in a disc changer will have a unique LUN. Jukeboxes will have a unique magazine/slot ID.
DiscView PRO User Guide The More Information dialog box for a DiscPort The Assigned CD-ROM host Name, the Default Name, and the attached Fileserver are detected by the DiscView Server Components. The Host Info tab section displays the CD-ROM host Status (connected to fileserver, etc.),... ...Indicates the Version number of the DiscPort image, and... ...Shows the Network Type (Ethernet, Token Ring) and AutoLock status (enabled, disabled, or not supported).
Chapter Two – DiscView PRO Map The More Information dialog box for a DiscPort Executive host. The Assigned CD-ROM host Name, the Default Name, and the attached Fileserver are detected by the DiscView Server Components. The Host Info tab section shows the Adapter ID, and the DiscView Server Component Version and... ...Indicates the Auto Lock status and the CD-ROM host Status (connected to fileserver, etc.).
DiscView PRO User Guide Configuration To change the configuration of a DiscPort host or fileserver, click on the appropriate icon in the DiscView Map window. Select Configure from the Tools menu, or click on the Configure toolbar icon. The current configuration for the selected object displays. Refer to Chapter One – Automatic Volume Configuration for information about changing the configuration of CD-ROM volumes.
Chapter Two – DiscView PRO Map Fileserver Configuration You can modify the configuration of the fileserver by rightclicking on the fileserver, selecting the Configuration option from the pop-up menu, and making your changes in the following Fileserver Configuration tab sections. Miscellaneous (NetWare Only) The features you see in the Miscellaneous tab section may vary depending on the system you purchased. By default, the first three options are enabled.
DiscView PRO User Guide ü The second operation is creating an NDS volume object for each mounted CD-ROM volume. ü The third is using the NDS account to determine if a client running DiscView is a manager, or if a client is permitted to access a CD-ROM volume. When the Server Components are loaded for the first time, or if an NDS login account has not been assigned, the Server Components will attempt to login to the NDS tree using CN=Guest.
Chapter Two – DiscView PRO Map Jukebox Support Tab (DiscPort Executive Only) If you have a DiscPort Executive installed and running as the CD-ROM host, jukebox support is available. If the jukebox driver is detected, the Jukebox Support tab is enabled. Refer to Chapter Eight for a list of supported jukeboxes and information about configuring the jukebox; installing the jukebox drivers; and adding, modifying and deleting the jukebox drivers.
DiscView PRO User Guide DiscView PRO security allows users access to volumes if any one of the following is true: 1. The user is a supervisor or equivalent (NetWare), or administrator (NT). 2. The user is a manager. You must be an administrator user on the selected NT server or domain in order to be a DiscView manager. 3. The user is in the list of users for the volume. 4. The user is in a group, which is in the list of groups for the volume. 5. The user has access to a member volume of a volume set.
Chapter Two – DiscView PRO Map CD-ROM Volume Security CD-ROM volume security controls access to mounted CD-ROM volumes. To set security for a CD-ROM volume, click on the CD icon, then select Security from the Tools menu, or click on the Set Security icon. Current security information displays for the selected object. See Chapter One Setting Security for information on adding managers and users. On NT, you can also use NT security to assign permissions on the volume shares.
DiscView PRO User Guide Dismount a CD-ROM Volume (NetWare Only) Be sure to dismount CD-ROM volumes before you: ü Delete CD-ROM volumes. ü Update the DiscView Server Components. You can dismount a CD-ROM volume in one of three ways: ü Click on the CD-ROM volume you wish to dismount, then click on the Dismount icon. ü Click on the CD-ROM volume and select Dismount CD-ROM Volume from the Tools menu. ü Right-click on the CD-ROM volume and select Mount CD-ROM Volume from the pop-up menu.
Chapter Two – DiscView PRO Map Select an attached user from the window that lists any users with open files. The selected user’s network and node address displays in the User Information box. You can also see how many CD-ROM files the user has open. alog ion diws all t a m r sho er Info The Us Volume Setbdirectories for a for all su users e.
DiscView PRO User Guide View Volume Statistics (NetWare Only) ■ To view CD-ROM volume statistics: 1. From the DiscView PRO Map window, click on the desired CD-ROM volume. 2. Select Statistics from the Tools menu, or click the Statistics icon. The CD-ROM Volume Statistics dialog displays. The statistics include volume name and status, i.e., mounted, unmounted, available, new volume, etc. The time and date the volume was mounted, if it is mounted. The number of kilobytes read since the volume was mounted.
Chapter Two – DiscView PRO Map View Selector Window Use this toolbar icon to switch from the DiscView PRO Map window to the Selector window. The features of the Selector window are discussed in Chapter Three. CD-ROM Drive Locking (NetWare Only) DiscView PRO supports automatic drive locking on both a DiscPort host and CD-ROM volume basis.
DiscView PRO User Guide ■ To enable AutoLock on a DiscPort: 1. From the DiscView PRO Map window, select a Host and select Configure from the Tools menu, or click the Configure icon on the toolbar. The Host Configuration dialog displays (the dialog changes depending on the host selected). n uratiot g i f n o st C Por The Hog for a Disc o dial PRO 2. Click the checkbox next to Automatically lock CD-ROM volume when mounted on this Host. 3. Click OK. AutoLock is enabled for the selected Host.
Chapter Two – DiscView PRO Map 2. Click on the checkbox next to Automatically lock this CDROM volume every time it is mounted. 3. Click OK. AutoLock is enabled for this volume. It will be locked automatically every time it is mounted and will remain locked until it is dismounted. A drive will be locked automatically if AutoLock is enabled on either the Host or the volume.
DiscView PRO User Guide Right-click on a fileserver, CD-ROM host, CD-ROM drive, or CD-ROM for a pop-up menu that provides a number of options for the selected item. p menu u p o p ple ry A samenu will vae item h m t the ding on depen e d select ■ To manually unlock a drive: 1. From the DiscView PRO Map window, right-click on a CD-ROM drive. 2. Select Unlock Drive from the pop-up menu. The drive is now unlocked.
Chapter Two – DiscView PRO Map The CD-ROM host automatically unlocks all drives whenever disconnecting from the fileserver, and before initiating a soft reset, which is requested via DiscView PRO. Drives are NOT unlocked automatically if power is removed from the CD-ROM host. Additional Map Window Options Reset Host If you have a network error, or the CD-ROM host is not responding, you can use DiscView PRO to reset the CD-ROM host.
DiscView PRO User Guide Delete a Host Adapter (NetWare Only) If you want to delete a DiscPort Executive host adapter, use DiscView PRO to do so. ■ To delete an adapter: 1. Select Delete Adapter from the Tools menu. A list of inactive, configured adapters displays. 2. Select the adapter you wish to remove and press Delete. Right-click on the DiscPort host to get a pop-up menu. Select Detach Host. 3. Answer Yes to confirm the deletion. You can delete only inactive adapters, which display as grayed out.
Chapter Three – DiscView PRO Selector
DiscView PRO User Guide Overview This chapter discusses the DiscView PRO Selector window and its features.
Chapter Three – DiscView PRO Selector DiscView PRO Selector The DiscView PRO Selector Window The DiscView PRO Selector window is a graphic representation of all available CD-ROMs, network drives, and CD-ROM groups, if any, for your currently attached servers.
DiscView PRO User Guide The Selector window consists of several sections: The Menu bar and Toolbar Local & Network Drives CD-ROM Groups CD-ROM Collection, Available CD-ROMs (mounted, previously mounted CDs) Fileserver \Default or Assigned Name and Title of the selected CD-ROM Notes to users from a manager, or a user's personal notes, regarding the selected CD-ROM volume If the word Refresh appears here, you need to manually refresh the display. Press F5.
Chapter Three – DiscView PRO Selector The Menu Bar, the Toolbar and the Drive Bar PRO cView ar, s i D e h b T menu ve bar r o t c e Sel dri , and toolbar l The too bar ico ns The commands used by DiscView PRO are organized into drop-down menus. The names of the menus are displayed on the Menu bar. The most frequently used commands from the menus are represented graphically by icons on the Toolbar. Each of the local and network drives are represented on the Drive bar.
DiscView PRO User Guide ve ba The dri r icon s Unmapped drive Floppy drive Hard drive Network drive CD-ROM drive RAM drive Unknown drive (or error occurred retrieving the drive type) Information Fields The information section of the window consists of three fields: The selected CDROM fileserver and default or assigned volume Name A descriptive Title of up to 48 characters for the selected CDROM volume Notes about the selected CDROM volume (both the manager and user have note fields) 54
Chapter Three – DiscView PRO Selector DiscView PRO Selector Menus You have several options available to you from the DiscView PRO Selector menus. If a menu item is grayed out, you are either not a DiscView manager, or you are running Windows NT and the option is not available. If you are an assigned DiscView PRO Manager, you have access to all menu items, at least those that are applicable to the current state of DiscView PRO. File Use the File menu to create, edit, or delete groups of CD-ROM volumes.
DiscView PRO User Guide Tools As a DiscView PRO user, the only option available to you from the Tools menu is Network..... Select this option to change network drive mappings. See the next section in this chapter and Chapter Four for details.
Chapter Three – DiscView PRO Selector Options The Options menu allows you to determine whether DiscView PRO will save previous drive mappings when you exit the program or allow users to map drives. You can elect to have DiscView PRO display status bars for dialogs and a confirmation message when you remap drives or dismount CD-ROM volumes. You can also change the display font and elect to have the Windows File Manager display when you map a drive, in addition to setting up Refresh options.
DiscView PRO User Guide Mapping Drives with DiscView DiscView PRO allows you to quickly map a CD-ROM volume to a network drive by using the mouse to drag-and-drop the CD icon on a drive icon. You can also use the Drive Mapping dialog box to map a mounted CD-ROM volume. ■ To map a CD-ROM using drag-and-drop: 1. From the DiscView PRO Selector window, click and hold on a CD-ROM volume icon. 2. Drag the CD to the desired drive and release it. 3. Click OK at the prompt.
Chapter Three – DiscView PRO Selector The appearance of this dialog depends on your NetWare version and driver. Don’t worry if it doesn’t look exactly the same. The dialog below is from Windows 95. 3. Click on the drop-down Drive button and select an available drive letter. 4. Select the desired path from the Path drop-down menu. Check Reconnect at logon if you want to reestablish the mapping each time you run 5. Click OK. Windows.
DiscView PRO User Guide Mapping Drives From DOS (NetWare) Some users may prefer to map drives from DOS. The DiscView Server Components allow DOS drive mapping by providing some basic DOS utilities for viewing CD-ROM volumes. ■ To map a CD to a drive letter using DOS: 1. Go to the DOS prompt. 2. Go to the \DISCVIEW\DOSUTIL directory. 3. Type DP VOLUME LIST and press Enter to get the volume name. 4. Type MAP := \: and press Enter to map the drive.
Chapter Four – DiscView PRO User Features
DiscView PRO User Guide Overview This chapter discusses what the user can do with DiscView PRO.
Chapter Four – DiscView PRO User Features Chapter Four – DiscView PRO User Features Installing DiscView PRO on the User’s Desktop This chapter assumes that the network administrator has already installed the DiscView Server Components and the CD-ROM host (DiscPort, DiscPort XL, DiscPort PRO, DiscPort Tower, or DiscPort Executive adapter). The following pages describe how to use DiscView PRO to manage and use CD-ROMs from your desktop.
DiscView PRO User Guide 3. When prompted, select the type of setup you desire for this workstation. Click Next. Select options one and two if you are configuring a CD manager’s workstation. For all other users, select either options two and three or just option three. 4. Setup copies the necessary files to the user’s \windows\system directory. 5. Select the folder Program Group to which the files are to be copied. Click Next. Setup creates the Program Group. Setup for this workstation is complete.
Chapter Four – DiscView PRO User Features ew DiscVi re t s e t o NetWa e Micr Sampl Group for m Progra ew DiscVi t s e t o e Micr NT Sampl Group for m Progra 65
DiscView PRO User Guide Using CD-ROMs from DiscView PRO The network administrator or DiscView PRO manager configures CD-ROMs for use through DiscView PRO. You will access these CDs from the DiscView PRO Selector window, shown below. The middle section of the DiscView PRO Selector window is called the CD-ROM Collection. This window lists all the CD- ROMs that are currently mounted, or were previously mounted. Differently shaded icons represent different CD-ROM states (see below).
Chapter Four – DiscView PRO User Features CD-ROM Groups The CD-ROM Group section displays groups of CD-ROMs associated with each attached server and user-defined groups of CD-ROMs. You have the option of displaying all the groups, including servers, or hiding the groups. CD-ROM Groups provide a way to organize the available CD-ROMs on the network. The Global Group contains all the CDs detected on the network, including those mounted or previously mounted.
DiscView PRO User Guide 2. Type a name for the new group. 3. Select an icon from the scrolling display list to represent the new group in the CD-ROM Groups section of the Selector window. 4. Click the OK button. The Edit Group dialog displays. 5. Select the CD-ROMs to include in the group. Click on the Add button to add your selections to the Group List list box. Click on the Add All button to add all the CDROMS in the Global List to the Group List.
Chapter Four – DiscView PRO User Features Information Fields The information section of the Selector window consists of four fields: The name of the selected CD-ROM (preceded by the name of the fileserver), is displayed in the Name Field. The title of the selected CD displays in the Title Field. It is a description of the CD created by the DiscView manager and can be up to 48 characters in length. Notes about the selected CD are created by either the DiscView manager or you and displayed in the Notes Field.
DiscView PRO User Guide Okay, So Now What Do I Do? The CD-ROM volumes have been configured and mounted, and have been assigned to groups. Now what? How do I actually use the CDs? Using CD-ROM Volumes from Windows The first thing you need to do to be able to access the files on a CD-ROM is to map the CD-ROM volume to a drive letter. You can do that through Windows or DOS. ■ To map a CD to a drive letter using DiscView PRO: 1. Go to the DiscView PRO Selector screen. 2.
Chapter Four – DiscView PRO User Features Macintosh Users Macintosh users can view and access CD-ROMs that have been configured for use with Macintosh clients. ■ To do so: l. Open the Macintosh Chooser from the Apple menu and click the AppleShare icon in the Chooser dialog box. The fileserver’s name should appear in the Select a fileserver list. 2. When you have logged in and closed the Chooser, the NetWare fileserver’s volume icon appears on the Macintosh desktop.
DiscView PRO User Guide 72
Chapter Five– DiscView PRO SmartLaunch™
DiscView PRO User Guide Overview This chapter introduces SmartLaunch, a Windows application that allows you to provide your users with point-andclick access to CD-ROMs on your network.
Chapter Five – DiscView PRO SmartLaunch DiscView PRO SmartLaunch™ Introduction DiscView PRO comes with an advanced and powerful feature, SmartLaunch, which allows nontechnical network users to easily access CD-ROM applications. The DiscView manager first configures the CD-ROMs through DiscView. SmartLaunch is then used to create Launch Items — on which the user clicks to run the applications or access the data found on the CDs.
DiscView PRO User Guide If the word Manager appears in the bottom right corner of the SmartLaunch window status bar, you are a SmartLaunch manager of this database. As a SmartLaunch manager you can create new Launch Items, configure existing items, delete items, and assign an associated executable, although you can do this only if you are a manager of the server to which the item is attached or configured.
Chapter Five – DiscView PRO SmartLaunch Open the SmartLaunch application by selecting Run DiscView PRO SmartLaunch from the Options menu.
DiscView PRO User Guide Configuring a Launch Item This section is designed to walk you through a typical Launch Item configuration. Follow the step-by-step sequence below. The CD-ROM we use in the example is Computer Select. Run SETUP on Computer Select first from a network version of Windows — this creates the .INI file that is modified in the following steps. To get started, select New Item from the File menu, or click on the New Item icon on the toolbar. The New Item dialog appears.
Chapter Five – DiscView PRO SmartLaunch the OK button to save the Launch Item configuration. 1. The Launch Name is what the users see on their Desktops. Type a descriptive name of up to 28 characters in this field. 2. The Notes field is used for documenting any special information about the CD you are configuring. For example, the Computer Select CD is updated monthly, so you could document the version here. 3.
DiscView PRO User Guide 2. In the File Name field, type the path and name of the application’s executable file. Use a percent sign (%) for the drive letter. This tells the program to use the first available drive. 3. In the Working Directory field, type the path that you want the application to use for a working directory, just as you do when you are setting up a program on the Windows desktop. You can use the Browse buttons to locate the correct path and file name, just as you would in Windows.
Chapter Five – DiscView PRO SmartLaunch 11. Click the On Exit tab. The On Exit Tab Section Exit The On section NT does not use the Dismount... or Detach... items. This section of the dialog tells the Launch Item how to act when the user exits the CD-based application. You can set it up so that the user’s system is returned to its original configuration, which is what we have done here for our example. 1.
DiscView PRO User Guide The Misc Tab Section The Mi sc sect ion The Miscellaneous section is used for Launch Items that require additional setup to run, such as setting environment variables or modifying an INI file. You can check the Configure for WebLaunch option if you want the Launch Item to be available to CDBrowser and WebLaunch (see Chapter Six).
Chapter Five – DiscView PRO SmartLaunch The Ad va ption nced O s dialo g This dialog is used to make changes to the application’s .INI file. It is currently the only available Advanced Option for Windows applications. 6. Type in the name of the CD-ROM application’s .INI file, or click Browse to search for it. 7. Click on the View button to display the INI file you indicated. You will select those line items that need to be changed in the INI File Changes dialog. The INI hang File C es dial og 8.
DiscView PRO User Guide SmartLaunch currently supports the editing of only one .INI file per Launch Item. 10. Click on the Add button to add this line to the Changes box in the dialog. 11. Repeat steps 6 through 10, as needed. The Changes text box will resemble the one on the previous pages. Click on the OK button to return to the Misc section of the New Item dialog. Steps 7 through 10 can be performed manually. Type the desired changes in the appropriate line of the .INI File String section.
Chapter Five – DiscView PRO SmartLaunch 3. Click OK to save the Launch Item configuration. See the INI File Examples in on-line Help for additional information. Copying a Launch Item If you are creating a Launch Item that has similar characteristics to an existing Launch Item, you can copy the existing item, make your edits, and save it as a new Launch Item. 1. Select a Launch Item to copy. 2. Click the Copy icon menu. , or select Copy from the File The New Item (copied) dialog displays.
DiscView PRO User Guide Workstation Setup (NetWare and NT) 1. Select Setup from the Options menu to modify the way in which SETUP.EXE works on users' workstations and to setup WebLaunch functionality. The Setup dialog displays.
Chapter Five – DiscView PRO SmartLaunch that will be updated at Windows start up. The default Group Name is Microtest CD-ROM. 2. Make your selections, then click on the WebLaunch tab. The WebLaunch Tab Section Samples of possible WebLaunch settings are displayed below. tti nch se WebLau are tW for Ne nch s WebLau for NT ngs ettings 3. When you have finished configuring WebLaunch, click on the OK button. You are returned to the SmartLaunch window.
DiscView PRO User Guide Command Line Arguments SmartLaunch recognizes the following command line arguments: LaunchItem Runs the Launch Item -S Displays the SmartLaunch window -UGroupName Updates the Program Manager with new Launch Items using the Group Name specified -Q Runs SmartLaunch in quiet mode, which does not display progress messages -NServer/Volume Creates a new Launch Item using Server/Volume (used by DiscView) -CLaunchItem Configures an existing Launch Item using Server/Volume (used by D
Chapter Five – DiscView PRO SmartLaunch A Launch Item is accessed by double-clicking on the Launch Item icon. That starts the process of attaching the user to the appropriate fileserver, mapping the CD-ROM volume to a drive letter, and running the application on the CD-ROM. The only indication the user will have of what's going on is the appearance of a Progress Gauge, if you checked that option in the workstation Setup dialog.
DiscView PRO User Guide CD-ROM Not Mounted If the CD-ROM is not currently mounted in a CD-ROM drive, SmartLaunch will notify the user and display the name of the Contact Person to call to rectify the problem. Once the CD has been mounted, the user will have to double-click again on the Launch Item icon to run the CD-ROM application.
Chapter Six – CDBrowser™ and WebLaunch™
DiscView PRO User Guide Overview This chapter introduces WebLaunch™ and CDBrowser™, Windows applications that allow you to provide your users with point-and-click access to CD-ROMs via a web browser. CDBrowser and WebLaunch are available only in DiscView PRO version 5.31a or greater.
Chapter Six – CDBrowser and WebLaunch CDBrowser™ and WebLaunch™ CDBrowser, WebLaunch, and WebLaunch Ultra The features described in this chapter show how CDBrowser extends DiscView PRO functionality to better integrate with Novell and Microsoft web server technology. CDBrowser features allow users to browse CD-ROM volumes across intranets and initiate executables through standard web browsers on intranets.
DiscView PRO User Guide Configuring CDBrowser CDBrowser is installed during the standard DiscPort product installation process. It consists of an NLM (for Novell), or a DLL (for NT), and is installed to the discport.cd subdirectory as DPCGI.NLM, or DPCGI.DLL. System administrators can move CDBrowser to the directory on the server where CGI (common gateway interface) files are typically located (such as CGIBIN). The configuration of CDBrowser varies depending on whether it's installed under Novell or NT.
Chapter Six – CDBrowser and WebLaunch Managing CDBrowser The CDBrowser server application determines what you see on the browser screen. It can be customized by the administrator to allow the automatic launching of executable files (WebLaunch Ultra only).
DiscView PRO User Guide Configuring WebLaunch and WebLaunch Ultra The WebLaunch executable must be added to a workstation’s default web browser as a Plug-in Helper application. When DiscView PRO is installed on the server the following things occur: ü The system type is checked (Win95, Win3.1, WinNT, etc.) ü The default browser is located – either Netscape, or Internet Explorer ü A new entry for the MIME type, the plug-in definition, is created, if a browser exists.
Chapter Six – CDBrowser and WebLaunch For NetWare 4.11: The HTML path is X:\WEB\DOCS where X is the remote drive mapping to the web server SYS volume. If you changed the name of this directory when you installed your web server, use the name you assigned. ation nfigur4.11 o c p u Set etWare for N For NT 4.0: The HTML path is X:\INETPUB\WWWROOT where X is the hard drive letter of the web server. atio nfigur o c p u t Se T 4.
DiscView PRO User Guide In most cases, if Setup is run from UNC, it automatically sets up the MIME type as UNC format. Create new Launch Items in SmartLaunch, or reconfigure existing Launch Items. In either case, you can indicate that these Launch Items are to be additionally configured for WebLaunch. 4. Either click on the Create a New Item icon, or select an existing Launch Item and click on the Configure an Item icon. The New Item dialog displays. 5. Click on the Misc tab.
Chapter Six – CDBrowser and WebLaunch WebLaunch Look and Feel An example of a WebLaunch web page is shown below. It contains a title and a brief instruction on how to access the Launch Items. All the current WebLaunch Items, showing the Launch Item’s associated icon (if unknown, a default icon displays), application name, and description, if given, are displayed.
DiscView PRO User Guide Browsing Intranet CD-ROM Files and Directories The CDBrowser components are responsible for generating a top level web page of all the currently mounted CD-ROM volumes. It makes the necessary calls to the DiscView Server Components, DISCPORT.NLM or MTDPSRVC.EXE, to get the current list of available CD-ROM volumes. The list will include only currently mounted CD-ROMs.
Chapter Six – CDBrowser and WebLaunch Viewing Web-Ready CD-ROMs Some CD-ROMs are web-ready. When these CD-ROMs are viewed from a web browser they appear as standard web pages. They contain graphics, text, and links to other web pages on the CD-ROM. wse CDBro l a c i p Ty e Page Hom r avai List of lable C Ds By default, CDBrowser shows web-ready CD-ROMs as web pages – not as files and directories.
DiscView PRO User Guide Double-clicking on a CD-ROM displays a page that resembles this web page for a Computer Select CDROM. This section displays the current directory hierarchy. This section displays the contents of the CD. Icons indicate the file type – if unknown, a question mark icon displays. The rocket to the right of an executable means that the application can be launched by clicking on the executable (WebLaunch Ultra only).
Chapter Six – CDBrowser and WebLaunch ü For each item that is made web-launchable, a set of two files is created in the specified subdirectory: The first file is a JPG file that is created from the ICO file already extracted by SmartLaunch. The second file is an SLI (SmartLaunch Item) file. For standard WebLaunch, it will contain the SmartLaunch Launch Item name. This is enough information for SmartLaunch to proceed to lookup and obtain other required information in the database.
DiscView PRO User Guide Customizing a WebLaunch Web Page If you have many CDs on your intranet, you may want to customize the WebLaunch web page to reflect the way users access the CDs. You can create your own WebLaunch page by editing the HTML source file for the default WebLaunch web page. Just cut and paste the lines containing the CD-ROM descriptions, add images as desired and save. The following example shows the HTML for the WebLaunch page shown on page 99.
Chapter Seven – FastCD™
DiscView PRO User Guide Overview This chapter describes the features of FastCD, the virtual CD image builder. FastCD functionality is available only in DiscView PRO version 6.0a or greater.
Chapter Seven – FastCD FastCD™ Introduction Have you ever noticed that no matter how large a refrigerator you have, you're always running out of room? And, no matter how many CD-ROM drives you have on the network, there are never enough to accommmodate users' requirements? In addition, as convenient as networked CD-ROM drives can be in providing users direct access to a wealth of information and a variety of applications, they can often be frustratingly slow when accessing the data and running the applica
DiscView PRO User Guide Configuring FastCD Before you begin building your CD images, you need to configure FastCD to establish your default settings. First, you should determine where on your network you want to build and save the virtual CD images – location, location, location. Obviously, you will choose a hard disk drive volume on the fileserver running the DiscView PRO Server Components that has enough free space to accommodate the virtual images you intend to create.
Chapter Seven – FastCD 3. If you want to change the default directory for image storage, click on the Browse button. The Browse FastCD Image Directory dialog displays. Ima astCD F e s w The Bro y dialog r Directo ge 4. Click on the drop-down list button to display the available drives. Make sure that the selection you make is mapped to a hard disk volume on the specified server. 5. Double-click on the new directory to change the path. The new path will be displayed in the Selected Directory field.
DiscView PRO User Guide Building a FastCD Image 1. If it is not already loaded, load the CD you want to make an image of in an available drive. The drive can be a locally attached drive, or a drive in a DiscPort Tower attached to the server, or attached to a DiscPort host attached to the server, for example. Do not mount the CD. 2. From the Map window, select the CD. 3. Select the Build FastCD Image option from the Tools menu, or right-click on the CD and select Build FastCD Image from the pop-up menu.
Chapter Seven – FastCD The Advanced Image Options Tab Section va The Ad section age nced Im Option s 1. When you configured FastCD, you set default image options. Those options are displayed here. You can override your default settings for the current image-build by clicking on the Data Compression and Auto Eject checkboxes. Building a virtual CD image from a CD-ROM can take anywhere from a few minutes to a few hours.
DiscView PRO User Guide The FastCD Image Creation Status Dialog The Status field dynamically displays the processes that are taking place. CD Name displays the name of the CD-ROM being imaged. Host displays the name of the host where the CD being imaged resides. Image File indicates the location to which the virtual CD image will be saved. The Image Status section is updated as the build progresses. 4. As explained earlier, the build process may take a while.
Chapter Seven – FastCD Managing Your Virtual CDs Once you have created your virtual CDs, they can be managed in the same way you manage your other CDs. You can change the configuration of the virtual CD, you can make it a member of a volume set, you can mount or dismount it, you can set security for it, etc. In addition, FastCD provides two monitors for your virtual CDs in the FastCD Configuration dialog. 1. Right-click on the FastCD icon. Select Configure from the pop-up menu.
DiscView PRO User Guide The Creation Log Tab Section Th ion L e Creat og sect ion The list box displays the contents of the image Creation Log. Each line in the log file describes the outcome of an imagebuild operation. An image-build can be completed successfully, terminated by the user, or terminated due to a failure during the process. 1. Click on the Clear Log button to erase the contents of the Image Creation Log. 2. Click on the OK button to exit the FastCD Configuration dialog.
Chapter Seven – FastCD Other Applications When you build a virtual CD image, you can opt to build the image in either a compressed or a non-compressed format. Compressed images are created using a proprietary format and are saved with an FCD file extension. Non-compressed images are created using the standard ISO 9660 CD-ROM format. They are built by performing a sector-by-sector copy of the CD-ROM and are saved with a CDR file extension. .CDR – Standard sector-by-sector copy using ISO 9660 format .
DiscView PRO User Guide ■ To share a CD-R image: 1. Copy the image file to the FastCD server. 2. Add the image file path to the FastCD configuration file, DPFASTCD.DAT. A sample DPFASTCD.DAT file with renamed images added: SYS:SYSTEM\DISCPORT.CD\DPFASTCD\NSEPRO.FCD SYS:SYSTEM\DISCPORT.CD\DPFASTCD\CSELECT.FCD SYS:SYSTEM\DISCPORT.CD\DPFASTCD\ENCARTA.CDR VOL1:CDIMAGES\TESTCD1.CDR VOL1:CDIMAGES\TESTCD2.
Chapter Eight– Jukebox Support
DiscView PRO User Guide Overview This chapter discusses configuring the jukebox and installing and using the driver software. Jukebox support is available only in DiscView PRO version 6.0 or greater.
Chapter Eight – Jukebox Support Jukebox Support The Basic System The following system is required to ensure the proper operation of your jukebox driver. ✓ DiscPort Executive installed and running as the CD-ROM host ✓ A supported jukebox ✓ DiscView Pro with the jukebox drivers installed Supported Jukeboxes There are four jukeboxes supported by DiscView PRO. The drivers for these jukeboxes are included with the DiscView software. Microtest does not sell the jukeboxes.
DiscView PRO User Guide Installing and Configuring the Jukebox Hardware The jukebox must be installed and configured before you load the jukebox driver software. We cannot tell you how to physically install your specific jukebox. The manufacturer does that in the jukebox installation guide.
Chapter Eight – Jukebox Support • All drives in a jukebox must be on the same host adapter as the changer mechanism. Although some jukeboxes allow you to connect the drive and changers to different adapters, you cannot do it here. • If you are setting up two jukeboxes, each jukebox must be set to a different Jukebox ID (see the next two pages, or the jukebox manual for details). This is different than setting the SCSI IDs of the drives.
DiscView PRO User Guide Dipping the Switches and Other Guilty Pleasures The information we have provided regarding switch settings is for your convenience and may not apply to a particular unit. Always refer to the manufacturer's instructions to confirm the settings described here. NSM Mercury 40 Jukebox The RS-232 ID, the Jukebox ID, for the Mercury 40 is set with the buttons on the front panel of the jukebox. The following basic instructions should help you set the RS-232 ID.
Chapter Eight – Jukebox Support NSM CDR 100 XA Jukebox The RS-232, or Jukebox ID, for the CDR 100 XA is set using one of the two dials on the interface board on the inner back panel of the unit. See the manufacturer's user manual for instructions on accessing the board. Use a small screwdriver to turn the switch to the position that represents the desired ID number. Using a small screwdriver, turn the appropriate dial to the desired ID number (SCSI, or RS-232).
DiscView PRO User Guide Pioneer DRM-1004X Jukebox Setting the Physical SCSI IDs The DRM-1004X has a set of five switches on the rear panel that are used for setting SCSI ID (see illustration). The first four switches set the SCSI ID for each of the internal CD-ROM drives. Drives 3 and 4 are optional — if not installed, the switch settings will be ignored. The fifth switch sets the SCSI ID for the jukebox changer mechanism controller. Each switch is a rotary switch.
Chapter Eight – Jukebox Support Pioneer DRM-5004X CD-ROM Changer (Jukebox) Setting the Physical SCSI IDs The DRM-5004X has a set of five switches on the rear panel that are used for setting the SCSI ID (see illustration). The first four switches set the SCSI ID for each of the internal CDROM drives. Drives 3 and 4 are optional - if not installed, the switch settings will be ignored. The fifth switch sets the SCSI ID for the jukebox changer mechanism controller.
DiscView PRO User Guide The first LED (from the left) corresponds to the SCSI ID for Drive 1, the second to Drive 2, the third LED is left blank, the fourth corresponds to Drive 3 (if installed), the fifth to Drive 4 (if installed), and the sixth LED is the physical SCSI ID of the changer mechanism. To change an ID for a drive, press the corresponding button (see the illustration below) until the desired ID number displays. The SCSI ID of the changer mechanism will be set by the rear switches.
Chapter Eight – Jukebox Support View Firmware Version The DRM-5004X firmware version can be determined by pressing and holding the top left button while the door is open, but with the door switch in the closed position. The resulting display corresponds to the firmware version. Remove the object holding the door switch in the closed position. Press the top left button again to clear the display. Sample firmware version: 00 1.13 We recommend version 1.
DiscView PRO User Guide Installing and Configuring the Jukebox Driver Software The jukebox driver software components were copied to the server when you loaded the DiscView PRO Server Components.The process by which you install the jukebox driver is very easy. Simply select Jukebox Driver... from the Install menu. If you are installing the driver for an NSM Mercury 40 or NSM CDR 100 XA jukebox, you must load the file AIOCOMX.NLM on the server before loading either of the NSM jukebox drivers.
Chapter Eight – Jukebox Support ■ To install the jukebox driver software: 1. If it's not already running, start up DiscView PRO. In the Map window, click on the server on which the DiskView PRO Server Components were loaded. 2. Select Jukebox Driver... from the Install menu. The Install Jukebox Driver dialog displays. It lists the supported jukeboxes. bo ll Juke a t s n I The dialog x Driv er 3. Click on the name of the jukebox driver you are installing.
DiscView PRO User Guide The first of the jukebox configuration screens appears. The screens will vary, depending on the jukebox you are configuring. The following screens represent the NSM jukebox configurations. ke The Ju Step 1 nfigu box Co ration If you are installing the jukebox driver for a Pioneer 1004X, or 5004X, skip to instruction 12. 4. Click Next. The Step 2 dialog displays.
Chapter Eight – Jukebox Support 5. Enter the correct serial port number (use the up or down arrows to select a number from 0 to 4). If you choose to keep the default setting of 0, the first available serial port will be used. 6. In the field labeled Comm Board, enter the board number you jotted down when you loaded the AIO driver at the fileserver. Specifying -1 attempts to use the first Comm board found. 7. Click Next. The Step 3 dialog displays. MJ The NS Step 3 Conf ukebox igurati on 8.
DiscView PRO User Guide MJ The NS Step 4 Conf ukebox igurati on 11. Set the Jukebox ID. This number is found in the jukebox manufacturer’s guide to operations. The jukebox ID can be changed by setting a series of switches on the Jukebox, if desired. You physically set the Jukebox ID when you were setting up the NSM jukebox earlier in this chapter. 12. Click Next to display the Step 5 NSM dialog (or the Step 2 dialog for a Pioneer jukebox configuration).
Chapter Eight – Jukebox Support 13. Check to make sure the default jukebox name listed on this dialog is correct. Important! Do not change the default name unless you know for sure that the jukebox name has been changed through the jukebox manufacturer’s utilities. 14. Click Next to display the Step 6 dialog (or Step 3 Pioneer dialog). M Juk The NS Step 6 e nfigu box Co ration 15. Set the Reserve Time based on the following description.
DiscView PRO User Guide M Juk The NS Step 7 e nfigu box Co ration 17. If you are satisfied that you have configured the jukebox driver correctly, click Finish to load the jukebox driver. Click Back to check previous settings. If you are configuring the jukebox driver before actually installing the jukebox, click the checkbox next to Load jukebox driver to disable it.
Chapter Eight – Jukebox Support The dialog displays the status as the driver is configured and loaded. It can take up to 20 seconds to load the driver. If any of the parameters are incorrect, the driver will not load. You will be taken back to the beginning of this installation. Go through it again, verifying that all of the parameters are set correctly. That’s all there is to installing the jukebox driver! You are ready to load CDs into the jukebox and use DiscView PRO to autoconfigure them.
DiscView PRO User Guide Adding Jukebox Drivers Your options are fairly limited when it comes to adding drivers. For example, you can have only one Pioneer DRM5004X jukebox per server, so adding another driver is not an option under this circumstance. However, you can have a Pioneer DRM-1004X and an NSM jukebox on a single server. Click on the Add... button and select the appropriate jukebox server from the list box. The first of the jukebox Configuration dialogs will display.
Glossary
DiscView PRO User Guide 138
Glossary Glossary Glossary of Terms CD-Bridge A format that allows a disc to be played on both a CD-I player connected to a TV set and on a CD-ROM / XA drive connected to a computer. CD-DA (Compact Disc-Digital Audio) Refers to the audio CDs you find in music stores. CD-I (Compact Disc Interactive) A hardware and software system thatplays CD-I, CD audio, and Photo CDs. It connects to television and stereo systems.
DiscView PRO User Guide CD-ROM drive A computer add-on (peripheral) that reads CD-ROM discs. CD-ROM tower A peripheral that is made up of two or more CD-ROM drives daisy-chained together and contained in a casing for ease of installation and portability. CD-ROM/XA An extension to the CD-ROM standard, XA allows computer data and certain audio data to be placed on the same track of the disc.
Glossary Drag-and-drop To click and hold the left mouse button on a desired object, then move, or drag, the object to a new location, releasing the mouse button to drop the object. Drive ID The actual computer memory location of the CD-ROM drive’s SCSI number. SCSI devices are numbered 0 through 7. The DiscPort’s ID is 7. Early Token Release Early token release improves the efficiency of a 16 Mb/s token ring network by using more of the network’s idle time.
DiscView PRO User Guide Interleaving A method of storing information in an alternating sequence of frames. Jukebox A CD-ROM drive that has a disc changing mechanism capable of playing multiple CDs. Locally Administered Address An alternate network address that can be assigned to a device on a Token Ring network. Logical Unit Number (LUN) Each disc in the disc changer CD-ROM drive has a different LUN from 0 to 5. For non-disc changer drives, this should always be 0.
Glossary Orange Book A set of standards that define the specifications for Compact Disc-Write Once (and Compact Disc-Magneto Optical) discs. Red Book A set of standards that define the specifications for Compact Disc Digital Audio formats. Remote Boot Loader (RBL) Software commands that allow a diskless workstation or other device, such as a DiscPort, to boot from the network — eliminating the need for a system boot disk for the device.
DiscView PRO User Guide Termination Power (aka Term Power) A 5V 1 ampere signal located on the SCSI bus which is used in conjunction with the terminator. Term power supplies this voltage for the pull down resistor in the terminator. At least one device on the SCSI bus needs to supply this power. Terminator A resistor or cable connector that is placed at the end of a SCSI bus. Token Ring A network uses token passing (a continuously repeating frame) technology in a sequential manner.
Appendix A – Troubleshooting Appendix A – Troubleshooting Icon Indicators Power off Configured Unconfigured DiscPort Icon In the DiscView PRO Map window, if the DiscPort icon is a light shade of gray, the DiscPort is in a power-off state. Reset the DiscPort, and press F5 to refresh your screen. This should change the icon to a darker gray color. Double-click on the icon to display all available CD-ROM drives. The icons at the left represent Token Ring and Ethernet DiscPorts, respectively.
DiscView PRO User Guide Configured Configured Power off Unconfigured Power off Unconfigured DiscPort XL and PRO Icons In the DiscView PRO Map window, if the DiscPort XL or DiscPort PRO icon is a light shade of gray, the DiscPort host is in a power-off state. Reset the DiscPort host. Press F5 to refresh your screen. This should change the icon to a darker gray color. Double-click on the icon to display all available CD-ROM drives.
Appendix A – Troubleshooting DiscPort Host Status LEDs This table applies to DiscPort XL, DiscPort PRO and DiscPort Towers. No.
DiscView PRO User Guide Disc Changer and CD-ROM Drive States A-4 State Meaning Available This platter position does not contain a CDROM. It is empty. Loaded The CD-ROM has been recognized by the DiscView Server Components, but it is not mounted, or published, as a volume and cannot be accessed yet by users. Mounted, or Mounted Set The CD-ROM is published as a volume, or volume set, and is ready for access by users. Mounting...
Appendix A – Troubleshooting Possible Disc Types and Lock Status This table defines the possible status values for some of the options displayed in various dialogs in DiscView PRO.
DiscView PRO User Guide Troubleshooting Guide Microtest is committed to providing easy-to-use products that increase productivity. We encourage your input on how we can better meet your needs. Before you call Technical Support, you may save yourself some time by looking over the following statements and questions in this troubleshooting guide, or in on-line Help. The guide presents the most commonly asked questions and things to check when using a DiscPort host.
Appendix A – Troubleshooting Novell 3.11 Restrictions Volume name size is 2-15 characters Maximum volume size is 32TB Volume limit is 63 volumes per fileserver When using a tape backup unit, be aware that CD-ROM discs are mounted as volumes. It is advised that you modify your backup device so it will not backup your CD-ROM volumes located on the DiscPort host.
DiscView PRO User Guide Unable to See CD Drives Attached to a DiscPort Host In normal operation, the attached CD drives should appear as available drives, or a CD title. First, verify the drives are SCSI-II compatible. Next, verify that each drive has a different SCSI ID. No drive can use ID 7, since it is used by the DiscPort.
Appendix A – Troubleshooting Problems Running DiscView PRO in Windows DiscView PRO Will Not Load Most of the time when DiscView PRO will not load, it is a result of DiscView PRO being unable to properly extract and copy all of the needed files to the WINDOWS\SYSTEM directory. Make sure there are no other Windows applications running and run SETUP.EXE from the DiscView PRO directory. If this does not work properly, exit to DOS and perform the following steps: 1.
DiscView PRO User Guide Supported CD-ROM Drives DiscPort, DiscPort XL, DiscPort PRO, and DiscPort Executive work with most external CD-ROM drives that support the SCSI-II specification. Drives that require a proprietary adapter are not supported through DiscPort hosts. SCSI supports up to 8 devices on the bus, including the host adapter. The DiscPort, as the adapter, uses SCSI ID 7. The DiscPort PRO has two SCSI adapters, both using SCSI ID 7, giving you virtually two separate SCSI buses.
Appendix B – NDS Login Account Requirements Appendix B – NDS Login Account Requirements Introduction If the DiscView PRO Server Components are loaded on a NetWare 4.x fileserver, you should create a Novell Directory Service (NDS) login account. The NDS login account is used by the Server Components to perform three key operations in the NDS environment: ü The first is browsing the NDS tree.
DiscView PRO User Guide NDS Login Account Requirements Four essential components must be in place before the NDS login account can perform the key operations described in the Introduction. e Brows Rights R Create I ate C mmedi ights ontain er re Compas y t r e p t o h Pr ead Rig and R B-2 The first component is object browse rights to the complete NDS tree, beginning at the root.
Appendix B – NDS Login Account Requirements Establishing an NDS Login Account When the Server Components are loaded for the first time, or if an NDS login account has not been assigned, the Server Components will attempt to login to the NDS tree using CN=Guest. If this login attempt fails, the Server Components will attempt to login using CN=DiscPort. Both attempts are initiated from the server's NDS context and no passwords are included.
DiscView PRO User Guide 1. Click on the Browse button to browse the NDS tree for a user name. e User Brows g dialo Name Remember, you will not be able to browse for the new NDS account in DiscView if the Server Components do not have the rights required to browse the NDS tree. The Server Components will use the new account name and password only if they are able to login successfully. Be aware that the Server Components are unable to verify that the new account has the required rights listed above.
Appendix C – Using DiscView from DOS Appendix C – Using DiscView From DOS (NetWare Only) Introduction This appendix describes how to use the DiscPort host on a DOS-based PC or fileserver. This document is intended to be useful to two types of users: ü Those with no access to a Windows environment ü Users wishing to develop DOS batch files, either for use by themselves, or to provide other DOS users a way to gain simple access to CD-ROM discs installed on a network.
DiscView PRO User Guide DiscPort Configuration Using The DOS Utilities This document assumes that: ü you have copied the DP*.IMG files to the “\login” directory ü you have installed the DiscView server components (*.dsk, *.nlm, *.ncf files) to the \system\discport.cd directory ü the DiscPort host is powered on and is connected to the network cable All commands are issued from the DiscView directory using the DP.EXE executable file.
Appendix C – Using DiscView from DOS For versions prior to 3.30a, the discport_address is just the last six digits of the address; for this example, 402B06 instead of discport_402B06. The image filename is the same as the DP*.IMG file that you copied to the \login directory. The name of the image file is logical — DPE510A.IMG — DPE for Ethernet, or DPT for Token Ring, the version of the software, for example, 510A, and the .IMG extension.
DiscView PRO User Guide Entering the reset command will display a screen similar to: If you enter dp discport list after performing a reset, a screen similar to the one following will display. Notice that the Status has changed from Unconfigured to Unattached. The status light on the DiscPort is now solid amber, indicating the DiscPort is configured, but unattached. If the status light is still blinking four times amber, the DiscPort did not accept the configuration.
Appendix C – Using DiscView from DOS For versions prior to 3.30a, the command is: dp discport attach Example: dp discport attach support 402B06 If you enter the command dp discport list at this point, a screen similar to the one below will be displayed. Notice that the Status is now Attached, and the status light is solid green. You can now proceed with the configuration of your CD-ROM volumes. Refer to the appropriate chapter for details.
DiscView PRO User Guide C-6
License and Warranty Provisions License and Warranty Provisions This manual and the product described in it have been protected internationally by copyright and other applicable laws with all rights reserved. You may not remove or conceal any trademark, patent or copyright notice appearing on the product or this manual. Microtest remains the sole owner of the software programs that are part of this product. Microtest grants you a nonexclusive license to use these software programs.
DiscView PRO User Guide EXCEPT FOR THE WARRANTIES SET FORTH ABOVE, MICROTEST’S PRODUCTS, AND THE SOFTWARE CONTAINED THEREIN, ARE LICENSED “AS IS,” AND MICROTEST DISCLAIMS ANY AND ALL OTHER WARRANTIES, WHETHER EXPRESS OR IMPLIED, INCLUDING WITHOUT LIMITATION, ANY WARRANTIES AS TO THE SUITABILITY OR MERCHANTABILITY OR FITNESS FOR ANY PARTICULAR PURPOSE OF ANY PRODUCTS OR PROGRAMS FURNISHED HEREUNDER.
License and Warranty Provisions part of this document may be photocopied, reproduced, or translated to another language without the prior written consent of Microtest, Inc. Microtest, Inc. makes no warranty of any kind with regard to this material, including, but not limited to, the implied warranties of merchantability and fitness for a particular purpose. Microtest, Inc.
DiscView PRO User Guide xviii
License and Warranty Provisions Software Licensing Agreement This is a legal agreement between the purchaser of this software package (hereafter “Purchaser”) and Microtest, Inc. BY OPENING THE SEALED DISK PACKAGE, PURCHASER AGREES TO BE BOUND BY THE TERMS OF THIS AGREEMENT. IF PURCHASER DOES NOT AGREE TO THESE TERMS, THE UNOPENED PACKAGE SHOULD BE PROMPTLY RETURNED TO THE PLACE OF PURCHASE FOR A FULL REFUND. NOTICE: Microtest, Inc.
DiscView PRO User Guide 5. Microtest, Inc. warrants that each licensed copy of the Software shall, for the period of thirty (30) days after receipt by Purchaser, perform substantially all of the functions described in the current Guide to Operations for the Software when used, unmodified, according to the instructions in the Guide to Operations. Microtest, Inc.
Index I Index A C About 57 Access 16 Adapter 48 Adapter ID 33 AIDCOMX.
DiscView PRO User Guide CD-ROM Volume Set create 14, 56 security 18 CDBrowser xii, 82, 93 configuring for NetWare 4.11 94 configuring for NT 4.0 94 managing 95 tree navigation 100 viewing files 100 viewing web-ready CD-ROMs 101 CDROMS 4 CGI 94 Changer Mechanism 121 Clear Log button 114 CLIB.
Index Host 10, 63, 112 Host Info section 32 HTML 95, 101, 104 path 97 I ICO file 103 Icon indicators 25, A-1 DiscPort 25, A-1 DiscPort PRO 27, A-2 DiscPort Tower 27 DiscPort XL 26, A-2 Fileserver A-2 Host adapter A-1 Image-build 108, 110, 114 delayed 111 immediate 111 Image file 32, 112 Image File section 113 Image status 112 Information 56 Information fields 54, 69 INI file changes 83 Intranet 93, 100 IPX/SPX protocol 9 ISO 9660 format 9 J JPG file 103 Jukebox changer mechanism 121, 126 Comm Board 130 ha
DiscView PRO User Guide Mount x, 39, 56, 84 history 42 options 15 Mounted CD 28, 100 volume 38 Multimap section 84 Multisession xiii, 31 N Name field 54, 69 NDS browsing the tree 35, B-1 login account 35, B-1 password 35 rights B-2 support 35 user name 35 NetWare volume 110 Network address 32 tools menu 58 Type 32 volumes x New group 67 New Item 78, 98, 102 Node address 32 Non-compressed format 115 Notes 5, 10, 15, 54, 79 manager 69 personal 69 Novell Directory Service 35 NSM jukebox 28, 119 CDR 100XA 123
Index SmartLaunch (cont.
DiscView PRO User Guide Microtest, Inc., 4747 N.22nd Street, Phoenix, Arizona 85016 Microtest Europe, 2A Kingfisher House, Northwood Park, Gatwick Rd. Crawley, West Sussex, RH102XN, United Kingdom 2943-4500-08E Rev.