
Installation Instructions


13
Test running
Perform the electric safe check after completing installation:
1. Insulated resistance
The insulated resistance must be more than 2M .
2. Grounding work
After finishing grounding work, measure the grounding resistance by visual detection and
grounding resistance tester. Make sure the grounding resistance is less than 4 .
3. Electrical leakage check (performing during test running)
During test operation after finishing installation, the serviceman can use the electroprobe
and multimeter to perform the electrical leakage check. Turn off the unit immediately if
leakage happens. Check and find out the solution ways till the unit operate properly.
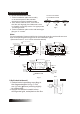
A: Lo packed valve B: Hi packed valve
C and D are ends of indoor unit connection.
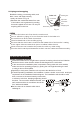
CAUTION
Indoor unit
check point
D
B
C
A
Outdoor unit
check point
Cover
Fig.25
Electrical safety check
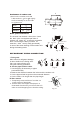
Gas leak check
1. Soap water method:
Apply a soap water or a liquid neutral detergent
on the indoor unit connection or outdoor unit
connections by a soft brush to check for leakage
of the connecting points of th piping. If bubbles
come out, the pipes have leakage.
2.
Leak detector
Use the leak detector to check for leakage.
ELECTRICAL SAFETY AND GAS LEAK CHECK
TEST RUNNING
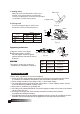
Manual control
Button
AUTO/
COOL
Perform test running after completing gas leak and electrical safety check.
The test running time should last more than 30 minutes.
1. Open the panel and lift the panel up to an angle which remains fixed. Do not lift the
panel any further when it stops with a click sound.
2. Press the manual control button twice until the operating indicator lights up, the unit
will operate on Forced Cool mode.
3. Check if all the functions works well during test running. Especially check whether
the drainage of indoor unit is smooth or not.
4. Press the manual switch button again after finishing the test running . The operating
indicator turns dark and the unit stops operating.