ProLine Series ML3215 / ML3245 Operating
Table of Contents FCC RF Exposure Compliance Requirements - for Occupational Use Only........……… 1 Safety Information.................................……………………………………………………….. 1 About Topaz3...........................................…………………………………………………….. 2 About Your Legacy ProLine Radios.............…………………………………………………… 2 Unpacking and Checking Equipment..........…………………………………………………… 2 Radio Control Buttons / Operation Features..……………………………………………. ….. 3 Radio Operation.......................................
FCC RF Exposure Compliance Requirements for Occupational Use Only The Federal Communications Commission (FCC), with its action in General Docket 93-62, November 7, 1997, has adopted a safety standard for human exposure to Radio Frequency (RF) electromagnetic energy emitted by FCC regulated equipment. Topaz3 / Maxon subscribes to the same safety standard for the use of its products.
About Topaz3 Topaz3 is the exclusive supplier of Maxon®, Legacy and TruTalk brand communication products. Our product line ranges from FCC licensed two-way radios suitable for Business and Industry (B&I) markets like farm, government, law enforcement, utility, etc. to consumer communications equipment for recreational and light-duty business markets.
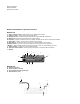
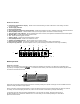
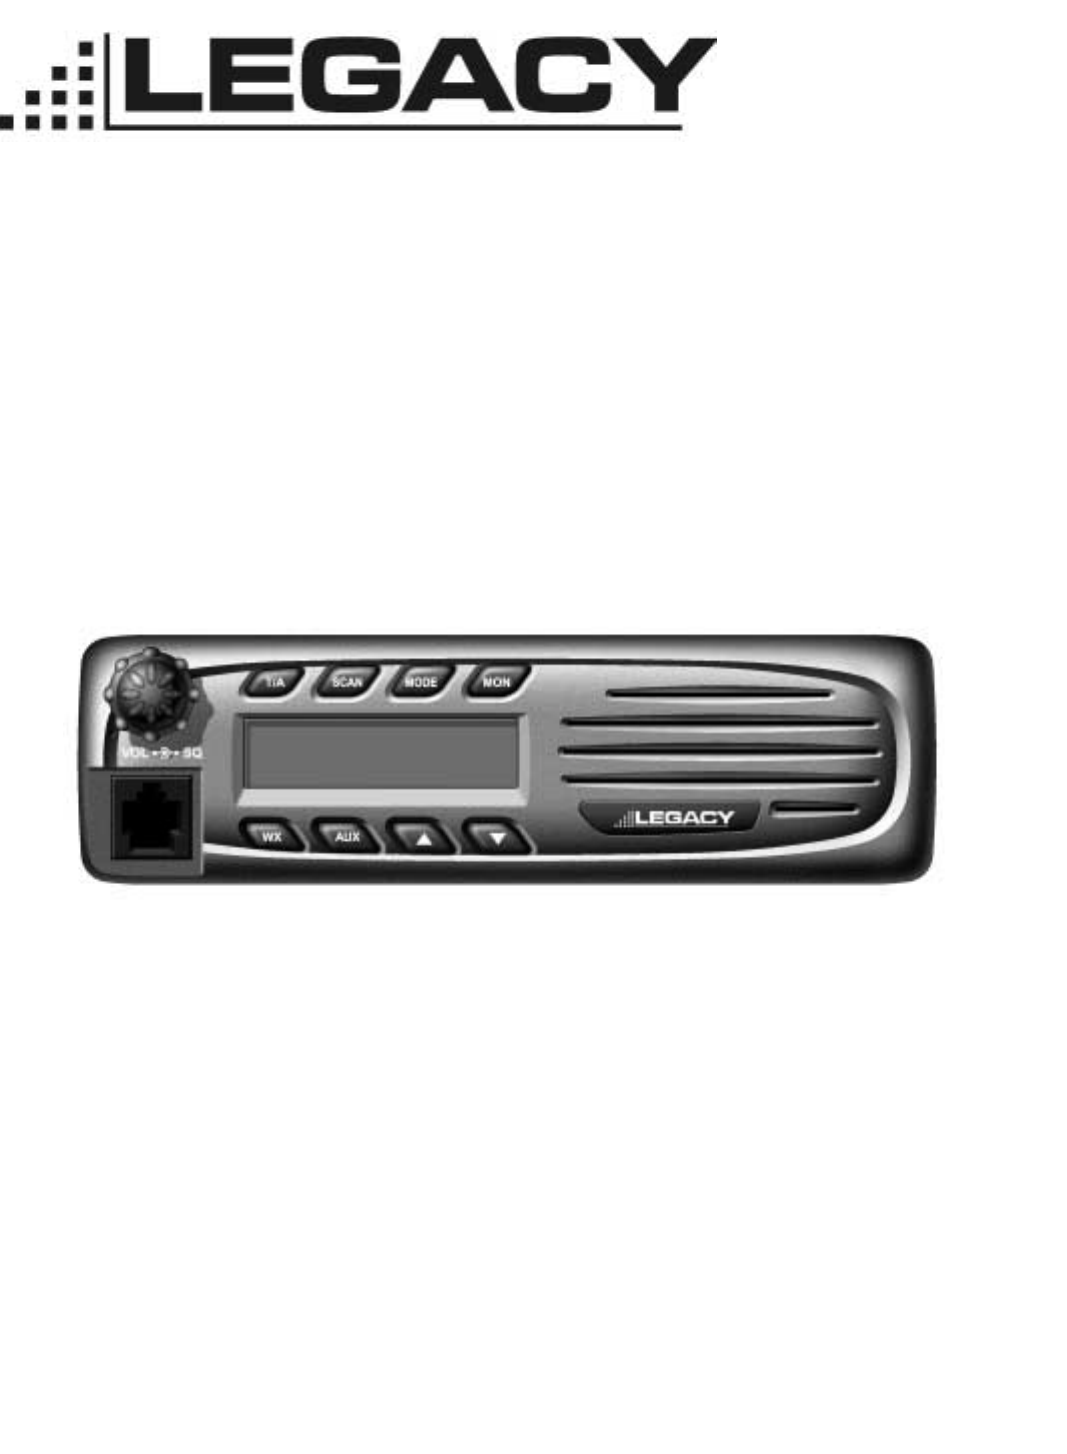
Mounting hardware Mounting Bracket Operating Instructions Radio Control Buttons / Operation Features Radio Front A. Power / volume control - Powers radio on and adjusts radio volume. B. Squelch control – adjust radio carrier squelch setting. C. Microphone jack – Attaches standard microphone or optional DTMF microphone. D. Backlit LCD - Provides visual confirmation of radio settings. E. T/A button – Bypass a repeater tower on a repeater channel pair for radio to radio communications. F.
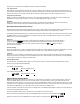
Backlit LCD Features A. 8-Character alphanumeric display - Shows current channel setting, CTCSS or DCS tone code setting, and other function indicators. B. Transmit (TX)) indicator C. Receive (RX) indicator D. Voice Operated Transmission (VOX) indicator - Shows VOX operation is active, allowing hands-free radio transmissions E. Monitor (MON) indicator – Shows monitor mode (used to open squelch and check for channel activity). F.
Radio Functions Tone Signaling To help block out unwanted calls to your ProLine ML3215 / ML3245 can be programmed to look for privacy tones. Scan Modes Scanning is a Dealer programmable feature that allows you to monitor a number of channels. Your radio communications Dealer will help you define a scanning mode and your channel "scan list". Once the scan list has been established, initiate scan by pressing the SCAN button. The the lower right corner of the display to confirm radio scanning.
Press the P-T-T bar after the TX inhibit time expires to resume transmitting. Two-Tone Decode Each channel can be programmed with two-tone decode selections: Individual Call, Group Call and Super Group Call. Your radio communications Dealer can program your radio(s) for this feature. To activate or reset the two-tone decode, press and hold the AUX button for 3 seconds. After two-tone is decoded an alarm will sound if two tone alarm is turned on.
, , and . Scroll through the sub-menu settings with the up or down buttons. To enter a sub-menu, press the MODE button when the desired sub-menu appears on screen. settings include: You can toggle between these settings with the up or down buttons. When the desired setting appears on screen, press the MODE button.
If you choose the IDCS tone code setting, you will need to use the up or down buttons to select the desired tone code of 105 available. If you choose IDCS code 023, your display will read: If you choose IDCS code 754, your display will read: When the desired IDCS tone code appears on the display, select and set your choice by pressing the MODE button or the PT-T. The radio will save your selection and return to standby mode.
display appears. Press and release the MODE button again to select. Scroll through the sub-menu settings with the up or down buttons, press the MODE button when and appears on screen. Settings include: . You can toggle between these settings with the up or down buttons. When the desired setting appears on screen, press the MODE button to select. The radio will save your On or Off selection for the current channel, and return to standby mode.
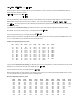
Tx Output Power High/Low Power High/Low Normal Scan List Normal Scan On/Off Priority Scan List Priority Scan On/Off 2-Tone Option Individual Tone On/Off Group Tone On/Off Super Group Tone On/Off System Option Settings Menu To enter the System Option Setting Menu, press and release the MODE button during the receive or standby mode, then use the up or down buttons until appears. Select the above option with a press and release of the MODE button.
If you choose the Busy Channel Lockout setting, your choices include: or . Toggle between the settings with the up or down buttons. When the desired setting appears on screen, press the MODE button. Your radio will save your On or Off selection and return to standby mode. NOTE: If you select “On”, and the channel is busy, it will inhibit transmission. If you choose the Marked Idle setting, your choices include On or Off. Toggle between the settings with the up or down buttons.
If you choose the Clear To Talk setting, your choices include On or Off settings. You can toggle between these settings with the up or down buttons. When the desired setting appears on the display, press the MODE button to select. The radio will save your selection and return to standby mode. Example of display: . NOTE: If you select On, the radio issues a beep tone when pressing the P-T-T button, letting you know that speaking may begin.
Time Out Timer TOT Off TOT Penalty Penalty On 1 ~ 100 sec Penalty Off Busy Lock Busy Lock On/Off Marked Idle Marked Idle On/Off Scan Set Scan Mode Normal Scan Tx Priority Scan Tx Priority Select Scan Priority Only Tx Priority Scan Scan Speed Time 50 ~ 500 msec Scan Delay Time 1 ~ 30 sec Look Back Time 1 ~ 10 sec On Priority Channel 1 ~ 16 Off Tx Delay On/Off Clear To Talk On/Off Roger Beep On/Off 2-Tone Alarm Set Microphone Hook On/Off Off Hook Off Scan On Audio Compander Off On
You can toggle between these settings with the up or down buttons. When the desired setting appears on screen, press the , your choices will include: , and MODE button to select. If you select (Name, Channel Number and Frequency). You can toggle between these settings with the up or down buttons. When the desired setting appears on the display, press the MODE button to view the current information for that setting. Example of Name display: .
B. C. D. Press the SND key to send the dialed number. When the called party answers, press the P-T-T of the microphone to answer. Release the P-T-T to listen for a response. When the conversation has ended Press and hold the P-T-T of the microphone press and hold the # key for 1 or 2 seconds to end the call. Release the P-T-T when the call has ended. Manual Dial Operation A. B. C. D. Press and hold the P-T-T of the microphone and enter the desired number by pressing and releasing 0 –9, * or # keys.
• • Clean external surfaces with a clean cloth dampened in a solution of dishwasher detergent diluted in water. Apply the solution sparingly to avoid any moisture leaking into cracks and crevices. DO NOT submerge the radio. Use a nonmetallic brush, if necessary, to dislodge stubborn particles. Dry the surface thoroughly with a soft, lint free cloth. DO NOT use solvents or spirits for cleaning – they may permanently damage the housing.
FOR ANY PRODUCT WHICH DOES NOT COMPLY WITH THE WARRANTY SPECIFIED, THE SOLE REMEDY WILL BE REPAIR OR REPLACEMENT. IN NO EVENT WILL TOPAZ3 BE LIABLE TO THE BUYER OR ITS CUSTOMERS FOR ANY DAMAGES, INCLUDING ANY SPECIAL, INCIDENTAL, INDIRECT OR CONSEQUENTIAL DAMAGES, OR FOR THE LOSS OF PROFIT, REVENUE OR DATA ARISING OUT OF THE USE OF OR THE INABILITY TO USE THE PRODUCT. This warranty is void for sales and deliveries outside of the U. S. A. Topaz3, LLC 10828 NW Air World Drive Kansas City, Missouri 64153 www.