Operating and Installation Instructions ProLine Fryer To prevent accidents and machine damage, read these instructions before installation or use. en-US M.-Nr.
Contents IMPORTANT SAFETY INSTRUCTIONS ............................................................ 4 Caring for the environment .............................................................................. 14 Overview............................................................................................................. Fryer .................................................................................................................... Indicators................................................
Contents Countertop cut-out for several ProLine elements ............................................... 39 Installation ........................................................................................................... 41 Electrical connection ...........................................................................................
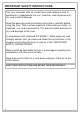
IMPORTANT SAFETY INSTRUCTIONS This fryer complies with all current local and national safety requirements. Inappropriate use can, however, lead to personal injury and material damage. Read the operating and installation instructions carefully before using the fryer. They contain important information on safety, installation, use, and maintenance. This prevents both personal injury and damage to the fryer.
IMPORTANT SAFETY INSTRUCTIONS Appropriate use This fryer is designed for domestic use and for use in similar environments. This fryer is not intended for outdoor use. This fryer is intended for domestic use only to cook food. All other types of use are not permitted. This fryer can only be used by people with reduced physical, sensory, or mental capabilities or lack of experience and knowledge if they are supervised while using it.
IMPORTANT SAFETY INSTRUCTIONS Safety with children Do not leave children unattended: Children should not be alone or unsupervised in the area where the appliance is installed. Do not allow them to sit or stand on the appliance. Children should be supervised in the vicinity of the fryer. Never allow children to play with the fryer. The fryer gets hot when in use and remains hot for quite a while after being switched off.
IMPORTANT SAFETY INSTRUCTIONS Technical safety Proper installation: Make sure that your appliance has been installed correctly and that it has been grounded by a qualified technician. Maintenance by the user: Never repair or replace any part of the appliance unless the instructions specifically recommend doing so. Service work should only be performed by a qualified technician. Unauthorized installation, maintenance, and repairs can cause considerable danger for the user.
IMPORTANT SAFETY INSTRUCTIONS Power bars and extension cords do not guarantee the required safety of the appliance (risk of fire). Do not use these to connect the fryer to the domestic electrical supply. For safety reasons, this fryer may only be used after it has been built in. This fryer must not be used in a non-stationary location (e.g., on a ship).
IMPORTANT SAFETY INSTRUCTIONS During installation, maintenance, and repair work, the fryer must be completely disconnected from the domestic electrical supply. It is only completely isolated from the supply when: - The circuit breakers have been switched off, or - The fuses of the electrical installation have been completely removed, or - The plug (if present) is removed from the socket. To do this, pull the plug, not the power cord. Danger of electric shock.
IMPORTANT SAFETY INSTRUCTIONS Correct use DO NOT TOUCH THE APPLIANCE OR AREAS NEAR THE APPLIANCE – The appliance may be hot even though it is dark in color. Areas near the appliance may become hot enough to cause burns. During and after use, do not touch, or let clothing or other flammable materials contact the appliance or areas near it until they have had sufficient time to cool. Storage in or on the appliance: Flammable materials should not be stored in an oven or in the vicinity of the appliance.
IMPORTANT SAFETY INSTRUCTIONS Oils and fats are a fire hazard if allowed to overheat. Never leave the fryer unattended when in use. Never attempt to put out oil or grease fires with water. Switch the fryer off. Extinguish the flames carefully with the fryer lid or a fire blanket. Do not leave the fryer unattended while it is being used. It should be continually monitored while frying. Risk of fire. Never use naked flames, e.g., an ignited lighter, near the hot fryer.
IMPORTANT SAFETY INSTRUCTIONS Handling and cooking food correctly is essential for maintaining good health. Please pay careful attention to the information provided in “Tips for frying” in the “Operation” chapter. Where several ProLine elements are installed side by side: Hot objects can damage the seal of the spacer bar. Do not place hot pans near or on the spacer bar.
IMPORTANT SAFETY INSTRUCTIONS Cleaning and maintenance The steam from a steam cleaner could reach live electrical components and cause a short circuit. Do not use a steam cleaner to clean the fryer. Miele will guarantee to supply functional parts for a minimum of 10 years and up to 15 years following the discontinuation of your ProLine element.
Caring for the environment Disposal of the packing material The cardboard box and packing materials protect the appliance during shipping. They have been designed to be biodegradable and recyclable. Ensure that any plastic wrappings, bags, etc. are disposed of safely and kept out of the reach of children. Danger of suffocation! Disposal of your old appliance Electrical and electronic appliances contain valuable materials.
Overview Fryer e f d c b a g h i a Oil reservoir b Heater element (lifts up) c Bracket for hanging the frying basket on d Frying basket e Handle (folds in, removable) f Hanging fitting g Knob h Indicators i Drain tap 15
Overview Indicators % a bc a Indicator light – heating switched on b Temperature indicator light Only lights up during heat-up c Residual heat 16
Overview Included accessories The accessories supplied with your appliance, as well as a range of optional ones, are available to order from Miele (see “Optional accessories”).
Before first use Please adhere the extra appliance data plate (supplied) in the space provided in the “After sales service” section of this manual. Remove any protective foil and stickers. Cleaning the ProLine element for the first time Fill the oil reservoir to the max. marker with water (approx. 1 gal (4 l)) and add a small amount of liquid dish soap. Turn the knob clockwise to 170°F (130°C) and bring the water briefly to the boil.
Operation Removing the fryer lid To remove the fryer lid, press the cover on the left or right-hand side with your finger . Use your other hand to lift the cover off the fryer . Hot fat/oil. Risk of burning due to hot fat/oil. Do not replace the lid until the fryer is cold.
Operation Fire hazard due to overheated Residual heat indicator food. Unattended food can overheat and ignite. Do not leave the fryer unattended while it is being used. Do not switch the fryer on when it is empty or with the heater element raised up. If the fryer is still hot, the residual heat indicator will light up after it has been switched off. Knob The knob has a stop and must not be turned to the 0 position past 410°F (200°C). Switching on Turn the knob clockwise to the required temperature.
Operation Before frying Do not use the fryer lid when frying. Only use oil and fat that has a high flash point. Liquid or solid fat can be used. Never mix different types of oil or fat together. The oil reservoir must be filled with sufficient oil or fat for frying at least 100 oz (3 liters) or 6.5 lb (3 kg), maximum 1 gal (4 liters) or 8.8 lb (4 kg). Check that the drain tap is closed. Fill the oil reservoir with oil or fat. Solid fat should be cut up into small pieces first.
Operation Food, fresh Quantity [°F/°C] [min]* Donuts 4 pieces 340/170 6–8 Camembert 4 x 1/2 pieces 340/170 2–3 Raw battered vegetables 14 oz (400 g) 340/170 7–9 Quarter chicken, breaded 2 pieces, each 250 g 340/170 8–10 14 oz (400 g) 340/170 Prefrying 2–4 Potato croquettes Frying 3–5 Apple turnovers 5 pieces Parsley French fries 14 oz (400 g) 340/170 6–8 355/180 1–2 340/170 Prefrying 4–6 Frying 2–4 Turkey steak, not breaded 2 pieces, each 250 g 355/180 3–5 Cutlets
Operation Quantity [°F/°C] [min]* Fish strips 11 oz (300 g) 340/170 4–6 Potato croquettes 14 oz (400 g) 340/170 Prefrying 1–2 Food, frozen Frying 3–4 French fries 9 oz (250 g) 340/170 14 oz (400 g) 2–3 3–4 Plaice filet, not breaded 11 oz (300 g) 340/170 3–5 Squid rings, not breaded 9 oz (250 g) 340/170 2–3 Temperature/ Frying times * The frying times specified in the chart are guidelines only.
Operation Frying tips Handling and cooking food correctly is essential for maintaining good health. Food should only be fried until golden, not dark brown. Never add salt to hot fat/oil. This will cause the fat/oil to boil over. - The fat/oil needs to be hot enough to seal the food quickly. If the temperature is too low, the food will absorb too much fat/oil, making it difficult to digest.
Operation After frying Hot fat/oil. You could burn yourself on the hot fat/oil. Always wait until the fat/oil has cooled down before draining. Make sure that the container you use for draining the fat/oil into is heat-resistant. Switch the fryer off and filter the fat/oil. This not only removes impurities, which can affect the taste of the food, but will help the fat/oil last longer.
Safety features Safety shut-off Your fryer has a safety shut-off feature. It will switch the heating off automatically if: Turn the knob to 0 and wait until the heater element has cooled down. - The oil reservoir is not filled to at least the lower level marker. - The fryer is switched on when empty. - The fryer is switched on when the heater element has been raised (e.g., for cleaning). Use a pen or similar to press the pin on the front right-hand side of the fryer in.
Cleaning and care Danger of burning due to hot surfaces. The surfaces will be hot after cooking. Switch the fryer off. Allow the surfaces to cool down before cleaning the fryer. Risk of damage due to moisture ingress. The steam from a steam cleaner could reach live electrical components and cause a short circuit. Do not use a steam cleaner to clean the fryer. Abrasive cleaning agents and scouring sponges may only be used to clean the heater element.
Cleaning and care Cleaning the stainless-steel frame/control panel and cover Risk of damage caused by pointed objects. The seal between the frame and the countertop could be damaged. Do not use pointed objects for cleaning. Damage due to soiling. Soiling, particularly salty food or liquid and olive oil, can cause damage if left on the printed surfaces for a long time. Remove such soiling immediately. Damage due to incorrect cleaning. Stainless-steel cleaners rub off the printed symbols.
Cleaning and care Cleaning the oil reservoir Cleaning the frying basket Clean the frying basket after each use with hot water and liquid dish soap. Do not clean the frying basket in the dishwasher. Drain the fat/oil or water (if the fryer has been used for cooking pasta) out of the reservoir before cleaning (see “After frying” in the “Operation” chapter). Then raise the heater element. Use kitchen paper to remove any coarse soiling.
Frequently Asked Questions With the help of the following guide minor faults in the performance of the machine, some of which may result from incorrect operation, can be remedied without contacting the Service Department. This guide may help you to find the reason for the fault, and how to correct it. Problem Possible cause and solution The fryer does not get hot. There is no power to the fryer. The safety shut-off has been activated (see “Safety shut-off” in the “Safety features” chapter).
Optional accessories Miele offers a range of useful accessories, as well as cleaning and conditioning products for your appliance. These products can be easily ordered from the Miele webshop. These products can also be ordered from Miele Technical Service (see the end of these operating instructions) or your Miele dealer. Pasta insert with pasta lid Cleaning and care products Ceramic and stainless steel cleaner 250 mL Removes heavy soiling, lime scale, and aluminum residue.
Customer Service Contact in the event of a fault In the event of a fault which you cannot remedy yourself, please contact your Miele dealer or Miele Customer Service. You can book a Miele Service Call online at www.miele.com/service. Contact information for Miele Customer Service can be found at the end of this document. Please quote the model identifier and serial number of your appliance (SN) when contacting Miele Customer Service. Both pieces of information can be found on the data plate.
*INSTALLATION* Installation IMPORTANT SAFETY INSTRUCTIONS - INSTALLATION Risk of damage caused by incorrect installation. Incorrect installation can cause damage to the ProLine element. The ProLine element must only be installed by a qualified person. Damage from falling objects. Take care not to damage the ProLine element when installing upper cabinets or a ventilation hood above it. Install the upper cabinets and ventilation hood before installing the ProLine element.
*INSTALLATION* Installation Safety distances Safety distance above the ProLine element The safety distance specified by the manufacturer of the ventilation hood must be maintained between the ProLine element and the ventilation hood above it. If the ventilation hood manufacturer’s instructions are not available or if combustible objects are installed above the ProLine element (e.g., cabinets, utensil rail), a minimum safety distance of at least 29 15/16" (760 mm) must be maintained.
*INSTALLATION* Installation Safety clearances to the sides and back of the cooktop Ideally the ProLine element should be installed with plenty of space on either side. The minimum safety distance shown below must be maintained between the back of the ProLine element and a tall unit or wall.
*INSTALLATION* Installation Safety distance from the wall covering If a wall covering is installed, a minimum safety distance must be maintained between the countertop cut-out and the covering, since high temperatures can damage these materials. If the covering is made of a combustible material (such as wood), the minimum safety distance between the countertop cut-out and the wall covering must be 2" (50 mm).
*INSTALLATION* Installation Installation notes Tiled countertop Sealing strip between the ProLine element and the countertop Damage caused by incorrect installation. Using sealant under the ProLine element could result in damage to the ProLine element and the countertop if the ProLine element ever needs to be removed for servicing. Do not use sealant between the ProLine element and the countertop.
*INSTALLATION* Installation Installation dimensions All dimensions in this instruction booklet are given in mm and inches.
*INSTALLATION* Installation Countertop cut-out for several ProLine elements h 25-30/16" a 1"-1 3 c d 25-30 6" c d 1"-1 3/1 19 5 0 110 /1 6" a b b c c g 568 372/ " 280/ "/22 3/8 8 / 5 4 11"/1 e f 0/576 11/16" 568 /8" 372/ 38 2 280/5/8"/22 3 288/ 15/16"/2 4 14 11"/1 /16"/ 11 5 Example: 3 ProLine elements a Spring clips b Spacer bars c Gap between spacer bar and countertop d Cover e ProLine element width minus 5/16" (8 mm) f ProLine element width g ProLine element width minus 5/16" (8 mm) h Countert
*INSTALLATION* Installation Calculating the countertop cut-out The frames of the ProLine elements overlap the countertop at the outside right and left by 5/16" (8 mm) on each side. Add up the widths of the ProLine elements and subtract 5/8" (16 mm) from this sum.
*INSTALLATION* Installation Installation Securing the spring clamps and spacer bars – wooden countertops Preparing the countertop Make the countertop cut-out as shown in the illustration in “Installation dimensions” or as calculated (see “Installation” – “Installing several ProLine elements”). Remember to maintain the minimum safety distances (see “Installation” – “Safety distances”).
*INSTALLATION* Installation Securing the spring clamps and spacer bars – granite and marble countertops You will need heavy-duty double-sided adhesive tape (not supplied with the appliance) to fasten the spring clips or spacer bars. 3/16" a 1"-1 m) (25 30 m mm - a b b Apply silicone adhesive to the side edges and bottom edge of the spring clips or spacer bars . a c Attach the adhesive tape along the top edge of the cut-out in the positions shown in the cooktop illustration.
*INSTALLATION* Installation Installing the ProLine element Installing several ProLine elements Feed the power cord down through the cut-out in the countertop. Push the built-in ProLine element to the side until the holes in the spacer bar can be seen. Starting at the front, position the ProLine element in the cut-out. Using both hands, press down evenly on the sides of the ProLine element until it clicks into position.
*INSTALLATION* Installation Connecting the ProLine element Connect the ProLine element/elements to the domestic electrical supply. Check that each ProLine element is working. 44 Removing a ProLine element If the ProLine element is not accessible from below, you will need a special tool to remove it. If the ProLine element is accessible from below, push it up to remove it. Push the back of the appliance out first.
*INSTALLATION* Installation Electrical connection Damage through improper work. Installation, repair, and maintenance work performed by by unqualified persons can cause considerable danger to users. Miele cannot be held liable for any damage arising as a result of such work.
*INSTALLATION* Installation Connection Ensure that the connection data on the data plate (voltage, frequency, and fuse rating) match those of your electrical supply. The data plate is located underneath the appliance. The appliance is approved and ready for connection to a grounded connector with three connecting wires, sheathed by a flexible metal hose. It must be connected to an assigned line in an approved connecting socket.
Please have the model and serial number of your appliance available when contacting Customer Service. U.S.A. Canada Miele, Inc. Importer Miele Limited National Headquarters 9 Independence Way Princeton, NJ 08540 www.mieleusa.com Customer Support Phone: 888-99-MIELE (64353) info@mieleusa.com International Headquarters Miele & Cie. KG Carl-Miele-Straße 29 33332 Gütersloh Germany Headquarters and Miele Centre 161 Four Valley Drive Vaughan, ON L4K 4V8 www.miele.
CS 1411 en-US M.-Nr.