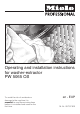
Operating and installation instructions for washer-extractor PW 5065 OS To avoid the risk of accidents or damage to the machine it is essential to read these instructions before it is installed and used for the first time. en - EXP M.-Nr.
Caring for the environment Disposal of the packing material The transport and protective packing has been selected from materials which are environmentally friendly for disposal and should be recycled. Ensure that any plastic wrappings, bags, etc. are disposed of safely and kept out of the reach of babies and young children.
Contents Caring for the environment . . . . . . . . . . . . . . . . . . . . . . . . . . . . . . . . . . . . . . . . . . 2 Warning and Safety instructions . . . . . . . . . . . . . . . . . . . . . . . . . . . . . . . . . . . . . 6 Operating the washer-extractor . . . . . . . . . . . . . . . . . . . . . . . . . . . . . . . . . . . . . 14 Control panel . . . . . . . . . . . . . . . . . . . . . . . . . . . . . . . . . . . . . . . . . . . . . . . . . . . . . 14 Display . . . . . . . . . . . . . . . . . . . . . .
Contents External dispensing system . . . . . . . . . . . . . . . . . . . . . . . . . . . . . . . . . . . . . . . . . . 39 Cleaning and care . . . . . . . . . . . . . . . . . . . . . . . . . . . . . . . . . . . . . . . . . . . . . . . . 41 Cleaning the machine . . . . . . . . . . . . . . . . . . . . . . . . . . . . . . . . . . . . . . . . . . . . . . 41 Cleaning the water inlet filters . . . . . . . . . . . . . . . . . . . . . . . . . . . . . . . . . . . . . . . . 43 Problem solving guide . . . . . . . . .
Contents Technical data . . . . . . . . . . . . . . . . . . . . . . . . . . . . . . . . . . . . . . . . . . . . . . . . . . . 66 Changing default settings . . . . . . . . . . . . . . . . . . . . . . . . . . . . . . . . . . . . . . . . . . 67 Settings menu J. . . . . . . . . . . . . . . . . . . . . . . . . . . . . . . . . . . . . . . . . . . . . . . . . . 68 Language J . . . . . . . . . . . . . . . . . . . . . . . . . . . . . . . . . . . . . . . . . . . . . . . . . . . . . .
Warning and Safety instructions This machine complies with current safety requirements. Inappropriate use can, however, lead to personal injury and damage to property. To avoid the risk of accidents and damage to the machine, please read these instructions carefully before using it for the first time. They contain important information on its safety, use and maintenance. Keep these instructions in a safe place and ensure that they are made available to new users.
Warning and Safety instructions ~ This machine can only be used by people with reduced physical, sensory or mental capabilities, or lack of experience or knowledge, if they are supervised whilst using it or have been shown how to use it in a safe way and recognise and understand the consequences of incorrect operation. ~ Children 8 years and older may use the machine unsupervised only if they have been shown how to do so in a safe way and recognise and understand the consequences of incorrect operation.
Warning and Safety instructions Technical safety ~ Before setting up the machine, check it for any externally visible damage. Do not install or use a damaged machine. ~ The electrical safety of this machine can only be guaranteed when continuity is complete between it and an effective earthing system which complies with local and national safety regulations.
Warning and Safety instructions ~ This machine must only be connected to the on-site water supply using a new hose kit. Old hoses must not be re-used. Check the hose regularly for signs of wear. Change in good time to avoid the risk of leaks and subsequent damage. ~ Faulty components must only be replaced by genuine Miele original spare parts. Only when these parts are fitted can the safety standards of the machine be guaranteed.
Warning and Safety instructions ~ A risk assessment of the installation must be carried out by a suitably qualified engineer before this appliance is installed or used. Installation must only be carried out by a suitably qualified engineer. ~ The appliance must be fixed in position when it is installed. Failure to do this could result in personal injury and damage to property.
Warning and Safety instructions Correct use ~ The maximum load of dry laundry for this machine is 6.5 kg. See the "Programme chart" for the maximum recommended loads in individual programmes. ~ Do not install your machine in rooms where temperatures below freezing may occur. Frozen hoses may burst or split. The reliability of the electronic control unit may be impaired at temperatures below freezing point.
Warning and Safety instructions ~ If the correct amount of detergent is dispensed, the machine should not need to be descaled. If, however, you do wish to descale the machine only use proprietary non-corrosive descaling agents and strictly observe the instructions on the packaging. A special descaling agent is available to order from your Miele Dealer or the Miele Spare Parts Department.
Warning and Safety instructions ~ Avoid contact of stainless steel surfaces (front, lid, casing) with liquid cleaning and disinfecting agents which contain chlorine or sodium hypochlorite. These agents can have a corrosive effect on stainless steel. Aggressive vapours containing chlorine bleach can also be corrosive. Do not store open containers of these agents near the machine. ~ Do not use a high pressure cleaner or hose to clean the machine.
Operating the washer-extractor Control panel a Start button Starts the selected programme. b Display with –, OK and + buttons See the following pages for more information. c + button For selecting delay start. d PC/Optical interface This is used by service technicians to run diagnostic checks on your machine and can also be used to update programming data in the future. 14 e Pre-wash button with indicator light f Programme selector For selecting a programme.
Operating the washer-extractor Display – / + buttons For altering the values highlighted in the display: – decreases the value or moves the highlighting upwards + increases the value or moves the highlighting downwards. OK button For confirming the value selected and choosing the next value.
Before using for the first time Reminder to remove transport bars Before using the machine for the first time ensure that it is correctly installed and connected. See "Installation and connection". Also check that the drain filter is securely tightened to prevent the risk of water leaks during use. For safety reasons, spinning is not possible until the machine has been prepared for using for the first time. To activate the spinning function you must run a wash programme without laundry.
Notes and tips on laundry care 1. Sort the laundry Removing marks ^ Badly soiled areas, stains etc. should be cleaned as soon as possible, preferably whilst still fresh. Spillages should be carefully dabbed off using a soft, colourfast cloth. Do not rub. Badly soiled areas can be pre-treated with liquid detergent, stain removers etc. first, following the manufacturer's instructions. With particularly stubborn stains ask your dry cleaner for advice. ,Do not use solvent-based ^ Empty all pockets.
Notes and tips on laundry care General tips – Curtains: Remove lead weights first or place in a laundry bag. – Underwiring and collar stiffeners: Any loose wiring in bras, shirt collar stiffeners, etc. should be removed or sewn in. – Knitted garments, trousers and jeans, T-shirts and sweat shirts: Turn inside out, if recommended by the manufacturer. – Close any zips, fasten hooks and eyes etc before washing. – Fasten duvet covers, pillow cases etc. to prevent small items from being rolled up inside them.
Notes and tips on laundry care Garment care label symbols Ironing Washing The figure quoted in the bucket is the maximum temperature the garment can be washed at. The number of bars under the symbol indicates the level of agitation permitted.
Short instructions ,It is very important to read the "Notes and tips on laundry care" section before proceeding. ,Make sure that no items are caught between the drum door and seal. A Sort the laundry B Load the drum ^ Switch on the machine. The interior drum lighting will come on. ^ Shut the door with a gentle swing. ^ Open the drum door. ^ Unfold the laundry and load loosely into the drum.
Short instructions C Select a programme When you turn the programme selector to Special programmes, these will appear in the display. C Quick wash E Shirts Starch H ^ Use the – or + button to highlight the programme you wish to select and confirm your selection by pressing the OK button. ^ The wash programmes and temperatures are selected with the programme selector. The programme selected will appear in the display. Cottons The display will then switch to show the menu for the programme selected.
Short instructions D Add detergent Take the level of soiling and water hardness into account when determining the amount of detergent to dispense. Too little detergent results in: – Laundry not getting properly clean, and with time maybe becoming grey and hard to the touch. – Greasy particles clinging to laundry. – Limescale deposits on the heater elements.
Short instructions E Start the programme The Start button will flash as soon as a programme can be started. ^ Press the Start button. The Start button will now light up. Check that all items have been removed from the drum. Items left in the drum could discolour other items in the next wash or become discoloured themselves. The drum lighting switches off once the programme has started. If delay start has not been selected, the estimated programme duration will appear in the display.
Spinning Maximum final spin speed Programme rpm Cottons 1400 Minimum iron 1200 Delicates 600 Towelling 1400 Table linen 1200 Bed linen 1200 Curtains 600 Cottons Eco 1400 Woollens 1200 Quick wash 1400 Shirts 600 Starch 1200 Pillows 1400 Outerwear 900 Proofing 800 Separate rinse 1400 Denim 1000 Dark garments 1200 Drain / Spin 1400 Intensive wash 1400 Flour 1400 Flour + 1400 Grease and fat 1400 Grease and fat + 1400 Towels 1400 Towels + 1400 Capes 600 The
Delay start You cannot use the delay start function if your machine is fitted with a payment system. With delay start you can choose when you want the programme to end. The start of a programme can be delayed from 30 minutes up to a maximum of 24 hours, allowing you to make use of night-time economy electricity rates, for example. The current time of day needs to have been set for delay start to work correctly. ^ Confirm the programme end time by pressing the OK button.
Programme chart Basic programmes Cottons 30°C to 95°C Max. load 6.5 kg Use for Cotton, linen or mixed fibre fabrics. Notes – Only use Cottons 95°C for very heavily soiled laundry. – For dark coloured fabrics use a detergent for coloured fabrics, or liquid detergent. Additional option Pre-wash Detergent Universal detergent or detergent for coloured fabrics Minimum iron 30°C to 60°C Max. load 3.5 kg Use for Synthetic, mixed fibre and easy care cotton fabrics.
Programme chart Bed linen 40°C to 60°C Max. load 6.5 kg Use for Cotton and mixed fibre bed linen. Note For dark coloured fabrics use a detergent for coloureds. Additional option Pre-wash Detergent Curtains Universal detergent or detergent for coloured fabric Cold to 40°C Max. load 3.0 kg Use for Curtains, including net curtains, specified as machine-washable by the manufacturer. Note Select Without spin for curtains which crease easily.
Programme chart Special programmes The list of special programmes varies depending on the setting (see "Settings menu - List of special programmes"). Quick wash 20°C to 60°C Max. load 3.5 kg Use for Very lightly soiled fabrics which can be washed in a Cottons programme. Detergent Universal detergent or detergent for coloured fabric Shirts 20°C to 60°C Max. load 2.5 kg Use for Shirts and blouses. Note – Pre-treat collars and cuffs if necessary.
Programme chart Proofing 30°C to 40°C Max. load 3.0 kg Use for For treating microfibre fabrics, ski wear, fine closeweave cotton garments (poplin) or tablecloths with a water and dirt resistant finish. Notes – The items should be colour sorted and freshly laundered and spun or dried before proofing. – For best results, they should be heat-treated afterwards, either in a tumble dryer or by ironing.
Programme chart Intensive wash 40°C to 95°C Max. load 6.5 kg Use for Heavily soiled cotton, linen and mixed fibre fabrics. Additional option Pre-wash Detergent Universal detergent or detergent for coloured fabrics Hygiene No laundry Hygiene will appear in the display if the last programme selected used a temperature below 60°C or if the Spin programme is selected.
Programme chart Towels 20°C to 40°C Max. load 5.5 kg Use for Lightly soiled cotton towelling. Note For dark coloured fabrics use a detergent for coloured fabrics. Detergent Universal detergent Towels + 40°C to 60°C Max. load 5.5 kg Use for Heavily soiled cotton towelling. Note For dark coloured fabrics use a detergent for coloured fabrics.
Programme sequence Main wash Rinses Spinning Water level Wash rhythm Water level Rinses Interim spin Final spin Cottons d a ( 2 L L Minimum iron d a ( 2 L L Delicates e b e 2 – L Towelling ( a ( 2 L L Table linen ( a ( 2 L L Bed linen ( a ( 2 L L Curtains ( a ( 3 – L Cottons Eco d a ( 2 L L Woollens ( c ( 2 L L Quick wash d a ( 2 L L Shirts ( a ( 2 – L Starch – – ( 1 – L Pillows2) ( a ( 3 – L Outerwear ( b
Programme sequence Symbols: d = Low water level ( = Medium water level e = High water level a b c = Normal wash rhythm = Gentle action = Woollens This machine has fully electronic controls with automatic load recognition. It takes in the right amount of water required for the programme depending on the amount of laundry and its absorbency rate. This means that programme cycles and durations can vary. The programme sequences outlined in the chart are based on the basic programme with a full load.
Changing the programme sequence To alter a programme If your machine is fitted with a payment system, the programme will lock after 3 minutes and it is then no longer possible to cancel or alter it. To cancel a programme To alter a wash programme After the start of a programme it is not possible to select a different programme. You can cancel a programme at any time after it has started. You will need to cancel the current programme before you can select a new one.
Changing the programme sequence Adding or removing laundry after a programme has started The door cannot be opened if: In some programmes you can add or remove laundry after the programme has started: – the water is above a certain level. ^ Press the Door button to open the drum door. ^ Add or remove items. ^ Close the drum door. The programme will continue automatically. Please note: – the suds temperature is above 50°C. – the programme has reached the Final spin stage.
Detergent All modern detergents produced for automatic washing machines are suitable, including liquid, compact (concentrated), tablets and special application detergents. Use dispensing aids, e.g. balls, if these are supplied with the detergent. Tablets are suitable for full loads but note that it may be impractical to reduce tablets by proportion to suit smaller loads. Some tablets do not dissolve as rapidly as others and may not be suitable for programmes with short durations.
Detergent Water softeners A water softener can be used to cut down on the use of detergents in hard water areas. Dispense according to the amount specified on the packaging. First add detergent and then the water softener. Use a quantity of detergent as for soft water. Washing with several components If you wash using several components (e.g. special application detergents), we recommend always dispensing the agents into compartment j in the following order: 1. Detergent 2. Water softeners 3.
Detergent Fabric conditioner or liquid starch Fabric conditioners make garments soft to handle and help prevent static cling when tumble drying. Starch stiffens and gives body to items of laundry, e.g. shirts, tablecloths and bed linen. ^ Dispense according to the amount specified on the packaging.
Detergent External dispensing system This washer-extractor is suitable for connecting to an external dispensing system. A conversion kit is required for the washer-extractor to be operated using an external dispensing system. This must be fitted by a Miele approved service technician. The external pumps are controlled by relays in the washer-extractor. The relays are activated as shown in the chart below.
Detergent Prewash Main wash Fabric conditioner Finishing agent Quick wash – R2 R4 – Shirts – R2 R4 – Pillows – R2 R4 – Outerwear – R2 R4 – Proofing – – – R4 Denim – R2 R4 – Dark garments – R2 R4 – Maintenance prog.
Cleaning and care ,Disconnect the machine from the mains electricity supply. Cleaning the machine ,Do not use solvents, abrasive ^ Pull out the detergent dispenser drawer until a resistance is felt. Press down the release catch and at the same time pull the drawer right out of the machine. ^ Clean the drawer with warm water. cleaners, glass cleaners or all-purpose cleaning agents. These might damage plastic surfaces and other components because of the chemicals they contain.
Cleaning and care Cleaning the detergent dispenser drawer housing Cleaning the drum, suds container and drainage system The drum, suds container and drainage system can be cleaned if necessary. ^ Run a programme of at least 60°C with a small quantity of powder detergent, but without any laundry. ^ At the end of the programme check the inner drum and remove any coarse residues. ^ Use a bottle brush to remove detergent residues and limescale from the jets inside the detergent dispenser drawer housing.
Cleaning and care Cleaning the water inlet filters The machine has two filters to protect the water inlet valve. These filters should be checked every six months or so, or more often if there are frequent interruptions to the external water supply. To clean the filter in the inlet hose: ^ First turn off the stopcock. Turn on the stopcock and check the connection is watertight. If water drips out, tighten the connection.
Problem solving guide With the help of the following notes, minor faults in the performance of the machine, some of which may result from incorrect operation, can be put right without contacting the Service Department. ,Repair work to electrical appliances should only be carried out by a suitably qualified person in accordance with local and national safety regulations. Repairs and other work by unqualified persons could be dangerous. The manufacturer cannot be held liable for unauthorised work.
Problem solving guide Fault messages in the display Message in the display q p o , , Drainage fault Remedy A Possible cause LP version: Clean the drain – The water outlet is blocked or restricted. filter and the drain pump. AV version: Call the Service Department. – The drain hose has been fixed too high. The maximum drain height is 1 m. Water inlet fault The water inlet is blocked or restricted. Check whether – the stopcock is opened wide enough. – the inlet hose is kinked.
Problem solving guide General problems Problem Possible cause Remedy The machine shakes during the spin cycle. The machine feet are not level. The pump makes strange noises. This is not a fault! These noises occur at the end of a pump sequence as a normal part of the operation. Large amounts of detergent residue remain in the detergent dispenser drawer. The water supply pressure is too low. Clean the filters in the water inlets.
Problem solving guide An unsatisfactory wash result Problem Possible cause Remedy Liquid detergent does not give the required result. Liquid detergents usually contain no bleaching agents. They do not remove fruit, coffee and tea stains. – Use a general purpose detergent containing a bleaching agent. – Pour stain removers into compartment j of the dispenser drawer and liquid detergent into a dispenser ball. – Never put stain removers and liquid detergent together in the dispenser drawer.
Problem solving guide The drum door cannot be opened by pressing the Door button Possible cause Remedy There is no power to the machine. Check whether – the machine is switched on. – the electricity supply to the machine is switched on. – the fuse or circuit breaker has tripped. Power cut. Open the drum door as described in the next section. The door was not correctly engaged. Press hard against the lock side of the drum door and then press the Door button.
Problem solving guide Opening the drum door in the event of a blocked drain outlet and/or power failure ,Disconnect the machine from the mains electricity supply. There is a lever behind the detergent drawer fascia panel. ... Machines with a drain pump If the drain outlet is clogged, a large amount of water will be retained in the machine (up to 30 litres). ,Caution: if laundry has been washed at a high temperature, water draining out of the machine will still be hot.
Problem solving guide Once the flow of water ceases: ,Make sure the drain filter is securely tightened. Otherwise there is a risk of water leakage during use. To avoid loss of detergent, pour approx. 2 litres of water into the detergent dispenser drawer after cleaning the drain filter. Excess water will be pumped out automatically before the next wash programme. Opening the drum door ,Always make sure that the drum ^ Remove the drain filter completely. ^ Clean it thoroughly.
Problem solving guide ... Machines with a dump valve Opening the drum door ,Always make sure that the drum is stationary before reaching into the machine to remove laundry. Reaching into a moving drum is extremely dangerous. ^ Push the emergency drain lever downwards (see illustration) and hold until no more water runs out. ^ Use a spoon handle to pull the emergency release downwards (see arrow). The drum door will open.
After sales service In the event of any faults which you cannot remedy yourself, please contact: – your Miele dealer, or – the Miele Service Department (see back cover for contact details). When contacting your Dealer or the Service Department, please quote the model and serial number of your machine, both of which are shown on the data plate visible above the porthole glass when the drum door is open.
Installation and connection Front view a Inlet hose (cold water) b Inlet hose (hot water) c Electrical connection d Control panel e Detergent dispenser drawer g Access to drain filter, drain pump or dump valve and emergency release h Height adjustable feet i Plinth j Fixing bracket (for installing on a concrete plinth) f Drum door 53
Installation and connection Rear view a Holder for: d Inlet hose (cold water) – Inlet hose e Inlet hose (hot water) – Drain hose f Drain hose for drain pump – Transit bars when removed g Drain pipe (optional accessory) for machines with a dump valve b Mains connection cable c Safety cap for transit bars 54 h Height adjustable feet
Installation and connection Installing the machine This washer-extractor is not suitable for building under. The machine must be permanently connected to the electricity supply so that the door can be opened. For this reason, it must not be connected to devices such as timers which would switch it off automatically. ^ Remove the packaging and position the machine where you want to use it. ,Ensure the machine is stable during transportation.
Installation and connection Installation surface ,Ensure that the machine feet and the floor are dry to prevent the machine from slipping during the spin cycle. Removing the transit bars ^ These must be removed before the machine is used for the first time. A concrete floor is the most suitable installation surface for a washing machine, being far less prone to vibration during the spin cycle than wooden floorboards or a carpeted surface. ^ The machine must be level and securely positioned.
Installation and connection ^ withdraw the transit bar. ^ withdraw the transit bar. ,To avoid the risk of injury the holes for the transit bars must be covered after they have been removed. ^ Turn the right-hand transit bar 90°, then ^ Fit the covers onto the two holes. Then plug the holes as shown with the caps.
Installation and connection Levelling the machine The machine must stand perfectly level on all four feet to ensure safe and proper operation. Incorrect installation may increase electricity and water consumption and may cause the machine to move about. Screwing out and adjusting the feet ^ Secure the transit bars to the back of the machine. Make sure that holes b are fitted over retainers a. The four adjustable screw feet are used to level the machine.
Installation and connection Securing the machine to prevent it slipping ^ Use a spirit level to check the machine is standing level. ^ Hold foot 1 securely with a pipe wrench. Turn counter nut 2 again using the spanner supplied until it sits firmly up against the housing. ^ Secure both front feet on the washing machine using the fixing brackets supplied. ^ Follow the fitting instructions supplied. ,All four counter nuts must sit firmly up against the housing.
Installation and connection Washer-dryer stack Installation on a raised plinth A Miele tumble dryer can be stacked on top of this washer-extractor. A "WTV" stacking kit (optional accessory) is required for this. The washer-extractor can be installed on a steel plinth (open or closed, available as an optional Miele accessory) or on a concrete plinth. ,If the machine is installed on a plinth, it must be secured using the fixing brackets supplied with the machine.
Installation and connection Plumbing The machine must be connected to the water supply in strict accordance with current local and national water authority regulations. UK only: This machine is a WRAS approved product. To comply with WRAS requirements, this machine must be connected to the potable water supply via the non-return valves supplied with it. The machine is designed to operate with a flow pressure of between 1 and 10 bar (100 kPa and 1,000 kPa).
Installation and connection Connection to the hot water supply To keep electricity consumption costs down this machine can be connected to a (ring) piped hot water supply. The maximum temperature must not exceed 70°C. It is not economical to run it from an individual hot water supply if it is not in continuous use, as the water in the supply pipes cools down and more energy would be required to reheat the water. For hot water connection the same conditions apply as for cold water connection.
Installation and connection Water drainage Dump valve version A motorised dump valve is used to drain the machine. A DN 70 angle connector can be used for draining the machine via an on-site gully (with odour trap). N.B. If not supplied with the machine, an angle connector is available to order from Miele. Machines with a drain pump The machine drains via a drain pump with a delivery head of 1 metre*. The drain hose must not be kinked as this restricts drainage.
Installation and connection Electrical connection ,All electrical work must be carried out by a suitably qualified and competent person in accordance with current local and national safety regulations (BS 7671 in the UK). The machine must only be operated with the voltage, frequency and fuse rating shown on the data plate supplied with the machine. Please ensure these match the site mains supply.
Installation and connection Single phase AC 230 V - country variant This device is intended for connection to the power supply with Earth Fault Loop impedance Zs not exceeding 0.38 Ohms. If in doubt please contact your electricity supplier or a qualified electrician for advice.
Technical data Height 850 mm Width 595 mm Depth 725 mm Depth with door open 1,085 mm Weight 114 kg Max. floor load in operation 3000 Newton Capacity 6.5 kg dry laundry Voltage See data plate Connected load See data plate Fuse rating See data plate Emission sound pressure level in accordance with EN ISO 11204/11203 < 70 dB re 20 µPa Minimum water flow pressure 100 kPa (1 bar) Maximum water flow pressure 1000 kPa (10 bar) Inlet hose length 1.55 m Mains connection cable length 1.
Changing default settings Default settings can be altered to adapt the machine to different requirements. The way these are accessed by the operator will depend on how the machine has been programmed. – Some settings are visible and can be changed by all operators via the Settings menu J. – All settings can be locked to prevent unauthorised access. They are then only accessible under Settings/Supervisor level by entering an access code. Please speak to the Miele Service Department for details.
Settings menu J To open the Settings menu A Turn the programme selector to Finish. The entry menu will appear. 15:03 Select a programme Settings F... B Press the OK button. C This will take you into the Settings menu. C Back A Language F Supervisor level D Use the – and + buttons to select the setting you want and confirm your selection by pressing the OK button. To close the Settings menu ^ Select Back and confirm your selection. The display will return to the entry menu.
Settings/Supervisor level menu The Settings menu (with the exception of Language J) is locked with a code to prevent it being accessed by unauthorised personnel. C Back A F Language F ^ Repeat the process until all three numbers have been entered. ^ After the last number has been entered, press the OK button. The following will appear in the display: W Entry OK Menu opened Supervisor level ^ Select Supervisor level and confirm your selection.
Settings/Supervisor level menu Language J The display can be set to appear in one of several different languages. You can set the language you want as the fixed default language in the Languages sub-menu. Time of day First select either a 24 hour or 12 hour clock, or not to have a clock displayed at all. Then set the current time of day. ^ Select the language you want and confirm your selection. If you select the Time not displayed option, the delay start function can only be used as a 24 hour timer, i.
Settings/Supervisor level menu Supervisor level You can alter the access code to the supervisor level. ^ Enter the old code. ^ Enter a new code. After you have confirmed the new code, the display will change to the beginning of the Settings menu. Standby (Display) To save energy, the display goes out after 10 minutes and the Start button flashes slowly. Turning the programme selector or pressing a button switches the display back on again.
Settings/Supervisor level menu Memory If an extra option has been selected for a programme, or the recommended temperature or spin speed has been altered, the machine will store the changes in memory at the start of the programme. When this programme is chosen again these settings will appear in the display. The machine is delivered with the memory function deactivated.
Settings/Supervisor level menu Low water pressure This setting should be activated to ensure the correct amount of water is taken into the machine in areas where the water pressure is constantly low (below 100 kPa / 1 bar). The machine is delivered with the Low water pressure option deselected. Temperature pre-wash You can choose the temperature you want the pre-wash to be carried out at in the Cottons and Grease and fat + programme.
Settings/Supervisor level menu Minimum iron duration You can increase the wash duration for the main wash in the Minimum iron programme. The machine is delivered with the Block parameters option selected (the wash duration will be controlled according to the programme data which has been programmed on site). Pre-wash Cottons/ Minimum iron You can choose for pre-wash to be carried out with every Cottons and Minimum iron programme or to select it on an individual basis.
Settings/Supervisor level menu No. rinses Cottons You can alter the number of rinses which are carried out in the Cottons programme. 2 rinses (factory default setting) 3 rinses 4 rinses 5 rinses No. rinses Minimum iron You can alter the number of rinses which are carried out in the Minimum iron programme. 2 rinses (factory default setting) 3 rinses 4 rinses Pre-rinse Cottons A pre-rinse can be carried out in the Cottons programme. The machine is delivered with this option deactivated.
International Service Contacts America: +1 609 419 4376 Australia, Asia, Oceania: +61 3 9764 7880 Europe, Africa, Middle East: +49 5241 89 66 877 E-mail: service@miele-marine.com www.miele.com/marine-service Manufacturer: Miele & Cie. KG, Carl-Miele-Straße 29, 33332 Gütersloh, Germany Alteration rights reserved/3615 M.-Nr.