Operating instructions Heat-pump dryer To avoid the risk of accidents or damage to the appliance it is essential to read these instructions before it is installed and used for the first time. en-GB M.-Nr.
Contents Caring for the environment ............................................................................. 7 Warning and Safety instructions ..................................................................... 8 Operating the tumble dryer .............................................................................. Control panel ....................................................................................................... Touch display and sensors.......................................
Contents 6. End of programme - unload the drum ......................................................... 38 End of programme............................................................................................... 38 Unloading the drum............................................................................................. 38 Programme chart .............................................................................................. 39 Extras......................................................
Contents Fragrance flacon................................................................................................ FragranceDos ...................................................................................................... Removing the protective seal from the fragrance flacon..................................... Inserting the fragrance flacon.............................................................................. Opening the fragrance flacon ............................................
Contents Installation.......................................................................................................... Front view ............................................................................................................ Rear view............................................................................................................. Transporting the tumble dryer .............................................................................
Contents Settings .............................................................................................................. Accessing the Settings menu.............................................................................. Operation/display ............................................................................................. Language .................................................................................................... Code................................................
Caring for the environment Disposing of the packaging material The packaging material is used for handling and protects the appliance from transport damage. The packaging material used is selected from materials which are environmentally friendly for disposal and can generally be recycled. to remove any old batteries which are not securely enclosed by the appliance and to remove any lamps without destroying them, where this is possible.
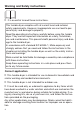
Warning and Safety instructions It is essential to read these instructions. This tumble dryer complies with all current local and national safety requirements. However, inappropriate use can lead to personal injury and damage to property. Read the operating instructions carefully before using the tumble dryer. They contain important information on safety, installation, use and maintenance. This prevents both personal injury and damage to the tumble dryer.
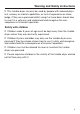
Warning and Safety instructions This tumble dryer can only be used by people with reduced physical, sensory or mental capabilities, or lack of experience or knowledge, if they are supervised whilst using it or have been shown how to use it in a safe way and understand and recognise the consequences of incorrect operation. Safety with children Children under 8 years of age must be kept away from the tumble dryer unless they are constantly supervised.
Warning and Safety instructions Technical safety Please observe the instructions in “Installation” and the “Technical data”. Before setting up the tumble dryer, check it for any externally visible damage. Do not install or use a damaged tumble dryer. Before connecting the tumble dryer, ensure that the connection data on the data plate (fuse rating, voltage and frequency) match the mains electricity supply. If in any doubt, consult a qualified electrician.
Warning and Safety instructions Faulty components must only be replaced by genuine Miele original spare parts. The manufacturer can only guarantee the safety of the appliance when Miele replacement parts are used. Unauthorised repairs could result in unforeseen dangers for the user, for which Miele cannot accept liability. Repairs should only be undertaken by a Miele approved service technician, otherwise any subsequent damage will not be covered by the warranty.
Warning and Safety instructions Heat pump technology and refrigerant: this tumble dryer uses a gaseous refrigerant which is condensed by the compressor. The refrigerant, which is brought to a higher temperature level and liquefied by condensing, is led in a closed circuit through the heat exchanger unit where heat exchange with the circulating drying air takes place. Damage to the tumble dryer by switching it on too soon. This can damage the heat pump.
Warning and Safety instructions Do not block the gap between the bottom of the tumble dryer and the floor with plinth facings, deep pile carpet etc. This would hinder a sufficient flow of air to the dryer. Make sure the dryer door can be opened without hindrance after installation. This tumble dryer must not be used in a non-stationary location (e.g. on a ship). Do not make any alterations to the tumble dryer, unless authorised to do so by Miele.
Warning and Safety instructions Correct use Do not install the tumble dryer in a room where there is a risk of frost occurring. At temperatures around freezing point the tumble dryer may not be able to operate properly. There is a risk of damage if the condensed water is allowed to freeze in the pump and hoses. The maximum load for this tumble dryer is 9.0 kg (dry weight). The maximum recommended loads for individual programmes are given in the Programme chart.
Warning and Safety instructions To prevent the risk of fire, the following textiles must not be dried in this tumble dryer: - Items which have not been washed. - Items, such as workwear, which have not been thoroughly cleaned and which are still soiled with grease, oil or other deposits (such as cosmetics, lotions etc). If items have not been thoroughly cleaned there is a danger that these might ignite when heated, even after they have been removed from the dryer at the end of the programme. - Items (e.g.
Warning and Safety instructions To prevent the risk of fire, the following textiles must not be dried in this tumble dryer: - Items which have been cleaned using chemicals (e.g. professional dry-cleaning agents). - Items which contain a large proportion of rubber, foam rubber or rubber-like materials. For example, products made from latex foam rubber, shower caps, waterproof textiles, rubberised articles and items of clothing and pillows with foam rubber filling.
Warning and Safety instructions The tumble dryer must not be used without fluff filters or - with damaged fluff filters, or - with a damaged plinth filter. This would cause an excessive build-up of fluff which in turn would cause a fault. If the water is drained externally through the drain hose instead of being collected in the condensed water container, make sure the drain hose is securely attached if you hang it in a sink or basin to avoid the hose slipping and the water causing damage.
Warning and Safety instructions Using a fragrance flacon (optional accessory) Only use genuine Miele original fragrance flacons. The fragrance flacon must be stored in its packaging so please make sure you retain this. Caution. The fragrance can leak out of the flacon. Make sure that you always keep the flacon, or the fluff filter with the flacon inserted in it, in a horizontal position when carrying and do not tip or place down on any surface.
Warning and Safety instructions Accessories Only use genuine Miele original spare parts and accessories with this appliance. If non-Miele parts are used, warranty, performance and product liability claims will be invalidated. The tumble dryer can be combined with a Miele washing machine in a washer-dryer stack. The appropriate “WTV” stacking kit (available to order) to match your tumble dryer and washing machine is required.
Operating the tumble dryer Control panel a sensor control Takes you back one level in the menu. b Touch display c Start/Stop sensor Touching the Start/Stop sensor starts the selected programme or cancels a programme that has already been started. The sensor flashes slowly as soon as it is possible for a programme to be started and then lights up constantly after the programme has started. d Optical interface This is used by the Service department as a transmission point.
Operating the tumble dryer Main menu Programmes After switching on the tumble dryer, the main menu will appear in the display. For selecting drying programmes. You can access all the important submenus from the main menu. You can save up to 12 of your own customised drying programmes (see “Favourites”). Touch the sensor control at any time to return to the main menu. Values set previously are not saved.
Operating the tumble dryer Examples on how to operate the appliance Lists Programmes menu Programmes Cottons Cottons 11:02 0:00 h 0:00 h Minimum iron Delicates Extras 11:02 DryFresh DryCare 40 PowerFresh Gentle tumble 0:00 h 0:00 h Help You can scroll right or left by swiping your finger across the screen. To do this, place your finger on the touch display and swipe it in the direction you want.
Operating the tumble dryer Moving programmes Setting numerical values You can move the programmes around in the menu to change the sequence in which they are displayed. You can set numerical values in some menus. Programmes 11:02 Cottons 0:00 h Minimum iron Delicates Cottons 0:00 h 0:00 h 0:00 h Clock display 14 02 13 01 12 00 11 10 59 58 OK Help Place your finger on the programme you wish to move until a border is displayed around it.
Operating the tumble dryer Pull-down menu Exiting a menu The pull-down menu can be used to display information, e.g. about a drying programme. Touch the sensor to return to the previous screen. Overview 11:02 Drying level Normal Cottons 2:35 h Extras Timer not selected Save Touch the top edge of the screen in the middle and drag down with your finger. Help display With some menus Help appears along the bottom line of the display. Touch the Help sensor to display the text.
Before using for the first time Installation Before using the appliance for the first time, check that you have followed all the instructions under “Installation”. Read these operating instructions, paying particular attention to the information provided under “Installation”. Removing the protective foil and stickers Remove: - Any protective film from the door - Any stickers from the front and the lid Please do not remove any labels (e.g. the data plate) which are visible when you open the door.
Before using for the first time Availability of the WiFi connection Switching on the tumble dryer The WiFi connection shares a frequency range with other appliances (including microwave ovens and remote control toys). This can give rise to sporadic or even complete connection failures. Therefore, the availability of featured functions cannot be guaranteed. Press the button. Miele@home availability The welcome screen will light up.
Before using for the first time Select the clock format you want and confirm this with the OK sensor. Setting up Miele@home The display will change to the next setting. Set up “Miele@home”? Setting the time of day Skip Continue To set up Miele@home now: touch the Continue sensor control. Tip: To postpone setup until later: touch the Skip sensor control. The following message will then appear in the display: It is possible to set up later in “Settings” / “Miele@home”.
Before using for the first time Continuing with commissioning Please see “1. Notes on correct laundry care”. You can then select a programme and load the tumble dryer as described in “2. Loading the tumble dryer” and “3. Selecting a programme”. The procedure for using for the first time is completed when a programme lasting longer than one hour has been carried out in full.
Energy saving tips Energy saving tips This dryer with heat-pump technology is designed for energy-saving drying cycles. However, you can save a little more energy with the following measures as the drying time is not extended unnecessarily. - If possible, make use of time-variable, low-cost electricity tariffs. Ask your energy supplier for information. Your tumble dryer's delay start function will be useful as you can select when during the next 24 hours you want drying to start automatically.
Energy saving tips 2. Actual consumption Feedback You can view information about the energy consumption of your tumble dryer in the pull-down menu. The following information will appear in the display: - An estimate of the energy consumption before the programme begins. - The actual energy consumption during the programme or at the end of the programme. Overview 11:02 Drying level Normal Cottons 2:35 h Extras Save Open the pull-down menu. 1.
1. Notes on correct laundry care Points to note regarding washed laundry - When washing very heavily soiled items ensure that you use sufficient detergent and select a high temperature. If in doubt, wash the items several times. - Do not put soaking wet items into the tumble dryer. Make sure your laundry is thoroughly spun before drying. The higher the spin speed, the greater the savings that can be made in energy and time during drying.
1. Notes on correct laundry care Drying Tip: See the “Programme chart”, which contains everything you need to know about programmes and load sizes. - Always observe the maximum recommended load size for each programme. This will mean that the energy consumption for the amount of laundry is at its most economical. - Down-filled garments have linings which have a tendency to shrink, depending on the quality of the item. Only use the Pre-Ironing programme for these textiles.
2. Load the tumble dryer Loading the laundry Preventing damage to fabrics. Before loading the dryer, read “1. Notes on correct laundry care”. Checking FragranceDos If you are not using a fragrance flacon, check that the FragranceDos sockets are closed. The “Fragrance flacon” chapter describes how to use the fragrance flacon. Open the door. Remove any items that have been left inside the drum. Unfold the laundry and load loosely into the drum.
3. Selecting a programme Switching on the tumble dryer Touch the sensor to switch the tumble dryer on. Tip: The condensed water can be recycled when certain programmes are used. See “Condensed water container – Filling the condensed water container”. To find out when the condensed water can be used as part of certain programmes, see the “Programme chart” and “Extras”. Selecting a programme There are various ways to select a programme.
4. Selecting programme settings Selecting the drying level Check the “Programme chart” to see which programme you can select a drying level for and which drying level meets your requirements. Overview 11:02 Drying level Normal Cottons 2:35 h Extras not selected Timer Save Touch the Drying level sensor control. Drying level 11:02 Machine iron Hand iron Normal plus Hand iron Normal Extra dry Scroll in the display until the drying level you want appears.
4. Selecting programme settings Selecting the running time for time programmes You can change the duration in 10minute increments. Programmes: Cool air: 20 min – 1:00 h Warm air: 20 min – 2:00 h Basket programme: 40 min – 2:30 h Overview See “Extras” to find out which programmes allow you to select an extra and which extra is appropriate for your needs.
5. Starting a programme Starting the programme The programme can be started when the Start/Stop sensor control is flashing on and off. Touch the Start/Stop sensor control. The Start/Stop sensor control lights up constantly. Status Cottons 11:02 Time left 1:42 h Machine iron PerfectDry Add laundry content of the water. PerfectDry continually adapts, constantly increasing the accuracy of the time left.
6. End of programme - unload the drum End of programme The programme is finished when Finish/ Anti-crease appears in the display. The Start/Stop sensor will no longer light up. The dryer will switch off automatically 15 minutes after the end of the Anticrease phase (with programmes without an Anti-crease phase it will switch off 15 minutes after the end of the programme). Unloading the drum Only open the door when the drying process has finished.
Programme chart All weights marked with * are based on the weight of dry laundry. Cottons max. 9 kg* HygieneDry Use for - Cottons and linen fabric which will be in direct contact with the skin, e.g. underwear, baby clothes, bed linen, towelling. - Other hard-wearing fabrics with special hygiene requirements. Tip Use for special hygiene requirements. Extra dry, Normal plus, Normal Use for Single and multi-layered cotton items.
Programme chart Cottons max. 9 kg* Use for Cotton items such as those described under Cottons Normal with normal residual moisture. Note - Items are dried to a Normal level only in this programme. - The Cottons programme is the most energy-efficient for drying cotton items with normal residual moisture levels. Note for test institutes - The Cottons programme is the test programme in accordance with Regulation 392/2012/EU for energy labelling, measured in accordance with EN 61121.
Programme chart Automatic max. 5 kg* Normal plus, Normal, Hand iron , Hand iron Use for Mixed loads of garments suitable for the Cottons and Minimum iron programmes. Woollens handcare max. 2 kg* Use for Woollen garments and fabric containing wool blends, e.g. pullovers, cardigans, tights. Note - Wool and wool blend items are only fluffed up; they are not dried completely. - Remove the garments as soon as the programme has finished. Silks handcare max.
Programme chart Steam care max. 1 kg* Normal, Hand iron Use for - All items made of cotton or linen - For minimum iron items made of cotton, mixed or synthetic fibre. For example, cotton trousers, anoraks and shirts. Tip - For dampening fabrics before ironing - For smoothing fabrics that are creased - Select Hand iron if the items are to be ironed after drying. - This programme is also used to freshen up fabrics. To enhance the effect, you can use the DryFresh fragrance flacon (optional accessory).
Programme chart Basket programme Note Max. load for basket 3.5 kg - This programme may only be used with the Miele tumble dryer basket TRK 555 (optional accessory) fitted. - Always follow the operating instructions for the tumble dryer basket. - Make sure that no sleeves, straps, belt straps and boot legs (for example) come into contact with the tumble dryer drum or drum ribs. When the drum rotates, the laundry can become knotted, causing damage to the dryer basket and tumble dryer.
Programme chart Warm air Use for max. 9 kg* - Multi-layered fabrics whose layers have different drying characteristics, e.g. jackets, pillows, sleeping bags and other bulky items. - For drying individual items, e.g. bath towels, bathing costumes and tea towels. Tip Do not select the longest drying time to start with. Check the items as you are drying them to find the optimum time. Cool air max. 9 kg* Use for Any item which only needs airing.
Programme chart Extra quiet max. 9 kg* Normal plus, Normal, Hand iron , Hand iron , Machine iron Use for Mixed loads of garments suitable for the Cottons and Minimum iron programmes. Tip Use to reduce the noise of the tumble dryer during quiet periods. Pre-ironing max. 1 kg* Normal, Hand iron Use for - Cotton and linen fabrics. - For minimum iron items made of cotton, mixed or synthetic fibre. For example, cotton trousers, anoraks and shirts.
Extras The drying programmes can be augmented with various extra options. The table lists the selection options. DryFresh Condensed water from the condensed water container is sprayed into the drum. The condensed water container must therefore be filled to at least the ―min― mark. The Normal drying level can be used to freshen up clothing that is clean and dry without wetting it. The function is slightly less effective when used with fabrics made of synthetic fibres.
Extras DryCare 40 Quick This option dries fabrics gently at very low temperature. Robust garments with the care symbol can be dried with reduced drying time. It can be used for all fabrics that are free of wool and are washable at temperatures of 40 °C and above. For the best possible drying result: Reduce the load size for the corresponding programme to half the maximum load size specified in these operating instructions.
Extras Drying programme overview - Extras Cottons – – – – – – – Cottons X X X X X X X Minimum iron X X X X X X X Delicates – – – – – – Bed linen – – – – – – – Automatic X X X X X X – Woollens handcare – – – – – – – Silks handcare – – – – – – Express – – – – – – – Shirts X X X X X X X Denim X X X X X X X Steam care – – – – – – – Sportswear – – X X X X – Basket programme – – –
Wash2Dry Once the programme has come to a proper end, the Miele washing machine transfers the programme data via the router to which the networked tumble dryer is also connected, as well as transferring it to the Miele Cloud. The tumble dryer automatically sets a drying programme tailored to the laundry based on the transferred programme data. All you need to do is start the drying programme once you have loaded the tumble dryer. No further programme settings are required on the tumble dryer.
Favourite programmes To create a Favourite programme You can save your own customised programmes under names of your choice. There are 2 ways to create a Favourite programme. Option 1 To enter a name It is best to select short, memorable names. Touch the letters or characters you want. Confirm with the Save sensor. The programme will then be saved to the Favourites programme list. The main menu must be visible in the display. Touch the Favourites sensor control.
Drying assistant The Drying assistant helps you when drying a wide variety of items. The tumble dryer will use the list of items to put together a suitable drying programme. Scroll to the second page in the main menu. Touch the Drying assistant sensor. A list will open. The drying purpose is grouped into different areas. Purpose Drying Proofing/ Reactivation 11:02 Textiles 11:02 Shirts Blouses Denim T-shirts OK Touch the appropriate sensor for your item of laundry.
Timer The timer can be used to set the time you wish a programme to finish or start at. The programme start can be delayed by up to 24 hours. Setting the timer Touch the Timer sensor. Select the Finish at or Start at option. Starting the timer Touch the Start/Stop sensor. The time until the programme starts will appear in the display. After the programme has started, the selected delay start time can only be changed or cancelled by interrupting the programme.
Timer SmartStart The SmartStart function lets you define a time period during which your tumble dryer will start automatically. The appliance will start on receipt of a signal, e.g. from your energy supplier, that indicates that the electricity tariff is particularly economical. This function is active when the SmartGrid setting is switched on. The timeframe can be defined between 1 minute and 24 hours. During this period, the tumble dryer waits for the signal from the energy supplier.
Changing the programme sequence Changing a programme once it has started You cannot change to another programme once a programme has started (this prevents unintentional alterations). You will need to cancel the current programme before you can select a new one. Cancelling a programme Touch the Start/Stop sensor. The following will appear in the display: Cancel the programme? Adding or removing laundry You have forgotten something but the programme is already running.
Condensed water container Emptying the condensed water container The condensed water is collected in the condensed water container. Empty the condensed water container after every drying programme. To prevent water from running out, keep it in a horizontal position when carrying it. Hold the condensed water container by the front panel and at the back.
Condensed water container Filling the condensed water container When certain programmes are being used, condensed water generated during drying is recycled and sprayed into the drum via a spray nozzle. The condensed water container must therefore be filled to at least the ―min― mark. Otherwise, this could cause a fault. The ―min― mark is on the front lefthand side of the container. If you have set the appliance up so that condensed water is drained away, the condensed water container will be empty.
Fragrance flacon FragranceDos Fragrance flacons (optional accessories) can be used to give your laundry a pleasant scent. This dryer has 2 places for inserting fragrance flacons. This gives you a choice of how to use them. - You can use both positions if you wish to change from one scent to another. You can close the fragrance flacon that you are not using. Removing the protective seal from the fragrance flacon Only hold the fragrance flacon as illustrated.
Fragrance flacon Inserting the fragrance flacon Open the door of the tumble dryer. The fragrance flacon is inserted in the upper fluff filter. They can be fitted on the left and the right hand side next the opener. Insert the fragrance flacon into the socket as far as it will go. Markers and must line up with one another. Open the cover using the tab until the tab is right at the top as shown. To prevent the accumulation of fluff, the cover of the unused socket must remain closed.
Fragrance flacon grance will also be noticeable in the room air during the process. The Cool Air programme will not generally apply fragrance. Closing the fragrance flacon After drying, the fragrance flacon should be closed to prevent the fragrance from escaping needlessly. Turn the outer ring clockwise a little. The fragrance flacon can slip out. Turn the outer ring in such a way that markers and line up. Opening the fragrance flacon Before drying, you can select the intensity of the fragrance.
Fragrance flacon Removing/replacing the fragrance flacon Turn the outer ring counter-clockwise until markers a and b line up. Replace the fragrance flacon with a new one. When not in use, you can store the fragrance flacon in its original packaging. Fragrance flacons are available to order from Miele or online at www.mieleshop.com. 60 Fragrance can leak. Do not lay the fragrance flacon down.
Cleaning and care Fluff filters Removing visible fluff This tumble dryer has 2 fluff filters in the loading area of the door. Both fluff filters trap fluff produced during the drying process. Tip: You can also use a vacuum cleaner so that you can remove the fluff without touching it. Open the door. Clean the fluff filters after each drying programme. This prevents an extension of the programme running time.
Cleaning and care Remove the fluff from the filter surface of all the fluff filters and the perforated laundry deflector. Turn the yellow dial on the lower fluff filter in the direction of the arrow (until it reaches the stop position). Push the upper fluff filter back into position until it clicks. Close the door.
Cleaning and care Cleaning the fluff filters with water Wipe the smooth plastic surfaces of the fluff filters with a damp cloth to clean them. Flush the filters through under warm running water. Shake the fluff filters thoroughly and then dry them carefully. Use a vacuum cleaner with a long crevice nozzle attached to remove any visible fluff from the upper air flow openings. Finally, clean the fluff filters with water. Ensure the filters are dry before replacing them.
Cleaning and care Cleaning the plinth filter Clean the plinth filter when the programme running time is longer than usual or if the following message lights up in the display: Clean the fluff and plinth filters. See the operating instruction manual for more information. To clear the message, confirm with OK. Removing the plinth filter Pull the plinth filter out by the handle. The right-hand guide pin comes out when the plinth filter is removed.
Cleaning and care Damage caused by a damaged or worn plinth filter. The heat exchanger will clog up if the plinth filter is not in good working order. This can cause a fault. Check the plinth filter following the instructions provided in “Problem solving guide – Replacing the plinth filter”. Replace the plinth filter if necessary. Fit the plinth filter back on the handle. Make sure it is the correct way round. Push the plinth filter in completely.
Cleaning and care Cleaning the plinth filter access panel Cleaning the dryer Disconnect the tumble dryer from the electrical supply. Damage due to the use of unsuitable care products. Unsuitable care products could damage plastic surfaces and other parts. Do not use any solvents, abrasive cleaners, glass cleaners, or all-purpose cleaners. Use a damp cloth to remove any fluff. Make sure that you do not damage the rubber seal when doing this. Close the heat exchanger access panel.
Problem solving guide Many malfunctions and faults that can occur in daily operation can be easily remedied. Time and money will be saved because a service call will not be needed. The following guide may help you to find the reason for a malfunction or a fault, and to correct it. Fault messages shown in the display when a programme is cancelled Message Cause and remedy The system has been clogged by fluff or detergent residue. To deactivate the message, confirm with OK.
Problem solving guide Message Cause and remedy The plinth filter looks clean after thorough cleaning. However, the programme terminates and the fault message appears again. It is likely that there is still underlying residue that could not be removed. To deactivate the message, confirm with OK. Check for the possible causes described below. Clean the fluff filter. Check the airways. The heat exchanger is clogged. Check the heat exchanger.
Problem solving guide Messages in the display Message Cause and remedy 000 Access via a code has been activated. Enter the code and confirm the entry. Deactivate the code if you do not wish this message to appear in the display the next time the appliance is switched on. Finish/Cooling down The laundry will be cooled down at the end of the programme. Either remove the laundry and spread it out to cool down or leave it in the tumble dryer to cool down during the cooling phase.
Problem solving guide Unsatisfactory drying results Problem Cause and remedy The DryCare 40 Extra is The room where the tumble dryer is located is too not drying the laundry warm. This has caused the DryCare process to finish sufficiently. prematurely. Ventilate the room thoroughly. To fully dry the laundry, select Warm air with the DryCare 40 Extra. The laundry is not suffi- The load consisted of different types of fabric. ciently dry. Finish drying using the Warm air programme.
Problem solving guide The drying cycle duration is very long Problem Cause and remedy The drying process goes on too long or even switches off.* The room where the tumble dryer is located is too warm. Ventilate the room thoroughly. Detergent residues, hair and fine fluff can clog the filters. Clean the fluff filters and the plinth filter. Remove visible fluff from the heat exchanger. The laundry is unevenly distributed or has rolled up. The drum is too full.
Problem solving guide General problems with the tumble dryer Problem Cause and remedy You can hear buzzing or The compressor (heat pump) is operating. Or you humming operating have selected a programme which sprays connoises. densed water into the drum. No action required. These noises are quite normal and can be heard when the compressor or the condensed water pump is operating. There is no fault. A programme does not start No obvious cause.
Problem solving guide Problem Cause and remedy The drum lighting does not come on. To save energy, the drum lighting goes out automatically after a set time and after the programme starts. Switch the dryer off and then on again. To switch the drum lighting on, open the door of the tumble dryer. The drum lighting is faulty. The drum lighting is designed to last a long time and should not normally need to be replaced.
Problem solving guide Replacing the plinth filter Deformations The heat exchanger can clog up. Replace the plinth filter immediately if you see the following signs of wear before or after cleaning (optional accessory). Poor fit Deformations indicate that the filter has become blocked and worn by continuous use. The edges of the plinth filter do not sit properly and the plinth filter is out of shape. Fluff will blow into the heat exchanger unfiltered through edges that do not sit properly.
Problem solving guide Cracks, tears, indentations Fluff will blow into the heat exchanger through cracks and tears. This will, in time, cause a blockage in the heat exchanger. White residues or residues of other colours These residues arise from laundry fibres and traces of detergent components. They can be found on the front and side edges of the plinth filter. In extreme cases, they can form stubborn crust.
Problem solving guide Reactivating the plinth filter You can reactivate one or more soiled plinth filters in a washing machine. You will then be able to use the plinth filter again. Prior to reactivation, check that the plinth filter is in good order. Check the plinth filter following the instructions provided in “Problem solving guide – Replacing the plinth filter”. Replace the plinth filter if it has worn out. Wash the plinth filter(s) separately, not with any laundry items. Do not add any detergent.
Problem solving guide Cleaning the fluff filter in the condensed water container When certain programmes are being used, water is taken from the condensed water container and sprayed into the drum. The spray jet can sometimes stop working. The fluff filter in the condensed water container is clogged. Be careful not to tug on the hose to avoid detaching it. Guide the end of the hose through the opening. Hold it securely with one hand. Use your other hand to pull the fluff filter off the hose.
Problem solving guide Remove the spray jet (optional accessory). Replace the spray jet. You can only replace the spray jet using a special tool. The special tool is supplied with the new spray jet. Open the tumble dryer door. The spray jet is located in the top left of the door opening. Using the wrong tool can cause damage. Doing so can damage the spray jet or the tumble dryer. Only use the tool supplied. Do not use any other tool. Attach the tool to the spray jet.
Service Contact in the event of a fault Optional accessories In the event of any faults which you cannot remedy yourself, please contact your Miele dealer or the Miele Customer Service Department. Optional accessories for this tumble dryer are available from Miele or from your Miele dealer. You can book a Miele Customer Service Department call-out online at www.miele.com/service. Contact information for the Miele Customer Service Department can be found at the end of this document.
*INSTALLATION* Installation Front view a Mains connection cable e Plinth filter flap b Control panel f 4 height-adjustable feet c Condensed water container g Cooling air grille d Door h Drain hose for condensed water 80
*INSTALLATION* Installation Rear view a Protruding lid for holding when moving the appliance b Drain hose for condensed water c Hook for winding up the mains connection cable during transport d Mains connection cable Transporting the tumble dryer Danger of injury to people and damage to property caused by moving the appliance incorrectly. If the tumble dryer tips up there is a danger of injury to people and damage to property. Ensure that the tumble dryer is stable during transportation.
*INSTALLATION* Installation Installation Levelling the tumble dryer Ensure that no closeable door, sliding door or oppositely hinged door is installed that could hinder opening of the tumble dryer door in any way. Downtime after installation Damage to the tumble dryer by switching it on too soon. This can damage the heat pump. After setting up the tumble dryer wait for at least one hour before switching it on.
*INSTALLATION* Installation Additional installation requirements Slot-in This tumble dryer is suitable for pushing under a worktop. Appliance defect due to a build-up of heat. Make sure there is adequate room for warm air from the dryer to be directed away. - The appliance lid cannot be removed. - The electrical socket must be located in an accessible position near the tumble dryer. - Drying durations may increase slightly.
*INSTALLATION* Installation External condensed water outlet Note When drying is in progress, condensed water is pumped into the condensed water container through the drain hose which is located at the back of the dryer. The condensed water can also be externally drained away via the drain hose at the back of the dryer. This means that the condensed water container no longer has to be emptied. Drain hose length: 1.49 m Max. delivery head: 1.00 m Max. drain hose length: 4.
*INSTALLATION* Installation Arranging the drain hose Examples Damage to the drain hose Drainage into a sink or floor gully through incorrect handling. The drain hose can suffer damage and leak. Do not pull on the drain hose and do not stretch it or allow it to become kinked. Use the hose holder to secure the drain hose. There will be a small amount of residual water left in the drain hose. Have a container ready to collect this. Water damage.
*INSTALLATION* Installation Direct connection to a sink drain outlet Use the hose holder, the adapter, the hose clips and the non-return valve (available to purchase). Fit adapter 1 to the sink drain outlet using nut 2. The nut is usually fitted with a washer which must be removed. Attach the end of the hose 4 to adapter 1. Use the hose holder. Use a screwdriver to tighten hose clip 3 up close to the nut. Fit non-return valve 5 to tumble dryer drain hose 6.
*INSTALLATION* Installation Changing the door hinging You can change the door hinging on this tumble dryer yourself. For safety reasons the tumble dryer must be disconnected from the electricity supply before changing the door hinging. You will need: - a Torx T20 and T30 screwdriver - a flat head screwdriver or pointed pliers Hold the door securely and pull it forwards: to remove the door you will need to pull the base plate of the hinge with its 2 pins out of the dryer.
*INSTALLATION* Installation Turn the door lock through 180°. Press the door lock into openings on the opposite side of the door opening. Use a T20 Torx screwdriver to remove screw on the lock catch. Pull off the lock catch together with lock catch cover . Adjust the position of the door lock so that the screw holes line up with those in the front panel of the dryer . Secure the door lock with the two Torx screws. 3.
*INSTALLATION* Installation 4. Dismantle the door hinge from the door The door hinge cover must be unclipped from position and then removed. Insert the lock catch into the new cover supplied with the dryer. Place this new cover to one side for now. Use a screwdriver to press down gently on position on the door hinge cover. Using a little force, pull out door hinge cover . This door hinge cover is no longer needed, however, please keep it in a safe place.
*INSTALLATION* Installation 5. Change over the door hinge on the door The door hinge is secured to the door with 2 angled rods. These rods need to be removed with a screwdriver or pointed pliers. Tip: In some circumstances, the rods can be difficult to dislodge. Moving the screwdriver with a levering action while pulling at the same time may help to work the rods free. Remove the door hinge and turn it through 180°. Fit the door hinge on the opposite side of the door.
*INSTALLATION* Installation You now need the new door hinge cover supplied with the tumble dryer. 6. Change the lock catch on the door You now need the new lock catch cover supplied with the dryer which you have already fitted with the lock catch. Fit new door hinge cover and clip it into position. Push lock catch cover with its lock catch into position. Tighten screw .
*INSTALLATION* Installation Refitting Now that you have changed the 7. Refit the door door hinging the door will open from the opposite side. Press the rubber seal back into the grove on the door. Position the door in front of the dryer. Fit the base of the door hinge with its 2 pins into the openings on the dryer. The base of the door hinge must be flush with the front panel of the dryer. The door cannot fall off in this position.
*INSTALLATION* Installation Electrical connection The tumble dryer is supplied with a mains cable with moulded plug ready for connection to a suitable earthed socket. The socket must be easily accessible after the tumble dryer has been installed. If the socket is not easily accessible, ensure that a suitable means of disconnection is provided on the installation side for each pole. Risk of fire from overheating.
Technical data Height 850 mm Width 596 mm Depth 643 mm Depth with door open 1077 mm Suitable for pushing under a worktop Yes Suitable for stacking Yes Weight approx. 62 kg Drum volume 120 litres Load size 9.0 kg (weight of dry laundry) Capacity of condensed water container 4.8 l Hose length 1.49 m Maximum delivery head 1.00 m Maximum drain hose length 4.00 m Length of connection cable 2.
Technical data Data sheet for household tumble driers In acc. with delegated regulation (EU) No.
Technical data 3 4 5 6 If the household tumble drier is equipped with a power management system. This programme is suitable for drying normal wet cotton laundry and is the most efficient programme in terms of energy consumption for cotton. If the household tumble drier is a condenser tumble drier. For the standard cotton programme at full load.
Technical data EU Conformity declaration Miele hereby declares that this heat-pump tumble dryer complies with Directive 2014/53/EU. The complete text of the EU declaration of conformity is available from one of the following internet addresses: - Products, Download from www.miele.ie - For service, information, operating instructions etc: go to www.miele.ie/domestic/customer-information-385.
Consumption data Load size 1 Final spin speed in Residual Energy Duration washing machine moisture kg rpm % kWh Min 9.0 1000 60 1.47 220 4.5 1000 60 0.78 131 9.0 1200 53 1.30 199 9.0 1400 50 1.25 189 9.0 1600 44 1.10 168 9.0 1000 60 1.16 176 9.0 1200 53 1.00 154 9.0 1400 50 0.95 144 9.0 1600 44 0.80 122 Minimum iron Normal 4.0 1200 40 0.50 65 Delicates Normal 2.5 800 50 0.55 70 Woollens handcare 2.0 1000 50 0.02 5 Shirts Normal 2.
Settings You can alter the tumble dryer's electronics to suit changing requirements with the settings. The settings can be altered at any time. Changing a setting Change the value displayed and confirm with OK. or Touch an option to select it. Accessing the Settings menu Switch the tumble dryer on. Scroll to the second page in the main menu. An option which is selected will be highlighted orange. Touch the Settings sensor. The option is saved.
Settings Operation/display - The clock format is set. Language The display can be set to appear in one of several different languages. The flag after the word Language (Sprache in German) acts as a guide in case a language which is not understood has been set. The language selected is saved. Code The code prevents your dryer being used without your knowledge. Options - - Change You can enter a PIN code of your own. If you forget the PIN code, only Miele Service can unlock the tumble dryer.
Settings Memory The dryer saves the settings that were selected last for a drying programme (drying stage and/or extra option, or the duration for some programmes). When the programme is chosen again, the saved settings will appear in the display. Options - Off - On (factory default) Volume The volume can be changed for the buzzer that sounds when the dryer is switched on and at the end of the programme. The volume of the tone that sounds when a sensor is touched can also be changed.
Settings “Display” off status To save energy the display and sensor controls will go out after 10 minutes and the Start/Stop button will flash slowly. You can change this setting. Options - On The display will go out (after 10 minutes): – if a programme is not selected after the dryer has been switched on – while the programme is running – after the end of a programme - On. Not in current prog.
Settings Networking Miele@home Control the networking of your tumble dryer with your home WiFi network. The following points may appear in the submenu: Set up This message only appears if the tumble dryer has not yet been connected to a WiFi network. Please refer to “Before using for the first time” for instructions on how to set up the connection.
Settings SmartGrid Remote control The SmartGrid setting is only visible if the Miele@home setting is set up and activated. The Remote control setting is only visible if the Miele@home setting is set up and activated. This function can be used for starting your tumble dryer automatically at a time when your energy costs are most economical. Once the Miele@mobile app has been installed on your mobile device, you can check the status of your tumble dryer from anywhere and start it remotely.
Settings RemoteUpdate Running a RemoteUpdate The RemoteUpdate function is used for updating the software in your tumble dryer. If a RemoteUpdate is available for your tumble dryer, it will be displayed automatically for you. RemoteUpdate is activated by default. You can choose to start the RemoteUpdate immediately or wait until later. If you select “Start later”, the prompt to run the RemoteUpdate will be displayed again the next time you switch on your tumble dryer.
Settings Programme sequence Anti-crease The Anti-crease function reduces creasing after the end of the programme. The drum will continue to rotate for up to 2 hours after the drying cycle has finished. This helps to reduce creasing. Options - Off - 1h - 2h (factory default) Cooling down temp. The laundry will be cooled down automatically before the end of the programme.
Settings Machine parameters Airways indicator Conductivity This setting is only relevant for regions with very soft water. Fluff should be removed after drying. In addition, this indicator will remind you to clean the filters when a certain amount of fluff has collected in them: Clean the fluff and plinth filters. See the Very soft water can result in unsatisfactory drying results.
Settings Operating hours You can read off how many hours your tumble dryer has been in operation for. The time is displayed as the total running time in hours. Factory default All settings except Operating hours are reset to the factory default settings. Options Reset to factory settings? - Yes The settings are reset to the factory default settings. - No The settings are not reset to the factory default settings. 108 Legal information Open source licences You can view information here.
Settings Copyrights and licences for the communication module For the purpose of operating and controlling the communication module, Miele uses proprietary or third-party software that is not covered by open source licensing terms. These items of software/software components are protected by copyright. The copyrights held by Miele and third parties must be respected. Furthermore, this communication module contains software components which are distributed under open source licence conditions.
United Kingdom Miele Co. Ltd., Fairacres, Marcham Road, Abingdon, Oxon, OX14 1TW Tel: 0330 160 6600, Internet: www.miele.co.uk/service, E-mail: info@miele.co.uk Australia Miele Australia Pty. Ltd. ACN 005 635 398 ABN 96 005 635 398 Level 4, 141 Camberwell Road Hawthorn East, VIC 3123 Tel: 1300 464 353 Internet: www.miele.com.au Ireland Miele Ireland Ltd. 2024 Bianconi Avenue Citywest Business Campus Dublin 24 Tel: (01) 461 07 10 Fax: (01) 461 07 97 E-Mail: info@miele.ie Internet: www.miele.
TWV 780 WP en-GB M.-Nr.