Operating and installation instructions Cooker hood To prevent the risk of accidents or damage to the appliance, it is essential to read these instructions before it is installed and used for the first time. en-GB M.-Nr.
Contents Warning and Safety instructions .......................................................................... 4 Caring for the environment ................................................................................. 13 Modes of operation.............................................................................................. 14 Con@ctivity 2.0 function ........................................................................................ 15 Guide to the appliance...........................
Contents Installation ............................................................................................................ 36 Appliance dimensions............................................................................................ 36 Safety distance between hob and cooker hood (S)............................................... 38 Installation recommendations................................................................................ 39 Before installation ................................
Warning and Safety instructions This appliance complies with all relevant local and national safety requirements. Inappropriate use can, however, lead to personal injury and damage to property. To avoid the risk of accidents and damage to the appliance, please read these instructions carefully before using it for the first time. They contain important notes on the safety, installation, use and maintenance of the appliance. Miele cannot be held liable for non-compliance with these instructions.
Warning and Safety instructions Safety with children Children under 8 years of age must be kept away from the cooker hood unless they are constantly supervised. Children 8 years and older may only use the cooker hood unsupervised if they have been shown how to use it safely and recognise and understand the consequences of incorrect operation. Children must not be allowed to clean or maintain the cooker hood unsupervised.
Warning and Safety instructions Technical safety Unauthorised installation, maintenance and repairs can cause considerable danger for the user. Installation, maintenance and repairs must only be carried out by a Miele authorised technician. A damaged appliance can be dangerous. Check it for visible signs of damage. Do not use a damaged appliance. The electrical safety of this appliance can only be guaranteed when correctly earthed. It is essential that this standard safety requirement is met.
Warning and Safety instructions For safety reasons, this appliance may only be used after it has been built in. The cooker hood must not be used in a non-stationary location (e.g. on a ship). Tampering with electrical connections or components and mechanical parts is highly dangerous to the user and can cause operational faults. Only open the housing as described in the instructions given in the installation sheet and in the Cleaning and care section of this booklet.
Warning and Safety instructions Using at the same time as other heating appliances that depend on the air from the room Warning - danger of toxic fumes Great care should be taken when using the cooker hood at the same time and in the same room or area of the house as another heating appliance which depends on the air in the room.
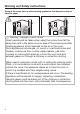
Warning and Safety instructions In order to ensure safe operation, and to prevent gases given off by the heating appliances from being drawn back into the room when the cooker hood and the heater are in operation simultaneously, an underpressure in the room of 0.04 mbar (4 pa) is the maximum permissible.
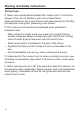
Warning and Safety instructions Correct use Never use a naked flame beneath the cooker hood. To avoid the danger of fire, do not flambé or grill over a naked flame. When switched on, the cooker hood could draw flames into the filter. Fat deposits could ignite, presenting a fire hazard. The cooker hood can become damaged when exposed to excessive heat. – When using the cooker hood over a gas hob, ensure that any burners in use are always covered by a pan.
Warning and Safety instructions Do not use the cooker hood without the filters in place. This way you will avoid the risk of grease and dirt getting into the appliance and hindering its smooth operation. There is a risk of fire if the cooker hood is not cleaned as described in these operating instructions. The cooker hood can get very hot during cooking due to heat rising from the hob. Do not touch the housing or the grease filters until the cooker hood has cooled down.
Warning and Safety instructions If exhaust air is to be extracted into a chimney or ventilation duct no longer used for other purposes, seek professional advice. Cleaning and care Do not use a steam cleaning appliance to clean this appliance. The steam could reach electrical components and cause a short circuit. Important information on handling the remote control battery: – Do not short circuit or recharge the battery, or throw it into a fire. Danger of explosion.
Caring for the environment Disposal of the packing material The packaging is designed to protect the appliance from damage during transportation. The packaging materials used are selected from materials which are environmentally friendly for disposal and should be recycled. Recycling the packaging reduces the use of raw materials in the manufacturing process and also reduces the amount of waste in landfill sites.
Modes of operation Depending on the model of the cooker hood, the following options are available: Extraction mode The air is drawn in and cleaned by the grease filters and directed outside. Non-return flap Recirculation mode (recirculation mode cooker hoods require a conversion kit and charcoal filters: see "Technical Data") The air is drawn in and cleaned first by the grease filters and then by the charcoal filters. The cleaned air is then recirculated back into the kitchen.
Modes of operation Con@ctivity 2.0 function Automatic control The cooker hood has a communication facility which enables the automatic operation of the cooker hood depending on the operational state of the hob. The hob transmits information about its operational status via a radio signal to the cooker hood. – When the hob is switched on, the hob lighting comes on independently and the fan also switches on and the deflector plate comes out.
Guide to the appliance 16
Guide to the appliance a Retractable deflector plate b Controls c Grease filters d Hob lighting e Exhaust socket The exhaust socket can also be fitted at the back.
Operation (Automatic mode) When Con@ctivity 2.0 is activated, the cooker hood always works in automatic mode (see "Activating Con@ctivity 2.0"). To operate the cooker hood manually, see "Cooking without Con@ctivity 2.0". Cooking with Con@ctivity 2.0 (Automatic mode) Switch a cooking zone on at the power level you want. The cooker hood lighting will come on. After a few seconds the fan will come on, first at power level 2, then it will switch immediately to power level 1.
Operation (Automatic mode) Cooking process Switching off If for example you switch on a cooking zone at the highest power level to heat a pan for frying and reduce the power level after approx. 60 to 90 seconds*, a cooking process is recognised (*60 seconds to 5 minutes for a HiLight hob). Switch off all cooking zones. The cooker hood switches itself on and when the hob power level has been reduced, the hood switches to power level 3 and remains at that level for approx. 5 minutes.
Operation (Automatic mode) Leaving automatic mode temporarily To leave automatic mode temporarily during cooking: Manually select a different power level, or Manually switch the cooker hood off, or Activate the cooker hood run-on option . The fan will switch off after the selected time and the lighting remains switched on. The cooker hood can now be operated manually (see "Cooking without Con@ctivity 2.0").
Operation (Manual mode) Cooking without Con@ctivity 2.0 (Manual mode) Extending the deflector plate, switching the fan on The cooker hood can be operated manually if: Press the "" button on the remote control. – Con@ctivity 2.0 is not activated. The deflector plate will come out. The fan will switch on at level 2. The symbol and 2 will light up in the power level display. – You have temporarily deactivated Con@ctivity 2.0 (see "Leaving automatic mode temporarily").
Operation (Manual mode) Selecting the power level Selecting the run-on time For light to heavy cooking vapours and odours, select from power levels 1 to 3. It is advisable to run the fan for a few minutes after cooking has finished to neutralise any lingering vapours and odours in the air. With the run-on option the fan switches itself off automatically and the deflector plate retracts after a pre-selected time. When frying or cooking food with a very strong aroma, select the Intensive setting IS.
Operation (Manual mode) The next time you switch the cooker hood on the deflector plate will come back out again correctly. Dimming/switching the hob lighting on/off The hob lighting can be switched on and off and dimmed regardless of whether the deflector plate is extended or retracted. Press the lighting control briefly to switch it on and off. The lighting will switch on at maximum brightness. With the hob lighting switched on, press and hold the hob lighting control in.
Operation (Manual mode) Switching Power management on/off All the indicator lamps will go out You can deactivate Power management. This can however result in increased electricity consumption. If you do not confirm within 4 minutes, the cooker hood will revert to the old setting. Switch off the cooker hood. The deflector plate must be retracted. Remove the grease filters. The controls are accessible via the slots for the grease filters. Press the run-on option control 5 15 for approx.
Operation (Automatic and Manual modes) Operating hours counters The number of hours the appliance has been in operation is stored in memory. When the Grease filter symbol or the Charcoal filter symbol lights up, the operating hours counters are signalling that the filters need to be cleaned or changed. Further information about cleaning and changing the filters and resetting the operating hours counter can be found under "Cleaning and care". Remove the grease filters.
Operation (Automatic and Manual modes) Activating and altering the charcoal filter operating hours counter In recirculation mode the operating hours counter for the charcoal filters needs to be activated once and the operating hours counter needs to be set to suit the kind of cooking you do. Switch off the cooker hood. The deflector plate must be retracted. Remove the grease filters. The controls are accessible via the slots for the grease filters.
Operation (Automatic and Manual modes) Reading the filter operating hours counter To check the percentage of time set already used Use the On/Off control to switch the fan on. Press and hold the operating hours control – Once, to read the Grease filter operating hours. The grease filter symbol lights up. – Twice, to read the Charcoal filter operating hours. The Charcoal filter symbol lights up. One or more of the power level indicators will flash.
Energy saving tips This cooker hood operates very efficiently and economically. The following will help you to save even more energy when using it: – Ensure that there is sufficient ventilation in the kitchen when cooking. In extraction mode, if there is insufficient air flow the cooker hood cannot operate efficiently and this causes increased operating noise levels. – Always cook with the lowest possible setting.
Cleaning and care Casing General information The surfaces and controls are susceptible to scratches and abrasion. Please observe the following cleaning instructions. All external surfaces and controls can be cleaned using hot water with a small amount of washing-up liquid applied with a well wrung-out soft sponge or cloth. Do not let moisture get into the cooker hood. Only use a damp cloth when cleaning. This is particularly important around the controls.
Cleaning and care Grease filters Cleaning interval The re-usable metal grease filters in the appliance remove solid particles (grease, dust, etc.) from the kitchen vapours, preventing soiling of the cooker hood. The grease filters should be cleaned regularly (at least every 3 - 4 weeks) to avoid a build-up of grease. An oversaturated filter is a fire hazard. Clean them immediately if the Grease filter operating hours symbol lights up.
Cleaning and care Cleaning the grease filters by hand Clean the filters with a soft nylon brush in a mild solution of hot water and a small amount of washing-up liquid. Do not use "neat" washing up liquid. Unsuitable cleaning agents Unsuitable cleaning agents can cause damage to the surface of the filters if used regularly.
Cleaning and care Resetting the grease filter operating hours counter After cleaning, the operating hours counter needs to be re-set. Fitting/replacing charcoal filters The slots for the charcoal filters are located above above the grease filters. Whilst the fan is switched on, press the operating hours control for approx. 3 seconds, until only the 1 is flashing. The grease filter symbol goes out.
Cleaning and care When to change the charcoal filters Always replace the charcoal filters when they no longer absorb kitchen odours effectively. They should, however be replaced at least every 6 months. The charcoal filter operating hours symbol will light up to remind you to change the charcoal filters. The charcoal filter operating hours counter needs to be activated before using for the first time (see "Operation").
Cleaning and care Remote control Cleaning the remote control Only clean the surface with a damp cloth. Do not use too much water to avoid moisture penetrating the casing. Changing the battery Use only the type of battery listed. Do not use rechargeable batteries. The remote control requires one 3 V CR 2032 battery.
After Sales / Guarantee In the event of a fault which you cannot remedy yourself, please contact your Miele dealer or the Miele Service Department. Contact details for Miele are given at the back of this manual. N.B. A call-out charge will be applied to service visits where the problem could have been resolved as described in these instructions. When contacting your dealer or Miele, please quote the model and serial number of your appliance. These are shown on the data plate.
Installation Appliance dimensions 36
Installation a Extraction, recirculation with conversion kit DUU 150. b The wall unit carcase needs to be 38 mm shorter than the wall unit door. c Installation is also possible in a 600 mm wide unit. In this case the unit door must open upwards to allow access to the grease filters. This also applies for adjacent units. d The ducting can also be connected at the back. e After installation the wall unit can be fitted with an interim panel.
Installation Safety distance between hob and cooker hood (S) When planning the installation height of your cooker hood, the minimum safety distance between the top of a cooker or hob and the bottom of the cooker hood is as follows, unless a greater distance is specified by the manufacturer of your cooking appliance. See "Warning and Safety" instructions for further information.
Installation Installation recommendations – To achieve optimum vapour extraction, the cooker hood must cover the hob. It should be positioned centrally over the hob, not to the side of it. – The hob should be no wider than the cooker hood, and if possible, it should be narrower. Before installation Before installation, it is important to read the information given on the following pages as well as the "Warning and Safety instructions" at the beginning of this booklet.
Installation Assembly parts 40
Installation a 1 collar for exhaust ducting 150 mm. b 1 reducing collar for exhaust ducting 125 mm. c 1 non-return flap for fitting into the exhaust socket on the motor unit (not needed for recirculation mode) d 2 covers for the brackets. 4 screws M4 x 16 mm for securing the cooker hood to the brackets and for securing the spacer strip. 4 screws M4 x 8 mm for securing the spacer strip. e 2 brackets to support the appliance in the wall unit. f 1 cover for the charcoal filter slots.
Installation 42
Installation Repositioning the ducting The motor unit can be rotated to allow the ducting to be fitted at the back of the cooker hood. This may be necessary if the cooker hood is being fitted in a reduced height wall unit, for example. Repositioning is carried out before installing the cooker hood. The cooker hood must be disconnected from the mains. Undo the fixing screws on the front panel of the cooker hood housing and remove the panel.
Installation Pull the grease filters out of the slots in the front of the cooker hood housing. The spacer strip needs to be attached to the back of the cooker hood housing before the cooker hood is installed in the wall unit. The spacer strip can be attached to the upper or lower edge of the deflector plate. Calculate the measurement T for the spacer strip Cut the spacer strip to measurement T. Score along the groove for the smaller measurement as shown, and remove the surplus.
Installation Screw the brackets onto the right and left inside walls of the housing unit so that they are flush with the bottom edges of the unit. The brackets are designed for 16 and 19 mm thick unit sides. Orientate the bracket so that the vertical depth matches the thickness of the unit side, as shown. Fit the screws for attaching the cooker hood so that they protrude by about 5 mm, as shown. Only use the front screws when fitting a 900 mm wide cooker hood in a 600 mm wide wall unit.
Installation Before connecting the cooker hood to the electricity supply, please see "Electrical connection" and "Warning and Safety instructions". Connect the cooker hood to the electricity supply. Press the "" button on the remote control. The motor switches on, the deflector plate comes out. When the deflector plate is extended, disconnect the cooker hood from the electricity supply. The motor will switch off, the deflector plate remains extended.
Installation Press the On/Off control on the cooker hood or the "" control on the remote control repeatedly until the fan switches off. The motor will switch off. The deflector plate goes back in. Tighten the four fixing screws from below. When fitting a 900 mm wide cooker hood in a 600 mm wide wall unit, insert the two rear screws at this stage. If the wall unit has side sections, you will also need to secure it to the base on either side. Reconnect the cooker hood to the electricity supply.
Installation When fitting a 900 mm wide cooker hood into a 900 mm wide housing unit without side base supports, the retaining brackets supplied are used to align the cooker hood and provide additional support. The retaining brackets are secured to the back panel of the wall unit. If the wall unit does not have a solid back panel, the cooker hood can be secured directly to the wall using the screws and plugs supplied. An angled key is supplied in case the screws are difficult to access.
Installation Secure the spacer strip to the bottom of the wall unit as well. The covers for the brackets are designed for 16 mm and 19 mm thick unit sides. Turn the covers so that they are in the appropriate position and fit them onto the brackets. Insert the cover for the charcoal filter slots as shown and close it. It is held in place by magnets.
Installation Take the grease filters out and remove any protective foil. Replace the grease filters. Exhaust socket dai2699 Attach the exhaust ducting, e.g. flexible hose, to the exhaust socket using a hose clip (available as an optional accessory). When using 125 mm ducting, fit the reducing collar supplied into the exhaust socket (see "Connection for air extraction"). Insert the non-return flap, if required. Make sure that it opens easily and closes again by itself.
Installation Setting up for recirculation mode If site conditions are not suitable for the cooker hood to be used with air extraction, the appliance must be set up for recirculation. A conversion kit, available through your dealer of from Miele is required for operating the cooker hood in recirculation mode. You will also need two charcoal filters (see "Technical data"). Fit the conversion kit as described in the installation instructions supplied with the kit.
Electrical connection All electrical work should be undertaken by a suitably qualified and competent person in strict accordance with current national and local safety regulations (BS 7671 in the UK). Installation, repairs and other work by unqualified persons could be dangerous, for which the manufacturer cannot be held liable. Ensure power is not supplied to the appliance until after installation or repair work has been carried out.
Connection for air extraction If the cooker hood is used at the same time as a heating appliance that relies on oxygen from the same room, there is a risk in certain circumstances of toxic fumes building up. It is essential that the "Warning and Safety" instructions are observed. The cooker hood should be installed according to local and national building regulations. Seek approval from the building inspector where necessary. – Ensure that all connections are strong and airtight.
Connection for air extraction Condensate trap In addition to insulating the exhaust ducting, we recommend that a suitable condensate trap is also installed to collect and evaporate any condensate which may occur. Condensate traps for 125 mm or 150 mm ducting are available as optional accessories. When installing a condensate trap, ensure that it is positioned vertically and if possible directly above the exhaust socket. The arrow on the housing indicates the direction of air-flow.
Connection for air extraction Recirculation mode The silencer needs to be positioned between the exhaust socket and the directional unit . Ensure there is adequate space for fitting it. Extraction mode with external motor To minimise noise from the motor in the kitchen, the silencer should be positioned in front of the external motor if possible, or, if the ducting is long, above the exhaust socket on the cooker hood .
Activating Con@ctivity 2.0 Installing the Con@ctivity 2.0 Stick In order to use the Con@ctivity 2.0 function, the hob must first be fitted with the Con@ctivity 2.0 Stick. Activating the cooker hood Signing on/off is carried out with the deflector plate retracted. Please read the separate installation instructions supplied with the Con@ctivity 2.0 Stick. Activating Con@ctivity 2.0 Remove the grease filters.
Activating Con@ctivity 2.0 Activating the hob Activation failed While the cooker hood is searching for a signal, start activating the hob. More information about this can be found in the Operating instructions for the hob. If connection cannot be established despite activating the Con@ctivity function on the cooker hood and hob, the function must be deactivated on both appliances and then the procedure repeated.
Signing on/off the remote control If the connection has been lost between the remote control and the cooker hood, they must be signed on again. To do this, the remote control function on the cooker hood and the remote control must be signed off first of all. Signing on/off is carried out with the deflector plate retracted. Signing on and off must be done at the same time on the cooker hood and the remote control. Signing on/off mode has to be accessed on the cooker hood first, then on the remote control.
Signing on/off the remote control Confirm the signing off procedure by pressing the run-on option control 515 on the cooker hood. All indicators will go out. Please bear in mind that disabling the signal will also disable any Con@ctivity 2.0 function and this will have to be activated again. To start the signing on procedure In Signing on/off mode press the "" control on the cooker hood first and then on the remote control. The search for a signal will commence.
Technical data Fan motor* 90 W Hob lighting DA 3660 2 x 4,5 W DA 3690 3 x 4,5 W Total connected load* DA 3660 99 W DA 3690 103,5 W Voltage, frequency AC 230 V, 50 Hz Fuse rating Mains connection cable length 5A 1.5 m Weight DA 3660 16 kg DA 3690 19 kg DA 3660 EXT 13 kg DA 3690 EXT 16 kg * For EXT models, the connected load and extraction power will depend on the type of external motor fitted. Length of connection cable to external motor: 1.
Technical data Data sheet for domestic cooker hoods In acc. with delegated regulation (EU) No. 65/2014 and regulation (EU) No.
Technical data Data sheet for domestic cooker hoods In acc. with delegated regulation (EU) No. 65/2014 and regulation (EU) No.
United Kingdom Miele Co. Ltd. Fairacres, Marcham Road Abingdon, Oxon, OX14 1TW Customer Contact Centre Tel: 0330 160 6600 E-mail: mielecare@miele.co.uk Internet: www.miele.co.uk Australia Miele Australia Pty. Ltd. ACN 005 635 398 ABN 96 005 635 398 1 Gilbert Park Drive, Knoxfield, VIC 3180 Tel: 1300 464 353 Internet: www.miele.com.au China Miele (Shanghai) Trading Ltd. 1-3 Floor, No. 82 Shi Men Yi Road Jing' an District 200040 Shanghai, PRC Tel: +86 21 6157 3500, Fax: +86 21 6157 3511 E-mail: info@miele.
DA 3660 DA 3690 DA 3660 EXT DA 3690 EXT en-GB M.-Nr.