
Operating and Installation Instructions
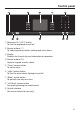
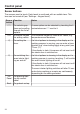

Table Of Contents
- Contents
- IMPORTANT SAFETY INSTRUCTIONS
- Overview
- Control panel
- Description of functions
- Before using for the first time
- Modes / Programs / Menus
- Operation: Steam cooking
- Operation: Combination cooking mode
- Operation: Functions without steam
- Quick guide
- Interrupting operation
- Additional functions
- Setting additional durations
- Turning off automatically
- Switching on and off automatically
- Sequence of an automatic cooking process
- Rapid PreHeat
- Switching off Rapid PreHeat
- Changing the operating mode
- Changing settings during a cooking process
- Changing the temperature
- Changing the core temperature
- Changing the broil level
- Changing the cooking duration
- Deleting a cooking duration
- Deleting a finish time
- Canceling cooking
- MasterChef
- Favorites
- Timer
- General notes
- Steam cooking
- Sous-vide (vacuum) cooking
- Special modes
- Roast probe
- Roast
- Bake
- Broil
- Settings
- Cleaning and care
- Frequently asked questions
- Optional accessories
- IMPORTANT SAFETY INSTRUCTIONS - INSTALLATION
- Detailed dimensions of oven front
- Installation dimensions
- Installation
- Electrical connection
- Caring for the environment
- Technical service, data plate, warranty
- MieleCare
Control panel
23
Display
The display is used for showing the time of day or information about modes, tem-
peratures, cooking durations, MasterChef programs and settings. Information or a
list of options is shown on the display depending on the function selected.
After switching the oven on with the On/Off sensor button, the main menu will
appear.
If a cooking process is running, selecting Change will call up a list of options which
can be set or changed for the cooking process in progress.
Touch the illuminated sensor button beside the option to select it.
Options can then be accessed by tapping the illuminated sensor button next
to OK.
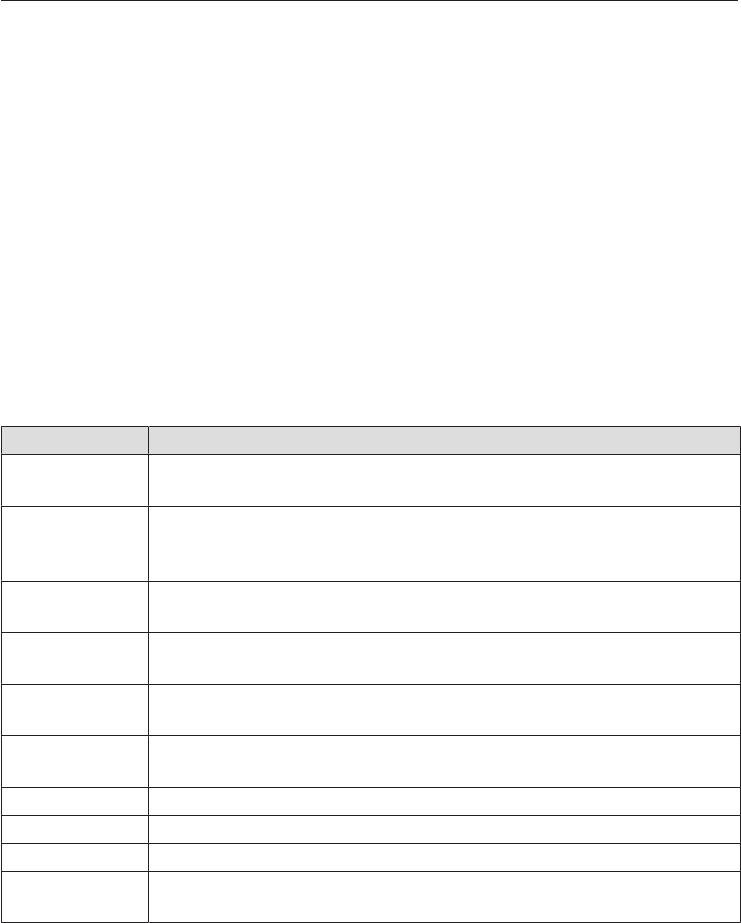
Symbols
The following symbols may appear in the display:
Symbol Description
Allocates an illuminated Sensor button to an option and indi-
cates that the option can be selected.
If more than four options are available a bar will appear on the
right-hand side of the display. Use the allocated sensors to scroll
through the list.
The end of a list is indicated by a dotted line. By scrolling down
further, you will reach the beginning of the list again.
/ These only appear when an entry is possible or necessary (e.g.
entering the date).
A check indicates the currently active setting. will not be dis-
played and the corresponding sensor will not be illuminated.
This symbol indicates that there is additional information and ad-
vice about using the oven. Select OK to access the information.
/ / Water level indicator
Program finished
Timer
Some settings, e.g. display brightness and buzzer volume, are
selected using a bar chart.