Operating and Installation Instructions Coffee System with convertible water connection CVA 4075 To prevent accidents and machine damage read these instructions before installation or use. en - US, CA M.-Nr.
Contents IMPORTANT SAFETY INSTRUCTIONS. . . . . . . . . . . . . . . . . . . . . . . . . . . . . . . . . 4 Guide to the machine . . . . . . . . . . . . . . . . . . . . . . . . . . . . . . . . . . . . . . . . . . . . . . 8 First steps to use . . . . . . . . . . . . . . . . . . . . . . . . . . . . . . . . . . . . . . . . . . . . . . . . . 10 Filling water, beans or ground coffee . . . . . . . . . . . . . . . . . . . . . . . . . . . . . . . . 11 Filling the water tank . . . . . . . . . . . . . . . . . . . . . .
Contents Cleaning and Care . . . . . . . . . . . . . . . . . . . . . . . . . . . . . . . . . . . . . . . . . . . . . . . . 35 Descaling the appliance . . . . . . . . . . . . . . . . . . . . . . . . . . . . . . . . . . . . . . . . . . . 45 Frequently asked questions . . . . . . . . . . . . . . . . . . . . . . . . . . . . . . . . . . . . . . . . 47 After sales service . . . . . . . . . . . . . . . . . . . . . . . . . . . . . . . . . . . . . . . . . . . . . . . . 54 Installation instructions . . . . . . . . .
IMPORTANT SAFETY INSTRUCTIONS When using electrical appliances basic safety precautions should always be followed, including the following: Read all instructions before installation or use of the coffee system. ~ Be certain your appliance is Please read these instructions carefully to prevent accidents and machine damage. This appliance complies with current safety requirements. Improper use of the appliance can cause personal injury and material damage.
IMPORTANT SAFETY INSTRUCTIONS ~ Installation work and repairs must ~ Do not operate any appliance with a only be performed by a trained technician in accordance with national and local safety regulations. Repairs and other work by unauthorized persons could be dangerous and may void the warranty. damaged cord or plug, or after the appliance malfunctions or has been damaged in any manner. Contact Miele. ~ Always attach the cord to the Only then can the manufacturer guarantee the safety of this machine.
IMPORTANT SAFETY INSTRUCTIONS Use The coffee system must be maintained daily to prevent the growth of harmful bacteria and mold. Please read the “Cleaning and care” section of this booklet. All parts are dishwasher safe except the brew unit and bean container. Caution! Do not look directly or with an optical instrument into the lighting - laser radiation. Caution! Risk of burns when dispensing hot beverages, they are extremely hot.
IMPORTANT SAFETY INSTRUCTIONS ~ Never place a cup with an ~ Depending on the fat content of the alcohol-coffee mixture underneath the coffee dispenser. Plastic parts of the unit could catch fire! coffee, the brew unit may clog. Clean the brew unit every 200 cups with a cleaning tablet. The display shows a respective request. ~ The hot water and steam dispensed could cause scalding. These functions must be used carefully. Never hold any parts of the body under the steam nozzle or the hot water dispenser.
Guide to the machine Front view a Touch controls (lowest control "On/Off" button) g Bottom lighting b Display h Plastic drip tray c Touch controls (lowest control "Clear" button) i Metal drip tray d Top lighting e Door grip f Hot water spout 8 j Coffee dispenser (height adjustable) k Froth dispenser (removable for better cleaning) l Intake hose (removable together with dispenser)
Guide to the machine Interior view a Main switch b Cover for ground coffee funnel c Funnel for ground coffee d Grind control lever e Coffee bean container f Drip tray with no-spill grid for transport g Water tank (with water inlet valve) h Brew unit i Waste unit 9
First steps to use Touch controls Turning on Select a touch control with your fingertip to use the machine. ^ Select "On/Off" to turn the coffee system on. Display The display shows the clock. See "Settings - Clock - Setting the time of day" to set the time. To select a menu, select the touch control next to the respective menu point. If more features can be selected under one menu point, the menu has three dots (e.g. "Settings...").
Filling water, beans or ground coffee Before using the coffee system for the first time, clean the appliance. See "Cleaning and Care". Filling the water tank The beans and the water quality is important for a good espresso or coffee. If the machine is plumbed to a water line and turned on, the water tank is automatically filled. Empty the water tank daily. The unit displays a reminder when turned on.
Filling water, beans or ground coffee Filling the beans container Only fill espresso or coffee beans in the beans container. Anything else including ground coffee - will damage the grinding unit. Caramelized or otherwise pre-treated beans or sugar containing beverages must not be filled into the appliance. It will damage the coffee system. Filling ground coffee A funnel for ground coffee is provided in case you would like to prepare a different coffee type, e.g. decaffeinated coffee.
Making coffee Turning on The lines must be rinsed daily before the first use. This will happen automatically if "Rinse automatic" is set to "On" (see "Settings - Rinse Automatic") and the machine is cold. After heating, hot water runs out of the two spouts into the drip tray. If "Rinse automatic" was set to "Off", use "Care" to rinse the lines. See "Cleaning and Care - Rinse". ^ Select the "On/Off" touch control.
Making coffee Pre-warming cups Adjust the dispenser height All beverages should be made in a warm cup, to develop the aroma. The smaller the amount of coffee or espresso and the thicker the cups, the more important it is to pre-warm the cups. Depending on the cup height, the coffee dispensers can be adjusted so that the coffee and espresso have a shorter distance to the cup, do not cool and have a better crema. ^ Set the cup under the hot water spout.
Making coffee Espresso and coffee made from coffee beans ^ Set a cup under the coffee dispenser. The drink is dispensed through both dispensers at the same time. ^ Select "Espresso" or "Coffee". The machine grinds the beans and pre-brews the coffee (if "On" is selected under "Pre-brewing"). The selected beverage is dispensed. Preparing two cups at the same time ^ Set a cup under each coffee dispenser. ^ Select "Espresso" or "Coffee". ^ Select "2 portions" when displayed.
Making coffee Espresso and coffee made from ground coffee After filling the funnel with ground coffee (see "Filling water, beans or ground coffee - Filling ground coffee"), the display shows: i Did you fill ground coffee and do you want to prepare it? + No Yes ~ ^ Select "Yes". Select "No" if no ground coffee is filled in the funnel. Otherwise the coffee system assumes that ground coffee is in the machine and dispenses only water next time coffee is made. ^ Set a cup under the coffee dispenser.
Making coffee Cappuccino and milk froth When using for the first time or using after descaling The lines were completely drained before the unit left the factory. They will also be drained when the machine is descaled. Before preparing cappuccino or froth, the lines must be filled with water. ^ Set a cup under the cappuccino dispenser. ^ Select "Milk froth". The intake hose takes in water from the tank and fills the lines with water. A small amount of water runs from the froth dispenser.
Making coffee Cappuccino Milk froth To prepare a cappuccino you need a large ceramic or porcelain cup and a small mug (supplied) of milk. If you need additional milk froth, prepare cold skim milk in a stainless steel mug which narrows towards the top. The best milk froth is achieved with cold milk. Only one cup of cappuccino can be prepared at a time because of the milk frothing process. ^ Set the supplied glass mug with milk under the intake hose and the stainless steel mug under the froth dispenser.
Adjusting the coffee grinder The amount of ground coffee determines the strength of the coffee and the quality of the crema. To adjust the grinder setting The amount of ground coffee can be adjusted in the main menu. See "Settings - Grind amount". To prevent machine damage adjust the coffee grinder one notch at a time and let the beans grind before adjusting another notch. Otherwise the machine will be damaged. ^ Push the slide control to the left for a finer grind or to the right for a coarser grind.
Settings The coffee system can be customized to suit individual preferences. Language To show the displays in the desired language, select the language before the first use. Preheating + DESCALING + USER PROFILES: STANDARD + SETTINGS F ... ^ Select "Settings" from the main menu during the pre-heating phase or, SETTINGS F ... ~ + back + CARE ... + USER PROFILES ^ in the main menu. SETTINGS + LANGUAGE F ... GRIND AMOUNT ... ~ PRE-BREWING ~ + CLOCK more ~ + TIMER ... ^ Select "Language".
Settings Clock Clock display size SETTINGS F ... ~ + back + CARE ... + USER PROFILES ^ Select "Size". ^ Select "Settings". The selected size is highlighted in the display. SETTINGS + LANGUAGE F ... The size of the clock display can be adjusted. The options are "normal" or "large". GRIND AMOUNT ... ~ + CLOCK PRE-BREWING ~ + TIMER ... more ~ ^ Select "Size" until the desired size is highlighted. ^ Select "OK" to save the selection. ^ Select "Clock".
Settings Timer Turn on at Setting a timer A specific time of day can be set to turn the machine on, e.g. for breakfast. SETTINGS F ... ~ + back ^ Set the hours to when the appliance should turn on by selecting "+" or "–". + CARE ... + USER PROFILES ^ Select "Settings". ^ Switch to "Minutes" and repeat. ^ Select "OK". SETTINGS + LANGUAGE F ... + CLOCK + TIMER ... ^ Select "Timer". ^ Select "Setting". ^ Select "Turning on at". GRIND AMOUNT ...
Settings Turn off after Turn off at The machine will turn off automatically to save energy after a programmed period of time. Time periods between 15 minutes and 6 hours can be selected. If the machine is not used after dispensing beverages, it will turn off after the selected time. A specific time of day can be set to turn the coffee system off. ^ Select "Turning off after". For example a 0:15 display means that the unit will turn off after 15 minutes of no use.
Settings Activating a timer SETTINGS ~ + back ^ Select "Activate". + CARE ... + USER PROFILES ^ Select "On" to activate the desired function. ^ Select "Settings". SETTINGS + LANGUAGE F ... + CLOCK + TIMER ... ^ Select "Timer". 24 The timer function "Turning on at" or "Turning off at" can be activated or deactivated. GRIND AMOUNT ... ~ PRE-BREWING ~ more ~ Select "Off" to deactivate the desired function. The selected times in the function will stay stored in the memory.
Settings Grind amount Pre-brewing The grind amount can be set, depending on the coffee type, between 0.2 ounces and 0.5 ounces (6 - 14 grams). The more the coffee is ground the stronger the espresso, coffee or cappuccino will be. During pre-brewing a small amount of water is released onto the ground coffee. After a short time the remaining water is pushed through the ground coffee at a high pressure. The crema is also influenced by the grind amount.
Settings Temperature Rinse automatic Five temperatures are available for each beverage, three for hot water. Maximum is the highest temperature, minimum the lowest. It is important to flush out any residual coffee from the lines when starting to use the machine for the day. If "Rinse Automatic" is set to "on", the rinsing starts automatically once the machine is turned on and still cold. The lines are rinsed with hot water and in return pre-warmed. A message shows in the display.
Settings Steam system Lighting The appliance has two heating systems. They allow for independent preparation of froth/cappuccino or espresso/coffee. The second heating system can be turned off to save energy during the heating phase e.g. if froth is not prepared very often. Lighting sets the type of light used when the appliance is turned on. The lighting can be turned on/off automatically or dimmed to the desired brightness. The dimming functions can be set independently for the upper or lower lighting.
Settings Total no. coffees System Lock ^ Select "Total no. coffees" to check the number of previously dispensed espresso, coffee and cappuccino. The coffee system can be locked so that it cannot be used by children or those not familiar with the operating instructions. After a few seconds the display switches back to the "Settings" menu or touch "OK". To activate the System Lock, it must be set in the settings. ^ Select "Settings" and then select "more" twice. ^ Select "System Lock".
Settings Water hardness The hardness of the water used in the coffee system must be determined and programmed into the appliance. The water hardness will determine how frequently the unit must be descaled to maintain the coffee system properly. The machine monitors the volume of water passing through it in conjunction with the hardness of the water and will indicate when descaling is necessary.
Settings User profiles Creating a user profile Up to 10 different user profiles can be entered to accommodate different tastes i.e. different grind amounts, temperature, pre-brewing, portion sizes. ^ Select "Settings" and then "more" twice. ^ Select "User profiles". The upper display line shows which user profile is currently set, if different profiles were already created. The "Standard" profile has standard settings. ^ Select "Creating".
Settings Change name Change ^ If you would like to change a name, touch "Change name" and then the touch control next to the name to be changed. The appliance can be set so that it changes back automatically to the standard profile or that the once set user profile is maintained. ^ Type in the name as described in "Creating a user profile" and select "OK". ^ Select "Change". ^ Select "Clear" to go back to the previous screen.
Settings Display Tone options The display contrast and brightness can be adjusted. A tone can be selected to confirm the selection of a touch control. ^ Select "Settings" and then select "more" three times. ^ Select "Settings" and then "more" three times. SETTINGS + back + DISPLAY SETTINGS PLUMBED ... ~ RESET ~ + TONE OPTIONS ^ Select "Display". ^ Select "Brightness" or "Contrast" and then the setting. The higher the number the higher the contrast or brightness. ^ Select "OK" to save the selection.
Settings Plumbed Reset This unit is designed for operation with a permanent tap water connection but can be converted from water line to water tank use. To do that the plumbed water line connection can be turned on or off. When the unit is set to on, it uses the water line. The water tank is automatically filled.
Setting the serving sizes The flavor of the coffee depends on the coffee and quantity of water used. To ensure the machine uses exactly the amount of water to suit your taste and your cups, there is a choice of two serving sizes for espresso/coffee. The fill height can be programmed. Espresso serving size approx. 30 - 125 ml. Coffee serving size approx. 30 - 250 ml. Hot water serving size approx. 30 - 250 ml. ^ Set the desired cup size under the coffee dispenser.
Cleaning and Care Allow the coffee system to cool before cleaning. Danger of burns! + back SETTINGS J... ~ + CARE ... Do not clean the unit with a steam cleaner. Never use cleaners containing chlorides, sand, soda or scouring agents. These will damage the surface. To avoid mold of coffee waste, clean the unit regularly. All parts can be cleaned in the dishwasher, except the brew unit and the bean container.
Cleaning and Care Water tank Waste unit If the unit is not plumbed, empty the water tank daily and refill before preparing the first drink with fresh, cold tap water. The display shows a message to empty the waste unit. Clean the waste unit daily. Coffee waste can mold if there is water in the waste unit from the rinse process. Check if the valve is clean. If the valve has residues on it, the water tank will not connect properly and might leak.
Cleaning and Care Drip tray The trip tray contains a sensor which causes the display to show when the tray is full and needs to be emptied. Clean the drip tray daily. Remove the drip tray after the final rinse when no more water runs from the lines. ^ Wash the drip tray in the dishwasher or by hand with hot water and liquid dish soap, then dry with a soft cloth. Take care that the metal contacts at the back of the drip tray are clean and dry.
Cleaning and Care Drip catch with metal insert Bean container The bean container must be cleaned by hand with hot water and liquid dish soap. ^ Pull the bean container out and push the lid back. ^ Wash the bean container by hand with hot water and liquid dish soap, then dry with a soft cloth. ^ Take out and clean the drip catch and metal plate. 38 ^ Push the lid back and reinsert the bean container into the machine.
Cleaning and Care Coffee dispenser connector Interior and door ^ Once all movable parts are removed clean the interior with a solution of hot water and liquid dish soap. Dry ground coffee can be vacuumed. A connector between the brew unit and coffee dispenser is located on the inner door. ^ Gently clean the connector regularly with a damp cloth without removing the lubricant for the gasket. ^ The lower part of the inner door has a drip tray. Clean the drip tray.
Cleaning and Care Brew unit Manually clean the brew unit monthly. The movable parts are lubricated and the gaskets will get damaged in the dishwasher. ^ Take out the water tank, waste unit and the cover for the ground coffee funnel. ^ Rub off any coffee residue from the filters with a sponge. One filter is in the funnel, a, the second is to the left of the funnel, b. ^ Dry the funnel, a, to prevent ground coffee from sticking. ^ Clean the interior and remove coffee residues.
Cleaning and Care Cleaning/Degreasing the brew unit Depending on the fat content of the coffee, the brew unit can clog. Clean the brew unit approx. every 200 cups with the enclosed detergent tablets. They are specially developed for the coffee maker to optimize the degreasing. The cleaning tablets can be purchased from Miele. ^ Set a 1 quart container under the coffee dispenser. The interior is also rinsed, therefore the drip tray must be emptied.
Cleaning and Care Froth dispenser/Intake hose Clean the froth dispenser after each use, otherwise they may become blocked with dried milk and hard to clean. Rinsing does not replace cleaning in the dishwasher. ^ Select "Care". ^ Select "System rinse". ^ Set a glass with water under the intake hose and select "OK". The intake hose takes in the water and rinses it. Cleaning in the dishwasher To clean the froth dispenser in the dishwasher, take the parts from the machine.
Cleaning and Care ^ Reassemble the parts as shown. Take care that the raised parts (see arrow) point downwards and, ^ Push the froth dispenser into the machine from underneath, a, and turn the cover above the spout to the right, b. Do not use the machine without the froth dispenser installed. Steam will spit uncontrollably. Danger of scalding and machine damage. ^ that the marks are lined up.
Cleaning and Care Exterior Stainless steel surfaces The front of the appliance can be cleaned with a sponge and a solution of warm water and non abrasive liquid dish soap. Dry with a soft cloth. Stainless steel surfaces can be cleaned using a non-abrasive stainless steel cleaner (available from Miele). Only use a slightly damp sponge when cleaning the controls. Water could penetrate into the electronics and cause damage.
Descaling the appliance The coffee system must be descaled regularly. The appliance will display a reminder message to descale and will eventually lock if not descaled. The display will show "Please descale the coffee system. Remaining numbers of servings: 50". This message will now appear after each preparation. If the counter has elapsed to 0, the appliance will be locked. Select "Descaling" to start the descaling immediately. The descaling takes about 20 minutes.
Descaling the appliance ^ The display will prompt you through the next steps: – to fill the descaling agent into the water tank – take the water tank out – fill the water tank with fresh lukewarm tap water to the mark k. If not filled to the mark, the descaling will be canceled prematurely and incomplete Dissolve two of the enclosed descaling tablets in the water. Close the water tank and insert into position. ^ Set the descaling funnels under the coffee dispensers.
Frequently asked questions Repairs to electrical appliances should only be carried out by a suitably qualified person in accordance with local and national safety regulations. Repairs and other work by unqualified persons could be dangerous. The manufacturer cannot be held responsible for unauthorized work. Machine Problems The light does not illuminate when the appliance is turned on. – Is the unit locked? – Is the lighting turned off? – See "Settings - Lighting". If not, the light bulb has burnt out.
Frequently asked questions The unit suddenly turns off. – Is the machine programmed to switch off after a programmed time? – The water temperature could be to high. – There could be pebbles within the coffee beans. The unit shuts off after 20 secs. to avoid damages. – Is the machine plugged in? – The machine goes into standby mode when not used for a programmed time. See "Settings - Timer - Turning off after". – The unit is locked until the water has cooled. – Call Miele's Technical Service Department.
Frequently asked questions Preparing / dispensing problems No water, steam or milk is dispensed from the froth dispenser. – The water tank is not correctly inserted. – The dispenser is clogged. – Take out the water tank and reinsert it. – Clean the froth dispenser as described in "Cleaning and Care - Froth dispenser/Intake hose". The grinding sounds louder than usual. There could be pebbles within the coffee beans. Turn off the unit immediately. Contact the Miele's Tech. Service.
Frequently asked questions The steam heating system is turned off but steam can still dispensed. Steam can be dispensed as long as the steam heating system is heated. Once it has cooled, steam can only be dispensed once the steam system has heated. The coffee dispensing is interrupted. The water tank is empty. If the unit is plumbed, check the water line and plumbing. If the unit is used with the water tank, refill the water tank with fresh cold tap water.
Frequently asked questions The machine does not rinse when turned on although the automatic rinse feature is set to "On". When the machine is still at a temperature of about 140°F (60°C). The machine will not rinse when it's too hot. The water dispensing stops when programming the serving size. – There was not enough water in the – Fill the water tank before programming tank (if the unit is not plumbed). the serving size. The dispensed water amount will not be saved.
Frequently asked questions The brew unit or waste unit could not be pulled from the machine. – The brew unit is not in the basic position. – The door was opened during grinding or brewing. – Close the door. The brew unit automatically gets into the basic position. No crema has formed or it is "different". – Check if the grind control is set too – The coffee is not fresh enough. coarse or too fine. – The coffee is unsuitable for use in this – Check what temperature range the machine.
Frequently asked questions "F" messages F 10 or F 17 No water is dispensed. – The water tank is not inserted properly. Take it out and reinsert correctly. – The water tank was not filled correctly during the descaling process. Fill the water tank up to the correct mark. – After fixing the fault, the machine turns off then on again. Start the desired preparation again. – If the message still appears contact Technical Service. F 73 or "Check brew unit" The brew unit is clogged and cannot – Select "Clear".
After sales service In the event of a fault which you cannot easily fix yourself, please contact the Miele Technical Service Department at the contact information on the back of this booklet. When contacting the Technical Service Department, please quote the model and serial number of your appliance given on the data plate inside the appliance.
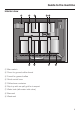
Installation instructions
Caring for the environment Disposal of packing material Disposal of an old appliance The cardboard box and packing materials protect the appliance during shipping. They have been designed to be biodegradable and recyclable. Please recycle. Old appliances may contain materials that can be recycled. Please contact your local recycling authority about the possibility of recycling these materials. Ensure that any plastic wrappings, bags, etc. are disposed of safely and kept out of the reach of children.
Plumbing The machine must be connected to the water supply in accordance with local and national regulations. The water being used should have the drinking water standards of the respective country where the machine is used. – All units and systems used to deliver the water to the coffee system must conform with the requirements of the respective country. – The machine is designed to be plumbed to a cold water connection. Connection to the water supply ^ Disconnect the machine from the electrical supply.
Electrical connection Important Ensure that power is not supplied to the machine while installation or maintenance work is performed. All electrical work should be performed by a qualified electrician in strict accordance with national and local safety regulations. Installation, repairs and other work by unqualified persons could be dangerous. The manufacturer cannot be held responsible for unauthorized work.
Installation Installation options The coffee system is designed to be built into cabinetry. A combination with other Miele built in appliances is possible. If the machine is installed in combination with other appliances, it should be installed with a protective base between the appliance and the unit (exception: installation with a built-in plate warmer). A special display cabinet is also available from your dealer or Miele, as an installation option.
Installation Installation Make sure power is not supplied to the appliance while installation or maintenance work is performed. Disconnect the power supply to the work area by unplugging the unit, tripping the circuit breaker or removing the fuse. The coffee system must be installed into cabinetry before being used. ^ If your cabinet has 3/4" (19 mm) side walls, drill four holes for the mounting. ^ Center the unit and turn the screws a little bit in and then out again.
Installation Adjusting the door hinges The door hinges can be adjusted if the door cannot be opened easily. ^ To adjust the door sideways, a, turn screw a. ^ To adjust the door to the front or back, b, turn screw b.
Alteration rights reserved / 4507 with convertible water connection CVA 4075 For the most updated manual see the Miele web site. M.-Nr.