
Operating and Installation Instructions
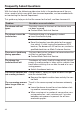

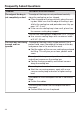
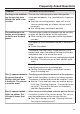
Table Of Contents
- Contents
- IMPORTANT SAFETY INSTRUCTIONS
- Caring for the environment
- Overview
- Cleaning for the first time
- Operation
- Cleaning and care
- Frequently Asked Questions
- Customer Service
- Installation

Frequently Asked Questions
39
Problem Possible cause and solution
The bag is not maintain-
ing the vacuum even
though the weld seam
is intact.
The vacuum-sealing bag has been damaged by
sharp pointed objects, e.g., pointed pasta shapes or
a bone.
Start the vacuuming process again with a new
vacuum-sealing bag, on a lower vacuum level if
necessary.
Use a third-party container if possible.
The weld seam is de-
fective or not properly
sealed in one or more
places.
The sealing bar and/or counterpressure bar are dirty
or there are liquid residues on the sealing bar.
Clean and dry the sealing bar and/or counterpres-
sure bar.
The rubber on the counterpressure bar is not evenly
fitted.
Flatten the rubber.
The edge of the bag is dirty (inside and out). For a
perfect weld seam, the edge of the bag must be dry
and grease-free in the area of the seam.
Fold the edges of the vacuum-sealing bag outward
for filling. This will give you a clean, perfect weld
seam.
The edge of the bag was not positioned smoothly
and without creases on the sealing bar.
Position the bag smoothly and without creases
along the sealing bar.
The sensor control is
lit up even though a
drying cycle has been
carried out. The drawer
cannot be used.
The drying cycle failed to remove all of the moisture
from the oil-circulation system in the vacuum pump.
The drawer is locked and cannot be used for 1hour.
Wait for 1hour and then carry out another drying
cycle (see “Cleaning and care – Carrying out a dry-
ing cycle”). Ensure that the vacuum chamber is
free from liquid residues.
The sensor control
lights up yellow. The
vacuum is lower than
usual.
When vacuum-sealing food, moisture got into the oil-
circulation system in the vacuum pump. This can im-
pair the performance of the vacuum settings.
Carry out a drying cycle (see “Cleaning and care –
Carrying out a drying cycle”).