Operating and Installation instructions Pyrolytic ovens SuperVision H 4681 BP KAT To avoid the risk of accidents or damage to the appliance, it is essential to read these instructions before it is installed and used for the first time. G M.-Nr.
Contents Description of the appliance . . . . . . . . . . . . . . . . . . . . . . . . . . . . . . . . . . . . . . . . . 4 Appliance overview . . . . . . . . . . . . . . . . . . . . . . . . . . . . . . . . . . . . . . . . . . . . . . . . . 4 Control panel . . . . . . . . . . . . . . . . . . . . . . . . . . . . . . . . . . . . . . . . . . . . . . . . . . . . . . 5 Features . . . . . . . . . . . . . . . . . . . . . . . . . . . . . . . . . . . . . . . . . . . . . . . . . . . . . . . . . . 6 Accessories . . . .
Contents Pyrolytic . . . . . . . . . . . . . . . . . . . . . . . . . . . . . . . . . . . . . . . . . . . . . . . . . . . . . . . . . 31 Heating-up phase . . . . . . . . . . . . . . . . . . . . . . . . . . . . . . . . . . . . . . . . . . . . . . . . . 31 Recommended temperatures . . . . . . . . . . . . . . . . . . . . . . . . . . . . . . . . . . . . . . . . 31 Display . . . . . . . . . . . . . . . . . . . . . . . . . . . . . . . . . . . . . . . . . . . . . . . . . . . . . . . . . . 31 Buzzer tones . . . . .
Description of the appliance Appliance overview a Control panel b Door lock for pyrolytic operation, Door contact switch c Heating element for top heat and grilling with roof liner d Air inlet for fan e Connection socket for the roast probe f Grill motor g Side runners with 4 shelf levels h Oven door 4
Description of the appliance Control panel a Sensors for selecting menu options in the display b Context sensitive numerical key pad c ON/OFF s sensor d Display e Minute minder l sensor f + C (Clear) sensor See "Controls" for more details.
Description of the appliance Features Electronic controls In addition to operating the various cooking programmes to bake, roast and grill the electronic controls also offer the following features: – Clock display – Minute minder – Timer to automatically switch cooking programmes off, or on and off with automatic use made of residual heat – User programmes – Automatic programmes – Settings can be customised. Safety features You can activate a system lock, to prevent the appliance being used unintentionally.
Description of the appliance PerfectClean treated surfaces Door buffer The following surfaces are all treated with PerfectClean enamelling: – Runners – Baking tray – Grill pan – Rack PerfectClean enamelled surfaces have very good anti-stick properties and are much easier to keep clean than conventional enamel, if cleaned regularly. See "Cleaning and care" for more information. There is a door buffer above the right hand door hinge. This cushions the door just before it shuts completely.
Description of the appliance Baking tray, grill pan and rack The baking tray, grill pan and rack are fitted with non-tip safety notches which prevent them being pulled right out when they only need to be partially pulled out. The droplets of fat caught up in the circulating air are deposited on the roasting filter. This helps to keep the oven and the area behind the interior back panel cleaner. Do not use the roasting filter when baking.
Description of the appliance The rotisserie fits into the grill pan for grilling or roasting. The grill pan goes into the first runner level and this automatically engages the rotisserie. The grill motor will then start up and turn the rotisserie. Food is grilled evenly on all sides as it rotates. the oven dirty. The juices can then be used for making gravy and sauces. Handle (depending on model) Instructions on how to use it are given in the separate booklet supplied with this oven.
Caring for the environment Disposal of the packing material The transport and protective packing has been selected from materials which are environmentally friendly for disposal and can normally be recycled. Ensure that any plastic wrappings, bags etc. are disposed of safely and kept out of the reach of babies and young children.
Warning and Safety instructions This appliance complies with all relevant legal safety requirements. Improper use of the appliance can, however, present a risk of both personal injury and material damage. To avoid the risk of accidents and damage to the appliance, please read these operating instructions carefully before installation and before using it for the first time. They contain important notes on installation, safety, operation and care of the appliance.
Warning and Safety instructions Installation, maintenance and repair work may only be carried out by a suitably qualified and competent person in accordance with national and local safety regulations. Repairs and other work by unqualified persons could be dangerous. The manufacturer cannot be held liable for unauthorised work. If the supply cord is damaged, it must be replaced by a Miele approved service technician in order avoid a hazard.
Warning and Safety instructions Use oven gloves when placing food in the oven, turning or removing it. When working with "Conventional" heating or when grilling, the element in the roof of the oven and the roof liner become very hot, and there is a danger of being burnt. The oven door gets much hotter during pyrolytic operation than during normal use. Make sure children cannot touch the oven whilst a pyrolytic programme is running. Danger of burning.
Warning and Safety instructions If you wish to leave food in the oven after cooking, e.g. to take advantage of the residual heat, do not turn the oven off. Simply select the lowest temperature and leave the function at the position set. Do not switch the appliance off until the food has been removed. Otherwise, moisture in the oven could lead to condensation forming on the control panel and surrounding kitchen furniture and drops of moisture collecting under the worktop.
Warning and Safety instructions Always ensure that food is sufficiently cooked or reheated. Many factors will affect the overall cooking time, including the size and amount of food, its temperature, changes to the recipe and the shape and size of cooking container. Some foods may contain micro organisms which are only destroyed by thorough cooking at temperatures over 70°C for a minimum of 10 minutes. Therefore when cooking or reheating foods, e.g.
Controls Sensors Display The electronic sensors around the display react to touch. ß The dot symbol appears next to an option or a command such as "Continue". You can select the entry by touching the sensor beside the dot. The display shows a maximum of three options. An audible tone will sound each time a sensor is pressed. You can deactivate this, if wished (see "Changing oven settings - Buzzer tones") C These sensors are used to call up options marked with a dot ß in the display.
Controls K Pressing this sensor calls up additional information about the option selected. Select "OK" to close the information screen. When the oven is switched off the display will either remain dark or show the time of day, if this has been set to appear.
Before using for the first time The oven will switch on automatically when it is connected to the electricity supply. A welcome screen will appear in the display and you will then be requested to select some basic settings which are needed to set up the appliance up for using for the first time. Follow the instructions in the display. The welcome screen will be replaced by the Language request menu. ^ Keep pressing the sensor to the right of the arrows until the language you want appears in the display.
Before using for the first time Cleaning and heating up for the first time Before use, please remove - any stickers from the floor of the oven, baking trays, grill pan etc. - the protective cork discs from the sides of the oven. - any protective foil from the oven front. See "Cleaning and care" for more information. Before using the oven for the first time – take all accessories out of the oven and wash them. – then heat the oven up once with nothing in it.
To set the minute minder The minute minder can be used to time any activity in the kitchen, e.g. boiling eggs. You can enter a time up to a maximum of 59 minutes. You can set the minute minder at the same time as another timed programme, e.g. as a reminder to stir a dish or add seasoning etc. ^ Touch the l sensor. ^ Use + or the numerical keypad to enter the minute minder time. ^ Confirm with "OK". You will then see the minute minder time counting down in the display.
Description of the oven systems Your oven has three heating elements: Fan plus – The ring heating element is located with the fan behind the back panel. This system works by the circulation of heated air, created by the ring heating element and the fan. The fan in the back wall of the oven draws in air from the oven cavity, heats it over the ring element and blows it back into the oven cavity through the openings around the edges of the back panel.
Description of the oven systems Auto roast Conventional heat In this system, the heat is created by the ring heating element and the fan. The oven heats initially to a high temperature (230 °C) which seals the meat to keep it succulent and tasty. As soon as this temperature has been reached, the oven temperature automatically drops back down to the pre-selected setting. Both the top and bottom heating elements are switched on. Radiant heat is directed onto the food from above and below.
Description of the oven systems Economy grill Gentle bake Pre-heat the grill for at least 5 minutes with the oven door closed before grilling. The inner part of the top heating element acts as the grill. This will glow red for a few minutes after being switched on, and it is then ready for use. Gentle bake uses the ring heating element and the fan. For grilling small quantities of flat items, e.g. fish and cuts of meat such as chops, steaks and kebabs and for browning small dishes, e.g. macaroni cheese.
Using the oven Selecting an oven function Selecting a temperature ^ Switch the oven on. As soon as you have called up a function, the recommended temperature will appear in the display. ^ Select the function required. After selecting an oven function, options which can be entered or changed for the cooking process will appear in the display, e.g.: ß Temperature ß Duration ß Start time ß Finish ß Heating-up phase ß Change function ß Save Save will only appear if you have entered a duration.
Using the oven Changing the heating-up phase The "Heating-up phase" option will appear with the Fan plus, Auto roast and Conventional functions. A rapid heat-up phase is set as standard for these functions. The top and ring heating elements will come on together with the fan during the heating-up phase to enable the oven to reach the required temperature as quickly as possible.
Using the oven Entering duration, start time or finish By entering the duration, start time or finish time, the cooking process can be programmed to switch off, or on and off automatically. ß Duration Enter the cooking duration you require. Once the duration set has elapsed, the oven will switch itself off automatically. The maximum duration which can be set is 12 hours. ß Start time ß Finish You can set the Start time and Finish to specifiy when you want cooking to start or finish.
Using the oven Change function User programmes You can change the function selected via this option. Up to 30 frequently used recipes can be saved under a user-defined name. This can be done in one of 3 ways: The times already entered will be kept.
Using the oven To create a User programme via the "User programme" menu ^ Select the "User programme" menu. ^ Select "Create", then select and confirm the cooking function you want. ^ Alter and confirm the pre-set recommended temperature if required. ^ Select a duration, or a core temperature if using the roast probe, and confirm. ^ Check the settings and confirm them with "Continue".
Changing settings You can change the standard default settings as follows: Time of day ^ Switch the oven on. Display ^ Call up the "Settings J" menu. If you select "On", the time of day will be displayed all the time. ^ Call up the sub-menu you require. Currently selected settings are indicated by a tick L next to them. If you do not make a selection in the sub-menu within approx. 20 seconds, the display will revert to the "Settings J" menu.
Changing settings Light The oven interior lighting can be set so that it goes out 15 seconds after a cooking programme has started, or so that it stays on throughout cooking. – "Factory default" the settings the oven was supplied with will be re-instated. Cooling fan run-on If this option has been set, the lighting can be switched back on for a further 15 seconds by pressing one of the sensors next to the display.
Changing settings Pyrolytic Recommended temperatures A message will appear in the display after a certain length of time to remind you to run a pyrolytic cleaning programme. You can disable this message if you do not wish to be reminded. Confirm the option "No reminder". If you frequently change a recommended temperature it may be a good idea to change it permanently.
Changing settings Activating the system lock $ Factory default setting ^ Call up the "Safety" sub-menu. If you select ^ Select "System lock $" and confirm "On". – "All settings" any settings that you have altered will be reset to the factory default setting. ^ Switch off the oven. Using the system lock: ^ Call up the ) symbol and confirm "on". The $ symbol indicates that the lock has been activated. The minute minder can still be used whilst the lock is on.
Cleaning and care In the UK, Miele branded cleaning and conditioning products as well as a microfibre E-cloth, which is suitable for cleaning surfaces such as stainless steel, glass, plastic and chrome without the use of chemicals, are available from the Miele Spare Parts Dept. or via the Internet (depending on country). Glass surfaces Glass surfaces are susceptible to scratches and abrasions. Avoid: – abrasive cleaning agents, e.g. powder cleaners and cream cleaners, Clean the – abrasive sponges, e.g.
Cleaning and care Stainless steel fronted appliances Aluminium fronted appliances Stainless steel surfaces are susceptible to scratches and abrasion. Aluminium is affected by the way that light falls on it, by the surrounding environment and by the angle you observe it from. Stainless steel surfaces can be cleaned using a Miele E-Cloth or with a proprietary non-abrasive cleaning agent designed specifically for use on stainless steel.
Cleaning and care Accessories Remove all accessories as well as the runners and any extra accessories such as, for example, the baking carriage, or telescopic runners from the oven interior before starting the pyrolytic cleaning process. The high temperatures needed for pyrolysis will damage the accessories and cause irreparable damage to the baking carriage and telescopic runners.
Cleaning and care PerfectClean Before using for the first time remove any stickers from PerfectClean surfaces. The enamelled surfaces of the baking tray, grill pan, anti-splash tray (if fitted), rack and runners have been treated with a special type of enamelling called "PerfectClean". This surface has very good anti-stick properties which is much easier to keep clean than conventional oven enamel, if cleaned regularly.
Cleaning and care Apply a spray oven cleaner to the soiled areas. Leave to take effect for a couple of minutes only! If necessary use a soft sponge, soft nylon brush or a scraper suitable for glass surfaces to loosen the soiling. Repeat the process if necessary. After cleaning rinse thoroughly with clean water and then dry thoroughly. Important For optimum performance of the PerfectClean enamel it is important to clean the oven and accessories after each use.
Cleaning and care Oven interior The oven interior, back panel and roof liner are coated with dark pyrolytic enamel which facilitates cleaning. This is a particularly hard enamel with an extremely smooth surface. Because of its anti-stick properties most debris can be easily removed with warm water and a little washing-up liquid applied with a soft cloth. This should be done after each use. Allow the oven to cool down before cleaning.
Cleaning and care During the pyrolytic process the oven is heated to approx. 460 °C . Any residual soiling is burnt off by the high temperatures. Starting a pyrolytic process The pyrolytic programme duration will vary depending on the level of soiling. ^ Start the pyrolytic cleaning process. For safety reasons the oven door is automatically locked at the beginning of the pyrolytic programme.
Cleaning and care After the pyrolytic process any debris (e.g, ash), can easily be wiped away. Remember to wait until the oven has cooled down before doing so! Danger of burning. Try not to wipe the fibre-glass seal when cleaning the oven cavity. It is particularly sensitive and should not be cleaned unless absolutely necessary. Rubbing it can damage it. Most residues are easily wiped away with a damp cloth.
Cleaning and care To remove the oven door Please note: the oven door is heavy and should be gripped firmly at both sides when being removed or refitted. The oven door is connected to the oven by hinges. ^ Then lift the door upwards as far as it will go. Do not attempt to take the door off the hinge guides when it is in a horizontal position. The guides will close, and damage the appliance. Danger of injury. Before removing the door, the locking clamps on both hinges have to be released.
Cleaning and care To dismantle the oven door In the rare event that condensate has worked its way in between the glass panes, the door can be dismantled in order to clean in between the panes. Do not use scouring agents, hard sponges or brushes or sharp metal tools to clean glass as these can scratch the surface. Do not use an oven spray. This would damage the surface of the aluminium surrounds. ^ Always remove the oven door before dismantling it. ^ Place the door on a protective surface (e.g.
Cleaning and care ^ Then carefully lift the middle panes up and out. ^ The individual panes can then be cleaned. Handle them very carefully to avoid the risk of breakage. ^ Replace the first of the middle panes. Make sure the cut-off corner is positioned at the top right hand side. When putting the door back together again replace the middle panes first. These panes are identical and both have a corner missing.
Cleaning and care To refit the door ^ Finally replace the black printed inner pane. The print should face the middle pane. ^ Hold the door securely at both sides and carefully fit it back onto the hinge guides. Make sure that the door goes back on straight. ^ Lift the upper of the two middle panes up a little and refit the spacers to the panes. Then re-position them back next to the hinge guides.
Cleaning and care ^ Open the door fully. To remove the runners Make sure the oven heating elements are switched off and cool. Danger of burning. ^ Flip both locking clamps back up to lock them. Turn them as far as they will go into a horizontal position. Make sure that the notches on the locking clamps hook into the slots on the door as illustrated. ^ Pull on the fixing knob to release it. It is essential that the locking clamps lock securely when the door is re-fitted after cleaning.
Problem solving guide Installation, maintenance and repairs may only be carried out by suitably qualified and competent persons in accordance with local and national safety regulations. Repairs and other work by unqualified persons could be dangerous, and the manufacturer will not be held liable for unauthorised work. ^ Cover the floor of the oven with a towel to protect the enamelling just in case the lamp cover is dropped.
Problem solving guide ^ Pull the glass cover out of the rear metal brackets. ^ Pull the defective halogen lamp out. When purchasing a new lamp it is a good idea to take the old one with you to make sure you get the correct replacement (12 V, 20 W, heat resistant to 300 °C, G4 fitting, Osram, Type 64428). ^ Push the glass cover back into the metal brackets with the cut out edge towards the rear.
Problem solving guide . . . no noise is heard when the oven door is opened during operation. . . . cakes or biscuits are unevenly browned. This is not a fault. If the door is opened during operation, the door contact switch causes the oven heating, and the fan if on "Fan" setting, to be switched off. There will always be a slight unevenness. . . . a noise can be heard after baking, roasting or grilling. This is not a fault.
Problem solving guide . . . a fault message appears in the display Faults which you can rectify yourself, are indicated by the following message "Please read notes in the operating instruction booklet". Fault 23 The pyrolytic temperature of approx. 460 °C was not reached. This could have been caused by too much soiling in the oven to start with. Remove all coarse soiling before starting the pyrolytic cleaning programme again. If the fault message appears again please contact the Miele Service Department.
After sales service In the event of any faults which you cannot remedy yourself, please contact – your Miele Dealer or – the Miele Service Department (see back cover for contact details). When contacting your Dealer or the Service Department, please quote the model and serial number of your appliance. These are shown on the data plate, visible below the oven interior, with the door fully open. Please note that telephone calls may be monitored and recorded for training purposes.
Extra accessories The following accessories may come are standard with some models. They following accessories are available at extra cost from your Miele Dealer, the Miele Spare Parts Department or via the Internet (depending on country). Telescopic runners Telescopic baking carriage The telescopic runners provide three shelf levels. Each shelf level can be drawn right out of the oven individually to give a good overview of cooking in progress.
Extra accessories Baking stone It is available in two sizes: HUB 61-22, 8 - 10 servings, W x D x H: 38 x 22 x 8.6 cm HUB 61-35, 16 - 20 servings, W x D x H: 38 x 35 x 8.6 cm A lid is available separately. The baking stone is ideal for items which need a well baked base such as pizza, quiche, bread, bread rolls and savoury snacks. Miele|home The baking stone is made from heat retaining fire brick and is glazed. Place it directly on the rack.
Electrical connection UK, IRL, ZA All electrical work should be undertaken by a suitably qualified and competent person in strict accordance with current national and local safety regulations (BS 7671 in the UK). Installation, repairs and other work by unqualified persons could be dangerous. The manufacturer cannot be held liable for unauthorised work. Ensure power is not supplied to the appliance until after installation or repair work has been carried out.
Electrical connection UK, IRL, ZA IRL ZA The voltage and rated load are given on the data plate, visible when the oven door is open. Please ensure that these match the household mains supply. Data relating to electrical connection will be found on the data plate, visible when the oven door is open. Make sure that these figures comply with the main voltage. Connection should be made via a suitable isolator which complies with national and local regulations.
Electrical connection AUS, NZ AUS: All electrical work should be undertaken by a competent person in strict accordance with national and local safety regulations. The wall oven is suitable for connection to an a.c. single phase 240 V, 50 Hz electricity supply. The fuse rating is 16 A. The voltage and rated load are given on the data plate, visible when the oven door is open. Please ensure that these match the household mains supply.
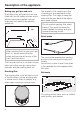
Installing the oven To ensure adequate ventilation to the oven once installed: - provide a ventilation cut-out in the housing unit as illustrated. - do not fit a rear panel into the housing unit. - do not fit insulation material inside the housing unit. Turn off the mains electricity supply to the isolator. ^ Connect the mains cable from the oven to the isolator. ^ Push the oven into the furniture housing unit as far as the oven trim, and align it.
Miele{home SuperVision You can sign a maximum of 11 appliances on to the system. These can include: – – – – up to three washing machines, up to three tumble dryers, up to two dishwashers, up to three refrigeration and/or freezing appliances. If several appliances of the same type are signed on, these will appear with a number beside them in ascending order, e.g. washing machine 1, washing machine 2. SuperVision display All signed on appliances will appear in the display.
Miele{home SuperVision Settings You can select and alter the following sub-menus in the "Settings J Miele{home" menu: The Miele{home option will only appear if your appliance is fitted with Communication module XKM 2000 SV and has been signed on to the Miele|home with SuperVision system. Display options – Display all the time The SuperVision display will appear automatically. – Only display when there is a fault Only faults on the signed on appliances will be shown in the display.
Miele{home SuperVision Problem solving guide Problem Possible cause Remedy The appliance has not been signed on. ^ Repeat the signing on procedure on the SuperVision oven and on the appliance, see "Signing on additional appliances" in the "Miele@home" installation book. There was a problem when setting up the SuperVision oven. ^ Select the "Search for appliances" function on the master appliance. A communication enabled appliance does not appear in the list of signed on appliances.
Alteration rights reserved / 22 / 1607 (H 4681 BP KAT) M.-Nr.