
Operating and Installation instructions
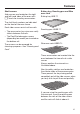

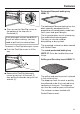
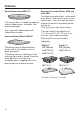
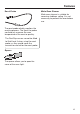
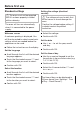
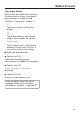
Table Of Contents
- Contents
- IMPORTANT SAFETY INSTRUCTIONS
- Guide to the oven
- Control panel
- Features
- Model numbers
- Data plate
- Items included
- Standard and optional accessories
- Shelf runners
- Baking tray, Roasting pan and Wire oven rack
- FlexiClip telescopic runners HFC 72
- Installing and removing the FlexiClip telescopic runners
- Perforated Gourmet baking tray HBBL 71
- Grilling and Roasting insert HGBB 71
- Round baking form HBF 27-1
- Gourmet Baking Stone HBS 60
- Gourmet Casserole Dishes HUB and Lids HBD
- Roast Probe
- Opener
- Miele Oven Cleaner
- Oven controls
- Oven safety features
- PerfectClean surfaces
- Self Clean ready accessories
- Before first use
- Settings
- Timer
- Guide to the modes
- Operating the oven
- Additional functions
- MasterChef
- Favorites
- Bake
- Roast
- Slow Roasting
- Broil
- Special Modes
- Cleaning and care
- Frequently Asked Questions
- Technical Service
- Caring for the environment
- Electrical connection
- Installation diagrams
- Installing the oven

Before first use
28
Standard settings
The oven must not be operated
until it has been properly installed
within cabinetry.
The oven will turn on automatically
when it is connected to the power
supply.
Welcome screen
A welcome greeting is displayed. You
will then be asked to select some basic
settings which are needed before the
appliance can be used.
Follow the instructions on the display.
Set the language
Scroll through the list until the desired
language appears.
Touch the illuminated sensor next
t
o the language you want to select.
Confirm with OK.
Select the location
Scroll through the list until the desired
location appears.
Touch the illuminated sensor next
to the location you want to select.
Confirm with OK.
Setting the voltage (electrical
version)
The voltage set must match that
of the house as to not damage the
oven.
Confirm the voltage before setting. If
in doubt contact a qualified
technician.
Select the voltage.
Confirm with OK.
Set the date
Use or to set the year, month
and day.
Confirm with OK.
Set the time of day
Use the numerical keypad to set the
time of day in hours and minutes (e.g.
1-2-1-5 for 12:15).
Confirm with OK.
Select the lit sensor button next
to am or pm.
Confirm with OK.
The time of day can be displayed in
24-hour format (see “Settings - Time
of Day - Clock Format”).