
Operating and Installation instructions
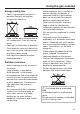
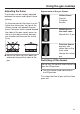
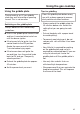
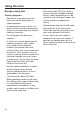
Table Of Contents
- Contents
- IMPORTANT SAFETY INSTRUCTIONS
- Guide to the range
- Controls for the range
- Features
- Data plate
- Scope of delivery
- Standard and optional accessories
- Side racks
- Universal tray and Wire Rack with anti-tip safety notches
- FlexiClips with Wire Rack HFCBBR 36-3
- Installing and removing the FlexiClips with Wire Rack
- Temperature selector with °C scale
- Replacing the temperature selector
- Round baking pans
- Perforated Gourmet Baking Tray HBBL 71
- Broiling and roasting insert HGBB 30-1
- HUB Gourmet Casserole Dishes HBD Gourmet Casserole Dish lids
- Accessories for cleaning and care
- Gas cooktop safety features
- Oven safety features
- PerfectClean treated surfaces
- Self-Clean-ready accessories
- Before first use
- Using the gas cooktop
- Using the oven
- Overview of operating modes
- Energy-saving tips
- Simple operation
- Preheating
- Operating the clock/timer
- Switching cooking programs on and off automatically
- Setting the cooking duration
- Setting a cooking duration and a finish time
- First set the cooking duration:
- Then set the finish time:
- At the end of the cooking duration:
- Changing the cooking duration
- Deleting a cooking duration
- Deleting a finish time
- Changing the time of day
- Changing factory default settings
- Settings overview
- Switching the system lock on and off
- Activating the system lock
- Deactivating the system lock for a cooking process
- Deactivating the system lock
- Using the timer
- Setting the timer
- Changing the timer
- Deleting the timer
- Baking
- Roasting
- Broiling
- Further applications
- Gas cooktop cleaning and care
- Cleaning and care of the oven
- Frequently Asked Questions
- Customer Service
- Caring for the environment

Using the gas cooktop
44
Using the grill
Switching on the grill
Always observe USDA food safety
guidelines.
Push in the grill control knob and turn
it counterclockwise to High until the
burner ignites.
If the burner fails to ignite, turn the
control knob to the Off position.
Aerate the room or wait at least
1minute before trying again.
If the burner does not ignite the
second time, turn the control knob
back to Off and see “Frequently
asked questions”.
Preheat the grill for approx.
10minutes.
Set the power level you want.
Do not use cooking utensils on the
grill.
Tips for grilling
Risk of fire!
Do not leave the appliance
unattended while cooking.
- Always preheat the grill for
10minutes before use. Select the
setting that you are going to cook
with.
- Pat wet food dry with a paper towel
to avoid spitting when grilling.
- To prevent meat drying out, do not
season with salt until after it has been
grilled.
- Select lean meat or cut the fat off
prior to grilling. Drops of fat can
ignite.
- If drops of fat ignite, use long
barbecue tongs to immediately move
the food to another area of the grill or
remove it completely.
- Remove the skin from chicken
breasts and thighs to minimize flare-
ups.
- Cover the food with the marinade
halfway through grilling.
- Leave the grill on for approx.
10minutes after you have finished
grilling. This will make the grill easier
to clean once it has cooled down.
The grill is heated by means of a
ceramic burner which transfers intense
heat to the food. Searing helps to keep
juices in the meat. The temperature of
the grill can be variably adjusted
between the lowest and highest flame
settings.
The grill and griddle plate will be
switched off as soon as you start the
Self Clean program on the oven.
The grill and griddle plate cannot be
turned on during Self Clean.