
Operating and Installation Guide

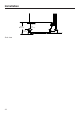
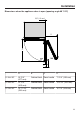
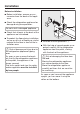
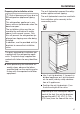
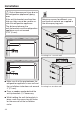
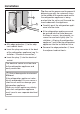
Table Of Contents
- Contents
- IMPORTANT SAFETY INSTRUCTIONS
- Caring for the environment
- Installation
- Installation location
- Installation notes
- Installation dimensions
- Building in the appliance
- Before starting...
- Tools required
- Aligning the installation niche
- Checking the installation niche
- Before installation
- Preparing the installation niche
- Pushing the appliance into the niche
- Aligning the refrigeration appliance
- Securing the appliance in the niche
- Securing the toe-kick board and cover
- Aligning the appliance door
- Limiting the opening angle of the appliance door
- Electrical connection
- Saving energy
- Guide to the appliance
- Accessories
- Before first use
- Switching on and off
- Selecting additional settings
- The correct temperature
- Using Automatic SuperCool
- Door alarm
- Adjusting the interior fittings
- Storing food in the refrigerator section
- Storing food in the MasterFresh zone
- Automatic defrosting
- Cleaning and care
- Frequently Asked Questions
- Causes of noises
- Customer Service
- Declaration of conformity
- Copyrights and licenses

Installation
*INSTALLATION*
29
2
Securing with a wooden wedge
Secure the installation niche to the
wall behind it and/or above it as re-
quired using the anti-tip brackets.
Pushing the appliance into the niche
Then push the appliance into the
niche, taking care not to damage the
electrical connection!
If you are installing several refrigera-
tion appliances side by side, now se-
cure the appliances to one another
(see the installation instructions for the
side-by-side installation kit).
To ensure that the refrigeration appli-
ance can then be aligned correctly,
the toe-kick ventilation grille must be
removed from the appliance toe kick:
Carefully guide a flat-head screw-
driver through the toe-kick ventilation
grille on both sides and use it to
push the internal plastic latches out-
wards to release the toe-kick ventila-
tion grille.
Place the toe-kick ventilation grille to
one side.