
Operating and Installation Instructions


Table Of Contents
- Contents
- IMPORTANT SAFETY INSTRUCTIONS 4
- Guide to the Fridge-Freezer combination 7
- Before use 9
- Settings 10
- Temperature and door alarm 13
- Setting the temperature 14
- SmartFresh drawers 16
- Using the refrigerator efficiently 18
- Using the freezer efficiently 19
- SuperCool 21
- Ice cube maker 22
- Automatic defrost 23
- Adjusting the interior fittings 24
- Cleaning and care 28
- Water filter 33
- Lead free certificate 38
- Frequently asked questions 39
- After sales service 47
- Caring for the environment 50
- Installation 51
- Dimensions 56
- Installing the appliance 59
- Plumbing 77
- Electrical connection 80
- RemoteVision (optional accessory) 81
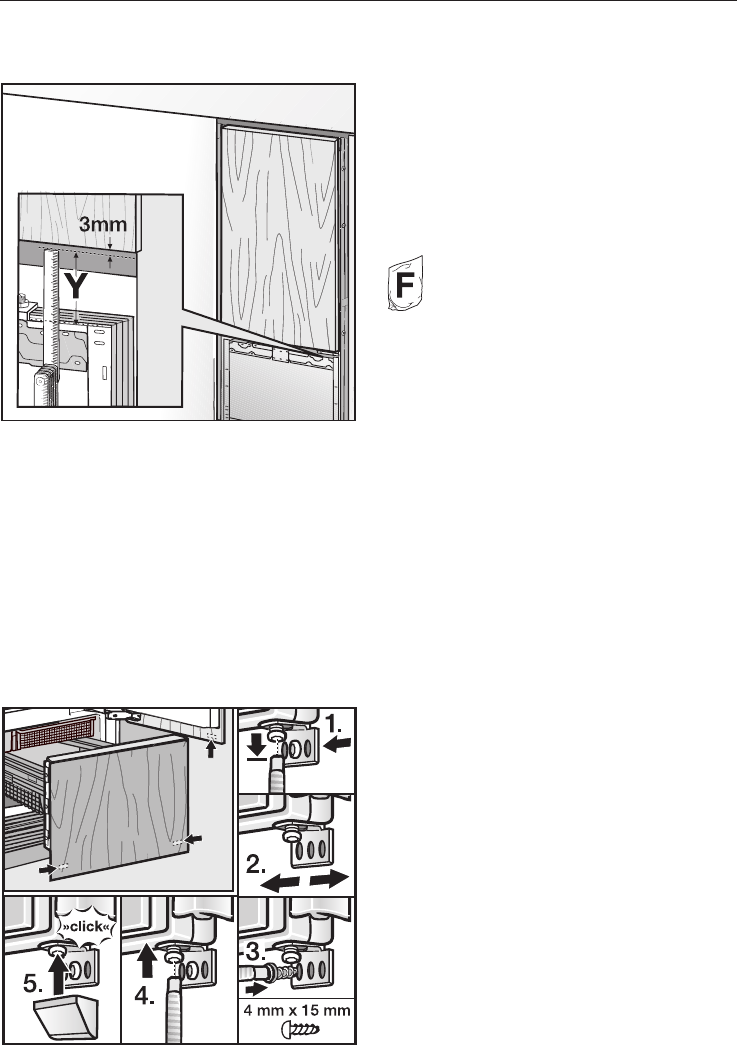
Note the size of the upper custom door
front:
^ Measure the distance Y between the
adjusting rail from the lower door and
the upper door.
^ Be sure to leave a distance of 1/8"
(3 mm) from the upper cabinetry
door.
Attaching the lower bracket
(Only for appliances using the "Front
panel gap kit".)
The fixing brackets are used to secure
the custom door front to the bottom of
the appliance door.
^
Open the appliance door all the way.
^
Slightly loosen the screw (1.).
^
Position the fixing bracket on the
appliance door (2.) and pre-drill a
hole in the custom door front.
^
Screw the fixing bracket securely to
the custom door front (3.).
^ Tighten the screw (4.).
^ Put the cover on the bracket (5.).
The number of lower brackets will
depend on the width and the design of
the custom door.
Installing the appliance
73