
Operating and Installation Instructions
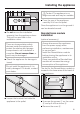
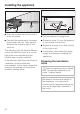
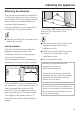
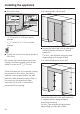
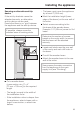
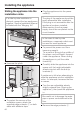
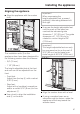
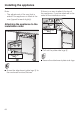
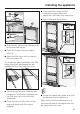
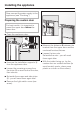
Table Of Contents
- Contents
- IMPORTANT SAFETY INSTRUCTIONS 4
- Guide to the Fridge-Freezer combination 7
- Before use 9
- Settings 10
- Temperature and door alarm 13
- Setting the temperature 14
- SmartFresh drawers 16
- Using the refrigerator efficiently 18
- Using the freezer efficiently 19
- SuperCool 21
- Ice cube maker 22
- Automatic defrost 23
- Adjusting the interior fittings 24
- Cleaning and care 28
- Water filter 33
- Lead free certificate 38
- Frequently asked questions 39
- After sales service 47
- Caring for the environment 50
- Installation 51
- Dimensions 56
- Installing the appliance 59
- Plumbing 77
- Electrical connection 80
- RemoteVision (optional accessory) 81
Securing an alternative anti-tip
device
If the anti-tip brackets cannot be
attached securely, an alternative
anti-tip device can be used.
Ensure that there is no "give" between
the appliance and the anti-tip device.
If possible, always screw the
wooden beam to existing studs.
^
Cut a wooden beam
(cross section min. 3" x 4"
[75 mm x 100 mm]) to the required
length.
–
The length is equal to the width of
the installation niche.
–
If the installation niche is deeper than
the appliance, select a beam with a
larger cross section, or attach two
beams.
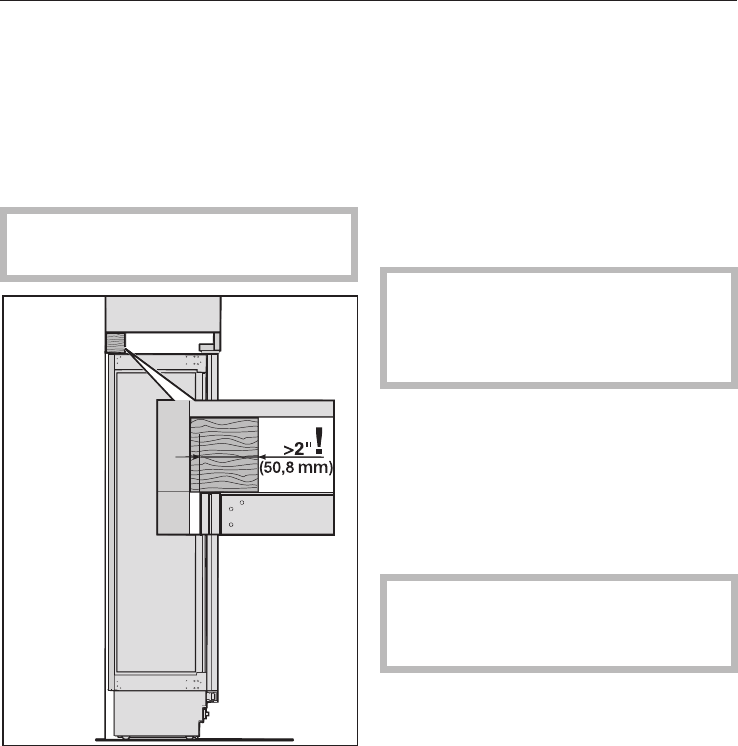
–
The beam must cover the appliance
by at least 2" (50.8 mm).
^
Mark the installation height (lower
edge of the beam) on the rear wall of
the niche.
^
Select screws according to the
thickness of the wooden beam.
Example: 3 ½" (89 mm) screw for 2x4
beam.
Determine the number of screws
based on the cavity width, to ensure
that the beam will be attached
securely.
^ Locate wall studs near the rear wall
of the cavity and mark drill holes in
the beam.
^ Pre-drill the wooden beam.
^ Attach the wooden beam to the rear
wall of the niche.
Now prepare the water connection
from the appliance to the main
supply line (see "Plumbing").
Installing the appliance
65