
Operating and Installation Instructions
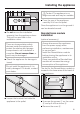
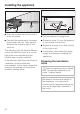
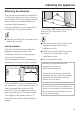
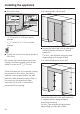
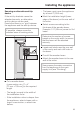
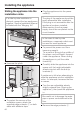
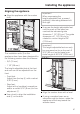
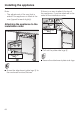
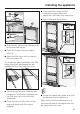
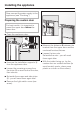
Table Of Contents
- Contents
- IMPORTANT SAFETY INSTRUCTIONS 4
- Guide to the Fridge-Freezer combination 7
- Before use 9
- Settings 10
- Temperature and door alarm 13
- Setting the temperature 14
- SmartFresh drawers 16
- Using the refrigerator efficiently 18
- Using the freezer efficiently 19
- SuperCool 21
- Ice cube maker 22
- Automatic defrost 23
- Adjusting the interior fittings 24
- Cleaning and care 28
- Water filter 33
- Lead free certificate 38
- Frequently asked questions 39
- After sales service 47
- Caring for the environment 50
- Installation 51
- Dimensions 56
- Installing the appliance 59
- Plumbing 77
- Electrical connection 80
- RemoteVision (optional accessory) 81
Now connect the water supply to the
appliance (see "Plumbing").
Preparing the custom door
For best results, it is important to
mount the upper door before the
lower door.
^
Open the appliance door.
^ Unscrew the installation supports n
from the appliance door.
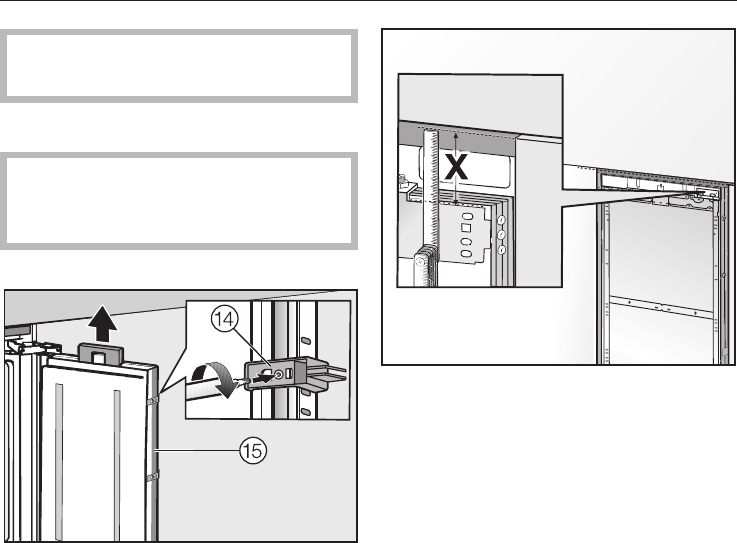
^
Loosen the remaining screws from
the strips o on each side of the door,
then remove.
^
Set aside the screws and side strips
o - you will need them again later.
^
Remove the light switch cover (see
arrow).
^ Measure the distance X between the
bracket from the upper door and the
overhead furniture/fixtures.
^ Loosen the two nuts.
Set aside the nuts - you will need
them again later.
^ With the inside facing up, lay the
custom door on a stable surface (to
avoid scratch marks, place some
plastic or a cloth on the surface).
Installing the appliance
70