Operating Instructions H 247 B oven H 247 ET cooker It is essential to read these operating instructions before installing or using the machine, to avoid the risk of accident or damage to the machine. Q\} M.-Nr.
Contents Description of the appliance . . . . . . . . . . . . . . . . . . . . . . . . . . . . . . . . . . . . . . . . . 4 Caring for the environment . . . . . . . . . . . . . . . . . . . . . . . . . . . . . . . . . . . . . . . . . . 6 Warning and Safety instructions . . . . . . . . . . . . . . . . . . . . . . . . . . . . . . . . . . . . . 7 Safety features . . . . . . . . . . . . . . . . . . . . . . . . . . . . . . . . . . . . . . . . . . . . . . . . . . . 11 Before using for the first time. . . . . . . . .
Description of the appliance H 247 ET Control panel Oven interior b Oven function selector and g Heating element for top heat function setting display c Display and pushbuttons - oven d Display and pushbuttons - timer e – /+ Button with indicator light f Hob zone controls (not applicable to “B” oven models) and grilling with guard plate h Grill motor i Halogen lamp change slide j Connection socket for core temperature probe (roast probe) k Air inlet for fan l Baking carriage with runner heights 1, 2
Description of the appliance Please note Accessories The illustration on the previous page shows the control panel of the H 247 ET. The H 247 B has no controls f for a hob. – 2 baking trays For “B” model ovens, only the instructions in this book relating to ovens are applicable. The instructions for hobs relate to “E” model ovens with hob controls, or to the hob of a free-standing cooker.
Caring for the environment Disposal of the packing material The transport and protective packing has been selected from materials which are environmentally friendly for disposal and can normally be recycled. Rather than just throwing these materials away, please ensure they are offered for recycling. 6 Disposal of your old machine Old machines contain materials which can be reclaimed or recycled.
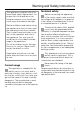
Warning and Safety instructions This appliance complies with all relevant legal safety requirements. Improper use of the appliance can, however, present a risk of both personal injury and material damage. Before installation and before using the appliance for the first time, read the operating instructions carefully. They contain important notes on safety, on the operation and care of the appliance. This way you will avoid the risk of accidents and damage to the appliance.
Warning and Safety instructions Installation work and repairs may only be carried out by suitably qualified and competent persons to ensure safety. Repairs and other work by unqualified persons could be dangerous. The appliance is only completely isolated from the electricity supply when: – it is switched off at the wall socket – or the mains fuse is withdrawn – or the screw-out fuse is removed (in countries where this is applicable). Do not pull on the lead to remove the plug from the socket.
Warning and Safety instructions Do not use plastic containers. They may melt at high temperatures. Do not push pots and pans around on the oven floor as this could damage the surface. Do not lean or sit on the open oven door, or place heavy items on it. This could damage the appliance. Take care in the region of the hinges. The oven door can support a maximum load of 10 kg. Cover any food which is left in the oven to be kept hot. This avoids the food drying out.
Warning and Safety instructions It is important that the heat is allowed to spread evenly throughout the food being cooked. This can be achieved by stirring and/or turning the food, and by observing a sufficiently long standing time, which should be added to the time needed for cooking, reheating or defrosting.
Safety features Operating lock for oven and hob cooking zones The operating lock can be activated to prevent the oven or hob being switched on unintentionally, by children for example. The operating lock is activated as follows: The oven function selector must be at the “0" setting. Press the “p” button until the key symbol appears in the display field. The oven (and cooking zones if applicable) can now not be switched on. To cancel the operating lock: Turn the oven function selector to any oven function.
Before using for the first time Timer Oven After the appliance has been switched on “12:00" and the symbols ”f“ and ”)“ flash in the display. Wipe out the oven interior using warm water and a little washing up liquid. Polish dry with a dry cloth. Setting the time of day (24 hour display) Do not close the oven door until the oven interior is dry. Rinse the accessories. Depending on the model fit the side rails or the telescopic carriage. Press the buttons “f” and “)” at the same time.
Before using for the first time Telescopic carriage New appliances have a slight smell on first use. Running the oven for at least an hour at a high temperature will dissipate this more quickly. Turn the oven function selector to “Fan Heat D”. Select the highest temperature with the “ - /+” button. The timer can also be used to set the finish time. Fit the guide rails in the oven. Ensure the room is well ventilated during this process. Put the carriage frame on to the guide rails. Fit the side rails.
Description of the oven systems Fan Heat D Auto Roast E This system works by the circulation of heated air. This setting offers the fan heat with Auto Roast. The oven heats initially to a high temperature which seals the meat to keep it succulent and tasty. A fan situated on the back wall of the oven sucks in the air, heats it over a ring element and blows the heated air through the carefully spaced openings in the rear panel of the oven.
Description of the oven systems Defrost G Grill 1 , Defrost can be operated without heating, or at a temperature of up to 50°C. When the defrost system is used without heating the air is circulated by the fan at room temperature. The inner part of the upper heating element acts as the grill. This will glow red for a few minutes after being switched on, and it is then ready for use. Use the Grill 1 setting for small quantities.
Oven - use Controls Pushbuttons The oven controls consist of the oven function selector and push buttons. With the pushbuttons you can: Function selector – change the oven temperature. – change the core temperature. – activate the minute minder. Each pushbutton has a matching symbol in the display field. With this control you select the oven function required. The selector can be turned clockwise or anti-clockwise.
Oven - use The – /+ button is used to enter or alter oven temperature, time of day and minute minder times. Temperature or time can be altered in single steps, by pressing the – /+ button briefly, or more quickly by holding the button pressed in. – button: selects a lower temperature, earlier time or shorter period. + button: selects a higher temperature, later time or longer period.
Oven - use Selecting an oven setting With the oven function selector the following settings can be chosen: – Light H Turns on the oven light independently. All oven settings are illuminated. – Fan Heat D For baking or roasting on several levels at the same time. – Top heat C For browning dishes, finishing dishes with a cheese topping. – Conventional A Top and bottom heat together, for baking / roasting traditional recipes, for soufflés.
Oven - use Selecting a temperature If you wish to retain the temperature suggested by the system this will be automatically adopted when the indicator light in the – /+ button goes out. The actual temperature in the oven is now displayed. The rise in temperature is shown in 1°C steps, until the required temperature is reached, which is then displayed constantly. A recommended temperature is assigned to each oven cooking setting. This appears in the oven display field.
Oven - use Altering the temperature To cancel a process The temperatures suggested by the system can be altered in the range: When the oven function selector is turned to “0" this cancels any previously entered oven or probe core temperature. Time entered with the minute minder is not affected. Fan Heat. . . . . . . . . . . . . . . . . 30-250°C Top Heat. . . . . . . . . . . . . . . . . 30-250°C Conventional . . . . . . . . . . . . . 30-280°C Bottom Heat . . . . . . . . . . . . .
Oven - use Pre-heating the oven The oven usually only needs to be pre-heated in the following cases: With “Fan Heat”: – for baking bread made with dark flour, – when roasting meat. Energy-save function If you are programming a cooking process using the timer, or if you are cooking with the roast probe, the residual heat is automatically used to save energy.
Oven - use Telescopic carriage Rack with safety feature (depending on model) The non-tip runners prevent the rack from being pulled right out when it only needs to be partially pulled out. When pushing the baking trays, grill pan or rack into the oven, make sure that the telescopic carriage is pushed completely in. If you wish to use only the lowest runner level for cooking, the side rails can be taken out.
Oven - use Short time (Minute minder) At the end of the short time: The minute minder can be used to time any activity in the kitchen, e.g. boiling eggs. – an audible tone sounds for approx. 5 seconds. The short time can be entered independently of another entered process. To enter the short time – The “l” symbol also flashes for approx. 1 minute. The audible tone and the flashing symbol can be cancelled at any time by pressing the “l” button. (1 min. - 23 hrs. 59 mins.
Timer - use Push buttons With the push buttons you can: – enter the start of a cooking process. – enter the duration of a cooking process. The timer can: – enter the end of a cooking process. – show the time of day, The Time of day is entered with the “f” and “)” buttons. – switch the oven (and separately, where applicable, the hob front cooking zones) off, or on and off automatically. A corresponding symbol for each push button appears in the display when appropriate.
Timer - use All data input or alteration is done with the – /+ button . Changes to the start, duration or end of cooking time, or time of day are effected in 1 minute steps. Press the required button. Enter the time immediately with the – /+ button. While the indicator light at the centre of the – /+ button is lit up, a time can be entered or altered. The – /+ button indicator light comes on when one of the buttons has been pressed.
Timer - use Time of day – 24 hour display To alter the time of day When the colon in the time display: This is the same procedure as for setting the time of day – flashes: Once the time has been entered it proceeds in minute intervals. – is on constantly: Time of day has been halted and can be entered or altered. When the appliance is first connected to the power supply, or after a power cut "12:00" and the symbols “f” and “)” flash in the display.
Timer - use Programming cooking time With the timer it is possible for the oven (and both the front hob cooking zones) to be switched off automatically, or set to come on at a later time and then also be switched off. The oven, the left and right front hob cooking zones can be programmed independently of each other. Programming cooking time in the oven Use the oven function selector to choose a setting. The indicator light in the centre of the “ - /+” button lights up.
Timer - use Programming hob zone cooking times When the end of cooking time is reached A symbol in the display shows which hob zone is being programmed. – the hob switches off automatically, – an audible tone sounds for approx. 5 seconds. – The symbol for the selected hob zone and the symbol “)” both flash. The symbol “)” does not flash when a cooking end time is entered for the oven.
Timer - use To enter the times for an automatic process: To end a cooking time automatically – entering the duration (1 min. to 23 hours 59 mins.) Turn the oven function selector or the hob zone control to the required setting. Press the “g” button. “0:00" appears in the display field. With the + button enter the required time in hours:minutes. The end of cooking time is automatically calculated from the time entered.
Timer - use Switching the cooking process on and off automatically To enter duration and end (The end can be postponed by up to 23 hours 59 mins) Turn the oven function selector or the hob zone control to the required setting. First enter the cooking time: Press the “g” button. “0:00" appears in the display field. With the + button enter the required cooking time in hours:minutes.
Timer - use To check Press the button for the time to be checked. “f” The start time of the cooking process is displayed. This goes out as soon as the process begins. “g” The display shows the duration of cooking time, or the time left if the programme has started. “)” The end of the cooking process is displayed. To cancel times entered To cancel, press the appropriate button and use the “ - ” button to set the time to “0:00".
Baking in the oven The following settings are recommended for baking: Baking with the “Intensive baking F”setting – Fan Heat D – Intensive Bake F – Conventional A This method of heating is particularly useful for: Baking with the “Fan Heat D” setting Most types of heat-resistant tins or dishes are suitable, including thin-walled and bright, non-reflective metal moulds. Several levels can be used at the same time for baking.
Baking in the oven General notes The Baking Chart gives suggestions for temperature, runner height and timing. For even browning – in general select the middle temperature. Increasing the temperature and reducing the time can have an adverse effect on even browning. Place oblong tins in the oven as shown in the illustration. Deep-frozen products such as pizzas should be placed on baking paper on the rack.
Baking in the oven Fan Heat Temperature in °C rec. runner from bottom Time in mins.
Baking in the oven Conventional heat Intensive baking Temperature in °C rec. runner from bottom Time in mins. Temperature in °C rec. runner from bottom Time in mins.
Roasting in the oven We recommend the following settings for roasting in the oven: – Auto Roast D – Conventional heat A The core temperature probe (roast probe) can be used with either of the above settings. See Section on “Roasting with the roast probe”. Auto Roast: Always remember to fit the roasting filter in front of the fan in the back of the oven before starting. Place the covered pot on the rack. The meat should be put into a cold oven.
Dear Customer, Congratulations on the purchase of your new Miele oven. We trust you will be delighted with the wide range of programmes and applications it has to offer. To help you make the most of your oven, we would be pleased to send you, free of charge, a copy of the MIELE COOKBOOK This prestigious book contains over a hundred delicious recipes, all tested on Miele ovens. Furthermore, it offers comprehensive advice on cooking, using the different cooking techniques to best advantage.
Roasting in the oven Calculating roasting time: The traditional British method is to allow 15 to 20 minutes to the lb, according to type of meat, plus approx. 20 minutes, adjusting length of time as roasting proceeds, to obtain the required result. Alternatively, multiply the height of the joint by the time per cm for the type of meat, as in the chart. Useful hints Roasting in a covered pot L Season the meat and place in the pot. Add some knobs of butter or margarine or a little oil or cooking fat.
Roasting in the oven Roasting with the Roast Probe Using the roast probe enables the roasting process to be monitored simply and reliably. When roasting with the probe it is a good idea to take the frame off the pullout carriage. The telescopic carriage can then be pulled right out. The tip of the probe measures the core temperature at the centre of the meat continuously. When the pre-selected core temperature is reached, the oven heating is automatically switched off.
Roasting in the oven Choose the required function with the oven selector: – Auto Roast – Conventional – Fan Heat – Fan Grill Please see the notes under “Grilling in the oven”. A suggested core temperature of 60°C appears in the display field. If the core temperature suggested by the system is appropriate for your recipe, this is automatically adopted once the indicator light goes out. The core temperature can however be changed. (see Section on “Changing the core temperature”).
Roasting in the oven The residual time is calculated from the oven temperature selected, the required core temperature and the pattern of the increasing core temperature. The residual time figure first shown is an estimate. As the cooking process continues the figure is continuously revised, and a more accurate revised figure shown.
Roasting in the oven Altering the core temperature Please note: The temperature can be altered between 20°C and 99°C. This process can also be programmed through the timer with delayed start. When the indicator light is on: If the temperature probe is left in the food at the end of the cooking process, the oven display will show the core temperature first rising and then sinking. Enter the required temperature with the – /+ button. When the indicator light has gone out: Press the “e” button.
Oven roasting chart Oven roasting chart Auto Roast 1) rec. runner from bottom Temp. in °C 2) Time in mins. Temp. in °C 2) 1 180-200 100-120 220-240 100-120 75-85 1 5) 190-210 35-45 240-260 35-45 50-70 6) 1 180-200 90-120 220-240 90-120 65-75 Leg of pork, (apprx. 1 kg) 1 170-190 100-120 210-230 100-120 80-90 Rolled pork (apprx. 1 kg) 1 170-190 100-120 200-220 110-130 80-90 Meat loaf (apprx. 1 kg) 1 170-190 50-60 200-220 50-60 70-75 Veal (apprx.
Defrosting in the oven We recommend defrosting at room temperature, i.e. without selecting an oven temperature. However, an oven temperature of up to 50°C can be selected. – Where possible remove the packaging and put the food to be defrosted on a baking tray or into a dish. – All meat and poultry should be fully defrosted before cooking. Do not use the liquids from defrosting.
Casseroles The following oven settings are recommended: – Fan Heat D – Conventional A The following dishes are suitable for this type of slower cooking: covered pots made of ovenproof glass and china, and earthenware pots, which could also be used as serving dishes. They should have heat-resistant handles and knobs. Put the rack in at the 1st runner height from the bottom, and place the prepared casserole with the food for braising or stewing on this. Select the oven setting and the temperature.
Grilling in the oven The oven has three grill settings: Grill 1 The whole of the grill element is switched on. The inner part of the grill glows red when heated, but the outer part stays darker, while at the same time creating the heat radiation necessary for grilling. Fan Grill For grilling larger items, for example, poultry, rolled meat. With this method the core temperature probe can also be used to monitor the temperature. See ,,Roasting in the oven: Roasting with the core temperature probe".
Grilling in the oven Preparing food for grilling Clean, wipe and season. Do not salt slices of meat beforehand as this detracts from the taste. Add a little oil if necessary. Other fats quickly become black or cause the food to smoke. A little butter can be added to chicken if desired. Clean flat fish and slices of fish in the normal way. To enhance the taste add a little salt or squeeze a little lemon juice over the fish.
Grilling in the oven Grilling time Two special accessories for rotisserie grilling, a meat and poultry clamp, and a kebab grilling device are available from your Miele dealer or the Miele Spare Parts Department. Select the method of grilling . Put the grill pan holding the assembled rotisserie in the oven, using the 1st runner from the bottom. The spit fits into the motor slot at the back of the oven.
Grilling Pre-heat the grill for about 5 minutes with the door shut before using. Food to be grilled Runner from bottom Fan Grill 4) Grill 1 / Grill 2 temperature in °C total grill time in mins. 1) temperature in °C total grill time in mins.
Cleaning and care Appliance front, decor strips, and control panel Use a mild cleaning agent or a dash of washing up liquid in hot water. Wipe dry with a soft cloth. Accessories Roast probe, telescopic frame (if fitted), Wipe with a damp cloth. Do not put the roast probe or the baking carriage runners into water, and do not put them in the dishwasher. Runners Wash in hot water with washing up liquid, or clean with a stainless steel cleaner.
Cleaning and care Oven interior Different surfaces of the oven interior are coated with either b “Clean-Enamel”, or c catalytic enamel. Important: Remove any soiling from the “Clean-Enamel” areas before carrying out the extra cleaning process for catalytic enamel described below. Never use hard brushes, wire wool or scourers, scouring pads, hard sponges or other scouring agents on the enamel coatings. These scratch and damage enamel.
Cleaning and care c Catalytic Enamel Because circulating air in the oven deposits oil and fat splashes predominantly on the rear wall of the oven, this is coated in catalytic enamel. With some models, side panels with catalytic coating are also fitted, and the removable guard plate above the grill has a catalytic coating. When this catalytic enamel is heated to temperatures above 200°C, oil and grease deposits are removed, except for deposits of spices and syrups.
Cleaning and care Cleaning catalytic enamel using the extra cleaning process Before carrying out the extra cleaning process, take out the rack and runners, or telescopic frame remove any soiling from the “Clean-Enamel” areas. To operate the extra cleaning process: Turn the oven function selector to “Fan Heat D”. With the + button select the highest temperature setting. Let the oven operate for about one hour. The length of time will depend on the degree of soiling.
Cleaning and care For ease of cleaning the oven door can be taken off, the runners or the telescopic frame, side panels and the back panel removed and the top grill element lowered. Please note : the oven door is quite heavy. It should be gripped firmly at the sides when being removed or refitted. To remove the oven door: Open the door fully. Lift up the door until the hinges disengage. Remove door.
Cleaning and Care Removing the telescopic carriage (according to model) Select the “Light” setting. Make sure the oven heating elements are switched off and cool, to avoid the danger of being burnt. Pull on the fixing knob to release it. Draw out the telescopic carriage and remove the side runners. Take the guide rails out of the oven. Reassemble in reverse order, carefully ensuring all parts are correctly in place. Remove the frame from the guide rails.
Cleaning and care To remove the runners (according to model) Select the “Light H” setting. Make sure the oven heating elements are switched off and cool, to avoid the danger of being burnt. Take the runners out of the oven. Reassemble in the reverse order, carefully ensuring all parts are correctly in place. Pull on the fixing knob to release it.
Cleaning and care To remove the catalytic side panels Select the “Light ” setting. The oven heater elements must be switched off, to avoid the danger of being burnt. Take the runners or the telescopic frame out of the oven. Gently lift and pull out the catalytic side panels. Reassemble in the reverse order, carefully ensuring all parts are correctly in place. When reassembling the catalytic side panels, ensure they sit correctly. Ease the back lug into the opening in the rear wall.
Cleaning and care To remove the back panel To lower the (upper heating) grill element: Select the “Light H” setting. The oven heating elements must be switched off, to avoid the danger of burning. Wait until the grill element has cooled down enough to touch to avoid being burnt. Take out the runners. Loosen the screws in the back panel and take it out. The oven must not be used without the back panel fitted. This could lead to injuries.
Cleaning and care If the guard plate is dirty it can also be removed for cleaning: Hold the guard plate firmly and unscrew the knurled knob. Take out the guard plate. Gently lower the grill element. Do not use force to lower it, as this could cause damage. 58 Reassemble in the reverse order, carefully ensuring all parts are correctly in place.
Correcting minor faults Installation, maintenance and repairs to the electrical components of this appliance should only be carried out by a fully competent person. Unauthorised repairs can be dangerous. . . . The heating elements in the oven function, but not the light. Some minor problems however can be dealt with as follows: There is a slide flap in each side trim to the oven. The halogen lights are faulty. Change as follows: Turn off the electricity supply to the oven.
Correcting minor faults . . . a noise can be heard after baking, roasting or grilling. This is not a fault. The cooling fan continues to run for a short time. When the temperature has fallen sufficiently the fan switches off automatically. . . . the cakes and biscuits are not cooked after following the times given in the chart? Check whether, the correct temperature was set. Pull out the metal strip. Pull out the halogen lamp: 12 V, 20 W, heat resistant up to 300°C, G4 socket, Osram, Type 64428.
Correcting minor faults . . . The browning effect is uneven There will always be a slight unevenness. Product information sheets give a percentage result for standard browning tests. These refer to results for one tray. If the item being baked is browning very unevenly, check: – when baking with Fan Heat D: whether the temperature was set too high, whether the roasting filter was in place. – when baking with the Conventional setting A the colour and composition of the baking tins being used.
Correcting minor faults If “F7", appears in the display, this may mean that the cooling fan has stopped turning. The Service dept must be called to put this right. Please quote the fault message. If “F8", appears in the display, this may mean that on a fan heat setting the fan has stopped turning. The Service dept must be called to put this right. Please quote the fault message. If “F9", appears in the display, this may mean that the maximum temperature of the appliance has been exceeded.
After sales service In the event of faults which you cannot remedy yourself, please contact: – your Miele Dealer or – the nearest Miele Service Department, (see address on the back page). When contacting the Service dept, please quote the Model and Serial number of your appliance, both of which are shown on the data plate, visible below the control panel, with the oven door open. If you have an oven and hob combination also give the number of your hob.
Electrical connection U.K. All electrical work should be undertaken by a competent person in strict accordance with national and local safety regulations. The voltage and rated load are given on the data plate, located to the right underneath the oven control panel, visible when the oven door is open. Please ensure that these match the household mains supply. Please quote these data, and the model and serial number when contacting the Miele Service dept.
Electrical connection U.K. Oven with integrated hob controls “E” model This is not available in all countries. For some countries the version of the oven with integral hob controls is supplied for connection to a 3N ~ 400 v power supply. Any adaptations must only be carried out in consultation with the relevant Miele Service Dept.
Installation instructions "E" model underbench-oven with hob controls (cooker), and KSE hob electronic control unit Pull the control knobs for the hob and the cooker plugs out of the insert retainers. Turn off the mains electricity supply to the isolator. Install the hob, see separate instructions. Connect the oven to the electricity supply by the isolator. Align the cooker in front of the base unit. 66 Fit the KSE hob electronic unit into place.
Installation instructions The plugs on the cooker / hob and the sockets on the hob electronic control are coded with the same colour for matching. Loosen the screws in the decor strips and remove the decor strips. Do not unscrew the screws completely. Place the oven into the oven housing unit as far as the oven trim and align. Insert the hob control knobs into the control facia. Fit the cooker plugs into their sockets.
Installation instructions Wall Oven Turn off the mains electricity supply to the isolator or fused unit. Connect the oven to the electricity supply by the isolator or fused unit. Loosen the screws in the decor strips and remove the decor strips. Open the oven door and using two screws secure the oven to the side walls of the housing unit through the holes in the oven trim. Do not unscrew the screws completely. Put the decor strips back in place and screw in.
Installation situations Pay particular attention to the distances necessary in the following installation situations for appliances H 247 ET and H 247 B: 69
Extra accessories These are available at extra cost from your Dealer or the Miele Domestic Sales dept. – Anti-splash tray to be placed in the grill pan when grilling – handle The juices from the food being grilled are gathered under the anti-splash tray, rather than being dried out, and they can then be used in sauces etc. To take the baking trays or the roasting / grill pan out of the oven, or to put them into it.
71
Alteration rights reserved / 22 / 000 GB / IRL / ZA – 2197 M.-Nr. 04 758 110 This paper consists of cellulose which has been bleached without the use of chlorine.