Operating instructions Microwave oven To avoid the risk of accidents or damage to the appliance it is essential to read these instructions before it is installed or used for the first time. en - GB M.-Nr.
Contents Guide to the appliance . . . . . . . . . . . . . . . . . . . . . . . . . . . . . . . . . . . . . . . . . . . . . 4 Oven interior and accessories . . . . . . . . . . . . . . . . . . . . . . . . . . . . . . . . . . . . . . . . . 4 Control panel . . . . . . . . . . . . . . . . . . . . . . . . . . . . . . . . . . . . . . . . . . . . . . . . . . . . . . 5 Accessories supplied . . . . . . . . . . . . . . . . . . . . . . . . . . . . . . . . . . . . . . . . . . . . . . . 6 Optional accessory . . . . . . .
Contents Quick start (programmable) . . . . . . . . . . . . . . . . . . . . . . . . . . . . . . . . . . . . . . . . . 38 System lock . . . . . . . . . . . . . . . . . . . . . . . . . . . . . . . . . . . . . . . . . . . . . . . . . . . . . . 38 Minute minder . . . . . . . . . . . . . . . . . . . . . . . . . . . . . . . . . . . . . . . . . . . . . . . . . . . . 39 Altering a minute minder entry . . . . . . . . . . . . . . . . . . . . . . . . . . . . . . . . . . . . . 39 Minute minder + cooking function . . .
Guide to the appliance Oven interior and accessories a Oven door f Grilling rack b Door locking mechanism g Gourmet plate c Quartz grill h Cover d Control panel i Boiling rod e Turntable 4
Guide to the appliance Control panel j Electronic timer and clock display k Rotary selector for microwave power, grill and combination programmes l Rotary selector to enter time and weight m Automatic programme buttons n Time of day button m o Minute minder button l p Memory button (to save a 1-3 stage programme sequence) q Stop/cancel button r Start button / Add a minute button / Quick start button c (programmable) s Door release a 5
Guide to the appliance Accessories supplied Optional accessory Grilling rack Glass tray The grilling rack can be used for all functions with and without microwave power, except for Microwave Solo mode. To avoid the grilling rack being used inadvertently with Microwave Solo, it should not be kept inside the microwave oven. The glass tray is suitable for use with all cooking functions. It is heat-resistant and microwave safe.
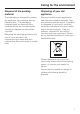
Caring for the environment Disposal of the packing material Disposing of your old appliance The packaging is designed to protect the appliance from damage during transportation. The packaging materials used are selected from materials which are environmentally friendly for disposal and should be recycled. Electrical and electronic appliances often contain valuable materials.
Warning and Safety instructions This appliance complies with statutory safety requirements. Inappropriate use can, however, lead to personal injury and damage to property. To avoid the risk of accidents and damage to the appliance, please read these instructions carefully before installation and before using it for the first time. They contain important notes on installation, safety, use and maintenance. Miele cannot be held liable for damage caused by non-compliance with these instructions.
Warning and Safety instructions ~ Do not use the microwave oven to store or dry items which could ignite easily. If such items were dried in the microwave oven, the moisture in the item would evaporate causing it to dry out and even self-ignite.
Warning and Safety instructions ~ Please supervise children in the vicinity of the appliance and do not let them play with it. ~ Danger of suffocation. Packaging, e.g. plastic wrappings, must be kept out of the reach of babies and children. Whilst playing, children could become entangled in packaging or pull it over their head and suffocate. ~ Danger of burning. Children's skin is more sensitive to high temperatures than that of adults.
Warning and Safety instructions ~ Operating a damaged appliance can result in microwave leakage and present a hazard to the user. Do not use the appliance if – the door is warped. – the door hinges are loose. – holes or cracks are visible in the casing, the door or the oven interior walls. ~ Tampering with electrical connections or components and mechanical parts is highly dangerous to the user and can cause operational faults. Do not open the casing of the appliance.
Warning and Safety instructions ~ The electrical safety of this appliance can only be guaranteed when correctly earthed. It is essential that this standard safety requirement is met. If in any doubt, please have the electrical installation tested by a qualified electrician. ~ For safety reasons, this appliance may only be used when it has been built in. ~ Repairs and other work by unqualified persons could be dangerous. The manufacturer cannot be held liable for unauthorised work.
Warning and Safety instructions ~ The appliance must be disconnected from the mains electrical supply during repair work, cleaning or maintenance. ~ Miele can only guarantee the safety of the appliance when genuine original Miele replacement parts are used. Faulty components must only be replaced by genuine Miele original spare parts. ~ If the appliance is installed behind a kitchen furniture door, it may only be used with the furniture door open.
Warning and Safety instructions Correct use , Danger of burning. The microwave oven gets hot during grilling (with and without the microwave function). You could burn yourself on the oven interior, grill element, hot food, accessories and oven door. Wear oven gloves when working with hot food in the oven, or placing food in or removing it from the hot oven. ~ Always ensure that food is sufficiently heated.
Warning and Safety instructions ~ Exercise caution when cooking or reheating food with a high sugar content, e.g. Christmas pudding. If heated for too long, sugar may caramelise and ignite. ~ Always remember that times for cooking, reheating and defrosting in a microwave oven are usually considerably shorter than with traditional methods of food preparation. Excessively long cooking times can lead to food drying out and burning, or could even cause it to catch fire.
Warning and Safety instructions ~ Always ensure that food has been placed in the microwave oven and that the turntable is in position before switching on. ~ Do not cook or reheat food or liquids in sealed containers, jars or bottles. With baby bottles, the screw top and teat must be loosened. Otherwise pressure builds up which can cause the bottle or container to explode, posing a severe risk of injury.
Warning and Safety instructions ~ When reheating liquids, place the boiling rod supplied into the cup or glass. The boiling rod ensures that the liquid heats up evenly with bubbles forming at the right time. When heating liquids, milk, sauces etc, using microwave power without the boiling rod, the boiling point of the liquid may be reached without the production of typical bubbles. The liquid does not boil evenly throughout.
Warning and Safety instructions ~ To avoid fuelling any flames, do not open the door if smoke occurs inside the microwave oven. Interrupt the process by switching the appliance off and disconnect it from the mains electrical supply. Do not open the door until the smoke has dispersed. ~ Oil and fat can overheat and catch fire. Do not leave the appliance unattended when cooking with oil and fat. Do not use the appliance to fry food.
Warning and Safety instructions ~ Do not use the appliance to heat up tins. Pressure can build up and they may explode. ~ Cover any food which is left in the microwave oven to be kept hot, as moisture in the food could lead to corrosion damage in the appliance and could also damage the control panel, worktop and surrounding kitchen furniture. Covering the food also prevents it from drying out. ~ Try to avoid the interior walls being splashed with food or liquids containing salt.
Warning and Safety instructions ~ Fire hazard. Using microwave power with plastic dishes which are not microwave safe can cause them to melt and damage the appliance. Do not use any containers or cutlery made from or containing metal, aluminium foil, lead crystal glassware, temperature-sensitive plastics, wooden utensils or cutlery, metal clips or plastic or paper covered wire ties.
Warning and Safety instructions ~ Do not reheat food in the microwave oven in heat-retaining bags intended for normal ovens, such as roasting bags. These heat-retaining bags usually contain a thin layer of aluminium foil which reflects microwaves. This reflected energy can, in turn, cause the outer paper covering to become so hot that it ignites. ~ Eggs can be cooked without their shells using microwave power only if the yolk membrane has been punctured several times first.
Warning and Safety instructions ~ Dishes with hollow knobs or handles are not suitable for use with microwave power. Moisture which has gathered in the hollow recesses can cause pressure to build up and the item can explode. If the hollow recess is sufficiently ventilated, the item could be used. However, we recommend that you do not use such dishes in the microwave oven. ~ To check food temperature, first interrupt the cooking process.
Warning and Safety instructions Accessories ~ Use only genuine original Miele accessories. Using spare parts or accessories from other manufacturers will invalidate the guarantee, and Miele cannot accept liability. ~ The rack and gourmet plate supplied are designed for use with microwave power and can be used for grilling with or without the microwave function. They must not, however, be used at the same time as this would damage the gourmet plate.
Warning and Safety instructions Optional accessories ~ Do not place the hot glass tray (or any other hot cooking containers) on a cold surface, such as a tiled or granite worktop. The glass tray or container could crack or shatter. Use a suitable heat-resistant mat or pot rest.
How the microwave oven works In a microwave oven there is a high-frequency tube called a magnetron. This converts electrical energy into microwaves. These microwaves are distributed evenly throughout the oven interior, and rebound off the metal sides of the oven interior to reach the food from all sides. Microwave distribution is improved with the turntable engaged. In order for microwaves to reach the food, they must be able to penetrate the cooking utensil being used.
Modes of operation What can a microwave oven do? In the microwave oven, food is cooked, reheated or defrosted quickly. You can use the microwave oven in the following ways: Microwave oven functions Microwave Solo mode Suitable for defrosting, reheating and cooking. Grilling – Food can be defrosted, reheated or cooked by entering a power setting and a duration. Ideal for grilling thin cuts of meat, e.g. steak or sausages. – Deep-frozen, ready-made meals can be defrosted and then reheated or cooked.
Suitable containers for microwave ovens Microwaves Material and shape The material and shape of the containers used affect cooking results and times. Heat distribution is more even in round and oval shaped flat containers than in rectangular containers, providing better results. – are reflected by metal, Containers and lids with hollow handles or knobs in which moisture can collect are unsuitable, unless the hollowed areas are adequately vented.
Suitable containers for microwave ovens Exceptions: Glassware – Ready-meals in aluminium foil dishes. Heat-resistant glass or ceramic glass are ideal for use in the microwave oven. These can be defrosted and reheated in the microwave oven, if recommended by the manufacturer. Important: Remove the lid and make sure the foil dish is at least 2 cm from the oven walls at all times.
Suitable containers for microwave ovens Plastics Plastics must only be used with Microwave Solo. They must be heat-resistant to a minimum of 110 °C. Otherwise the plastic may melt and fuse with the food. Special plastic utensils designed for use in microwave ovens are available from retail outlets. Melamine is not suitable for use in this oven. Melamine absorbs microwave energy and gets hot. When purchasing plasticware, make sure that it is suitable for use in a microwave oven.
Suitable containers for microwave ovens Testing dishes for their suitability If in doubt as to whether glass, earthenware or porcelain plates or dishes are suitable for use in a microwave oven, a simple test can be performed: ^ Place the item you wish to test in the centre of the oven, fill a suitable glass with water and also place this in the oven. ^ Close the door. ^ Turn the power selector to 800 W. ^ Enter a time of 30 seconds with the time selector. ^ Press the Start button.
Suitable containers for microwave ovens The cover – prevents too much steam escaping, especially when cooking foods which need longer to cook, such as potatoes. – speeds up the cooking process. – prevents food from drying out. ,Sealed containers and glass jars, such as jars of baby food, must be opened before they are placed in the oven. With baby bottles the screw top and teat must be loosened. Otherwise, pressure builds up and can cause the bottle or container to explode.
Before using for the first time After installation, let the appliance stand for approx. 2 hours at room temperature before using it. This is important for the correct electronic functioning of the appliance. ,Danger of suffocation. Packaging, e.g. plastic wrappings, must be kept out of the reach of babies and children. Whilst playing, children could become entangled in packaging or pull it over their head and suffocate. ^ Remove all the packaging materials from the appliance.
Time of day display ,For safety reasons, this appliance may only be used when it has been built in. Setting the time of day ^ Connect the appliance to the mains electrical supply. 12:00 and the m symbol will flash in the display until the current time of day is set. Before this, the time of day will start to run from 12:00, as the clock will start as soon as the appliance is connected to the mains electrical supply. Altering the time of day ^ Press the m button.
Time of day display Night time switch-off The time of day display can be set to switch itself off from 23:00 to 04:00 hrs. Setting the time of day display to switch off at night ^ Press and hold in the Stop/C button and at the same time press the m button. ON will appear in the display. The appliance can still be operated. To switch the display back on ^ Press and hold in the Stop/C button and at the same time press the m button. OFF will appear in the display.
Operation Opening the door Closing the door ^ Press a to open the door. ^ Push the door firmly shut. If the microwave oven is being used, opening the door will interrupt the cooking programme. Press the Start button again to resume an interrupted cooking programme. Placing the dish in the oven Ideally the dish should be placed in the middle of the oven. Turntable The turntable helps the food to cook, reheat or defrost evenly.
Operation When heating up food which cannot be stirred or turned during cooking, as with a plated meal, it is best to use a lower microwave power level. – the frequency of stirring or turning the food. Frequent stirring or turning heats the food more evenly, and it is therefore ready in a shorter time. This ensures the heat is distributed evenly. Heat for long enough to cook the food properly. – the amount of food. As a general rule, allow approx.
Operation Interrupting or re-starting a programme Cancelling a programme ^ Press the Stop/C button twice. At any time you can . . . . . . interrupt a programme: ^ Press the Stop/C button, or open the appliance door. The duration stops counting down. . . . continue a programme: ^ Close the door and press Start. The programme will continue. Altering settings At the end of a programme An audible tone will sound when the cooking programme is complete. The oven interior lighting goes out.
Operation Quick start (programmable) System lock Pressing the Start /c button is sufficient to set the appliance operating on maximum power. Three set durations are stored in memory: The system lock prevents the appliance being used by children, for example.
Operation Minute minder Minute minder + cooking function The minute minder can be used to time any activity in the kitchen, e.g. boiling eggs. The time set counts down in one second steps. The minute minder can be used at the same time as a cooking function, and counts down in the background. ^ Press the l button. 0:00 flashes in the display and the l symbol lights up. ^ Press the l button whilst the cooking function is in progress. 0:00 flashes in the display and the l symbol lights up.
Operation - Grilling The grill has 4 settings: grill solo and in combination with the microwave function using 3 microwave/grill settings. If the total grilling duration required is less than 15 minutes, the grill should be pre-heated for approx. 5 minutes before placing food under it. Thin, flat cuts of fish and meat should usually be turned half way through grilling for even results. Larger, chunkier pieces should be turned several times. ,Caution.
Operation - Grilling To change a cooking duration The cooking duration can be changed during operation. To do this, interrupt the cooking programme by pressing the Stop/C button, and change the duration. Continue the cooking process by pressing the Start button. The cooking duration can also be extended during operation by pressing the Start button once for each minute you wish to extend the cooking duration by. ^ Turn the power selector to select the required combination Q, X or L.
Gourmet plate Use The gourmet plate gets extremely hot when in use. Always use oven gloves when handling it to avoid burns. Place it on a suitable heat-resistant mat or pot rest. Before using for the first time Before using the gourmet plate for the first time, fill it with 400 ml water and add 3 to 4 tbsp vinegar or lemon juice. Heat for 5 minutes at 450 W + Grill L. The gourmet plate has an easy to clean non-stick coating so that food can be removed easily.
Gourmet plate Some suggested uses Pre-heat the gourmet plate directly on the turntable for up to 5 minutes at 450 W + Grill L. Fish fingers (frozen), 150 g + 2 tbsp oil L, 3 – 4 minutes each side Hamburgers, 2 burgers + 2 tbsp oil L, 3 – 4 minutes each side Croquette potatoes (frozen), 10 – 12 pieces + 2 tbsp oil L, 6 – 8 minutes, turning halfway through Filet steak, approx.
Gourmet plate Vegetable medley (serves 3) 2 onions 2 tbsp oil 100 g mushrooms, cleaned 150 g frozen diced carrots or carrot slices 100 g broccoli florets 1 red pepper 1 tomato Salt, pepper 30 g grated Parmesan cheese Slice the onions into fine rings. Halve, quarter and de-seed the pepper, and then cut into strips. Dice the tomato. Place the gourmet plate on the turntable, and pre-heat for approx. 5 minutes at 450 W + Grill. Place the oil and the onions on the gourmet plate, and brown the onions for approx.
Gourmet plate Pork fillets (serves 2) Curried chicken (serves 3) 1 piece pork fillet (approx. 400 g) 4 rashers streaky bacon Salt, pepper 10 g butter 200 g sliced mushrooms 200 ml double cream 2 tbsp brandy 600 g chicken or turkey breasts 2 tbsp oil 2 tbsp white wine 2 tbsp apple juice 1 tbsp lemon juice Salt, black pepper 1 tsp curry powder A pinch of finely chopped rosemary A pinch of ground ginger A pinch of cayenne pepper 1 /2 tsp Tabasco sauce 20 g butter Cut a piece of pork fillet into 4 slices.
Gourmet plate Fisherman's salmon (serves 2) 2 pieces of salmon fillet (each 150 g) 1 tbsp lemon juice Salt, white pepper Drizzle the salmon fillet with the lemon juice and leave to stand for approx. 10 minutes. Place the gourmet plate on the turntable and pre-heat for approx. 5 minutes at 450 W + Grill. Remove from the oven, pat the fish dry with kitchen paper, and place on the gourmet plate. Place the gourmet plate back on the turntable, and cook each side for approx.
Gourmet plate Pineapple cake Quick almond tart For the cake: 2 eggs 80 g sugar 11/2 ripe bananas 30 g chocolate chips 100 g plain flour 3 /4 tsp. baking powder For the base: 100 g plain flour 1 /2 level tsp baking powder 75 g butter or margarine 30 g sugar Topping: 1 tin pineapple chunks (drained weight 240 g) 11/2 tbsp brown sugar 11/2 tbsp desiccated coconut Beat together the eggs and sugar until frothy. Mash the bananas with a fork, and add to the egg mixture.
Operation - Automatic programmes All of the automatic programmes are weight dependent. The weight of the food can be displayed as metric (g) or imperial (lb). See "Changing settings" After selecting a programme, enter the weight of the food. The microwave oven automatically calculates the duration according to the weight entered. After cooking, allow the food to stand at room temperature for the suggested number of minutes ("standing time") to allow the heat to be distributed evenly through the food.
Operation - Automatic programmes An audible tone will sound when the cooking programme is complete. The interior lighting of the oven goes out. ^ Press the relevant button repeatedly until the Automatic programme required shows in the display. For example, to call up programme AC 5 (Grilled chicken) press the ° button five times. g or lb will flash in the display to prompt you to enter the weight and the programme (e.g.
Recipes for Automatic programmes ° Below are some recipe suggestions for the Automatic programmes using the "Cooking fresh food" function °. These can be adapted to suit your requirements. It is important to follow the weight guidelines for the programme concerned. If the weight guidelines are exceeded, the food will not cook sufficiently. AC 1 # Vegetables Place the prepared vegetables in a container.
Recipes for Automatic programmes ° AC 2 À Potatoes This programme can be used to cook peeled, new and bouillon potatoes. Enter the weight for the potatoes and the cooking liquid. For peeled potatoes, peel, wash and drain the potatoes and place them in a cooking container. Season with a little salt, cover and cook. When cooking new potatoes, add approx. 1 tbsp water per potato.
Recipes for Automatic programmes ° AC 4 Á Kebabs Chicken kebabs (makes 8 kebabs) Pork kebabs (makes 8 kebabs) 1 piece of pork fillet, approx. 300 g 1 red pepper 2 onions For the marinade: 8 tbsp vegetable oil Salt, pepper, paprika and chilli powder 8 wooden kebab skewers Cut the pork fillet into 16 cubes. Wash the pepper and cut into bite-sized pieces. Peel the onion and cut into eighths. Arrange the meat, peppers and onions alternately on the skewers.
Recipes for Automatic programmes ° AC 5 Grilled chicken Cut the whole chicken in half. Brush with melted butter or oil and season. Arrange the two chicken halves with the cut side uppermost on the grilling rack in a heat-resistant microwave safe container and place in the microwave oven. Halfway through the cooking duration (the audible tone will sound), turn the chicken halves and continue to cook. AC 6 ¼ Chicken drumsticks Brush the drumsticks with melted butter or oil, and season.
Recipes for Automatic programmes ° Fish and tomato gratin (serves 4) AC 8 Savoury bakes Vegetable gratin (serves 4) 500 g firm white fish 2 tbsp lemon juice 500 g tomatoes Herb salt 2 tsp oregano, finely chopped 150 g Cheddar cheese, grated Cut the rosefish into pieces, drizzle with lemon juice and leave to stand for approx. 10 minutes. Dice the tomatoes, and place in a baking dish with the fish and half of the cheese. Season generously with herb salt and oregano, and mix well.
Recipes for Automatic programmes ° Potato cheese gratin (serves 4) 500 g potatoes, peeled 250 ml double cream 125 g crème fraîche 150 g Cheddar, grated 1 clove of garlic Salt, black pepper, nutmeg Butter Slice the potatoes finely, mix with approx. 2/3 of the cheese, and place in the base of a greased baking dish (approx. 24 cm in diameter) with the garlic. Mix together the cream and crème fraîche, season with salt, pepper and nutmeg and pour over the potato and cheese mixture.
Saving your favourite programme (Memory) One favourite programme can be saved in memory. This programme can be used for your most frequently cooked recipe. The programme can have up to 3 stages (e.g.: 1 minute at 600 W, followed by 2 minutes on Grill and finally 3 minutes at 150 W + Grill). Programming (The example given is for a 3-stage programme). ^ First select the function for the first stage. ^ Then select the duration. ^ Press the M button. 1 will light up in the display, and 2 will flash.
Saving your favourite programme (Memory) To call up your favourite programme ^ Turn the programme selector to the 12 o'clock position. ^ Press the M button. ^ Press the Start button. In the event of a power cut, the favourite programme is no longer saved and must be re-entered.
Changing settings Some of the standard settings for the appliance (which are set at the factory) have an alternative which you can select if required. Please consult the chart for the different options. The factory settings are marked with a star* on the chart. Proceed as follows: ^ Press and hold the m and M buttons at the same time until P I and X light up in the display. Then release them. If you press them for too long, the time of day will appear again in the display.
Changing settings Setting P I Settings available (* factory default) Night time switch-off S 0 * Night time switch-off is deactivated. S I Night time switch-off is activated. The time of day display is switched off from 11 pm to 4 am. P 2 Automatic keeping warm function S I * S 0 The keeping warm function is activated. The keeping warm function is deactivated. P 3 "door" message S I * The "door" message appears if the door has not been opened during the 20 minutes before Start is pressed.
Reheating Select the following microwave power levels to reheat food: Drinks . . . . . . . . . . . . . . . . . . . . . 800 W Food . . . . . . . . . . . . . . . . . . . . . . 600 W Food for babies and toddlers . . . 450 W ,We do not recommend heating or reheating food or drinks for babies or young children in the microwave oven. Any decision to do this is the responsibility of the user, and should only be done with the utmost care.
Cooking Place the food in a microwave safe container and cover it. When cooking, it is a good idea to select a power level of 800 W to start with and then when the food is hot reduce the power level to 450 W for more gentle continued cooking. For dishes such as rice or semolina pudding, first select a power level of 800 W, and then reduce it to 150 W for simmering. Tips on cooking Vegetable cooking durations depend on the texture of the vegetable.
Defrosting / Defrosting and reheating or cooking Do not refreeze partially or fully defrosted food. Consume defrosted food as soon as possible, as it will lose its nutritional value and spoil if left for too long. Defrosted food may only be re-frozen after it has been cooked. Defrost Select the following microwave power settings to defrost food: – 80 W for defrosting very delicate food, e.g. cream, butter, gateau and cheese. – 150 W for defrosting everything else.
Some suggested uses Food Duration (in minutes) Notes Quantity Microwave power level (W) Melting butter and margarine 100 g 450 1:00 – 1:10 Do not cover. Melting chocolate 100 g 450 3:00 – 3:30 Do not cover. Stir halfway through melting. Dissolving gelatine 1 packet + 5 tbsp water 450 00:10 – 00:30 Preparing flan topping/jelly glaze 1 packet + 250 ml liquid 450 4–5 Do not cover. Stir halfway through heating. Made with 100 g flour 80 3–5 Cover and leave to prove.
Cleaning and care Disconnect the microwave oven from the power supply before cleaning. Do not use a steam-cleaning appliance to clean this appliance. Steam could reach electrical components and cause a short circuit. Oven interior and inside of the door ,The oven interior can get hot during use. To avoid the danger of being burnt, wait until it has cooled down before cleaning. It should be cleaned after each use. Waiting too long can make cleaning unnecessarily difficult and in extreme cases impossible.
Cleaning and care The door should be kept clean at all times and checked at regular intervals for any signs of damage. ,If any damage to the door is noticed, the appliance should not be used until the fault has been rectified by a Miele authorised and trained service technician. Do not turn the turntable and/or locator manually, as this could damage the drive motor. Appliance front Do not let water or any object find its way into or block the air vents in the door frame.
Cleaning and care To avoid damaging the surfaces of your appliance, do not use: – cleaning agents containing soda, ammonia, acids or chlorides, – cleaning agents containing descaling agents, – abrasive cleaning agents, e.g. powder cleaners and cream cleaners, – solvent-based cleaning agents, – stainless steel cleaning agents, – dishwasher cleaner, – oven sprays, – glass cleaning agents, – hard, abrasive sponges and brushes, e.g. pot scourers, Rack Wash and dry the rack after each use.
Problem solving guide ,Repairs to this appliance must only be carried out by a Miele authorised service technician in strict accordance with current local and national safety regulations. Repairs and other work by unqualified persons could be dangerous. The manufacturer cannot be held liable for unauthorised work. Some minor problems can be corrected without contacting Miele. What to do if . . . . . . a programme will not start. Check whether, . . . a noise can be heard after a cooking programme.
Problem solving guide . . . the microwave function is working but not the oven lighting. ^ You can operate the appliance as normal, but the lamp has blown. To change the lamp, contact the Miele Service Department. such as plated meals, it is therefore sensible to select a lower power level and lengthen the duration required. . . . the microwave oven switches itself off during a cooking, reheating or defrosting programme. . . . strange noises are heard when the microwave oven is being used.
After sales service In the event of any faults which you cannot remedy yourself, or if the appliance is under guarantee, please contact: – your Miele Dealer or – Miele (see back cover for contact details). Please note that telephone calls may be monitored and recorded for training purposes. When contacting your Dealer or Miele, please quote the model and serial number of your appliance. These are to be found on the data plate inside the front of the appliance. N.B.
Electrical connection ,Before connecting the appliance, ensure that it has not been damaged in any way. Do not use a damaged appliance. Electrical connection U.K. All electrical work should be carried out by a suitably qualified and competent person in strict accordance with current national and local safety regulations (BS 7671 in the UK). The appliance is supplied with a mains cable and moulded plug ready for connection to an a.c. single phase 220-240 V 50 Hz supply.
Electrical connection This appliance must not be connected to the inverter of an autonomous power supply, e.g. a solar power system. When switching the appliance on, a surge in power could trigger the safety cut-out mechanism. This could damage the electronic unit. The appliance must not be used with so-called energy saving devices. These reduce the energy supply to the appliance which could then become too warm. Using such devices could alter the specification of the product.
Installation When installing the appliance ensure that there is unhindered ventilation at the front of the appliance. Do not block the ventilation gaps with any objects. Make sure that there is a gap of at least 2.5 mm between the sides of the appliance and adjoining furniture doors and at least 4 mm above the appliance. The appliance can fit into a 350 mm high niche in a wall unit, or a 360 mm high niche in a tall unit.
Installation M 6032 SC 73
Installation Building-in kit The following items are supplied in the accessory pack for installing the appliance: Installation The appliance must be built in before it can be used. Otherwise it poses an electric shock hazard. There are three spacers in the accessory pack: one for the right-hand side (R) and two for the left-hand side (L), depending on whether the housing unit wall is 16 or 19 mm thick.
Installation 1. Niche height 350 mm ^ Draw a line on both sides of the housing unit 337 mm above the floor of the housing unit. ^ Position the lower edge of the spacer on this line and align the stopper at the front of the spacer with the front of the housing unit side wall. ^ Slide the appliance into the housing unit, and pull the cable with the plug* through the back of the unit.
Installation 2. Niche height 360 mm ^ Remove all the accessories including the turntable and the roller ring from the microwave oven cavity. ^ Place the microwave on is right-hand side so that the front frame overhangs the front of the table or the work surface. ^ Unscrew the three feet under the microwave oven and replace them with the three longer feet using the same screws.
8QLWHG .LQJGRP -IELE #O ,TD &AIRACRES -ARCHAM 2OAD !BINGDON /XON /8 47 4EL #USTOMER #ONTACT #ENTRE 4EL % MAIL INFO MIELE CO UK )NTERNET WWW MIELE CO UK $XVWUDOLD -IELE !USTRALIA 0TY ,TD !". 'ILBERT 0ARK $RIVE +NOXFIELD 6)# 4EL &AX )NTERNET WWW MIELE COM AU &KLQD -IELE 3HANGHAI 4RADING ,TD &LOOR .
M 6022 SC M 6032 SC en - GB M.-Nr.