Operating instructions Dryers PT 7251 PT 7331 PT 7401 PT 7501 PT 7801 To avoid the risk of accidents or damage to the machine it is essential to read these instructions before installing, commissioning and using it for the first time. G M.-Nr.
M.-Nr.
Contents Warning and Safety instructions . . . . . . . . . . . . . . . . . . . . . . . . . . . . . . . . . . . . . . . . . . . . . . . 4 Caring for the environment . . . . . . . . . . . . . . . . . . . . . . . . . . . . . . . . . . . . . . . . . . . . . . . . . . . . 7 Description of the machine . . . . . . . . . . . . . . . . . . . . . . . . . . . . . . . . . . . . . . . . . . . . . . . . . . . . 8 Control elements . . . . . . . . . . . . . . . . . . . . . . . . . . . . . . . . . . . . . . . . . . . . . .
Warning and Safety instructions To avoid the risk of accidents and damage to the machine read the operating instructions carefully before using it for the first time. They contain important information about the installation, safety, use and maintenance of the machine. Keep these operating instructions in a safe place and ensure that new users are familiar with the content. Pass them on to any future owner of the machine.
Warning and Safety instructions This machine must not be operated in the same room as dry cleaning machines which use solvents containing chlorofluorocarbons (CFCs). Escaping vapours break down during combustion into hydrochloric acid which can have a detrimental effect on both the laundry and the machine. These machines should be installed in separate rooms and there must be no exchange of air between them.
Warning and Safety instructions Gas heated dryers Using accessories The gas mains connection and the gas connection to the machine should be switched off for all cleaning and maintenance work and in the event of a fault. Accessory parts may only be fitted when expressly approved by Miele. If other parts are used, guarantee, performance and product liability claims may be invalidated. Safety precautions to take if you smell gas – Turn off the gas emergency control valve immediately.
Caring for the environment Disposal of the packing material The transport and protective packing has been selected from materials which are environmentally friendly for disposal and can normally be recycled. Packaging e.g. cling film, polystyrene and plastic wrappings must be kept out of the reach of babies and young children. Danger of suffocation. Rather than just throwing these materials away, please ensure that they are recycled.
Description of the machine b f a c d g h e a Emergency stop switch Press the red button to switch the machine off. b Control panel c Drum door f Electrical connection g Air intake h Exhaust connection Pull the door handle to open the drum door. d Access to fluff / lint filter e 4 adjustable screw feet 8 M.-Nr.
Description of the machine Control elements d PC / Optical interface a Display This interface is used for transferring data to the control unit from a PC and vice versa. 1 Cottons dry plus 0% 2 Cottons dry 0% 3 Cottons damp 20% FC e Rotary selector A After switching on, the "Welcome" display will appear for a short time followed by the programme list. The most recently used programme is highlighted. b Function buttons The six buttons underneath the display are the function buttons.
Description of the machine Function buttons Chip card operation f Stop/End The function button on the right-hand side is used to stop a programme after it has started. Pressing it again finishes the programme. The chip card is supplied without any programmes. See the programming instruction booklet for information on transferring data from the control unit to the chip card and vice versa. [ Block plus The relevant programme block (e.g. Pre-dry) is added to the programme.
Drying Sort the laundry Not all textiles are suitable for machine drying. Please read the instructions given on the garment care label. Significance of symbols: q = Dry at normal temperature r = Dry at low temperature s = Do not tumble dry Sort the laundry according to fibre type and weave to ensure even drying.
Drying ^ Open the drum door. The machine must be commissioned by a Miele service technician or a dealer authorised by the manufacturer before it is used for the first time. For gas heated machines in the U.K. this must be carried out by a Corgi registered technician. Before using for the first time Before loading the dryer with laundry you should wipe the internal drum surface with a soft, dry cloth. ^ Load the drum. The pre-sorted laundry should be loaded loosely in the drum.
Drying Select a programme This machine is equipped with an electronic sensor system that continually monitors the moisture level of the laundry. As soon as the required dryness is reached the laundry is cooled down. At the end of this cooling down phase the drying programme is automatically finished. 1 Cottons dry plus 0% 2 Cottons dry 0% 3 Cottons damp 20% FC ^ Turn the rotary dial to select a programme (e.g. Programme 2 Cottons).
Drying If you wish to make alterations before the start of the programme, e.g. to the load size, temperature or residual moisture: 2 0% 2 0% Cottons dry 10.0 / 10.0 kg Drying 70°C e A Cooling down m The max. load will be shown at the far right of the display. Load weight You can enter the weight of the load manually before the start of the programme. 2 0% Cottons dry 10,0 Drying 70°C m ^ Turn the rotary dial to highlight the load. Press the dial to confirm your selection.
Drying At the end of a programme 2 If no more laundry is to be processed: ^ Close the drum door Cottons dry Programme finished Anti-crease Ready at 12:35 m FC K f ^ Press the 0 "Off" button to switch the machine off. ^ Switch off the on-site mains switch. The programme end time is displayed, the buzzer sounds and the anti-crease phase commences. The drum will rotate at intervals to keep the laundry from creasing. ^ Close all stopcocks for gas and steam as applicable.
Card operation Cards on which a programme has been saved can only be used on the machine type for which they have been written. Unwritten cards can be used universally. If the card is inserted the wrong way round the following message will appear in the display: § ^ Press the "On" I button to switch the machine on. Card fault Card incorrectly inserted in card reader. Continue: Press start The Welcome screen will appear. ü f ^ Insert the card the right way round in the card reader.
Additional options Language selection Start date and time The language shown in the display can be changed briefly before starting a programme if you wish. To do so use the button underneath the flag symbol. If you want a programme to start at a later time use the m button for "Start date and time".
Additional options After setting the required start date and time: Changing the programme order ^ Press the Start button h and the programme selected will commence at the time specified. The order of the programme in progress can be changed or programme blocks can be repeated. The display will now contain the following information: ^ Press the f button and the programme will stop. 2 0% Cottons dry 10.0 kg Cottons dry Programme stop Drying 16:15 -2.4.2003 2 Start 6:00-3.4.
Additional options Programme information Peak load cut-out (optional) Pressing the K "Information" button will call up further information about the programme e.g.: If the peak-load cut out function is activated the heating will switch itself off and any programme running will be stopped. The following message will appear in the display: 2 Cottons dry 1 Start date and time: 10.7.2003 Start time: 9:47 m K e f Cottons dry plus Prog. stopped. Peak load cut-out. Programme will continue.
Standard programme overview Programme 1 Cottons dry plus 0 % (Normal+) 2 Cottons dry 0 % (Normal) 3 Cottons damp 20 % (Machine iron) 4 Cottons damp 25% (Machine iron) 5 Cottons damp 40 % (Machine iron) 6 Minimum iron dry 0 % (Normal) 7 Minimum iron damp 10 % (Machine iron) 8 Minimum iron damp 20 % (Machine iron) 9 Delicates 20 % Fabric Multi-layered cotton and linen textiles which do not get dry in the Cottons dry programme. Single and multi-layered cotton and linen textiles.
Optional modules Operating data By pressing the \ "Operating data" button, the module can be used to read or delete operating data either before the start of a programme, or after it has finished. 1 Cottons dry plus 2 Cottons dry 0% Cottons damp 20% \ If you press the A "Back" button or do not press the h "Start" button within 30 seconds, the display will revert to the way it was before starting the programme.
Optional modules Programme data Programme fault: None (only the last 3 faults are Operating data module saved.) Programme data e A Delete data \ After selecting Programme data the following (example) will appear in the display: Area 1: Drying Block1: Pre-drying Process type: Residual moisture Value: 15 % Actual residual moisture: 15 % Duration: 6 min Max. exhaust temperature: 72 °C Max.
Optional modules Delete data Operating data module Programme data e A Delete data [ After selecting Delete data the following message will appear in the display: Operating data module~ Delete data Module: 21.02.2004 e A Total data: 12.07.2004 [ The module menu option can be used to delete the total data and programme data from the operating data memory. The total data option can only be used to delete the total data from the operating data.
Problem solving guide Error messages A message will flash in the display if there is a problem either before starting a programme or once it has started: ,Repairs to electrical, gas or steam operated machines may only be carried out by a suitably qualified person in accordance with national and local safety regulations. For gas heated machines in the U.K. this must be a "Corgi" registered technician. Repairs and other work by unqualified persons could be dangerous.
Problem solving guide m Drive motor fault § Motor overheating. Press the start button to continue. Gas system fault Call the Service Department if restart does not work. f f If this message appears after a programme has been started: ^ Allow the motor to cool down. y ^ Open the gas tap and then press the "h Start" button. Power cut Programme stop Press the start button. f ^ Press the h "Start" button. ^ The programme can be continued by pressing the h "Start" button.
Problem solving guide After sales service In the event of any faults please contact your Dealer or the nearest Service Department. When contacting the Service Department, please quote the Model (Typ), Serial number (Fabr.Nr) and Material number (M.Nr) of your machine. These are shown on the data plate. This is visible above the door aperture or at the back of the machine. Please let the Service Department know any error message that has appeared in the display.
Cleaning and care Fluff /lint filter Dryer A lint filter collects any fluff and lint from the laundry. Before cleaning the dryer switch off at the on-site mains switch. With gas heated dryers the gas connection must also be switched off, both at the mains and at the machine. It should be cleaned at least once a day and whenever a reminder to clean it appears in the display. If there is a large build-up of fluff and lint the filter will need frequent cleaning. The filter must not be removed.
Cleaning and care The following should be checked and cleaned once a year by a Miele service technician: – The burners and burner compartment on gas heated dryers, the heaters and heater shaft on electric heated dryers. – the entire interior of the dryer – the fins on the exhaust fan ,To ensure the correct performance of the machine and to prevent the risk of faults and fire risk it is important to check the machine and carry out maintenance on a regular basis. 28 M.-Nr.
Notes for the installer This machine must only be installed and commissioned by a Miele authorised technician. In the U.K. gas heated machines must be installed by a Corgi registered fitter only. Please observe the installation instructions and the installation diagram supplied with the machine. They are important for the correct setting up and connection of the machine. ,The machine must not be transported without its transport pallet in position.
Notes for the installer Electrical connection Steam connection The electrical components of this machine comply with IEC 335-1 and IEC 335-2-11. Steam connection must only be carried out by an authorised installer. See installation diagram and installation instructions supplied with the machine. The electrical connection may only be carried out by a suitably qualified technician in accordance with current local and national safety regulations (BS 7671 in the UK).
Explanation of symbols on the data plate 1 Machine type 2 Serial number / year of manufacture 3 Voltage/Frequency 4 Mains fuse rating 5 Drive motor 6 Plate diameter/No. of plates * 7 Drum data 8 Drum diameter/drum depth * 9 Spin speed * 10 Drum volume/Laundry dry weight 11 Kinetic energy * 12 Run-up time * 13 Braking time * 14 Heating 15 Electric heating 16 Fuse rating (on-site) 17 Indirect steam heating * 18 Direct steam heating * 19 Gas heating 20 Commissioning date 21 Water regulations registration no.
M.-Nr.
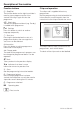
Abbreviated operating instructions PT 7251/7331/7401/7501/7801 1. Sort the laundry Not all textiles are suitable for machine drying. Please read the instructions given on the garment care label. q = Dry at normal temperature r = Dry at low temperature s = Do not tumble dry ^ Sort the laundry according to fibre type and weave 2. Switch the machine on and load the drum ^ Press the "On" button I in ^ Open the drum door and load the laundry 3.
M.-Nr.
M.-Nr.
Alteration rights reserved 48.05 M.-Nr.