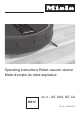
Operating instructions Robot vacuum cleaner Mode d'emploi du robot aspirateur en, fr - US, AUS, NZ, CA HS17 M.-Nr.
en - Contents IMPORTANT SAFETY INSTRUCTIONS. . . . . . . . . . . . . . . . . . . . . . . . . . . . . . . . . 5 Guide to the appliance . . . . . . . . . . . . . . . . . . . . . . . . . . . . . . . . . . . . . . . . . . . . . 9 Functions and features of the robot vacuum cleaner . . . . . . . . . . . . . . . . . . . 11 Accessories supplied . . . . . . . . . . . . . . . . . . . . . . . . . . . . . . . . . . . . . . . . . . . . . 11 Preparing for use . . . . . . . . . . . . . . . . . . . . . . . . . . . . . . .
en - Contents Maintenance . . . . . . . . . . . . . . . . . . . . . . . . . . . . . . . . . . . . . . . . . . . . . . . . . . . . . 18 Purchasing accessories . . . . . . . . . . . . . . . . . . . . . . . . . . . . . . . . . . . . . . . . . . . . 18 Ordering the correct accessories . . . . . . . . . . . . . . . . . . . . . . . . . . . . . . . . . . . . . 18 When to empty and clean the dust box . . . . . . . . . . . . . . . . . . . . . . . . . . . . . . . . . 18 How to empty the dust box . . . . . . . . . . .
en - IMPORTANT SAFETY INSTRUCTIONS This robot vacuum cleaner complies with statutory safety requirements. Improper use can, however, lead to personal injury and damage to property. To avoid the risk of accidents and damage to the robot vacuum cleaner, please read these instructions carefully before using it for the first time. They contain important information on its safety, operation and maintenance. Keep these instructions in a safe place and ensure that new users are familiar with the content.
en - IMPORTANT SAFETY INSTRUCTIONS ~ Please supervise children in the vicinity of the robot vacuum cleaner and do not let them play with it. ~ Keep the rechargeable battery and the batteries for the remote control out of the reach of children. Technical safety ~ Before using the robot vacuum cleaner and the accessories supplied, check for any visible signs of damage. Do not use a damaged appliance or damaged accessories.
en - IMPORTANT SAFETY INSTRUCTIONS ~ If the supply cord is damaged, it must be replaced by the manufacturer, its service agent or similarly qualified persons in order to avoid a hazard. ~ Batteries can leak corrosive fluids. Avoid contact with the eyes and skin. In the event of contact, rinse thoroughly with water and seek medical advice. ~ Do not stick any labels on the base station infrared transmitter. Do not place any items in front of it.
en - IMPORTANT SAFETY INSTRUCTIONS ~ Do not use the robot vacuum cleaner to vacuum toner dust. Toner, such as that used in printers and photocopiers, can conduct electricity. ~ Do not use the robot vacuum cleaner to vacuum up any inflammable or combustible liquids or gases and do not use it in areas where such substances are stored. ~ Do not allow loosely fitting clothes or hair near the roller brush or other moving parts of the robot vacuum cleaner.
en - Guide to the appliance The three illustrations for the "Guide to the appliance" section are on the pull-out pages in the back of these operating instructions. 1.
en - Guide to the appliance d Charging contacts e Cleaning brush storage compartment f Contact indicator 2. Remote control a Start / Pause button (~ II) b Timer button c Spot vacuuming mode button d Corner vacuuming mode button e Base button f OK confirmation button with direction buttons around it g Turbo vacuuming mode button h Auto standard vacuuming mode button i Clock button j Power button k Battery compartment cover 3.
en Functions and features of the robot vacuum cleaner The robot vacuum cleaner is suitable for the daily cleaning of short pile carpets, fitted carpets and hard flooring. Please observe the flooring manufacturer's cleaning and care instructions. The robot vacuum cleaner is fitted with a camera and various sensors. At the start of cleaning and during operation, the room plan as well as the items present in the room are stored in memory for the next time the room is vacuumed.
en After approx. 60 seconds the robot vacuum cleaner will switch to standby. The battery status indicator will continue to light up. The robot vacuum cleaner is reactivated by pressing any button on the remote control or one of the two sensors in the display. Connect the base station (dia. 5 - 9) ^ Open the storage compartment at the back of the base station. ^ Insert the power unit connector supplied into the socket.
en Set the clock (dia. 12) Use the remote control to set the clock. Use Switching on and off ^ Press the Clock button for three seconds. The hour indicator will flash in the clock display on the robot vacuum cleaner. ^ Press the + or - direction button to set the current hour. ^ Press the OK button to confirm your selection. The minutes indicator will flash in the clock display on the robot vacuum cleaner. ^ Press the + or - direction button to set the current minutes.
en Finishing vacuuming Interrupting vacuuming – if vacuuming started from the base station The robot vacuum cleaner will return to the base station automatically and recharge. The robot vacuum cleaner will also return to the base station and recharge when there is low battery capacity. II will appear in the clock indicator in the display. The robot vacuum cleaner will then continue vacuuming.
en Finishing vacuuming manually Turbo For vacuuming lightly soiled flooring with a short vacuuming duration. Selecting the vacuuming mode ^ Press the Power button on the remote control. The robot vacuum cleaner will switch to standby automatically after approx. 60 seconds. The display will be deactivated. The battery capacity status indicator will continue to light up. You can switch the robot vacuum cleaner to standby before 60 seconds is up by pressing the Power button again.
en Option 2 (Display) ^ Press the Y sensor repeatedly until the symbol for the vacuuming mode you want lights up. ^ To start vacuuming, press the ~ II button on the remote control or the ~ II sensor in the display. ^ Press the + or - direction button to set the hour you want. ^ Press the OK button to confirm your selection. The Timer m and minutes indicators will flash in the display.
en The settings will be displayed for approx. three seconds. The robot vacuum cleaner will now start to vacuum at the same time each day. Deactivating the acoustic signals The acoustic signals are activated as standard. You can deactivate and then reactivate them. The Timer indicator m lights up to show that the timer has been activated. To alter the entries, proceed as described previously. Deactivating the timer ^ Press the OK button on the remote control for at least three seconds.
en Maintenance How to empty the dust box ,Before any maintenance work switch the robot vacuum cleaner off with the OFF switch on the side. Only use genuine accessories with the "Original Miele" logo on them. This will ensure that the suction power of the robot vacuum cleaner is maintained, giving the best possible cleaning results.
en Cleaning the roller brush ^ Remove the dust box and empty it. ^ Place the robot vacuum cleaner upside down on a level, clean surface. ^ Clean the bottom of the lid and also the filter grille using the brush end of the cleaning brush. ^ Remove the roller brush cover. ^ Close the lid of the dust box making sure it clicks into place. ^ Replace the dust box in the robot vacuum cleaner, making sure it clicks into position. ^ Remove the roller brush.
en ^ Remove the threads and hairs with the comb end of the cleaning brush. ^ Replace the roller brush. Make sure you position it carefully. ^ Press the two side brushes firmly but carefully onto the pins provided. Ensure that they match up correctly with the L and R markings. ^ Lock the cover making sure it clicks into position. ^ Replace the dust box in the robot vacuum cleaner, making sure it clicks into position.
en Replacing the seal on the dust box Cleaning the front wheel ^ Place the robot vacuum cleaner upside down on a level, clean surface. ^ Press the dust box release button and remove the dust box. Do not lift the robot vacuum cleaner by the area around the dust box as it can come loose. ^ Unclip the seal from the bottom of the dust box and carefully swing it out until it detaches from the dust box. ^ Unclip the cover. ^ Attach the new seal to the side and clip it into position.
en Changing the batteries in the remote control The remote control requires two AAA (1.5 V) batteries. ^ Carefully remove the rechargeable battery, pressing the lug on the contact to release it. ^ Remove the battery compartment cover. ^ Replace the batteries making sure the polarity is correct. Replacing the rechargeable battery Replace it with an original Miele lithium-ion rechargeable battery type 4S1P (14.8 V / 2.2 Ah / 32.5 Wh). ^ Place the robot vacuum cleaner upside down on a level, clean surface.
en Maintenance Maintaining the robot vacuum cleaner and accessories ,Before cleaning the robot vacuum cleaner, switch it off with the OFF switch on the side. The robot vacuum cleaner and all plastic accessories can be cleaned with a dry or a slightly damp cloth, or with a proprietary cleaner suitable for plastic. ,Do not use abrasive cleaning agents, glass cleaning agents, all-purpose cleaners or oil-based conditioning agents.
en The robot vacuum cleaner is not charging. The base station / robot vacuum cleaner is not connected to the electricity supply correctly. Connect the base station exactly as described in these operating instructions. Do the same for the robot vacuum cleaner, see "Preparing for use - Charge the rechargeable battery"). The robot vacuum cleaner does not return to the base station after vacuuming. The Auto standard vacuuming mode was started somewhere else in the room.
en After sales service In the event of a fault that you cannot easily remedy, please contact – your Miele Dealer Test Marks Electrical safety RCM Mark Electrically suppressed according to AS/NZS CISPR 14 or Caring for the environment – Miele (see back of manual for contact details) Disposal of the packing material Warranty For information on the appliance warranty specific to your country please contact Miele. See back of manual for contact details. The battery pack must be removed before disposal.
en Copyright and licences Miele uses software to operate and control the robot vacuum cleaner. The copyright authorisation from Miele and other relevant software suppliers must be respected. Miele and their suppliers reserve the rights to the software components. In particular the following are prohibited: – copying and distribution, – modifications and derivations, – decompilation, reverse engineering, disassembling and other such reductions of software.
LIMITED WARRANTY - VACUUM CLEANERS USA What The Warranty Covers And For What Period The Coverage Extends Miele, Inc. (hereinafter "Miele") warrants to the original purchaser of this product, living in the United States of America, who purchased their vacuum from a Miele authorized distributor or dealer: a. That this product, including all of its Miele authorized parts is free of defects in material and workmanship. b.
LIMITED WARRANTY - VACUUM CLEANERS USA Exclusion of Other Warranties Except for the limited warranty provided herein, Miele disclaims any and all other express warranties with respect to the product. Any warranty of merchantability or fitness for a particular purpose is limited in its duration to the term of the limited warranty provided herein. Some states do not allow limitations on how long an implied warranty lasts, so the above limitation may not apply to you.
LIMITED WARRANTY - Australia / New Zealand Miele Australia Pty Ltd. ACN 005 635 398 ABN 96 005 635 398 of 1 Gilbert Park Drive Knoxfield VIC 3180. Miele New Zealand Limited. IRD 98 463 631 of Unit L, 10-20 Sylvia Park Road Mt Wellington 1060 Auckland New Zealand Warranty 1.1 Miele domestic products are subjected to rigorous testing and assessment as to their quality and fitness. 1.2 Our goods come with guarantees that cannot be excluded under the Australian Consumer Law.
LIMITED WARRANTY - Australia / New Zealand 1.7 This Miele warranty will not apply if the product/s is rendered faulty by a factor other than a defect in materials and workmanship. Such factors include but are not limited to: i. damage through misuse (including failure to maintain, service or use with proper care), neglect, accident or ordinary wear and tear (including deterioration of parts and accessories and glass breakage); ii. use for a purpose for which the product was not sold or designed; iii.
LIMITED WARRANTY - Australia / New Zealand B. Provide and make available the warranty card or a copy of the purchase receipt to show that the warranty applies to the product at the date of the claim. For New Zealand Residents A. Notify Miele who will arrange at no cost to you a warranty repair or service, call (06) 350 1350 or e-mail: service.nz@miele.com.au B.
LIMITED WARRANTY - Australia / New Zealand To notify us of these issues, please collect all the relevant information on your query and direct it to: For Australian Residents The Complaints Officer Miele Australia Pty. Ltd. 1 Gilbert Park Drive Knoxfield VIC 3180 Or e-mail: contact@miele.com.au For New Zealand Residents The Complaints Officer Miele New Zealand Ltd. Unit L, 10-20 Sylvia Park Rd Mt Wellington Auckland 1060 Or e-mail: contact@miele.com.
fr - Table des matières Prescriptions de sécurité et mises en garde. . . . . . . . . . . . . . . . . . . . . . . . . . . 35 Description de l'appareil . . . . . . . . . . . . . . . . . . . . . . . . . . . . . . . . . . . . . . . . . . . 39 Fonctionnement et caractéristiques du robot aspirateur . . . . . . . . . . . . . . . . 41 Accessoires fournis. . . . . . . . . . . . . . . . . . . . . . . . . . . . . . . . . . . . . . . . . . . . . . . 41 Avant utilisation . . . . . . . . . . . . . . . . . . . . . . . . .
fr - Table des matières Entretien . . . . . . . . . . . . . . . . . . . . . . . . . . . . . . . . . . . . . . . . . . . . . . . . . . . . . . . . 48 Comment me procurer les accessoires dont j'ai besoin ? . . . . . . . . . . . . . . . . . . 48 De quels accessoires ai-je besoin ? . . . . . . . . . . . . . . . . . . . . . . . . . . . . . . . . . . . 48 Quand dois-je vider et nettoyer le bac à poussières ? . . . . . . . . . . . . . . . . . . . . . 48 Comment vider le bac à poussières ? . . . . . . . . . . . . .
fr - Prescriptions de sécurité et mises en garde Ce robot aspirateur répond aux réglementations de sécurité en vigueur. Toute utilisation non conforme peut entraîner des dommages corporels et matériels. Lisez le mode d'emploi avant d'utiliser votre appareil pour la première fois. Vous y trouverez des informations importantes sur la sécurité, l'utilisation et l'entretien du robot aspirateur. Vous assurez ainsi votre protection et évitez d'endommager votre appareil.
fr - Prescriptions de sécurité et mises en garde ~ Les enfants à partir de huit ans sont autorisés à utiliser l'appareil sans surveillance uniquement si vous leur avez expliqué comment l'utiliser sans danger. Les enfants doivent être en mesure d'appréhender et de comprendre les risques encourus en cas de mauvaise manipulation. ~ Les enfants ne sont pas autorisés à procéder au nettoyage ou à l'entretien de l'appareil hors de la surveillance d'un adulte.
fr - Prescriptions de sécurité et mises en garde ~ Ne passez pas le robot aspirateur sur les câbles électriques. ~ Eteignez le robot aspirateur avant chaque opération d'entretien ou de nettoyage en appuyant sur le bouton OFF situé sur le côté. Procédez de même en cas de disfonctionnement. ~ Pour recharger la batterie, utilisez exclusivement les accessoires fournis (câble électrique, bloc d'alimentation et station de base). ~ Le liquide corrosif qui se trouve dans les piles est susceptible de s'écouler.
fr - Prescriptions de sécurité et mises en garde ~ Le robot aspirateur ne doit pas aspirer de liquides ou de poussières contenant de l'humidité ! Laissez sécher complètement les tapis et moquettes shampouinés avant que le robot aspirateur se déplace dessus. ~ N'aspirez pas de toner ! Le toner utilisé pour les imprimantes et les photocopieurs par exemple peut être conducteur. ~ N'aspirez pas de produits ni de gaz inflammables ou explosifs.
fr - Description de l'appareil Les croquis mentionnés au chapitre "Description de l'appareil" se trouvent dans le dépliant placé en fin de mode d'emploi. 1.
fr - Description de l'appareil d Contacts du chargeur e Compartiment de rangement des brosses de nettoyage f Signal de contact 2. Télécommande a Touche Départ / Pause (~ II) b Touche Timer c Touche du mode d'aspiration Spot d Touche du mode d'aspiration Corner e Touche Base f Touche de confirmation OK avec flèches de navigation g Touche du mode d'aspiration Turbo h Touche du mode d'aspiration standard Auto i Touche Clock j Touche Power k Couvercle de protection des piles 3.
fr Fonctionnement et caractéristiques du robot aspirateur Le robot aspirateur est conçu pour nettoyer les tapis et les moquettes à poil ras ainsi que les sols durs. Veuillez vous conformer aux conseils de nettoyage et d’entretien du fabricant du revêtement de sol. Monter les brosses latérales (croquis 1) ^ Installez le robot aspirateur sur le dos sur une surface plane et propre. Quand vous soulevez le robot aspirateur, ne l'attrapez pas du côté du bac à poussières.
fr Vous pouvez réactiver le robot aspirateur en appuyant sur n'importe quelle touche de votre télécommande ou en effleurant une des zones tactiles de l'écran. Brancher la station de base (croquis 5 à 9) ^ Ouvrez le compartiment de rangement situé derrière la station de base. ^ Insérez la fiche du bloc d'alimentation (fourni) dans la prise de la station de base. ^ Enfoncez le câble électrique (fourni) dans le bloc d'alimentation puis branchez la fiche dans la prise murale.
fr Régler l'heure (croquis 12) Utilisation Réglez l'heure à l'aide de la télécommande. Allumer et éteindre ^ Appuyez sur la touche Clock pendant 3 secondes. A l'écran, l'affichage des heures clignote. ^ Appuyez sur les touches + ou - pour régler les heures. ^ Appuyez sur la touche OK pour confirmer votre choix. A l'écran, l'affichage des minutes clignote. ^ Appuyez sur les touches + ou - pour régler les minutes. ^ Appuyez sur la touche Power de la télécommande. L'écran s'allume.
fr Terminer l'aspiration – Démarrage de la station de base Le robot aspirateur rentre tout seul à la station de base pour se recharger. Si son niveau de charge est insuffisant, le robot aspirateur rentre aussi à la station de base pour se recharger. Le cas échéant, l'heure II s'affiche à l'écran puis une fois rechargé, le robot repart aspirer. Pour reprendre l'aspiration, appuyez de nouveau sur cette touche.
fr Option 1 (télécommande) Pour mettre le robot aspirateur en veille avant que les 60 secondes soient écoulées, appuyez de nouveau sur Power. Pour réactiver le robot aspirateur, appuyez sur une des touches de la télécommande ou sur une zone tactile de l'écran.
fr Régler la minuterie (disponible uniquement si vous avez réglé l'heure) Si vous souhaitez par exemple utiliser votre robot aspirateur tous les jours à la même heure, vous pouvez programmer l'heure de démarrage et le mode d'aspiration souhaités. Votre robot est capable d'aspirer dans l'obscurité mais naturellement la qualité d'aspiration sera un peu moindre, l'appareil photo ayant besoin de lumière pour naviguer de manière optimale. Pour régler la minuterie, utilisez la télécommande.
fr Désactiver la minuterie Vous ne pouvez pas désactiver les avertissements sonores en cas d'anomalie. ^ Appuyez brièvement sur la touche Timer de la télécommande. L'affichage de la minuterie m disparaît. Pour réactiver la minuterie, appuyez de nouveau sur la touche Timer. Le symbole de la minuterie m s'allume et le robot aspirateur est prêt à démarrer à l'heure programmée. Afficher l'heure du démarrage programmé ^ Appuyez brièvement sur la touche Timer de la télécommande.
fr Entretien Comment vider le bac à poussières ? ,Eteignez le robot aspirateur avant chaque opération de maintenance : appuyez sur le bouton OFF situé sur le côté. Pour garantir des performances optimales au robot aspirateur et le meilleur résultat possible, n'utilisez que des accessoires portant le logo "Original Miele".
fr ^ Nettoyez le bac à poussières avec l'extrémité du goupillon. ^ Déverrouillez la grille qui protège le filtre puis changez le filtre d'évacuation. ^ Refermez la grille jusqu'à ce que vous entendiez un déclic. Nettoyer la brosse cylindrique ^ Avec l'extrémité du goupillon, nettoyez l'intérieur du couvercle qui contient la grille de protection du filtre. ^ Refermez le couvercle du bac à poussières jusqu'à ce que vous entendiez un déclic.
fr Nettoyer les brosses latérales ^ Installez le robot aspirateur sur le dos sur une surface plane et propre. ^ Retirez tous les fils et cheveux avec l'extrémité du goupillon. ^ Replacez la brosse cylindrique dans son habitacle en la positionnant correctement. Quand vous soulevez le robot aspirateur, ne l'attrapez pas du côté du bac à poussières. Ce dernier risque de se détacher et le robot aspirateur de tomber. ^ Soulevez les brosses latérales en vous aidant d'un tournevis plat par exemple.
fr Nettoyer la lèvre d'étanchéité du bac à poussières ^ Appuyez sur la touche de déverrouillage du bac à poussières puis sortez-le. ^ Déverrouillez la lèvre d'étanchéité sous le bac à poussières puis faites la basculer doucement jusqu'à ce qu'elle se détache du bac à poussières. ^ Nettoyez la lèvre d'étanchéité sous le bac à poussières avec un chiffon humide. ^ Replacez le bac à poussières dans le robot aspirateur jusqu'à ce que vous entendiez un déclic.
fr Changer la batterie Gardez toujours une batterie Original Miele Lithium-Ion de type 4S1P (14,8 V / 2,2 Ah / 32,5 Wh) en réserve. ^ Retirez les fils et les cheveux puis nettoyez la roue avant avec l'extrémité du goupillon. ^ Replacez la roue avant puis refermez le couvercle jusqu'à ce que vous entendiez un déclic. ^ Installez le robot aspirateur sur le dos sur une surface plane et propre. Quand vous soulevez le robot aspirateur, ne l'attrapez pas du côté du bac à poussières.
fr Rangement ,Avant de le ranger, éteignez toujours votre robot aspirateur en appuyant sur le bouton OFF situé sur le côté. Si vous prévoyez de ne pas utiliser vote robot aspirateur pendant quelques temps, rangez-le dans un endroit frais et bien aéré. Entretien Anomalies ,Eteignez le robot aspirateur avant de chercher à résoudre l'anomalie : appuyez sur le bouton OFF situé sur le côté.
fr La brosse cylindrique et les brosses latérales sont usagées : remplacez-les. Le robot aspirateur ne se recharge pas ? La station de base et / ou le robot aspirateur sont mal branchés : branchez la station de base comme indiqué au mode d'emploi. Procédez de même avec le robot aspirateur (cf. chapitre "Avant utilisation - Charger la batterie").
fr F 7 Problème interne au système : éteignez le robot aspirateur puis rallumez-le (bouton ON/OFF sur le côté du robot aspirateur). F 8 Anomalie "salissures sur la roue avant" : vérifiez que des salissures ne se sont pas accumulées au niveau de la roue avant. Retirez bien les fils et les cheveux puis nettoyez la roue. Service après-vente Si vous ne pouvez résoudre certains problèmes, veuillez communiquer avec le Service technique Miele au numéro indiqué au verso de la présente brochure.
fr Droits d'auteur et licences Miele utilise un logiciel de commande pour ce robot aspirateur. Les droits d'auteur détenus par Miele et d'autres fournisseurs de logiciels concernés doivent être respectés. Miele et ses fournisseurs se réservent tout droit relatif aux composants logiciels. Sont interdites notamment les actions suivantes : – reproductions et diffusions – modifications et dérivations – décompilations, rétro-ingénierie, décompositions et autres désassemblements du logiciel.
Limited Warranty Limited WarrantyCanada Canada The following warranty conditions are valid in Canada only. Miele Limited, (hereinafter "Miele") warrants to the original purchaser that this product, including all of it’s Miele authorized parts and accessories, is free of defects in material and workmanship. 1. Duration of Warranty This warranty is valid during the following time periods: a) Domestic appliances in normal, non-commercial, household use: – One (1) year. Parts and labour.
Limited Warranty 5.
Garantie Limitée Garantie LimitéeCanada Canada Les conditions de la garantie suivante sont valides au Canada seulement. Miele Limitée, (ci-après nommée "Miele") garantit à l’acheteur original que ce produit, y compris tous ses accessoires et pièces autorisés par Miele, est libre de tout défaut de matériel et de fabrication. 1.
Garantie Limitée Canada 5.
Tous droits réservés LES RENSEIGNEMENTS FOURNIS PEUVENT ÊTRE MODIFIÉS. VEUILLEZ CONSULTER NOTRE SITE WEB POUR CONNAÎTRE LES CARACTÉRISTIQUES LES PLUS RÉCENTES DES PRODUITS AINSI QUE LES DERNIERS RENSEIGNEMENTS TECHNIQUES ET L'INFORMATION MISE À JOUR CONCERNANT LA GARANTIE.
0LHOH $XVWUDOLD 3W\ /WG !". A]Y`Y 7YbhYf UbX
Alteration rights reserved Scout RX1 - 5113 M.-Nr. 09 860 910 / 01 INFORMATION IS SUBJECT TO CHANGE. PLEASE REFER TO OUR WEBSITE TO OBTAIN THE MOST CURRENT PRODUCT SPECIFICATIONS, TECHNICAL & WARRANTY INFORMATION.