Operating instructions for heat pump tumble dryer T 8007 WP SUPERTRONIC To avoid the risk of accidents or damage to the appliance it is essential to read these instructions before it is installed and used for the first time. en - GB M.-Nr.
Caring for the environment Disposal of the packing material The transport and protective packing has been selected from materials which are environmentally friendly for disposal and should be recycled. Ensure that any plastic wrappings, bags, etc. are disposed of safely and kept out of the reach of babies and young children. Danger of suffocation.
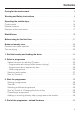
Contents Caring for the environment . . . . . . . . . . . . . . . . . . . . . . . . . . . . . . . . . . . . . . . . . . 2 Warning and Safety instructions . . . . . . . . . . . . . . . . . . . . . . . . . . . . . . . . . . . . . 6 Operating the tumble dryer . . . . . . . . . . . . . . . . . . . . . . . . . . . . . . . . . . . . . . . . . 14 Control panel . . . . . . . . . . . . . . . . . . . . . . . . . . . . . . . . . . . . . . . . . . . . . . . . . . . . . 14 Selector sensors . . . . . . . . . . . . . . .
Contents Extra options . . . . . . . . . . . . . . . . . . . . . . . . . . . . . . . . . . . . . . . . . . . . . . . . . . . . 31 Freshen up . . . . . . . . . . . . . . . . . . . . . . . . . . . . . . . . . . . . . . . . . . . . . . . . . . . . . . . 31 Gentle tumble . . . . . . . . . . . . . . . . . . . . . . . . . . . . . . . . . . . . . . . . . . . . . . . . . . . . 31 Favourite programmes . . . . . . . . . . . . . . . . . . . . . . . . . . . . . . . . . . . . . . . . . . . . 32 Programme chart . . . . .
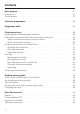
Contents Installation and connection . . . . . . . . . . . . . . . . . . . . . . . . . . . . . . . . . . . . . . . . 55 Front view. . . . . . . . . . . . . . . . . . . . . . . . . . . . . . . . . . . . . . . . . . . . . . . . . . . . . . . . 55 Rear view . . . . . . . . . . . . . . . . . . . . . . . . . . . . . . . . . . . . . . . . . . . . . . . . . . . . . . . . 56 Transporting the dryer . . . . . . . . . . . . . . . . . . . . . . . . . . . . . . . . . . . . . . . . . . . . . . 56 Installation site . . .
Warning and Safety instructions ~ It is essential to read these instructions. This tumble dryer conforms to current safety requirements. Inappropriate use can, however, lead to personal injury and damage to property. To avoid the risk of accidents and damage to the tumble dryer, please read these instructions carefully before using it for the first time. They contain important information on its safety, installation, use and maintenance.
Warning and Safety instructions ~ The tumble dryer can only be used by people with reduced physical, sensory or mental capabilities, or lack of experience or knowledge, if they are are supervised whilst using it or have been shown how to use it in a safe way and understand the hazards involved. Safety with children ~ Children under 8 years of age must be kept away from the tumble dryer unless they are constantly supervised.
Warning and Safety instructions Technical safety ~ Before setting up the tumble dryer, check it for any externally visible damage. Do not install or use a damaged tumble dryer. ~ Before connecting the tumble dryer, ensure that the connection data on the data plate (voltage and frequency) match the mains electricity supply. If in any doubt, consult a qualified electrician. ~ The electrical safety of this tumble dryer can only be guaranteed when correctly earthed.
Warning and Safety instructions ~ The tumble dryer must be isolated from the electricity supply in the event of a fault and during cleaning and maintenance. ~ The tumble dryer must not be used in a non-stationary location (e.g. on a ship). ~ Do not make any alterations to the tumble dryer, unless authorised to do so by Miele.
Warning and Safety instructions Correct use ~ To prevent the risk of fire, the following textiles must not be dried in this appliance: – items which have not been washed. – items, such as workwear, which have not been thoroughly cleaned and which are still soiled with grease, oil or other deposits (such as cosmetics, lotions etc).
Warning and Safety instructions ~ Danger. This tumble dryer must not be connected to a controllable socket (e.g. a timer switch or a peak load shut-off device). If the dryer programme were to be interrupted before the end of the cooling down phase, the laundry could self-combust. ~ To prevent the risk of fire, the following must not be tumble dried: – items which have been cleaned using chemicals (e.g. professional dry-cleaning agents).
Warning and Safety instructions ~ The tumble dryer must not be used: – without the fluff filters in place or if the fluff filters are damaged in any way. – without the fine filters in place of if the fine filters are damaged in any way. This would cause an excessive build-up of fluff which in turn would cause a fault. ~ After every cycle remove fluff from the surfaces of the fluff filters. ~ The fluff filters and the fine filters must be thoroughly dried after cleaning.
Warning and Safety instructions Accessories ~ Only use genuine Miele original spare parts and accessories with this tumble dryer. If non-Miele parts are used, guarantee, performance and product liability claims may be invalidated. Miele cannot be held liable for damage caused by non-compliance with these Warning and Safety instructions.
Operating the tumble dryer Control panel a Miele{home Symbol for Miele|home enabled appliance b Information sensor : The sensor lights up when information about the menu in the display is available. c Service interface This is used by service technicians to run diagnostic checks on your machine, or to update programming data in the future. d Selector sensors A sensor is active when it is lit up. See next page for more information.
Operating the tumble dryer Selector sensors The selector sensors are on the left and right of the display. They light up when they are active. The selector sensors are used for the following: Selecting an option A dot (#) next to an option indicates that it can be selected. The selector sensor on the left is active when the dot (#) is in front of the word, the selector sensor on the right is active when the dot (#) is behind the word or symbol.
Operating the tumble dryer Favourite programmes Programme sequence display You can save up to ten of your own customised programmes under names of your choice. Symbols in the display show which section of the programme has been reached. Drying assistant This helps you find the correct wash programme. The drying assistant guides you step by step so that you can select the best programme for the fabrics and garments you want to dry.
Operating the tumble dryer Structure of the main menu Favourite programmes – Favourite programmes (listed alphabetically) – Create – Change – Delete Cottons – Minimum iron – Delicates – .... – Drying level: (depending on programme) – .... – Duration (depending on programme) – Extras (depending on programme) – Start at – Finish at Drying tips – Cottons* – Delicates* – Cotton + synthetic* – Woollens – Silks – Microfibre* – Linen* * This option has further choices.
Operating the tumble dryer Settings ! – Language ! – Time* – Buzzer – Drying levels* – Code – Keypad tone – Brightness – Contrast – Display / keypad illumination – Memory – Anti-crease – Miele|home** – Remote control** * This option has further sub-menus. ** Appears if the dryer has been fitted with the optional communication module.
Miele{home a Communication-enabled appliances Possible connections (optional) b Communication module g PC, Notebook c SuperVision master appliance h iPod* or iPhone* d Power supply i Connection with a domestic bus system display e Miele|home Gateway f (WLAN) Router j Possible internet conection * iPod and iPhone are registered trade marks of Apple Inc.
Miele{home Depending on country, this appliance is communication enabled and can be linked into the Miele|home system via a communication module b(optional accessory). Miele|home enabled appliances send information via the household power supply network d to the master appliance c about the operational status of the appliances, as well as information about the progress of the programme.
Before using for the first time Before using the dryer for the first time ensure that it is correctly installed and connected. See "Installation". ,If the tumble dryer has not been transported as described in "Installation" then it must be left to stand for at least 1 hour before it is connected to the electricity supply. Otherwise the heat pump may become damaged. Preparing the dryer for use is done in five steps. The dryer guides you automatically through steps 1. to 5. 1.
Before using for the first time 3. Set the time of day (if required) Enter the time of day. Time + $ 10 :21 – # OK ! [ [ [ ^ Use + and - to set the hour. ^ Confirm with OK. Then set the minutes and confirm with OK. 4. Miele|home message This communication enabled dryer can transmit programme data through the power lines to the Miele|home system if it has been fitted with a communication module (optional accessory). ^ Confirm the message with OK. 5.
Notes on laundry care Garment care label symbols Drying q/r Normal/low temperature Drying is carried out at a low temperature in every programme, so you do not need to sort your garments according to whether they have the q or r symbol. s Do not tumble dry Tips on drying – Always observe the maximum recommended loads given in the "Programme chart". Never overload the drum. Overloading can cause unnecessary wear and tear to the laundry, give a disappointing drying result and cause more creasing.
1. Sort the laundry and loading the drum Prepare the laundry Load the tumble dryer To ensure an even drying result sort the washed laundry according to: .. . . . the drying level required, . . . the type of fibre or weave, . . . size, . . . the moisture content after spinning. ^ Press the a button to open the door. ,Make sure that objects, e.g. detergent dispensing balls, have been removed from the laundry. They could melt and cause damage to the dryer or the laundry.
2. Select a programme Switch the dryer on with the K button \ \ \ Main menu 10:21 $ Favourite programmes # Cottons [ m [ ! Minimum iron ^ Select the programme you want: Use the right hand sensors to show more programmes. An additional menu may appear depending on the programme selected: – Programmes with drying levels (sensor drying) e.g. Cottons ... : You have a choice of drying levels with this programme.
2. Select a programme – Programmes which operate by time e.g. Warm air ... : You have to select a duration. \ \ \ Warm air 1-7 kg 0:20 h $ Duration 0:25 h:min 10:21 + $ – # # Extras OK ! # Start at ^ Touch the Duration sensor. ^ Use the + and - sensors on the right to alter the value which is highlighted. ^ Confirm the value you have set with OK. – Cool air: 20 mins - 1 hour – Warm air: 20 mins - 2 hours – Basket programme: 40 mins - 2:30 hours – Other programmes e.g. Gentle smoothing ...
2. Select a programme Select an extra option \ \ Extras 10:21 $ 9 Freshen up # 8 Gentle tumble OK ! [ ^ Select the Extra you require. When you select – Freshen up the items are aired until they are at the Normal drying level. – Gentle tumble drum rotation is reduced for less mechanical action. A tick 9 will appear to show which Extra has been selected. ^ Confirm with OK. Start at / Finish at You can set the start (Start at) or the end (Finish at) time of a programme.
3. Start the programme Starting a programme ^ Touch the green illuminated Start sensor. Cottons G 10:21 Normal - Extras (See :) Time left: 2:03 h Change ! [ – The time left counts down in the display. – Symbols in the display show which section of the programme has been reached.
3. Start the programme Cancelling a programme ^ Touch the U sensor. Cottons : \ 10:21 Cancel programme? ! Continue Cancel ! [ ^ Select Cancel. The items will be cooled down 7, depending on the temperature reached and how long they have been dried for. If you select U and Cancel again, O Finish will appear in the display. ^ Press the s button to switch the dryer off. ^ Press the s button to switch the dryer on. ^ Select another programme and start it. An alternative way to cancel ^ Press the a button.
4. End of the programme - unload the drum Before the end of a programme There is a cooling down phase at the end of the drying sequence: 7 (= Cooling down) appears in the display. The programme is not finished until the cooling down phase has been completed. End of the programme - unload the drum O Anti-crease and Finish will appear in the display to indicate that the programme has finished. The buzzer will sound at intervals.
Extra options The drying air is heated up for a specific length of time. After this, the garments are aired to the Normal drying level without any more heat being added. Use the Freshen up extra option to eliminate or reduce unwanted smells in clean (dry or damp) clothing. Items must be suitable for drying in a tumble dryer. Dampen the garments a little beforehand or add a fabric conditioner sheet. Odours will not be removed as effectively from any parts of the garments which are made of synthetic fibres.
Favourite programmes You can save up to ten programmes with the settings you have selected for them under names of your choice. The name can have up to 12 characters. The favourite programmes which have been set are stored alphabetically. To save a favourite programme There are two ways of saving a programme as a favourite. 1. Open the Favorite programmes menu and select Create. You can then select a programme in the usual way. 2.
Favourite programmes To save a name for a favourite programme \ \ \ Name: D r y _ _ _ _ _ _ _ $ Space 10:21 Delete character ) g h i j k l m n o p q r s t u v w x ! Select character y $ * Confirm name ! [ [ [ ^ Select Confirm name. To select a favourite programme ^ Call up the Favorite programmes menu. The saved programmes will appear in alphabetical order. ^ Select the favourite programme you want. ^ Touch the green illuminated Start sensor. The programme will start.
Programme chart Cottons Max. load 8 kg* Extra dry, Normal+, Normal** Use for Single and multi-layered cotton fabric such as Towelling, T-shirts, underwear, flannelette bed linen and baby clothes. Notes – Select Extra dry for multi-layered and very thick fabrics. – Do not use Extra dry for loopknit fabrics (e.g. T-shirts, underwear, baby clothes), as they have a tendency to shrink. Hand iron r, Hand iron rr, Machine iron Use for Cotton or linen fabrics e.g. Table linen, bed linen, starched laundry.
Programme chart Automatic plus Max. load 5 kg* Normal+, Normal, Hand iron r Use for Mixed loads of garments suitable for the Cottons and Minimum iron programmes. Sort according to colour. Shirts Max. load 2 kg* Normal, Hand iron r Use for Shirts and blouses. Denim Max. load 3 kg* Normal, Hand iron r Use for Denim garments, e.g. jeans, jackets, skirts, shirts. Express Max. load 3.
Programme chart Sportswear Max. load 3 kg* Normal+, Normal, Hand iron r Use for Sportswear which is suitable for drying in a tumble dryer. Outerwear Max. load 2.5 kg* Normal, Hand iron r Use for Outerwear which is suitable for drying in a tumble dryer. Cottons hygiene Max. load 3.5 kg* Normal Use for Cotton and linen fabric which is in direct contact with the skin, e.g. underwear, baby clothes, bed linen, towelling.
Programme chart Pillows 1-2 pillows up to 80 x 40 cm Large pillows 1 pillow up to 80 x 80 cm Normal Use for Pillows suitable for drying in a tumble dryer, with feather, down or synthetic fillings. Note Please observe the instructions on the care label. Pillows can still feel damp after being dried. You can use this programme several times until the pillow feels dry. Gentle smoothing Max. load 1 kg* Use for – Cotton and linen fabric – Minimum iron mixed fibre, cotton or synthetic fabric, e.g.
Programme chart Cool air Use for Max. load 7 kg* Any item which only needs airing. Warm air Max. load 7 kg* Use for – Drying voluminous and multi-layered fabric whose layers have different drying characteristics, e.g. jackets, pillows. – For drying individual items, e.g. bath towels, swimwear, tea-towels. Note – Do not select the longest drying time to start with. Check the items as you are drying them to find the optimum time. Basket programme Max.
Cleaning and care Emptying the condensed water container The condensed water will be collected in the condensed water container. Empty the condensed water container after every drying programme. If the maximum level of the condensed water container is reached – the programme will be cancelled. – Empty the container will appear in the display. To delete the message: ^ Switch the dryer off and then on again. ^ Empty the container. ^ Replace the container in the dryer.
Cleaning and care Make sure you clean all the filters at the correct intervals This tumble dryer has a multi-stage filter system, consisting of the fluff filters and a fine filter. When to clean the fine filter Only clean the fine filter when Clean the plinth filter which is located in front of the heat-exchanger appears in the display. – This dryer must not be used without the fluff filters or fine filter in place. The grille in the bottom right must always be in place.
Cleaning and care Cleaning the surfaces of the fluff filters When to clean Clean the surfaces of the fluff filters in the door and the door opening after each drying programme. Cleaning them whilst dry Note: You can also use a vacuum cleaner to remove the fluff. ^ Use your fingers or a vacuum cleaner to remove the fluff from the surface of 1 Fluff filter 2 Door seal ^ Open the door and pull the fluff filter (1) out of the door as illustrated.
Cleaning and care Cleaning with water If there is a great deal of compacted fluff on any of the filters, they can be removed and cleaned under hot running water. ^ Open the door and pull the fluff filter out of the door as described previously. The two filters in the door opening can also be removed if you need to clean them with water. Replacing the filters ,Do not replace the filters if they are damp or wet. Damp or wet filters could cause operational faults.
Cleaning and care Fine filter When to clean Only clean the fine filter when Clean the plinth filter which is located in front of the heat-exchanger appears in the display. ^ To delete the message: Touch the OK sensor. Removing the fine filter ^ Pull the filter out by the handle. ^ Switch the dryer off. On the front left of the tumble dryer: ^ Pull the handle out of the filter. Cleaning the fine filter ^ Press to open the access panel for the fine filter (see arrow).
Cleaning and care Cleaning the cover for the fine filter Cleaning the heat exchanger ,Danger of injury. Do not touch the cooling fins. You could cut yourself. ,Prevent damage. Carefully pass the vacuum cleaner brush over the surface, without applying any pressure. Otherwise the cooling fins or the struts in front of them could become damaged. ^ Use a damp cloth to remove any fluff. Make sure that you do not damage the rubber seal when doing this.
Cleaning and care Replacing The filter must be fitted correctly and the access flap closed to ensure that water cannot leak from the condenser system and to ensure that the dryer functions efficiently. Cleaning the tumble dryer Disconnect the dryer from the mains electricity supply. ^ Fit the filter back on the handle. Make sure it is the correct way round.
Problem solving guide With the help of the following notes minor faults in the performance of the appliance, some of which may result from incorrect operation, can be put right without contacting the Service Department. ,Repair work to electrical appliances should only be carried out by a suitably qualified person in strict accordance with current local and national safety regulations. Repairs and other work by unqualified persons could be dangerous.
Problem solving guide Problem : Clean the plinth filter which is located in front of the heat-exhanger appears at the end of a programme. ; Fit plinth filter Fit the plinth filter appears and the programme cannot be started. ; Technical fault F1 Comfort cooling Possible cause Remedy This is a reminder to clean the fine filter in front of the heat exchanger unit under running water. – Clean the fine filter. See "Cleaning and care". To delete the message: – Touch the OK sensor.
Problem solving guide Problem , Clean out airways Possible cause The cool air intake panel is blocked. Remedy * – Move any objects, such as a laundry basket, away from the grille. – Open a door or window to keep the room temperature down. – Wait until the room has cooled down before restarting the programme. appears after a programme has been cancelled. The temperature in The laundry is the room has risen not properly dry. sharply.
Problem solving guide An unsatisfactory drying result Problem The laundry is not sufficiently dry. Possible cause The load consisted of different fabrics. Feathers are a natural product and this is quite normal. Items made of synthetic Synthetic fibres tend to fibres are charged with attract static charge. static electricity after drying. Feather filled pillows smell after drying. Remedy – Finish drying using the Warm air programme. – Select a different programme next time*.
Problem solving guide Other problems Problem The drying process goes on too long or even switches off. Possible cause Remedy * Ventilation to and from the dryer may be insufficient, e.g. because it is installed in a room which is too small. This can cause the temperature in the room to rise sharply. – Detergent residues, hair and fine fluff can clog the fluff filters and the fine filters. – The cooling ribs can be clogged. Open a door or window while the dryer is in operation for increased air flow.
Problem solving guide Problem Possible cause Remedy These noises are quite normal and do not indicate a fault. The display and the The display and sensor – Touch the Start sensor. sensors are not lit up illumination switch off to The display and sensors and the Start sensor is save energy. will light up. flashing slowly. – See "Settings menu, Display / keypad illumination". The programme does No obvious cause. – Is the dryer switched on? not start.
Problem solving guide Cleaning the cooling fins (bottom right grille) ,In general, the cooling fins do not need cleaning. They should only be cleaned if the drying process is taking an exceptionally long time due to a very high level of dust or fluff in the room in which the dryer is installed. ,To prevent damaging the cooling fins, only pass the vacuum cleaner brush over them lightly, without applying any pressure. Use the yellow lever supplied to open the bottom right grille.
Problem solving guide Changing the lamp Disconnect the tumble dryer from the mains electricity supply. ^ Open the door. You will find the interior light cover at the top of the drum aperture. The light specification and maximum wattage is stated on the data plate and on the light cover. ^ Turn the light anti-clockwise to remove. ^ Replace the lamp. ^ To close the cover push it upwards and press it on the left and right until you hear it click into position.
After Sales service Repairs Future updates (PC) In the event of any faults which you cannot remedy yourself, please contact The indicator or check light marked PC on the fascia panel is the interface used by the Miele service technicians during service work for testing purposes and for updating the appliance's programme data. – your Miele dealer or – the Miele Service Department (see back cover for contact details).
Installation and connection Front view a Mains connection cable f Four height adjustable screw feet b Control panel g Cool air intake grille (do not obstruct with a laundry basket or other objects) c Condensed water container (empty after every drying programme) d Door e Service panel for the fine filter (do not open during drying) h External drainage of condensed water hose (see "External condensed water outlet") 55
Installation and connection Rear view ,If transporting the dryer at an angle, only tip it towards its left side. a Protruding lid for holding when moving the dryer (see arrows) b Mains connection cable c Hose for external drainage of condensed water d Accessories for connection to a sink drain outlet Transporting the dryer When moving the dryer, hold it by the lid where it protrudes to the rear.
Installation and connection Installation site ,Make sure the dryer door can be opened without hindrance after installation. ,The cool air intake panel at the front of the dryer must not be blocked or covered, e.g. by a laundry basket, as this would cause a fault. Building under a continuous worktop/ in a row of kitchen units ,It is very important to avoid a build-up of heat. The warm air which is expelled from the rear of the dryer must be able to dissipate.
Installation and connection Levelling the appliance Before moving the tumble dryer again (e.g. when moving house) After each use a small quantity of condensed water will collect in the area around the pump. This water can run out if the tumble dryer is tipped up when it is being moved. It is a good idea to run the Cool air programme for approximately 1 minute before moving it. Any remaining condensed water will then be fed into the condensed water container or out through the drain hose.
Installation and connection External condensed water outlet General notes ^ There will be a small amount of residual water in the drain hose. Have a container ready to collect this. When drying is in progress, condensed water is pumped into the condensed water container through the drain hose at the back of the dryer. The condensed water can also be drained off directly if the tumble dryer is installed near a sink, drain outlet etc. so that the condensed water container does not have to be emptied.
Installation and connection External drainage via a sink or gully ^ See "Front view" illustration. ,If you want to drain the water off into a sink you will need to secure the hose carefully, e.g. by tying it to a tap to make sure it cannot slip during use. Otherwise there is a risk of overflowing water which could cause damage. Example: Connection to a sink drain outlet The drain hose with non-return valve fitted can be connected directly to a suitable sink drain outlet.
Installation and connection ^ Fit adapter 1 to the sink drain outlet using nut 2. If this nut has a flat disc in it you should take the disc out first. ^ Attach the end of hose 4 to adapter 1. ^ Use a screwdriver to tighten hose clip 3 up close to the nut. 1 Adapter 2 Nut 3 Hose clip 4 End of the hose 5 Non-return valve 6 Tumble dryer drain hose ,Non-return valve 5 has to be fitted with the arrow pointing in the direction of flow (i.e. towards the sink).
Electrical connection Electrical connection U.K. Non-rewireable plugs BS 1363 All electrical work should be carried out by a suitably qualified and competent person, in strict accordance with current national and local safety regulations (BS 7671 in the UK). The fuse cover must be refitted when changing the fuse, and if the fuse cover is lost, the plug must not be used until a suitable replacement is obtained.
Consumption data Cottons Normal2 Cottons Normal Cottons Normal + Gentle tumble + Freshen up Cottons Hand iron rr Load1 Final spin speed in a domestic washing machine Residual moisture kg 8.0 4.0 8.0 8.0 8.0 8.0 rpm 1000 1000 1200 1400 1600 1800 % 60 60 53 50 44 43 kWh 2.02 1.11 1.80 1.70 1.55 1.50 min. 154 89 139 132 118 116 8.0 3.0 8.0 8.0 8.0 8.0 8.0 3.5 1000 1000 1000 1200 1400 1600 1800 1200 60 60 60 53 50 44 43 40 2.05 0.95 1.40 1.20 1.15 0.95 0.95 0.
Technical data Height 850 mm Width 595 mm Depth Depth with door open 596 mm 1071 mm Height for building under Width for building under 820 mm 600 mm Depth for building under Suitable for pushing under a worktop 600 mm yes Suitable for stacking Weight yes 61 kg Drum volume Maximum capacity 111 litres 1-8 kg dry weight Capacity of condensed water container Drain hose length Approx. 4.2 litres Maximum delivery head Maximum drain hose length 1.5 m 4m Length of connection cable 2m 1.
Settings menu The Settings menu is used to alter the dryer's electronics to suit different requirements. Settings can be altered at any time. Open the Settings menu \ \ \ Main menu 10:21 $ Settings ! # Favourite programmes # Cottons [ m [ ^ Use the top right hand sensor to select the Settings ! menu. ^ Confirm with OK. To select a setting \ \ \ Settings 10:21 $ Language ! # Time ! Drying levels [ m [ ^ The sensors on the right can be used to scroll up or down the list.
Settings menu Time The time can be set to appear as a 24 hour or 12 hour clock. You can also use this setting to adjust the time of day. Clock format \ \ Time 10:21 $ 24 h clock ( # 12 h clock OK ! [ ^ Select the format you want. The dryer is delivered with the clock format set as a 24 hour clock. Set the time of day Time + $ 10 :21 - # OK ! ^ Use the + and - sensors to set the hour. ^ Confirm the hours with OK and then enter the minutes.
Settings menu Code The code prevents the dryer being used without your knowledge. When the code has been activated, you have to enter a code after switching the dryer on. Otherwise the dryer cannot be operated. The door can be opened and items removed at any time. To activate the code The display will now request that a code is entered. The code is 250 and cannot be altered. Activate code 10:21 + $ 2 AA Please enter code – # OK ! [ [ [ ^ Use + to enter the first number.
Settings menu To use the dryer when the lock code is activated When the dryer is switched on again, the display will request the code. ^ Enter code 250 with the + and - sensors. The dryer is now unlocked and ready for use. To deactivate the code ^ Proceed as for activating the code. Information 1 Code OK. Ready OK ! [ ^ Confirm with OK. You can now switch on the dryer without being asked to enter a code.
Settings menu Buzzer When the buzzer function has been activated, an audible tone sounds at the end of a programme. Off Factory default The buzzer is switched off but sounds at maximum volume if there is a fault. Normal The buzzer sounds at the end of a programme. Loud The buzzer sounds louder at the end of a programme. Keypad tone An audible tone sounds each time a button is pressed. If you make an alteration it will appear in the display immediately.
Settings menu Memory The electronics will memorise the drying level and some of the extra options selected for the current drying programme and the duration of a timed drying programme. When the programme is chosen again these settings will appear in the display. Off Factory default On Anti-crease Anti-crease helps prevent creasing, if laundry is not normally removed immediately after the end of a programme. After the programme has finished, the drum will continue to rotate at intervals.
Optional accessories Optional accessories for this dryer are available from your Miele Dealer or from the Miele Spare Parts Department, or via the internet at www.miele-shop.com. Fragrance flacon For a pleasant fragrance when drying your laundry. Holder for fragrance flacon The holder is required to fit the fragrance flacon to the fluff filter. The holder comes with its own instructions. Dryer basket This enables items which must not be subjected to mechanical action to be dried or aired.
Alteration rights reserved/0113 M.-Nr.