
User manual


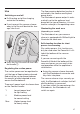


Table Of Contents
- Contents
- Warning and Safety instructions
- Guide to the appliance
- Caring for the environment
- -
- Installation and connection
- Assembling the vacuum cleaner
- Using the PowerUnit solo
- Connecting the Comfort handle
- Connecting the PowerUnit and the suction tube
- Inserting the battery
- Connecting the Electrobrush
- General battery information
- Charging the battery (without wall mounting)
- Charging the battery (with wall mounting)
- Wall mounting
- Attaching the mounting plate
- Connecting the accessories holder (if required)
- Connecting the wall bracket
- Battery charging state indicator (while charging)
- Battery charging state indicator (while in use)
- Using the supplied accessories
- Use
- Maintenance
- Error messages
- Problem solving guide
- Cleaning and care
- Service
- Optional accessories
- Electrical connection for the UK
- Installation and connection

26
Additional AP01 battery and LS03
charger cradle
(depending on model)
Using the additional battery doubles the
amount of time the vacuum cleaner can
be used for.
Before charging for the first time,
please note the information in “Install-
ation and connection – General bat-
tery information”.
After the battery has been fully
charged once in the PowerUnit, the
charger cradle can be used to charge
it. Push the battery into the charger
cradle until it audibly clicks into place.
Insert the plug into a power socket.
The charging process will start. The
battery charging state indicator flashes
on the left.
You can find out more about the battery
charging state indicator in “Installation
and connection – Battery charging state
indicator”.
If you place the run-down battery in
the charger cradle straight after use, it
will only start charging once the bat-
tery has cooled down.
The cooling process can take up to
60minutes. The battery charging state
indicator on the charger cradle will not
respond during this time.