
User manual


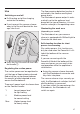


Table Of Contents
- Contents
- Warning and Safety instructions
- Guide to the appliance
- Caring for the environment
- -
- Installation and connection
- Assembling the vacuum cleaner
- Using the PowerUnit solo
- Connecting the Comfort handle
- Connecting the PowerUnit and the suction tube
- Inserting the battery
- Connecting the Electrobrush
- General battery information
- Charging the battery (without wall mounting)
- Charging the battery (with wall mounting)
- Wall mounting
- Attaching the mounting plate
- Connecting the accessories holder (if required)
- Connecting the wall bracket
- Battery charging state indicator (while charging)
- Battery charging state indicator (while in use)
- Using the supplied accessories
- Use
- Maintenance
- Error messages
- Problem solving guide
- Cleaning and care
- Service
- Optional accessories
- Electrical connection for the UK
- Installation and connection

30
Once it is clean, replace the fine dust
filter in its position in the dust con-
tainer.
Replace the dust container on the
PowerUnit connector.
Cleaning the pre-filter
The pre-filter is located in the dust con-
tainer.
Clean the pre-filter when required.
Remove the dust container.
Remove the fine dust filter.
Empty the dust container over a bin
and lift the pre-filter upwards to re-
move it.
Unlock the motor protection filter by
turning it anti-clockwise and lift it up-
wards to remove it.
Risk of damage caused by incor-
rect cleaning.
The pre-filter can become damaged
and be less effective as a result.
Do not use pointed or sharp-edged
objects to clean the filter.
Carefully knock the dust out of the
pre-filter over a bin.
Tip: Use a tool like a fine cleaning brush
to clean the inside of the pre-filter thor-
oughly.
You do not need to clean the motor pro-
tection filter. It can be removed so that
the inside of the pre-filter is easier to
reach.
After cleaning the pre-filter, place the
motor protection filter back into the
pre-filter securely, making sure it is
properly positioned.
Lock the motor protection filter by
turning it clockwise as far as it will go.