
Instruction Manual


Milestone Husky M30/M50
Administrator's Manual
www.milestonesys.com
152
Advanced configuration
To start the wizard, select Access Control in the node tree, right-click, and click Create new.
Steps in this wizard:
Access control system integration ......................................................... 152
Connecting to the access control system .............................................. 152
Associate cameras with doors ............................................................... 152
Final summary ....................................................................................... 152
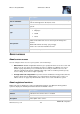
Access control system integration
Specify the connection details for the access control system you want to add. The parameters that you
must specify depend on the type of system, but are typically the network address of the access control
system server and an access control administrator user name and password.
The video management system uses the specified user name and password when you log into the
access control system for retrieving configuration.
The integration plug-in may also define secondary parameters which are not listed in the wizard, but
you can change these in General Settings after setting up the integration. The default values for the
parameters are supplied by the plug-in or XProtect.
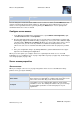
Connecting to the access control system
When the plug-in has been successfully integrated, a summary of the retrieved access control system
configuration appears. Review the list to ensure that all items have been integrated before you
continue to the next step of the wizard.
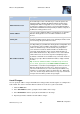
Associate cameras with doors
Configure mappings between access points in the access control system and the cameras in the
XProtect system, to show related video for events from the doors.
You can map several cameras to one access point. The primary camera is the camera defined at the
top of the list, but the XProtect Smart Client user is able to switch between all cameras when
investigating events, for example.
The XProtect Smart Client user is also able to add each of the cameras when configuring Access
Monitor view items, for example.
Final summary
Your system has been successfully integrated with default settings inherited from the integration plug-
in. The access control feature is immediately available for use by operators of the XProtect Smart
Client. You can refine the configuration in Properties. Press F1 to launch the help system.