Integrated Modeling Amplifier User’s Guide Please visit Johnson Amplification on the World Wide Web at http://www.digitech.
WARNING CAUTION FOR YOUR PROTECTION, PLEASE READ THE FOLLOWING: RISK OF ELECTRIC SHOCK DO NOT OPEN A T T E N T I O N : RISQUE DE CHOC ELECTRIQUE - NE PAS OUVRIR W A R N I N G : TO REDUCE THE RISK OF FIRE OR ELECTRIC SHOCK DO NOT EXPOSE THIS EQUIPMENT TO RAIN OR MOISTURE The symbols shown above are internationally accepted symbols that warn of potential hazards with electrical products.
Johnson Millennium DECLARATION OF CONFORMITY Manufacturer’s Name: Manufacturer’s Address: declares that the product: Product Name: Product Options: Johnson Amplification 8760 S.
Johnson Millennium Quick Start For those of you who prefer to play now and read later, we've included this Quick Start section to get you up and running. Connect Cables: Connect guitar into the Bright or Normal input jacks. Connect an un-shielded speaker cable to the extension speaker cabinet outputs (located on the rear panel of the Millennium) and run into the desired extension speaker cabinet (such as the Johnson Amplification J212 or J412) with a 4 ohm minimum load resistance requirement per channel.
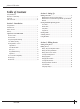
Johnson Millennium Table of Contents Safety Information Declaration of Conformity................................................................i Quick Start........................................................................................ii Table of Contents ............................................................................iii Section 1 - Introduction Congratulations ................................................................................1 Included Items..........................
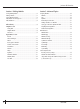
Johnson Millennium Section 4 - Editing Modules Section 5 - Advanced Topics Storing/Naming Defaults ..................................................................30 Editing a Module ..............................................................................31 Output Module Functions................................................................32 Effect Module Size and Type List ....................................................33 Effect Default List .............................................
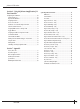
Johnson Millennium Section 6 - Using the Johnson Amplification J-12 Foot Controller Configuring the Pedalboard ............................................................68 Connecting the J-12 ....................................................................68 Expression Pedal Names ..............................................................68 Assigning Functions ....................................................................69 Preset to Footswitches ............................................
Johnson Millennium VI User Guide
Johnson Millennium Section -1 Introduction Section-1 Introduction Congratulations... ... you are now the proud owner of a Johnson Millennium Stereo 250 Amplifier Head, the most powerful, flexible, and easy-to-use Integrated Modeling Amplifier ever produced. Your Millennium has set the new standard for all other Amplifiers/Multi-effect processors to follow. This owner's manual is your key to understanding the powerful world of the Millennium. Read it carefully.
Section -1 Introduction We at Johnson Johnson Millennium Amplification are very proud of our products and back-up each one we sell with the following warranty: 1. The warranty registration card must be mailed within ten days after purchase date to validate this warranty. 2. Johnson Amplification warrants this product, when used solely within the U.S., to be free from defects in materials and workmanship under normal use and service. 3.
Johnson Millennium Section -1 Introduction A Quick Tour of the Millennium Two-Fifty The Front Panel 1 2 3 4 a-e 5 a-f 6 7 8 10 9 12 13 14 15 16 11 a-f 17-a-f 18 1) Bright and Normal Inputs - The 1/4” inputs of the Millennium allow you to select between Bright (top) and Normal (bottom). The Bright input produces a slightly brighter sound, where as the Normal input provides a normal input color. 2) Input Level Control - This knob controls the overall input level of the Millennium.
Johnson Millennium Section 1 Introduction 5) Amplifier Model Buttons- These buttons let you instantly select any one of the Integrated Amplifier models and switch channels within the currently selected Amplifier model setting. The buttons are as follows: 5a) American Stack - This button is used to instantly call up the American Stack amplifier models. 5b) British Stack - This button is used to instantly call up the British Stack amplifier models.
Johnson Millennium Section -1 Introduction 9d) Information Line - The row of 24 characters in the top line of the display indicates more detailed information about specific functions and items such as: preset names, parameter names and utility information. 9e) Parameter Data Sections - Immediately below the information line, are four parameter data sections. They correspond with knobs <1> through <4> on the front panel. Each section displays the current value of the indicated parameter.
Section -1 Introduction Johnson Millennium 13) Speed/1 Knob - This knob controls the Speed of modulation effects when the unit is in Preset mode. In Edit or Utility mode, it controls the number 1 parameter that appears in the display. 14) Depth/2 Knob - This knob controls the depth of modulation effects when the unit is in Preset mode. In Edit or Utility mode, it controls the number 2 parameter that appears in the display.
Johnson Millennium Section -1 Introduction The Rear Panel 2 1 Expression Pedal 1 2 3 4 5 7 6 8 9 10 FX Return FX Send MIDI In J3 Out/Thru Footswitch Right Speaker Left Speaker Speaker Output (4 Ohms Minimium) J12 Right Left Direct/Record Output 1) Fuse- 100, 120 VAC 6 Amp fuse is inserted here. 2) Expression Pedal 1 and 2 Jacks - This is the insert point for an external expression pedal. Standard volume or Voltage controller pedals can be used in these inserts.
Johnson Millennium Section -1 Introduction Integrated Amplifier Modeling Vintage and Modern Amp Models: There is really no need to have numerous vintage or modern amplifiers in storage or cluttering up space. The Millennium's unique Integrated Amplifier modeling puts almost every amplifiers’ tone under the hood.
Johnson Millennium Section - 1 Introduction Digital Effects Not only is the MIllennium a great stand-alone guitar amplifier, but it also has a world class digital multi-effect section that includes almost every studio-quality effect imaginable.
Section - 1 Introduction Johnson Millennium Basic Specifications 2 Inputs, Up to 4 Extension Speaker Outputs and XLR Cabinet Emulation Outputs With the Millennium, the input section offers both a Bright and Normal input, and up to 4 extension speaker cabinets can be connected to the Millennium. The Bright and Normal Inputs give you the best of both worlds. Using the Bright Input produces a hotter and louder tone, where the Normal Input will produce a more natural coloring of the tone.
Johnson Millennium Section - 1 Introduction Foot Controller Compatibility Although the Millennium has incredible flexibility on its own, we at Johnson Amplification have made the Millennium compatible to use with the Johnson Amplification J-12 foot controller, or the Digitech Control One. The optional J-12 can help you maximize the potential of your Millennium.
Johnson Millennium Section - 1 Introduction Module Types Each effect in the digital FX section is contained in separate effect blocks referred to as “Modules”. There are three basic types of FX Modules used by the Digital FX section of the Millennium • Mono FX module • Dual FX module • Stereo FX module The figure below illustrates how signals are routed through each type of FX module. Although all three modules are shown with stereo inputs, they can still be used with a mono source.
Johnson Millennium Section - 2 Setting Up Section-2 Setting Up Making Connections Your Millennium can be connected in several different ways to meet the requirements of specific applications. The following diagrams offer some different ways your Millennium can be connected. NOTE: In the following diagrams, we have shown use of the external FX loop.
Johnson Millennium Section - 2 Setting Up Output Input Loop Return Loop Send Input Left Direct XLR Output 4 6 4 2 Right Direct XLR Output 6 4 8 2 0 0 6 0 6 0 0 0 +1 0 -2 -4 Pan 0 -2 +5 Pan 0 -2 Pan +5 0 Pan 0 +1 0 -2 Pan +5 0 Pan +1 +5 Pan +5 +4 -5 Mute Mute Mute Mute Mute L/R L/R L/R L/R L/R L/R +10 +10 +10 +10 +10 +10 +10 +5 +5 +5 +5 +5 +5 +5 0 0 0 0 0 -5 -5 -5 -5 -5 -5 -10 -10 -10 -10 -10 -10 -10 -10 -20 -20 -3
Johnson Millennium Section - 2 Setting Up Getting Around In the Operating System The menu structure of your Millennium has been specially designed to be easy to use. The display shows the information you need, but to make things even easier for you, illumination of the front panel buttons offers additional operating information. The front panel buttons give you information in one of two ways: 1 - If the button is dim, its function is inactive.
Johnson Millennium Section - 2 Setting Up Getting Sounds It never fails, there always seems to be a sound man at the back of the room, or an engineer in the control room that wants “more of this, or less of that” (bottom line: your ear is king). But, to accommodate these situations, you may need to make some minor adjusting here and there along the way. So here are some helpful guidelines for getting great sounds, while keeping everyone happy.
Johnson Millennium Section - 2 Setting Up •When the tone controls are used, the display will appear as follows on page 2 of the amplifier module when the Millennium is in Edit mode: 2 USER BANK PAGE 2 OF 5 a:gain lvl 1 40 . LINK CHANGED 2 B:GAIN LVL 50 . 3. 70 LINK CHANGED WAH TUBE LINK CHANGED EQ 4 70 . LINK CHANGED GATE L/R OUTS # b DIGITAL •Using the knob turn to page 4 and the display will appear like this: 2 USER BANK PAGE 4 OF 5 CHN B:TREB 2 LINK CHANGED b 25 .
Section - 2 Setting Up Johnson Millennium Digital FX Quick Adjust Knobs Many digital effects available in the Millennium have a simple quick adjustment knob located on the front panel. These knobs are great to use when you need to bring in or bring down the level of a selected effect. To use these knobs when the Millennium is in Preset mode, simply turn the appropriate quick adjust knob and adjust. Always remember to store the settings once they are dialed-in.
Johnson Millennium Section - 2 Setting Up Selecting A Preset When you first turn on your Millennium, you are in Preset mode, and the display will appear something like: 2 USER PAGE 11 OF Clean Comp Delay %kHz %kHz 0 msdB 2 1 LINK CHANGED %kHz 0msdB 3 LINK CHANGED WAH TUBE GATE # b % 0 msdB 4 100 LINK CHANGED EQ LINK CHANGED L/R OUTS CLIP To select a preset, do the following: 1. Make sure Preset mode is selected (the button will be brightly lit).
Johnson Millennium Section - 2 Setting Up Instant Tuner Access To instantly access the Tuner mode of the Millennium, press and hold the button. This will take you directly to the tuner function. 3. As you play a note on the guitar, the large number display will tell you which note you are playing, while the meter will show you if the note is flat or sharp. If the meter is moving to the right, the note you are playing is sharp. If the meter moves left, the note is flat.
Johnson Millennium Section - 3 Editing Presets Section-3 Editing Presets Naming and Storing Presets Before we get into editing presets and creating your own, let’s learn how to store changes so you won’t lose any modifications that you will want to keep. The Store procedure allows you to re-name, relocate and save any modifications you have made to presets so that they can be accessed easily later. Naming the Preset 1. Press the button once.
Johnson Millennium Section - 3 Editing Presets Storing the Preset 1. When you have the name as you want it to appear, press the button again. The top line of the display appears something like this: 2 USER BANK PAGE 1 OF 1 Store Pst to: Matchless LINK CHANGED 2 3 LINK CHANGED WAH TUBE LINK CHANGED EQ LINK CHANGED GATE L/R OUTS # b DIGITAL This screen allows you to select the location of the new Preset.
Johnson Millennium Section - 3 Editing Presets Editing a Preset The Millennium is capable of producing almost any sound ever thought conceivable. Whether it be amplifier tone or an effect configuration that utilizes the most sophisticated digital effects available. Great sounds aren’t just an unrealistic concept, but a very achievable possibility. In the next few pages, we will give you some pointers in editing presets to help achieve your own unique tones. Preset Editing Sections 1.
Johnson Millennium Section - 3 Editing Presets 2. Now use the wheel and scroll to the Amplifier type module. Once you are there, the display will appear something like this: 2 USER BANK PAGE 1 OF 5 '65 Blk Face Twin Chan LINK CHANGED 2 AC1 4 LINK CHANGED WAH TUBE LINK CHANGED EQ b LINK CHANGED GATE L/R OUTS # b DIGITAL 3.
Johnson Millennium Section - 3 Editing Presets 6. Now use the knob to move to page 5 of the amplifier model editing section and the display will appear like this: 2 USER BANK PAGE 5 OF 5 A:DIG LVL 1 100% LINK CHANGED b:dig lvl 3 100 % 2 LINK CHANGED WAH TUBE 4 LINK CHANGED EQ LINK CHANGED GATE L/R OUTS # b DIGITAL 7. Using the <1> knob will let you adjust the digital level of Channel A. The <3> knob adjusts the digital level of Channel B.
Johnson Millennium Section - 3 Editing Presets 3. The <2> button (pedal parameter) can be assigned to a footswitch to bypass or turn the module On. This parameter can be selected by turning the <2> knob and a Changed icon will appear directly beneath the parameter. At this point press the button and the display will appear as follows: 2 USER BANK PAGE 1 OF 19 Avail Link for: Pedal 1 OFF LINK CHANGED LINK CHANGED WAH TUBE LINK CHANGED EQ GATE LINK CHANGED L/R OUTS # b DIGITAL 4.
Johnson Millennium Section - 3 Editing Presets 4. Once the Noise gate type and position are selected use the knob and turn to page 3 of the Noise gate edit module. This page is used to set the Threshold, Attenuation, Attack and Release parameters. Higher Threshold settings will close the gate sooner. Lower Release settings allow the gate to open up faster 5. To exit Noise gate edit mode, press the button.
Section - 3 Editing Presets Johnson Millennium When you enter FX Edit mode, the first page of every FX Module allows you to: 1) Bypass that effect module (by turning it on or off) using the <1> knob. 2) Select an Effect Module (Only in the Digital Effect section), using the <2> knob. 3) Store the Default using the <3> knob (for more info on storing Defaults, see pg. 30. 4) Select a Default for the selected Effect Module using the <4> knob.
Johnson Millennium Section - 3 Editing Presets Comparing Changes During the course of editing presets, you may find that you want to compare the edited version of the preset to the original, stored version. Fortunately, your Millennium provides you with a Compare function. To compare an edited preset with the original stored version, please do the following: 1. While in FX edit mode, press the button once.
Johnson Millennium Section - 4 Editing Modules Section-4 Editing Modules Storing/Naming Defaults Before we get into editing modules and creating your defaults, let’s learn how to store changes so you won’t lose any modifications that you will want to keep. The Store procedure allows you to re-name, relocate and save any modifications you have made to defaults so that they can be accessed easily later. 1.
Johnson Millennium Section - 4 Editing Modules Storing the Default 1. When you have the name as you want it to read, press the button. The top line of the display reads: Store To: [Name] This screen allows you to select the location of the new default. Note that when the default is stored, it is stored in the User bank of defaults because factory defaults cannot be overwritten. 2. Use the <2> knob to select the default number where you want to store the new default. 3.
Johnson Millennium Section - 4 Editing Modules Scrolling through a Module’s Pages Notice in the bottom left corner of the display (just under the preset number) the display indicates which page you are on and the total number of pages within the module. Each page allows you to access up to four parameters using the <1> - <4> knobs.
Johnson Millennium Section - 4 Editing Modules Digital Effect Module Size and Type With all of the work that these digital effect modules do for your sound, they have a tendency to work up an appetite. So, they consume their food from the FX pies chart referred to on page 12. Since some of these effect modules have a larger appetite than the others, they require more processing power.
Johnson Millennium Section - 4 Editing Modules Default List The Following list contains the names of all of the Effect Defaults in the Millennium Noise Gate •S1 Pre Gate •S2 Post NR •Post Tub •S2 PostDst •Fast Swell •Slow Swell Choruses Dual Chorus •Medium •Shallow •MildNWide •MediumWell •DeepDepth •Deep •Max Depth •Shimmery •SloVibrato •FstVibrato Quad Chorus •Medium •MildNWide •Medium Well •Thick •DeepDepth •Deep •Max Depth •Shimmery •SloVibrato •FstVibrato •ChorusLeft Octal Chorus •Medium •Shallow
Johnson Millennium Section - 4 Editing Modules Effects Library The following pages offer a complete description of all of the effects available in the Johnson Millennium Stereo 250. Analog Wah With the Analog Wah, you get the best of both worlds. This Analog Wah is digitally controlled. This means that you get an dead-on accurate Wah emulation, which is controlled via the Millennium's powerful processing. And the best thing is, you no longer have to change batteries every 3 to 4 hours.
Section - 4 Editing Modules Johnson Millennium Channel A Treble This parameter controls the high EQ frequency used in channel A. Range is from 0.0 to 10. Channel A Mid This parameter controls the mid EQ frequency used in channel A. Range is from 0.0 to 10. Channel A Bass This parameter controls the low EQ frequency used in channel A. Range is from 0.0 to 10. Channel B Treble This parameter controls the high EQ frequency used in channel B. Range is from 0.0 to 10.
Johnson Millennium Section - 4 Editing Modules Digital Effects Reverbs Reverberation is probably the most widely used effect because it allows you to simulate the sound reflection characteristics of almost any kind of room. In a real room, reverb is a result of sound reflecting off room surfaces such as the walls, floor, ceiling, and objects in the room. The materials, size, and shape of the room determine how long these reflections echo and decay before dying out completely.
Section - 4 Editing Modules Johnson Millennium Gated Reverb Gated reverb doesn't behave as naturally as the standard varieties of reverb. Originally, it was created by taking a long, dense reverb and chopping it short with a noise gate. This made for a burst of reverberation energy that could help thicken up a variety of sounds. Digital signal processing techniques improved and soon allowed ways to create similar gated reverb sounds that were far more usable and flexible.
Johnson Millennium Section - 4 Editing Modules Selects which crossover type will be used for the Primary Secondary reverb stages. The two crossover types are High Pass (HP) and Low Pass (LP). Selects the Frequency where the crossover begins to function. Ranges from 25Hz to 20kHz. X-Over Type X-Over Freq. Prim & Secd X-Over These two Parameters allow the crossover to be turned On or Off for each reverb stage.
Section - 4 Editing Modules Johnson Millennium Note: The following Delay parameters that are utilized within the Reverb section are to be used in the Room Echo reverb module. Delay A Sets the length of time before hearing Delay Group A. Ranges from 0 to 120 milliseconds. Delay B Sets the length of time before hearing Delay Group A and Delay Group B. Ranges from 0 to 120 milliseconds. Delay C Sets the length of time before hearing Delay Group B and Delay Group C. Ranges from 0 to 120 milliseconds.
Johnson Millennium Section - 4 Editing Modules 10 -5 cents 0 5 cents P I T C H 10 The Dual Chorus creates two different pitch “voices”, while the Octal Chorus creates eight voices for extremely full, rich sounds . 1 sec 2 sec 3 sec Modulated Sound Original Sound T I M E Figure 4-1 Modulation Example The only difference between choruses and flangers is that flangers use less delay and have a feedback parameter that sends a portion of the effected signal back to the input of the module.
Section - 4 Editing Modules Johnson Millennium When do I use Chorus? The Chorus effect is so vast in applications, an easier question would probably be “When can’t I use a Chorus. When playing the Blues, turn the Speed and Depth parameters up to produce an almost Leslie-Type effect When trying to add dimension to guitar tone, use the Chorus to thicken-up and add depth to your sound. And, any time your using a clean tone program, guitar always sounds so lush when chorus is added.
Johnson Millennium Section - 4 Editing Modules Out C - D Adjusts the overall level of chorus voice C or D. Ranges from Off to 100%. Pan C - D Controls the placement of chorus voice C or D in the stereo image. Ranges from -99 to 99. Out LA - LB Adjusts the left-side level of chorus voice A or B. Ranges from Off to 100%. Out RA - RB Adjusts the right-side level of chorus voice A or B. Ranges from Off to 100%. Spread Controls the width of the effect’s stereo imaging.
Section - 4 Editing Modules Johnson Millennium Dly A - B Controls the delay time of flange voice A or B. Shorter delay times produce a more dramatic, deeper sweeping sound. Ranges from 0 to 60 milliseconds. Out A - B Adjusts the overall level of flange voice A or B. Ranges from Off to 100%. Pan A - B Controls the stereo soundfield placement of flange voice A or B. Ranges from -99 to 99. Out L - R Controls the output level of the left or right side of the flanger. Ranges from Off to 100%.
Johnson Millennium Section - 4 Editing Modules Rotary Speaker Simulator The Rotary Speaker Simulator allows you to emulate the classic rotating speaker sound, without the chiropractic problems that come with moving bulky speaker cabinets. The Rotary speaker is directly responsible for some of the most unique sounds in music. The applications for this effect are so diverse, it can be used to achieve sounds ranging from the Allman Brothers Band to the legendary Stevie Ray Vaughan.
Section - 4 Editing Modules Johnson Millennium Tremolo and Auto-Panner With such a re-surgence in vintage tone and gear Tremolo and Auto panner effects of the 50’s and 60’s are back and more popular than ever. These effects that revolutionized “Surf-Style” music can be heard all everywhere in the 90’s. Tremolos and auto panners are similar to one another in that they both use an LFO to modulate input levels to produce vibrato effects.
Johnson Millennium WvFrm Section - 4 Editing Modules Selects which waveform the LFO follows. Options for this control include sine, triangle, SP1 (Special 1), and SP2 (Special 2). The sine wave setting is probably the most easily recognized, but the smooth response of the triangle wave or the intensity of SP1 or SP2 typically produce better results. See figure 4-2 on page 41. Pitch Shifters and Harmony The pitch shifter allows you to move sound from one pitch to another.
Section - 4 Editing Modules Johnson Millennium Shft E - H See Shift A - B. Dtn E - H See Dtn A - B. Key Sets the diatonic key for the harmonies. If the song you are playing is in the key of G Major, you would select G for the scale. Scale Sets the scale type for the Harmony you want to hear. Scale types include: Major, Minor, Harmonic Minor, Melodic Minor. Dorian, Mixolydian, Lydian, Lydian Augmented, Major Pentatonic, Minor Pentatonic, Blues, Whole Tone, HalfWhole,and Whole-Half.
Johnson Millennium Section - 4 Editing Modules When do I use a detuner? The detuner falls into the same guidelines as the chorus effect. It works with just about everything; It is ideal for thickening up a rhythm guitar track. Remember to experiment with the delay parameters if you are looking for a wider detuning sound. Adding 30-60 ms of delay to the detuner's voices that are panned hard to one side (while not delaying the other side) will change the detuner's stereo imaging greatly.
Section - 4 Editing Modules Johnson Millennium recorded into memory, where it is held for the amount of time you specify with the delay time setting, after which the sample is replayed at the output. The Millennium delays have a feedback meter that is used to send a portion of the delayed signal back to the input to be re-recorded along with new source material. The feedback setting determines how long the delay repeats take to decay to inaudibility.
Johnson Millennium Section - 4 Editing Modules Gain Controls the output gain of the LPF. Ranges from -12 to 12. Dly A - B Controls the percentage of DELAYTIME allocated to delay voices A and B. For example, if DELAYTIME (above) is set to 1000 ms and DLYA is set to 75%, the voice A delay time is 750 ms. Remember, each voice in the Module can have any delay time up to 100% of DELAYTIME. Ranges from 0% to 100%. Dly C - D See Dly A - B. Out Adjusts the overall level of the Delay.
Section - 4 Editing Modules Delay Johnson Millennium This parameter sets the delay time of the compressor. Ranges from 0 to 10 ms. Equalizers The Millennium has a broad selection of equalizer Modules to cover virtually any need. If you need bigger Guitar tone, the EQs will give it to you. Both mono and stereo modules are available. Remember that mono equalizers connected to stereo sources will always sum the stereo signal together for equalization (thus eliminating the stereo image).
Johnson Millennium Section - 4 Editing Modules frequency centers, (Hz) while the GEQ15 and GEQ31 use 2/3 octave and 1/3 octave frequencies. Boost/cut range for each band is from -12 to 12. Parametric Equalizers Parametric EQs offer the added flexibility of letting you define the center frequency you want to adjust, and how many frequencies around that center frequency you want to affect. Some of the PEQ modules in the Millennium, also include high shelf and low shelf EQ bands.
Section - 4 Editing Modules Johnson Millennium Multi-Effect Module Parameters FX: Lvl Controls the signal input level fed to the Module. Ranges from Off to 100%. Dry: Lvl Controls the level of the dry (uneffected) signal. Ranges from Off to 100%. Balance Controls the positioning of the dry signal in the stereo soundfield. Ranges from -99 (all left) to 99 (all right). Route Selects the route signal path within the Chorus/Delay, and Flange/Delay Multi effects modules.
Johnson Millennium Section - 4 Editing Modules Whammy Effect Parameters Whammy On/Off Turns the Whammy module on or off. When the module is turned off, the signal will only continue to pass through the module if the dry level is turned up. FX Level This parameter lets you select the overall FX level mix of the Whammy Effect module. Ranges from: Off to 100%. Dry Level This parameter lets you select the amount of Dry signal that is included in the Whammy effect. Ranges from: Off to 100%.
Section - 5 Advanced Topics Johnson Millennium Section-5 Advanced Topics Assigning Modifiers Modifiers are unique tools that can be used to dramatically alter your sound based on information from external expression pedals and external footswitches, signal amplitude, the settings of a Low Frequency Oscillator (LFO) or MIDI continuous controller. Every preset in your Millennium has a set of Modifiers. Up to 16 modifier links can be assigned to control any parameter.
Johnson Millennium Section - 5 Advanced Topics External Expression Pedals The rear panel of the Millennium contains 2 external expression pedal inserts that can be linked to control any parameter of the Amplifiers’ operating system. Either a standard volume or a voltage control pedal can be connected to these insertion jacks. The 2 external expression pedals on the J-12 foot controller can be used as well.
Johnson Millennium Section - 5 Advanced Topics Setting up an LFO To set up an LFO that is linked to an effect parameter, the procedure is as follows: 1. Enter the Assign mode by pressing the button. 2. Use the knob to scroll to the LFO page. The display looks something like: 2 FACTORY USER BANK PAGE OF 17 19 LFO 1 1 %kHz msdB LINK CHANGED WvForm Speed %kHz 2 Off%kHz msdB 3 SinmsdB 4 006 LINK CHANGED WAH TUBE LINK CHANGED EQ L/R OUTS # b Hz LINK CHANGED GATE L/R OUTS 3.
Johnson Millennium Section - 5 Advanced Topics 8. Use the <2> knob to adjust the attack time of the Dyn. 9. Use the <3> knob to adjust the hold time of the Dyn. 10. Use the <4> knob to adjust the release time of the Dyn. Morphing Pedal Assignments The Johnson Amplifier modules and the effect configurations within the Millennium have special morphing capabilities that allow you to morph between one amplifier type to another in selected amplifier models.
Johnson Millennium Section - 5 Advanced Topics 4. Now using the knob, turn to page 2 and the display will appear like this: 2 FACTORY USER BANK PAGE OF 2 2 Vol Pdl 1 100 % LINK CHANGED Morph Pdl 3 LINK CHANGED WAH 0% LINK CHANGED TUBE EQ DIST EQ b GATE L/R OUTS # L/R OUTS 5. By turning the <3> this will activate the Morph pedal parameter making it ready for assignment.
Johnson Millennium Section - 5 Advanced Topics 1. From Preset mode, you must get to the configuration screen by either pressing the button and turning the wheel, or simply press the button until the display appears something like this: 2 FACTORY USER BANK PAGE OF 1 Config: Series 1 1 LINK CHANGED WAH LINK CHANGED TUBE EQ DIST EQ GATE L/R OUTS # b 2 2,2 %kHz msdB LINK CHANGED L/R OUTS 2.
Johnson Millennium Section - 5 Advanced Topics MIDI Functions In this day and age where the role of the Guitarist has taken on so many new responsibilities, his or her equipment has to be fast, and has to be able to communicate with other devices at the drop of a hat. So, we at Johnson Amplification have made the Millennium a fully MIDI implemented device.
Johnson Millennium Section - 5 Advanced Topics 1. Press the button and scroll to Page 4 of the Utility menu using the knob. The display reads: 2 FACTORY USER BANK PAGE OF 4 16 Prg Rcv Map:MIDI= User %kHz msdB LINK CHANGED %kHz msdB 2 LINK CHANGED WAH 1 3 %kHz msdB LINK CHANGED TUBE EQ 1 4 LINK CHANGED GATE L/R OUTS # b L/R OUTS 2. Use the <3> knob to select the MIDI Preset change number you want mapped.
Johnson Millennium Section - 5 Advanced Topics Normal MIDI data such as: Preset Changes, MIDI Volume, Modulation, etc. is transmitted and received on the MIDI channel designated by the setting of MIDI RECEIVE CHANNEL ). SysEx data, on the other hand, is transmitted and received on the SysEx channel designated by the setting of SYSEX DEVICE CHANNEL.
Johnson Millennium Section - 5 Advanced Topics To initiate an individual Default dump from the Millennium, please perform the following procedure: 1. Press the button and scroll to Page 9 of the Utility menu using the knob. The display reads: 2 FACTORY USER BANK PAGE OF 9 16 UsrDflt:Dual Cho User 1 LINK CHANGED LINK CHANGED %kHz 1 Yes%kHz msdB 2 --msdB 3 LINK CHANGED WAH TUBE %kHz msdB LINK CHANGED EQ GATE 4U 1 L/R OUTS # b 2.
Johnson Millennium Section - 5 Advanced Topics Other Utility Functions The following page, lists some additional Utility functions included in the Millennium that make your programming life a little easier. Factory Reset Allows you to erase all User Presets, Default and Utility settings at once and restore the Millennium memory to its factory condition. WARNING! This procedure will destroy and reset ALL User Presets in the Millennium memory.
Johnson Millennium Section - 5 Advanced Topics 1. Press the button and scroll to page 2 of the Utility page using the knob. The display reads: 2 FACTORY USER BANK PAGE OF 2 16 XLR Cabinet %kHz msdB 1 LINK CHANGED %kHz msdB 2 LINK CHANGED WAH TUBE : Local %kHz msdB 3 LINK CHANGED EQ 4 L/R OUTS # b On LINK CHANGED GATE L/R OUTS 2. Using the <4> knob, you can turn the Cabinet Emulator to either Local On or Global On mode, or Global Off.
Section - 6 The J-12 Foot Controller Johnson Millennium Section-6 The J-12 Foot Controller Configuring the Pedalboard The optional Johnson Amplification J-12 foot controller can help you get the most out of your Millennium. Since the J-12 talks to the Millennium using a proprietary communication protocol, it offers better response time and capabilities not available with convention MIDI pedalboard controllers. The J-12 includes 12 footswitches for preset and parameter control.
Johnson Millennium Section - 6 The J-12 Foot Controller Assigning Functions The J -12 helps you organize your sounds into 19 groups called Banks. Each of these Banks utilize the 10 footswitches patches, which are user programmable to do one of several functions.
Johnson Millennium Section - 6 The J-12 Foot Controller Assigning Parameters to Footswitches/ Expression Pedals The Millennium allows you to control up to 16 Parameters per Preset. Each time you link a parameter to a Footswitch or expression pedal, it is added to any assignments already made to that controller.
Johnson Millennium Section - 6 The J-12 Foot Controller Other Footswitch Functions The footswitches on the J-12 can be assigned to do several functions. This is done through the Foot Controller menus in the Utility section of the Millennium. These functions include: Toggle MIDI CC: This function allows you to send MIDI Continuous Controller (CC) information out the MIDI port while the footswitch still maintains its ability to control a parameter directly.
Johnson Millennium Section - 6 The J-12 Foot Controller 5. Now to assign the CC number, just turn the <4> knob until you have reached the desired CC. The display will now read something like this: FACTORY PAGE 2 J12 FC:Bank FS=Tog CCTran 2 1 1 LINK CHANGED 3 LINK CHANGED WAH 6 LINK CHANGED TUBE EQ USER 4 127 LINK CHANGED GATE L/R OUTS DIGITAL CLIP L/R OUTS # 16 b 10 OF 6. Press the button to exit the Foot controller setup menu.
Johnson Millennium Section - 6 The J-12 Foot Controller 3. Turn either function keys <2 or 3> to assign a CC number to the selected expression pedal . The display will appear like this on page 11 if, for example Exp 1 is selected. (Exp1=Internal Expression pedal 1 insert on Millennium w/o the J-12. Or, expression pedals 1 or 2 on the J12 when connected.
Johnson Millennium Section - 6 The J-12 Foot Controller 2. Turn knob to page 3 and the display will read: FACTORY PAGE 2 USER 3 OF 16 MIDI: RcvChnl 1 1 2 LINK CHANGED LINK CHANGED WAH TUBE TransChnl 1 3 4 LINK CHANGED LINK CHANGED EQ GATE L/R OUTS DIGITAL CLIP L/R OUTS # b 3. Turn the function knob <4> to select the MIDI CC transmit channel.
Johnson Millennium Section - 6 The J-12 Foot Controller Other Pedalboard Tidbits Here are a few other features that you will want to learn about to get the most out of your J-12 foot controller: Bank Up/ Tuner and Bank Down / Bypass Footswitches These two foot switches are located at top right side of the J-12.
Johnson Millennium Section - 6 The J-12 Foot Controller 3. At this point, use the <2> knob to select the Bank to be named. Once the Bank has been selected, turn the <4> knob to rename the Bank. The display now appears like this: FACTORY 2 USER Name:Top 5 1 CAP LINK CHANGED 2 nbr 3 Ins LINK CHANGED WAH b TUBE LINK CHANGED EQ 4 COP LINK CHANGED GATE L/R OUTS DIGITAL CLIP L/R OUTS # 4. To exit the naming bank assignment, press the button. 5.
Johnson Millennium Section - 7 Appendix Section-7 Appendix Millennium Factory Preset List Bank 1 Top 5 1- Rectifier Solo 2- Panning Twin Reverb 3- Matchless Blues 4- Custom Marshall w/Reverb 5- Get Your Wah Wahs Out Cfg-4 Cfg-4 Cfg-3 Cfg-1 Cfg-4 Bank 2 Fender 6- ‘65 Black Face Twin 7- ‘65 Twin Bright 8- Fender Overdrive 9- Leslie Jazz twin 10-Fender Phase/Pong Delay Cfg-4 Cfg-4 Cfg-4 Cfg-4 Cfg-4 Bank 3 Boogie/Soldano 11- Boogie Mark II Combo 12- Rectifier Stack 13- Trem-O-Verb 14- Boogie Mark II Stack
Johnson Millennium Section - 7 Appendix Bank 12 Alternative 56- Industrialized 57- Whammy Madness 58- Triplet Delay 59- Post-Seattle Grind 60- Space Hippie Bank 18 Dynamics Cfg-9 Cfg-2 Cfg-4 Cfg-4 Cfg-8 Bank 13 Country 61- Pedal Steel 62- Rockin’ Billy 63- Good For Pickin’ 64- Drinking w/Cowboyz 65- Stereo Slapback Cfg-1 Cfg-4 Cfg-1 Cfg-7 Cfg-4 Bank 19 Morph Cfg-2 Cfg-4 Cfg-4 Cfg-7 Cfg-13 Bank 14 Vintage 66- Surfari 67- Fuzz in the Sky 68- Danno Electro 69- Electric Sitar 70- Guitar Organ 86- Ducked
Johnson Millennium Section - 7 Appendix Millennium Preset Descriptions To help all of you Tone and Effect connoisseurs along the way, this list gives you a brief description all 100 Factory presets of the Millennium. Bank - 1 Top 5 1- Rectifier Stack - Pure and rich Dual Rectifier Stack tone with Dual Delay and Chorus modules which make it ideal for soloing. 2- Panning Twin Reverb - Tone of the legendary Twin with Reverb and an Auto Panner effect to that pans the signal right and left.
Section - 7 Appendix Johnson Millennium Bank - 4 Vox 16- ‘63 Vox AC 30 Top Boost - Vintage British Combo tone with Reverb mixed in for good measure. 17- Vox AC 30 Clean/Dirty - Classic clean AC 30 in channel A and distortion in channel B. 18- Vox w/Analog Wah - A slightly overdriven AC 30 with an Analog tape delay effect. 19- AC 30 Chorus/Delay - AC 30 tone with lush Chorus and a 500ms Delay. 20-Vox AC30 Cln/Drty Combo - Channel switching from a clean to overdriven AC 30 Amp.
Johnson Millennium Section - 7 Appendix 33- Jonson Edge->Clean - A overdriven Amp tone that can be switched to to clean with a digital Compressor, Dual Delay and Stereo reverb digital effect modules. 34- Johnson Tone and Clean- A custom Johnson Amplifier module that boosts the clean signal with 6-band Parametric EQ and adds a Dual Phaser and Stereo dual delay module. 35- Johnson Gain&Mo Gain- A Johnson custom amplifier module that boosts the signal by using a parametric 6-band EQ.
Section - 7 Appendix Johnson Millennium 49- Blue BB’s- Added parametric EQ with reverb and Delay give you the tone of BB'S and his best girl Lucille. 50- Slide Blues- Use an expression pedal on this preset to create bayou-type slide guitar effects. Bank - 11 Dual Tone 51- L) Vox R)Marshall - This preset combines an AC 30 and Marshall amp model to give you the best of both worlds.
Johnson Millennium Section - 7 Appendix Bank - 14 Vintage 66- Surfari - Great surf music tones will shoot the pipeline with this Tremolo and Reverb preset. 67- Fuzz in the Sky - Use this preset to bring out the great fuzz tone of the ‘60s and ‘70s. 68- Danno Electro - Pitch shifting and Dual Chorus is used to help produce this Baritone guitar preset. 69- Electric Sitar - Use this Dual Pitch Shifter preset to create Shenkar-type sounds.
Section - 7 Appendix Johnson Millennium 83- Phasey Rhythm - Use this Dual-tone Phaser effected preset for rhythm playing. 84- Too Heavy - You will have gain for days when you use this Dual Rectifier model preset. 85- Just a Wah - This JCM 800 Combo amp with distortion uses an Analog Wah module to produce overdrive tones. Bank - 18 Dynamics 86- Ducked Delay Solo - A Dynamic modifier is used in this preset so the harder your attack is, the more delay will be heard.
Johnson Millennium Section - 7 Appendix Effect Configuration Chart 1 Config:Series Full F GATE L/R OUTS Config:MonoSplit 2,2 6 2 GATE 2 2 Config:Series 3,4 3 GATE 4 7 L/R OUTS GATE L/R OUTS 4 3 4 L/R OUTS 8 Config:Series 4,2,4 GATE 4 Config:Series 2,2 GATE 2 2 L/R OUTS 12 9 2 4 4 4 L/R OUTS L/R OUTS Config:Mono Split 4,4,2 GATE 4 4 L/R OUTS 13 2 L/R OUTS Config:Series 4,4,4,4 GATE 4 4 4 4 L/R OUTS L/R OUTS Config:Series 4,4,2 GATE 4 2 L/R OUTS 4 4 2 L
Johnson Millennium Section - 7 Appendix Harmony Interval Charts Interval Major üOct ü7th ü6th ü5th ü4th ü3rd ü2nd Ref ¨2nd ¨3rd ¨4th ¨5th 86 Minor Harm.Minor Mel.
Johnson Millennium Section - 7 Appendix Millennium Specifications Power Amp Section: 80 Watts RMS per channel @ 8 ohms 125 Watts RMS per channel @ 4 ohms Audio Outputs: Left Speaker outputs: 2-1/4 inch jacks paralleled Right Speaker outputs: 2-1/4 inch jacks paralleled Loop Send: 1/4 inch TRS balanced / unbalanced: -10dBu Left/Right Direct/Recording Outputs: 2- XLR servo-balanced: +4 dBu: 1 ground Maximum level: +18 dBu Impedance: 100 ohms Audio Inputs: Bright Input: 1/4 inch unbalanced: sensitivity adj
Johnson Millennium Section - 7 Appendix MIDI Implementation Chart Function...
Johnson Millennium Section - 7 Appendix System Exclusive Implementation MIDI System Exclusive communication allows a user to control a device directly through MIDI in a very powerful and flexible manner. Much care has gone into creating and testing this documentation but Johnson Amplification can not guarantee 100% accuracy, nor can Johnson Amplification be held responsible for presets and data lost in a product from System Exclusive Information use. A working knowledge of the MIDI Version 1.
Johnson Millennium Section - 7 Appendix Pitch Bend: Pitch Bend information is a higher resolution controller that is not supported in Johnson Amplification products, due to the density of the information and the resources needed to process it properly. Many MIDI control products offer the ability to map Pitch Bend to normal Continuous Controllers if a user wanted to control a parameter with a device such as a Pitch Bend Wheel.
Johnson Millennium Section - 7 Appendix REQUEST ONE PRESET (01h) SYS_HEAD, 01(h), yy1, yy2, zz1, zz2 F7(h) When yy = 00(h) When yy = 01(h) zz User bank is selected Factory bank is selected The Preset number, 1-100 User (00-63(h)) or 1-100 Factory (00-63(h)) When a Request One Preset procedure is received, the Millennium will respond with a Receive One Preset procedure. RECEIVE ONE PRESET (42h) SYS_HEAD 42(h), vv(1)1, vv(1)2, vv(2)1, vv(2)2, yy1, yy2, zz1, zz2, dd(1st)1,dd(1st)2, ...
Johnson Millennium Section - 7 Appendix RECEIVE UTILITY SETTINGS (12h) SYS_HEAD 12(h), vv(1)1, vv(1)2, vv(2)1, vv(2)2, rr1, rr2, tt1, tt2, ee1, ee2, ff1, ff2, ss1, ss2, nn1, nn2, mm1, mm2, qq1, qq2, yy (1st)1,yy(1st)2, zz(1st)1,zz(1st)2 ...
Johnson Millennium When ww= 7F(h) When ww= 68(h) ww Section - 7 Appendix All module’s parameters will be requested. (position of the module minus 1), only that module’s parameters will be requested. Requested Module’s parameter Values When a Request All Current Parameter Values procedure is received, the Millennium will respond with a Respond All Current Parameter Values procedure.
Johnson Millennium Section - 7 Appendix 02(h) 03(h) 04(h) 1/2 Effect Module 3/4 Effect Module Whole Effect Module RECEIVE KEY SCAN CODE (54h) SYS_HEAD, 54(h), cc, F7(h) cc Code for the Key Scan (note: there is only one byte, not two) The Receive Key Scan Code procedure is used to emulate a button press on the front panel of the. See the Key Scan Code Maps (page 96) for a list of Key Scan codes.
Johnson Millennium Section -7 Appendix RESET PRESET (20h) SYS_HEAD, 20(h), F7(h) The Reset Preset procedure causes the Millennium to reload the current saved program. RESET DEVICE (21h) SYS_HEAD, 21(h), F7(h) The Reset Device procedure causes the Millennium to reboot the software as if the power had been turned off, and then back on. If edits have been made to the current preset without saving, they will be lost.
Johnson Millennium Section - 7 Appendix SysEx Button/Keys/Footswitch codes The following are codes for each of the buttons or keys on the Millennium. Numbers are given as hexadecimal values.
Johnson Millennium Section - 7 Appendix SysEx Preset Dump Example For those of you that are reluctant to stick your feet in the SysEx water, we have included a simple example of a SysEx Preset jump. It takes you set by step through all of the operation commands of a typical SysEx procedure. <> F0 00 00 10 47 <> 42 <> 00 01 00 01 <> 00 00 00 00 <
Johnson Millennium Section - 7 Appendix Fx Module codes and numbers Page 2 The Following chart shows all effect modules and their respective parameters with SysEx Effect I.D. numbers attached. Page 3 FX # FX Name EditPage P# 131(h) Tube Dist. Page 1 Page 2 132(h) Tube EQ Page 1 Page 2 Page 3 Page 4 Page 5 Page 4 Page 5 Page 6 S. State Dist. Page 1 Page 2 134(h) 98 S.
Johnson Millennium Page 4 Page 5 Page 6 Section - 7 Appendix 08(h) 100Hz 1F(h) 8.0kHz 09(h) 160Hz 20(h) 10.0kHz 0A(h) 250Hz 21(h) 12.5kHz 0B(h) 400Hz 22(h) 16.0kHz 0C(h) 630Hz 23(h) 18.0kHz 0D(h) 1kHz 0E(h) 1.6kHz 00(h) On/Off 0F(h) 2.5kHz 01(h) FX Type 10(h) 4.0kHz 02(h) Default 11(h) 6.3kHz 03(h) Level 12(h) 10.0kHz 04(h) Phase L 13(h) 16.
Johnson Millennium Section - 7 Appendix Page 5 Page 6 Page 7 Page 8 46(h) St PEQ 6 Page 1 Page 2 Page 3 Page 4 Page 5 Page 6 Page 7 Page 8 1F(h) Dual Cho Page 1 Page 2 Page 3 Page 4 Page 5 100 09(h) Band2 Freq 0C(h) PanA 0A(h) Width Level 0D(h) OutB 0B(h) Band3 Freq 0E(h) PanB 00(h) On/Off 0C(h) Width Level 0D(h) Band4 Freq 0E(h) Width Level 01(h) FX Type 0F(h) HiShlv Freq 02(h) Default 10(h) Level 20(h) Quad Cho Page 1 Page 2 03(h) FX Level 04(h) Dr
Johnson Millennium Page 7 47(h) Dual Flange Page 1 Page 2 Page 3 Page 4 Page 5 Section - 7 Appendix 12(h) DlyH 13(h) Spread Page 4 Dual Phaser Page 1 Page 2 Page 3 Page 4 30(h) Rotary Speaker Page 1 Page 2 Page 3 User Guide Rotor Lvl 0A(h) Dummy (ignore) 0B(h) Horn Slow Speed 00(h) On/Off 0C(h) Horn Slow Depth 01(h) FX Type 0D(h) Horn Slow Doppler 02(h) Default 0E(h) Dummy (ignore) 03(h) FX level 0F(h) Horn Fast Speed 04(h) Dry Level 10(h) Horn Fast Depth 05
Johnson Millennium Section - 7 Appendix Page 4 2E(h) Quad Detune Page 1 Page 2 Page 3 Page 4 Page 5 Page 6 2F(h) Octal Detune Page 1 Page 2 Page 3 Page 4 Page 5 102 09(h) DlyB 0F(h) DlyB 0A(h) OutA 10(h) DlyC 0B(h) PanA 11(h) DlyD 0C(h) OutB 0D(h) PanB Page 6 12(h) DlyE 13(h) DlyF 14(h) DlyG 15(h) DlyH Page 7 16(h) Spread Page 1 00(h) On/Off 01(h) FX Type 02(h) Default 03(h) FX Level 04(h) Dry Level 05(h) Balance 06(h) Shft 00(h) On/Off 01(h)
Johnson Millennium Page 4 Page 5 Page 6 Section - 7 Appendix 08(h) ShftB 09(h) DtnB 0A(h) ShftC 0B(h) DtnC 00(h) On/Off 0C(h) ShftD 01(h) FX Type 0D(h) DtnD 02(h) Default 0E(h) Out A 03(h) FX Level 0F(h) PanA 04(h) Dry Level 10(h) OutB 05(h) Balance 11(h) PanB 06(h) Shft 12(h) OutC 07(h) Dtn 13(h) PanC 08(h) OutL 14(h) OutD 09(h) OutR 15(h) PanD 00(h) On/Off Page 9 27(h) Stereo Pitch Page 2 Page 3 29(h) St Dual Pitch 2B(h) Octal Pitch Page 1 Page
Johnson Millennium Section - 7 Appendix Page 2 Page 3 Page 4 02(h) Default 0F(h) OutB 03(h) FX Level 10(h) PanB 04(h) Dry Level 11(h) OutC 05(h) Balance 12(h) PanC 06(h) Delay Time 13(h) OutD 07(h) FeedBack 14(h) PanD 08(h) Tapit (ignore) 00(h) On/Off 01(h) FX Type 02(h) Default Page 6 09(h) Out 17(h) S Delay(370ms) 0A(h) Pan 1C(h) S Delay(700ms) Page 1 Dual Dly(370ms) Page 2 15(h) Dual Dly(700ms) 1A(h) Dual Dly(1400ms) Page 1 Page 2 Page 3 Page 4 Page
Johnson Millennium Page 4 Page 5 Page 6 Section - 7 Appendix 07(h) FeedBack 0B(h) Freq 08(h) Tapit (ignore) 0C(h) Gain 09(h) DlyA 0D(h) OutL 0A(h) DlyB 0E(h) OutR 0B(h) DlyC 0C(h) DlyD 00(h) On/Off 0D(h) OutLA 01(h) FX Type 0E(h) OutLB 02(h) Default 0F(h) OutLC 03(h) FX Level 10(h) OutLD 04(h) Dry Level 11(h) OutRA 05(h) Balance 11(h) OutRB Page 3 06(h) Route 13(h) OutRC Page 4 07(h) Speed 14(h) OutRD 08(h) Depth 09(h) WvFrm 0A(h) Chorus Delay
Johnson Millennium Section - 7 Appendix Page 8 09(h) PreDelay Page 1 Page 2 Page 3 Page 4 0A(h) Reverb Page 1 Page 2 Page 3 Page 4 Page 5 Page 1 Page 2 Page 3 Page 4 Page 5 Page 6 Page 7 106 Secondary Decay 00(h) On/Off 13(h) Secondary Size 01(h) FX Type 14(h) Second Reflection 02(h) Default 03(h) FX Level 04(h) Dry Level 05(h) Balance Page 9 Page 10 15(h) Primary OutL 16(h) Primary OutR 17(h) Secondary OutL 18(h) Secondary OutR 00(h) On/Off 06(h) Delay 0
Johnson Millennium Page 5 Section - 7 Appendix 09(h) Dispersion 06(h) Thrsh Closed 0A(h) Low Pass 07(h) Attn 0B(h) Blend 08(h) Delay 0C(h) OutL 09(h) Attack 0D(h) OutR 0A(h) Hold 0B(h) Release Page 1 8(h) Spring Reverb Page 2 0F(h) Room Echo Page 1 Page 2 Page 3 Page 4 Page 5 Page 6 Page 7 Page 8 52(h) Noise Gate Page 1 Page 2 User Guide Page 3 00(h) On/Off 01(h) FX Type 02(h) Default 03(h) FX Level 04(h) Dry Level 00(h) On/Off 01(h) FX Type 02(h) Def
8760 South Sandy Parkway Sandy, Utah, 84070 Telephone 801.566.8800 FAX 801.566.7005 International Distribution: 3 Overlook Drive, Unit 4 Amherst, New Hampshire 03031 U.S.A. FAX 603.672.4246 Johnson Amplification™, Millennium™, and S-DISC™II are registered trademarks of the Harman Music Group Incorporated Copyright © 1997 the Harman Music Group Incorporated Printed In U.S.A. 10/97 Manufactured in the U.S.A.