
Operator's Manual S/N A58A & A58B


4
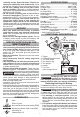
Using the Forward/Reverse Switch
The forward/reverse switch may be set to three
positions: forward, reverse and lock. Due to a
lockout mechanism, the forward/reverse switch
can only be adjusted when the trigger is not pulled.
Always allow the motor to come to a complete stop
before using the forward/reverse switch.
Reverse
Forward
1. For forward (clockwise) rotation, push the forward/
reverse switch in the direction shown. Check the
direction of rotation before use.
2. For reverse (counterclockwise) rotation, push
the forward/reverse switch in the direction shown.
Check the direction of rotation before use.
3. To lock the trigger, push the forward/reverse
switch to the center position. The trigger will not
work when the forward/reverse switch is in the
locked position.
Always remove the battery pack before performing
maintenance or changing accessories. Always
lock the trigger or remove the battery pack before
storing the tool and any time the tool is not in use.
Starting, Stopping and Controlling Speed
This impact wrench may be operated at any speed
from 0 to full speed.
1. To start the tool, grasp the handle rmly and pull
the trigger.
2. To vary the speed, increase or decrease the pres-
sure on the trigger. The further the trigger is pulled,
the greater the speed.
3. To stop the tool, release the trigger.
WARNING
To reduce the risk of explosion,
electric shock and property
damage, always check the
work area for hidden pipes
and wires before drilling.
To reduce the risk of injury,
only grasp tool by handle
and red insulated surfaces.
Do not hold gray gear case
when impacting or drilling.
Electric Brake
The electric brake engages when the trigger
is released, causing the socket to stop and al-
lowing you to proceed with your work. Gener-
ally, the socket stops within two seconds. How-
ever, there may be a delay between the time you
release the trigger and when the brake engages.
Occasionally the brake may miss completely. If the
brake misses frequently, the impact wrench needs ser-
vicing by an authorized MILWAUKEE service facility.
WARNING
Only use accessories specically
recommended for this tool. Others
may be hazardous.
Attaching and Removing the Tool Hanger
1. To attach, remove the two top gear case screws.
2. Place the ring through the tool hanger.
3. Position the tool hanger on the tool over the two
gear case screw holes.
4. Replace the two gear case screws. Hand tighten
the screws.
5. To remove, reverse the procedure.
WARNING
Use only sockets and other
accessories specically designed
for use on impact wrenches and drivers. Other
sockets and accessories might shatter or break
causing injury.
Attaching and Removing Accessories
(Cat. No. 0779-20)
This impact wrench is intended only for use with
sockets designed for impact wrenches and that have
a 1/2" square drive. Other sockets could shatter or
break, causing injury.
1. To attach a socket or other acces-
Drive
shank
Detent
pin
sory, align the hole in the acces-
sory with the detent pin on the
drive shank. Hold the detent pin
in while pushing the socket onto
the drive shank. The
detent pin will snap into place in
the hole to secure the socket.
2. To remove the accessory, insert a nail or other thin
object into the hole in the accessory and press the
detent pin in. Pull the accessory off the drive shank.
Attaching and Removing Accessories
(Cat. No. 0799-20, or other Impact Wrenches
using the Quick Change 1/2” Square Drive
to 7/16” Hex Adapter)
Cat. No. 0799-20 is intended for use with drill bits and
adapters with a 7/16” Hex Quick. The Quick Change
shank has a ball-retainer groove. It is not intended
for use with Hex Shank Bit Extensions.
Open (Release)
Closed (Locked)
Ball-retainer
groove
1. To attach an accessory, pull the chuck collar
forward and insert the accessory shank. Release
the collar. It may be necessary to pull the bit out
slightly to engage the holding mechanism.
2. To remove the accessory, pull the chuck collar for-
ward and remove the accessory. Release the collar.
OPERATION
WARNING
Always remove battery pack before
changing or removing accesso-
ries. Only use accessories specically recom-
mended for this tool. Others may be hazardous.
To reduce the risk of injury, keep hands away
from the bit and all moving parts. Always wear
safety goggles or glasses with side shields.